Configuring Ingenico Desk/Move 5000
eQuate POS can communicate to payment debit terminals like the Ingenico Desk 5000 or Ingenico Move 5000. This allows you to combine external hardware to have a integrated payment solution with your Point Of Sale. The Ingenico device you are adding to eQuate POS must be on the same local network as your eQuate POS terminal.
Supported devices:
| Manufacturer | Model | Support |
|---|---|---|
| Ingenico | Desk 5000 | Yes |
| Ingenico | Move 5000 | Yes |
Ingenico Devices:
- Ingenico devices must have semi-integrated mode enabled by the payment processor.
- Ingenico devices will only work on the same local network as your Point Of Sale terminal.
- You must configure a static IP on the Ingenico terminals, or setup a DCHP lease on your network router to ensure the peripheral's IP address does not change.
- The Move 5000 must not change to the GSM network; when this happens, the terminal will not communicate with eQuate POS. We recommend disabling this feature on the Move 5000.
- The Move 5000 will go into sleep mode when off the dock or unplugged. You should always leave the Move 5000 docked or plugged in when using it with eQuate POS.
Ingenico Desk/Move 5000 Configuration
You will need to configure your Ingenico Desk/Move 5000 before adding it to eQuate POS
You should;
- Perform any downloads on your Ingenico Desk/Move 5000 before following this guide. (Admin Menu > Maintenance > Download > Start Download)
- Ensure the Ingenico device is connected to your local network and configured with a static IP/DHCP lease. You may need assistance from your I.T. department for this.
- For the Ingenico Move 5000;
- Disable the Mobile Data option; go to the Setup Menu on the Ingenico device, select Communications, and Mobile Data, and toggle to "OFF".
- Keep the device on the dock or plugged in at all times. If the device goes to sleep, eQuate POS will not be able to communicate with the device.
If you have the Move 5000 model, you should increase the sleep timer. The Move 5000 must always be connected to a power source for integration to work.
- On the Ingenico device; select the bottom left Admin (gear icon).
- Select "3 - Setup Menu"
- Select "5 - Term Settings"
- Select "2 - Term HW"
- Select "2 - Sleep Timer"
- Enter the time in seconds. We recommend the maximum size, "9999" (166 minutes). Press Enter.
- Press the Red button 4 times to go back to the main screen.
- On the Ingenico device; select the bottom left Admin (gear icon).
- Select "8 - Misc. Options"
- Select "1 - Semi-Integrated"
- Toggle "Enable SemiInteg" mode to "ON" (If you do not see this option, your terminal must be configured by your provider to allow semi-integration).
- Select "2 - Communication Type"
- Select "3 - Ethernet" (for Move 5000, select "WiFi") press Enter.
- Enter the port, which will be "95" by default. We recommend leaving it on this port. Press Enter
- Select "Receipt Options", and set this to "ECR". Press Enter.
- Press the Red button 3 times to go back to the main screen.
- On the Ingenico device; select the bottom left Admin (gear icon).
- Select "3 - Setup Menu"
- Go to "2 - Communications"
- Click on Ethernet (Desk 5000) or WiFi Settings (Move 5000)
- Desk 5000:
- Select "Ethernet Setup"
- Select "Static IP" and press Enter.
- Input the TerminalIP (this is the static IP you will use for your terminal)
- Enter the appropriate GatewayIP, IPSubMask, and PriDNSIP/SecDNSIP (if applicable)
- Press the green save button.
- Move 5000:
- Select "Advanced Settings"
- Select "IP Settings"
- Select "Static IP" and press Enter.
- Input the TerminalIP (this is the static IP you will use for your terminal)
- Enter the appropriate GatewayIP, IPSubMask, and PriDNSIP/SecDNSIP (if applicable)
- Press the green save button.
- Desk 5000:
- Press the Red button 4 times to go back to the main screen.
- When you have enabled Semi-Integration mode and set the static IP, proceed to follow the instructions for Adding a Peripheral to eQuate POS
Adding a Peripheral to eQuate POS
Once you have backed up your Prestashop database, you can proceed to add the connection between Prestashop and eQuate POS from the Back Office.
- Login to the Back Office.
- On the left menu, select "Settings" then select "Terminals".
- On the terminal you want to configure the peripheral for, select "Actions" then "Edit".
- Click on the "Peripherals" tab
- Select the peripheral type Ingenico Desk/Move 5000:
- Enter the local static IP address of the debit terminal (peripheral).
- Enter the port selected during the activation of semi-integrated mode. By default, this is usually 95.
- Enter the payment methods you would like to associate with this peripheral (Debit, Credit, etc...)
- Once you are done entering the information, press "Save Changes".
- Synchronize your Front Office by pressing the Synchronize button.
- Test your peripheral.
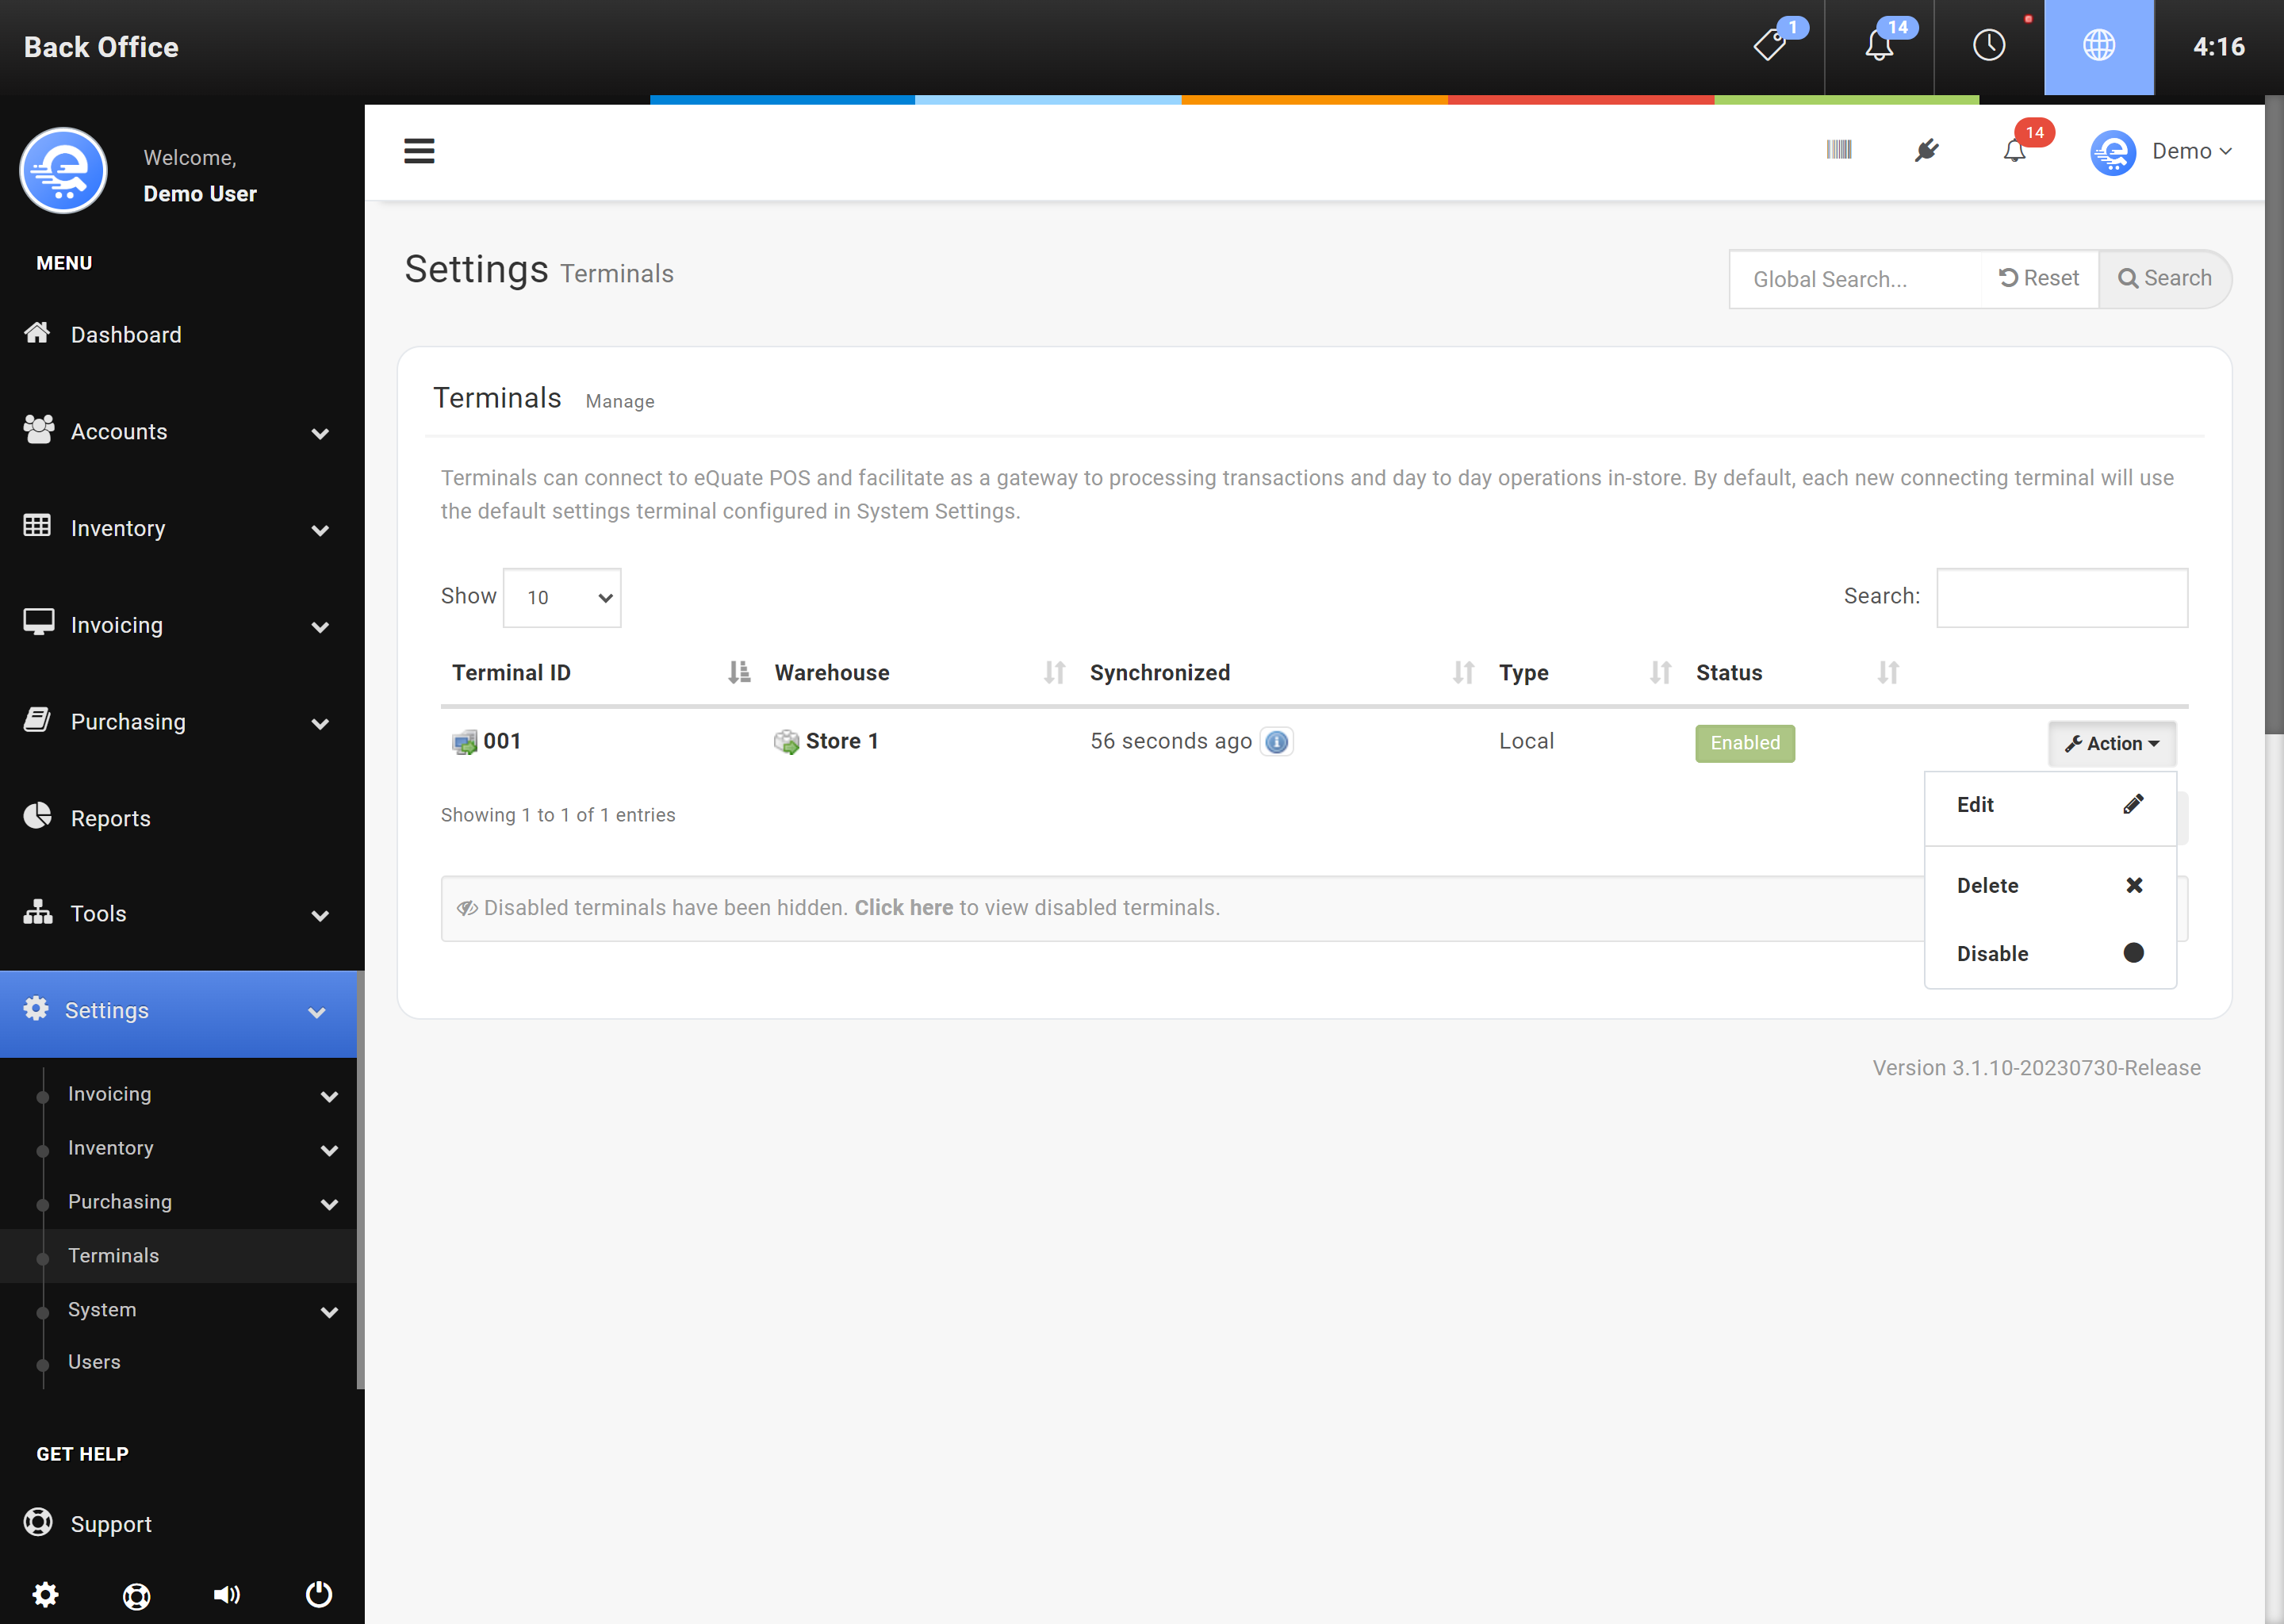
Figure A
Configure the Ingenico Desk/Move 5000 by accessing the Terminal area within the Back Office.
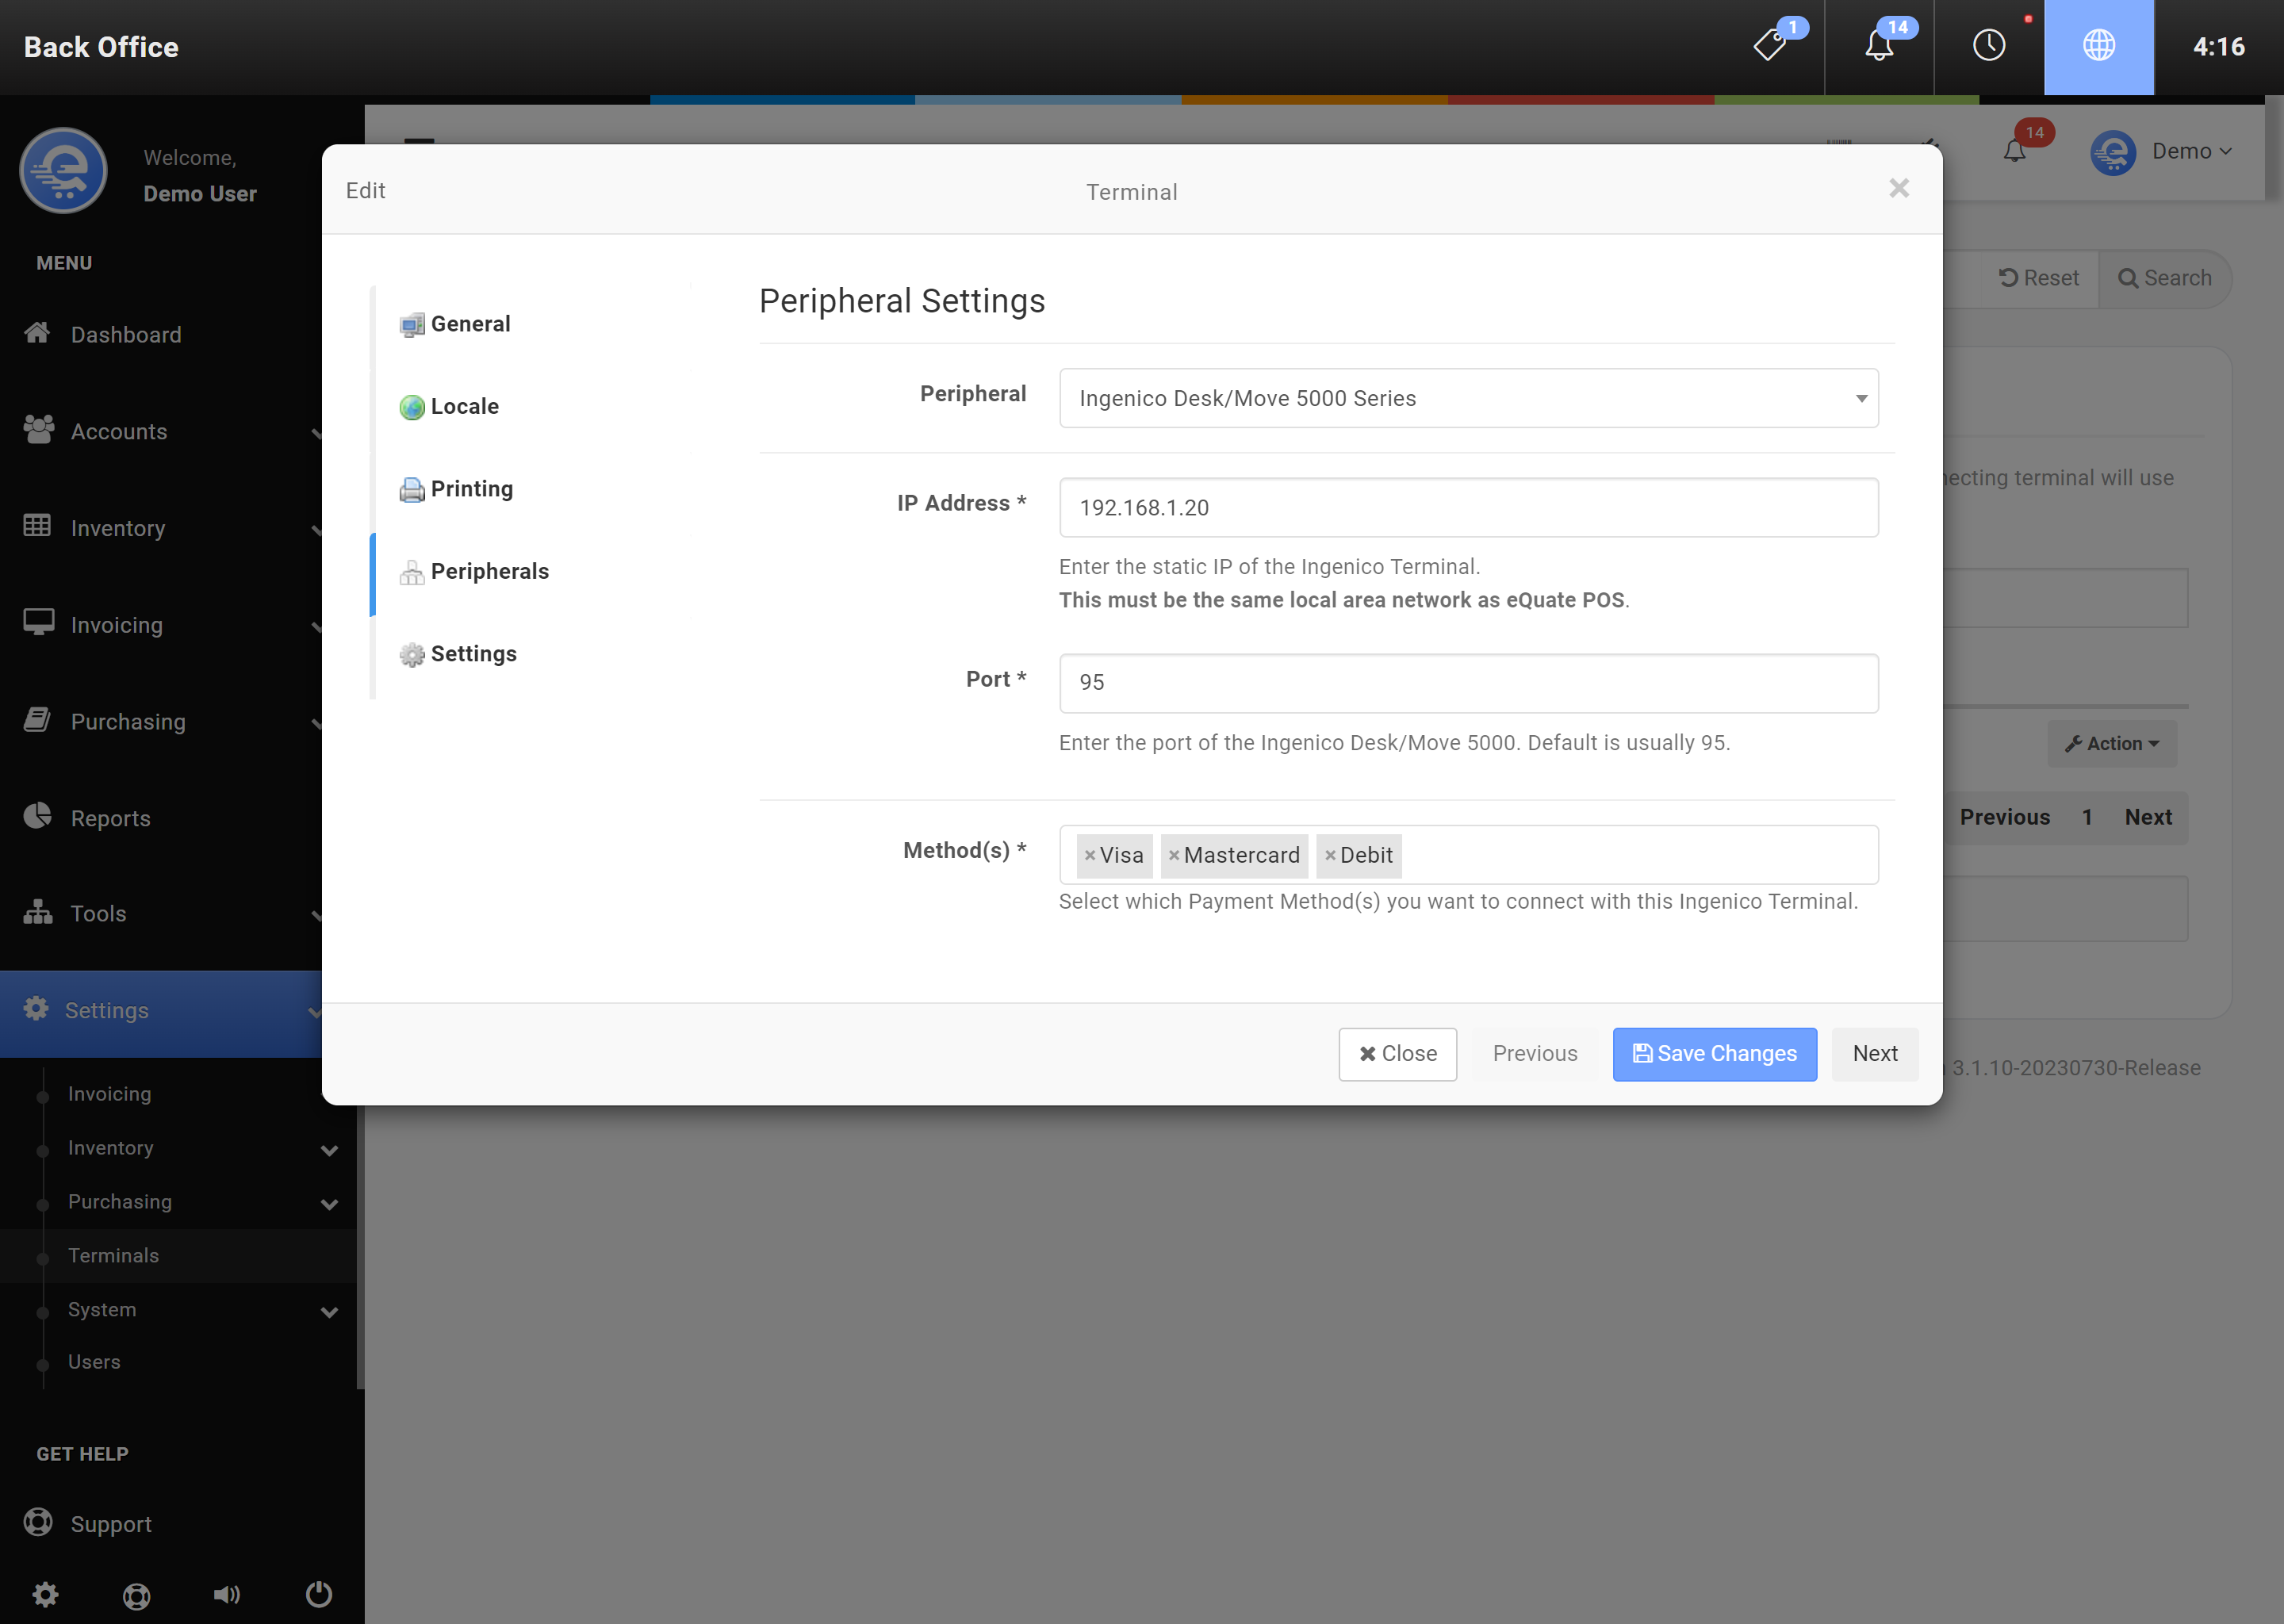
Figure B
On the Peripherals tab, select Ingenico Desk/Move 5000 and fill in the terminal details then press "Save Changes".

Figure C
Select the payment type you have configured for the peripheral and click Add to send the request to the peripheral.