Installation
Before You Begin
eQuate Point Of Sale comes bundled in two software packages; the Terminal (Client) which is to be installed on computers that you want to sell from, and the Back Office (Server), which is already pre-installed and acts as a hub/gateway for your various clients (terminals). eQuate Point Of Sale allows you to sell products easily and quickly. eQuate POS synchronizes every 5 minute by default, keeping all of your sales records updated no matter which location the terminal is installed at.
- Before installing this software; please be sure that your system meets the minimum system requirements.
- A stable Internet connection is required during installation
Minimum Requirements
Before beginning your installation, you should ensure your system meets the software minimum requirements.
Windows
- Minimum system requirements
Windows 8 or higher
At least 8GB RAM, multi core CPU, and at least 10 gigabytes of free disk space on a solid state drive (SSD). - An Internet Connection to synchronize the data for the first time, a somewhat stable internet connection is required to keep the inventory up to date.
Linux/Mac
- Requires at least 4GB RAM, Dual core CPU, and at least 10 gigabytes of free disk space
- Software:
- PHP 5.6+
- phpCurl
- phpZip
- MySQL 5+
- Apache 2+
- Curl
- PHP 5.6+
- Windows (XAMPP) - www.apachefriends.org
- Debian Linux - wiki.debian.org/LaMp
Installing on Linux/Mac
If you are running a Linux or Mac operating system. Follow these instructions for installation of eQuate POS - Client.
- If you are running Mac/Linux, you must install a working LAMP server first (Apache, MySQL, PHP). We suggest using XAMPP for Mac, and Apache/MySQL for Linux. However, any other web server with the same features will work. You can download at XAMPP at https://www.apachefriends.org/index.html
- You must create a SQL database, username, and password to import the tables during the installation.
- Download the .zip file from the eQuate POS website.
- Unpack the contents into a web directory (we suggest securing this directory from outside access).
- Create a SQL database, and a username and password to access the database. These details will be used in Step 1.
- Use a Web Browser to access the unpacked files.
- Step 1 - Local Connection: Enter a Terminal ID (see Figure A below). This ID should be a unique numerical value of 3 digits (example: 100, 200, 300, 201, 202). Enter your local database information you created earlier. Press Continue.
- Step 2 - Back Office Connection: Input the SQL information for your eQuate Back Office (Server) (see Figure B below) (this information can be found in My Account > Manage on eQuatePOS.com). Press Continue.
- Allow the system to synchronize with the Back Office (Server) for the first time. This can take up to 30 minutes depending on the size of the database (see Figure C below).
- Once the synchronization is complete, you will automatically be forwarded to a login screen (see Figure D below) (if enabled), or directly into the Point Of Sale.
- The installation process is complete.
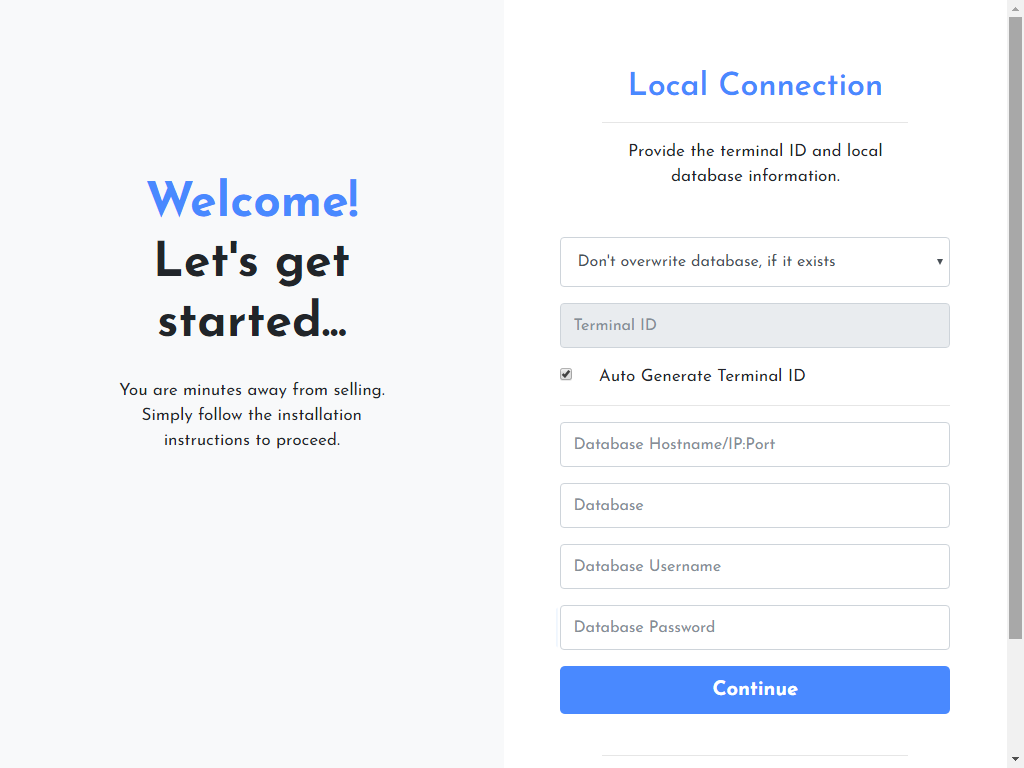
Figure A
Enter SQL database information, and provide Terminal ID.
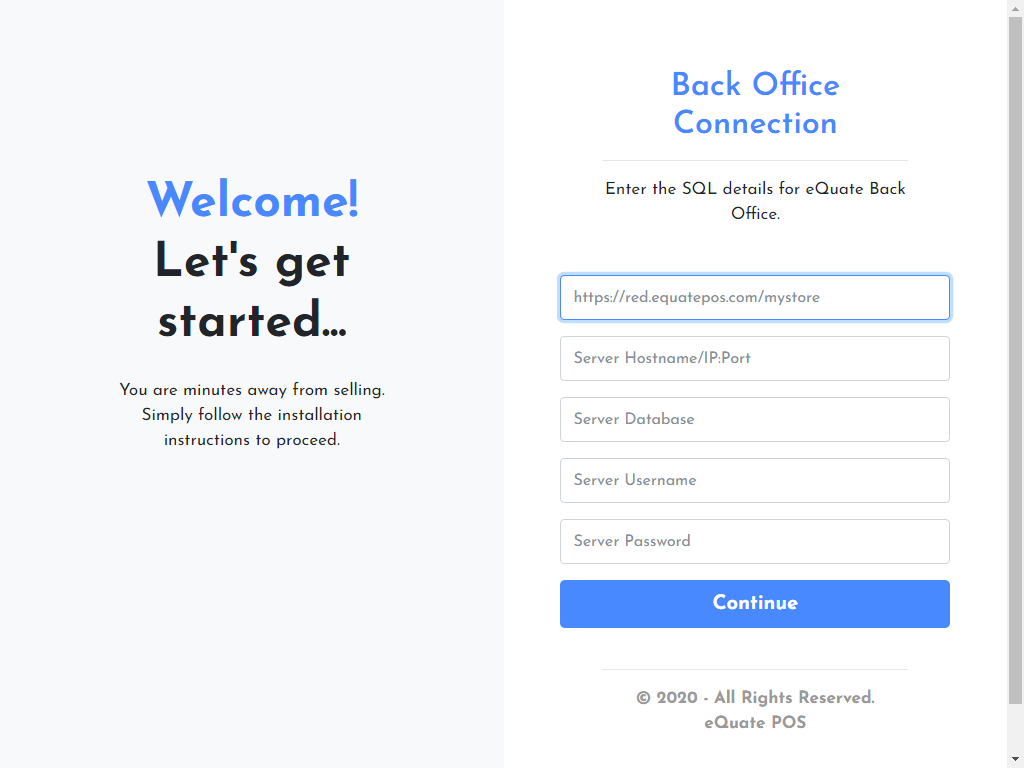
Figure B
Enter your eQuate Back Office (Server) SQL credentials.
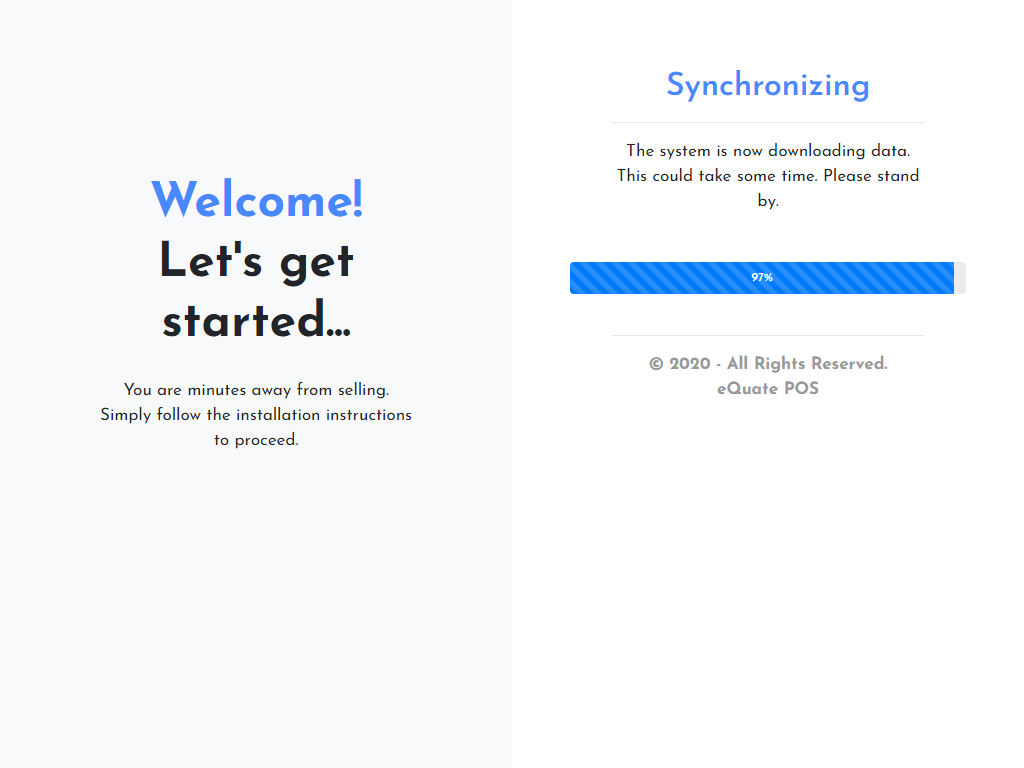
Figure C
Synchronization may take up to 30 minutes, depending how large your database is.

Figure D
Once the synchronization is complete, you will see a login screen (default).
Installing on Windows
eQuate POS can be installed on Windows operating systems. Download and install the Windows installation file from our downloads page.
Be sure your systems meets the system requirements.
- Download the latest Windows installation file from the eQuate POS website.
- Run the installation file (see Figure A below).
- Step 1 - Connect: To get started, enter your Back Office URL (this can be found in My Account on eQuatePOS.com) (see Figure B below).
Press Continue. - A download will begin of the software version that is required by your eQuate Back Office. When the download is complete, the software will take you to the next step - Step 2.
- Step 2 - Local Connection: If you are re-installing the software for an existing terminal, enter a Terminal ID (see Figure C below). This ID should be a unique numerical value of 3 digits (example: 100, 200, 300, 201, 202). If you are installing for the first time, you can leave "Auto Generate Terminal ID" checked. This will automatically generate a terminal ID.
Press Continue. - Step 3 - Back Office Connection: Input the SQL information for your eQuate Back Office (Server) (see Figure D below) (this information can be found in My Account on eQuatePOS.com).
Press Continue. - Allow the system to synchronize with the Back Office (Server) for the first time. This can take up to 30 minutes depending on the size of the database (see Figure E below).
- Once the synchronization is complete, you will automatically be forwarded to a login screen (see Figure F below) (if enabled), or directly into the Point Of Sale.
- The installation process is complete.

Figure A
On Windows, to begin the install; select the eQuate POS icon on your desktop.
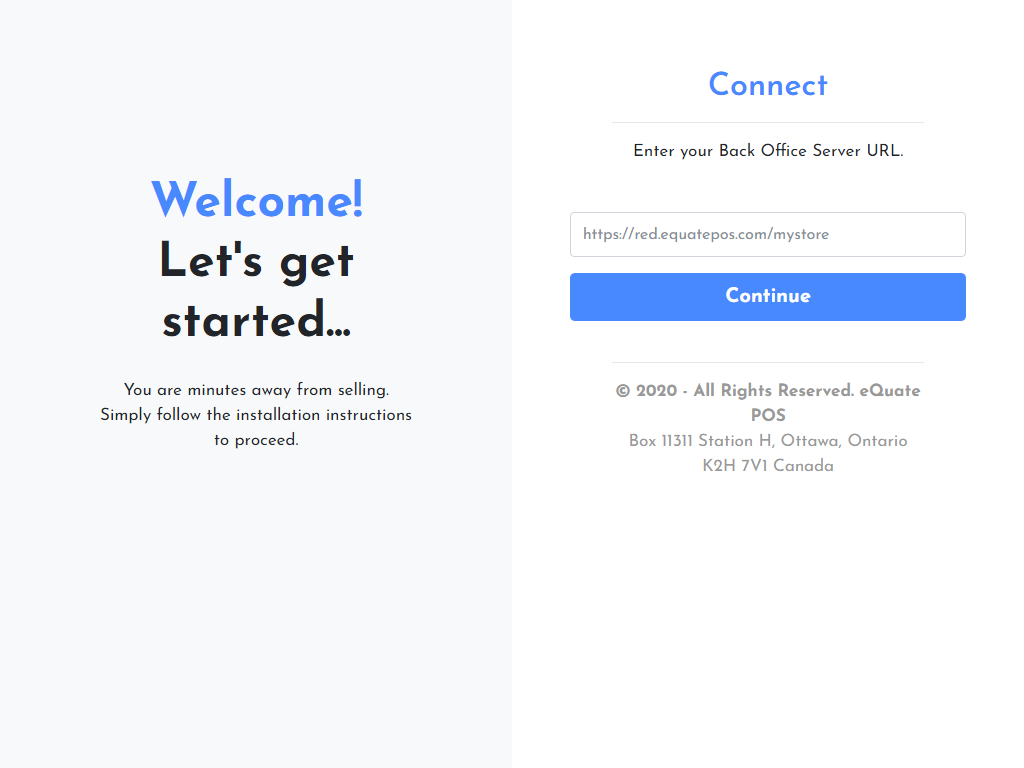
Figure B
Enter your Back Office (Server) URL. You can find these details within your eQuatePOS.com profile.
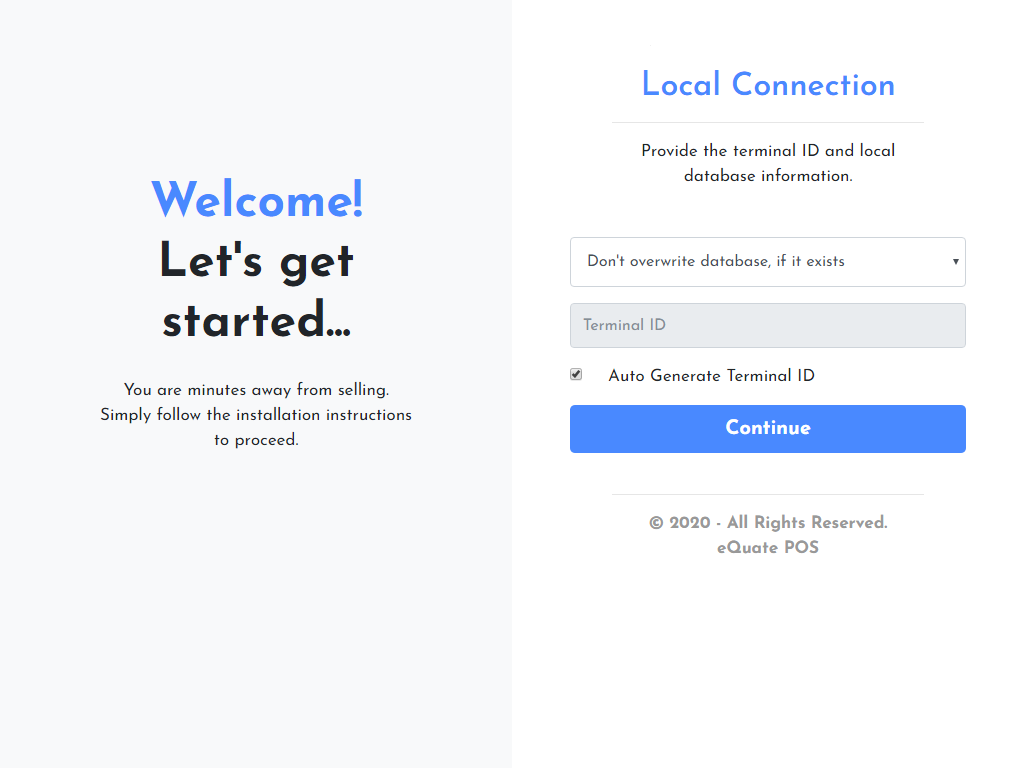
Figure C
Select the database install type, and Terminal ID, or auto-generate the Terminal ID.
Figure D
Enter your eQuate Back Office (Server) SQL credentials. You can find these details within your eQuatePOS.com profile.
Figure E
Synchronization may take up to 30 minutes, depending how large your database is.
Figure F
Once the synchronization is complete, you will see a login screen (default).