Terminals
Getting Started
The eQuate Terminal is a seperate peice of software that runs on Windows or Linux. The Terminal is generally installed at the check out of a store. It's used for completing transactions, looking up information, and also some basic inventory tasks.
Logging In
After opening up eQuate POS Terminal, if logins are enabled, it will prompt you to login. You can edit your operator ID/PIN's in the User section of the Back Office.
- Open eQuate POS by selecting the icon on the Windows desktop (see Figure A).
- After eQuate POS is opened, if logins are enabled; you will be asked to provide at least an ID, and PIN. You can also use your Back Office e-mail address, and password (see Figure B).
- If you make a mistake during this process, you can press the escape key on the keyboard to reset the login screen.
- Once you are logged in; the Sale screen will appear and you can start your Sale.

Figure A
Finding the eQuate POS icon on a Windows PC

Figure B
If logins are enabled, you will need to sign in using your credentials.
Back Office
If Terminal logins are enabled, you can access the back office directly from the Terminal. The Back Office is essential to running your store. You can use the Back Office to create purchase orders, receive inventory, edit calendars, and more.
- After logging in to the Terminal, click the top Globe icon. Note: Terminal logins must be enabled otherwise it will ask you to enter your full username and password.
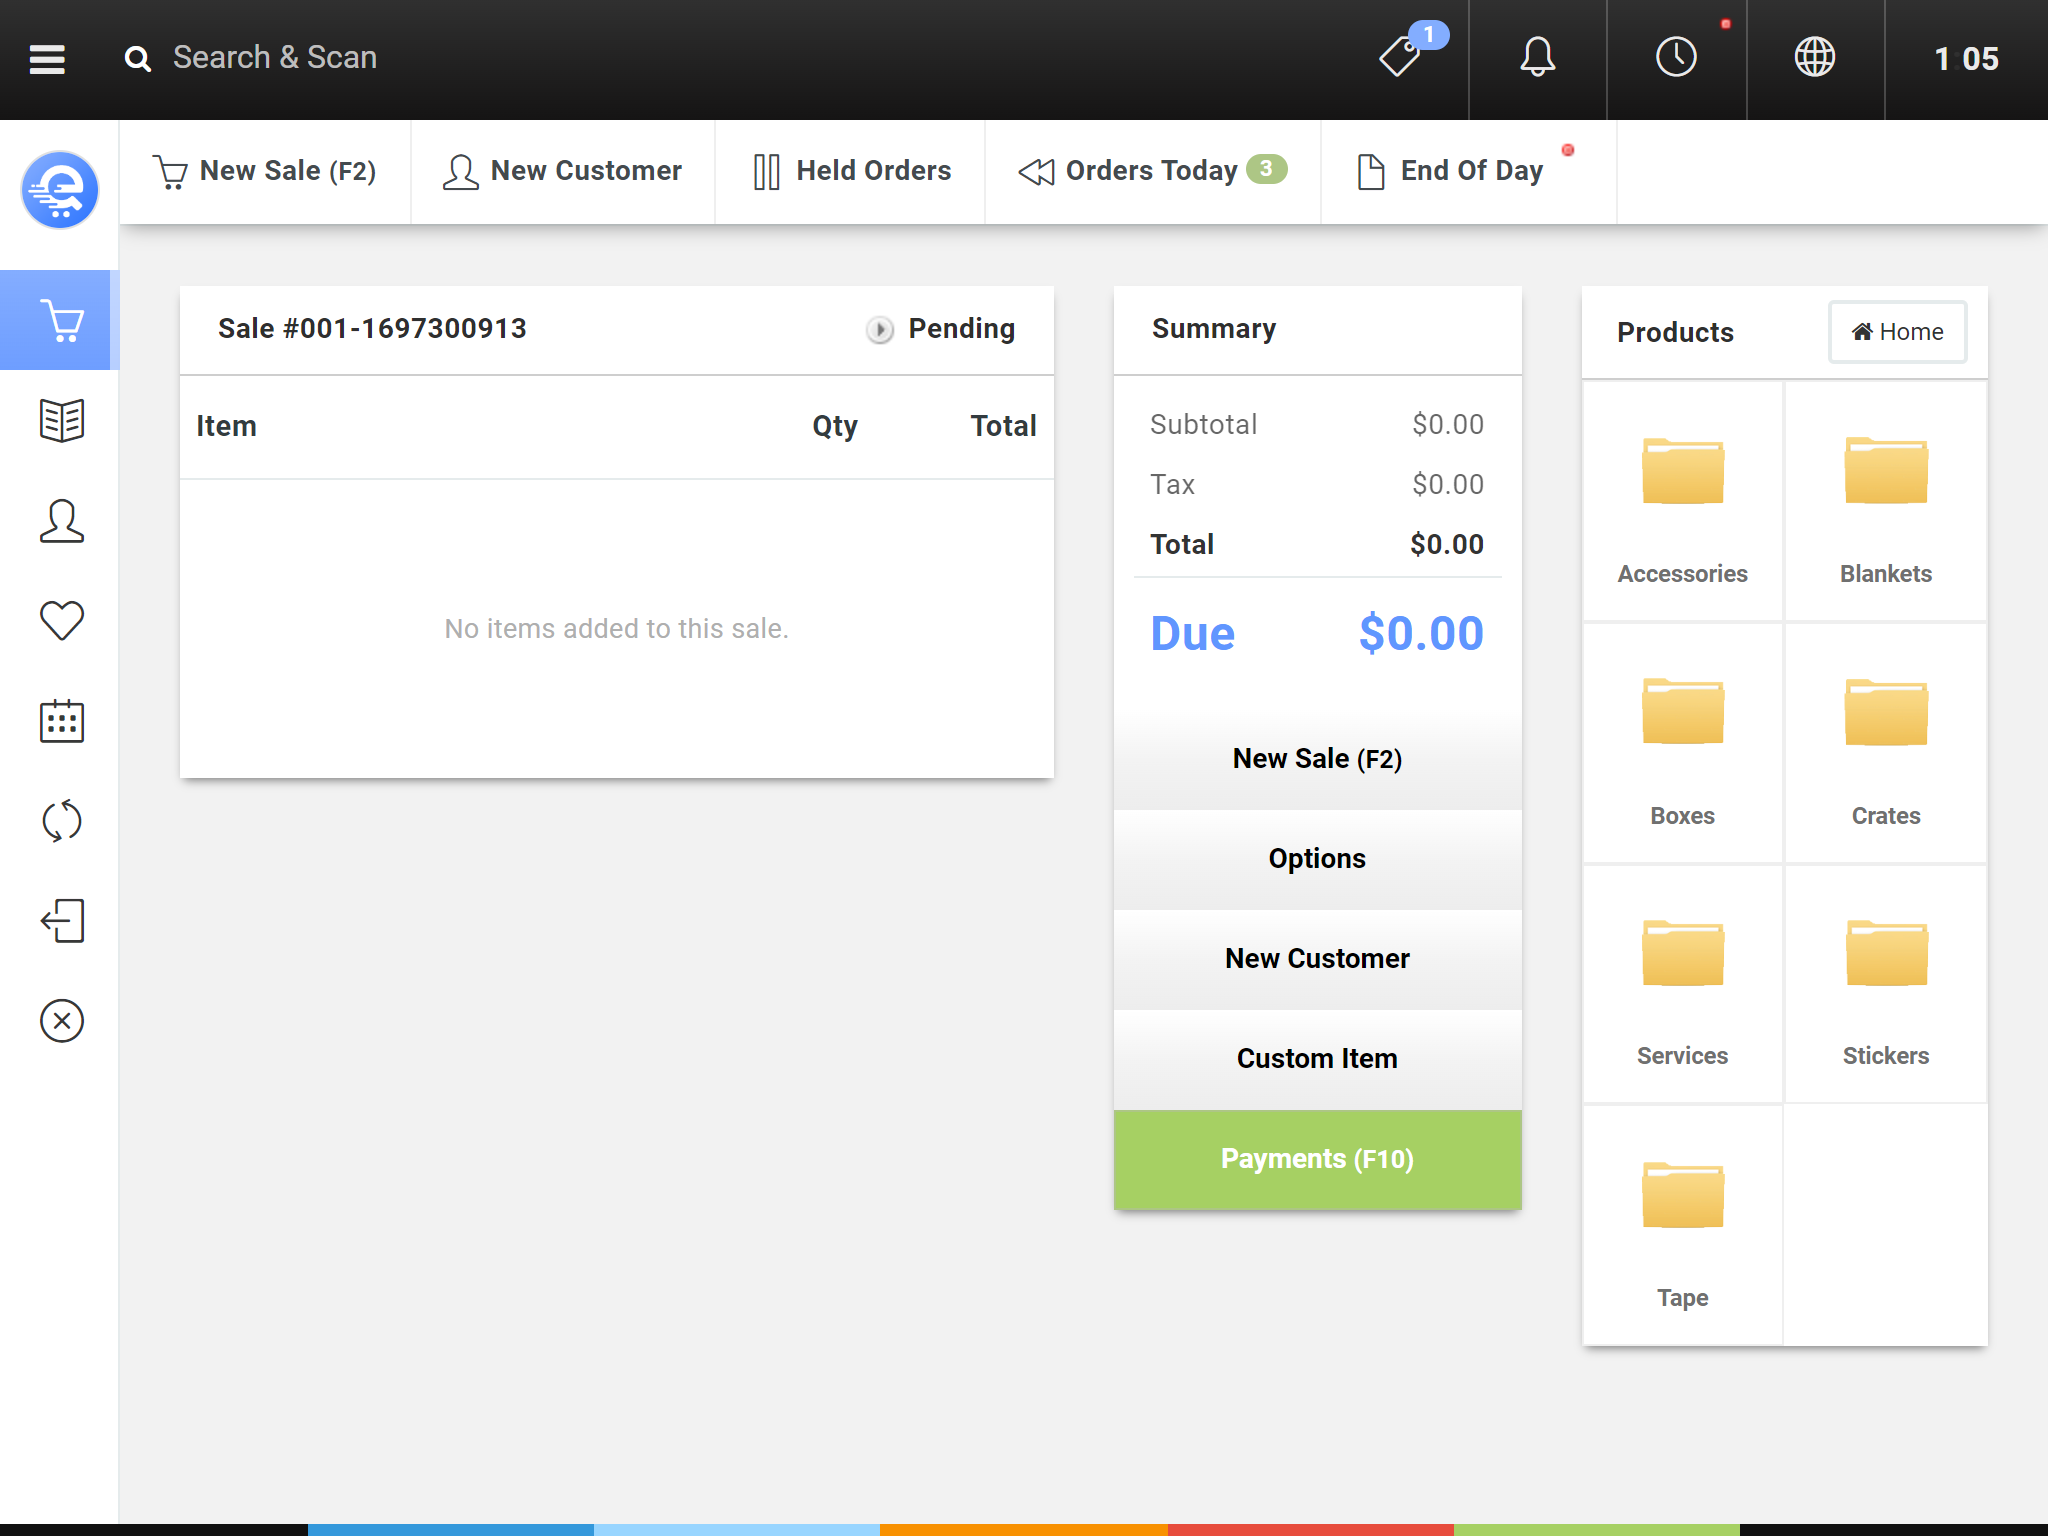
Figure C
To access the Back Office, click the Globe icon at the top menu bar.
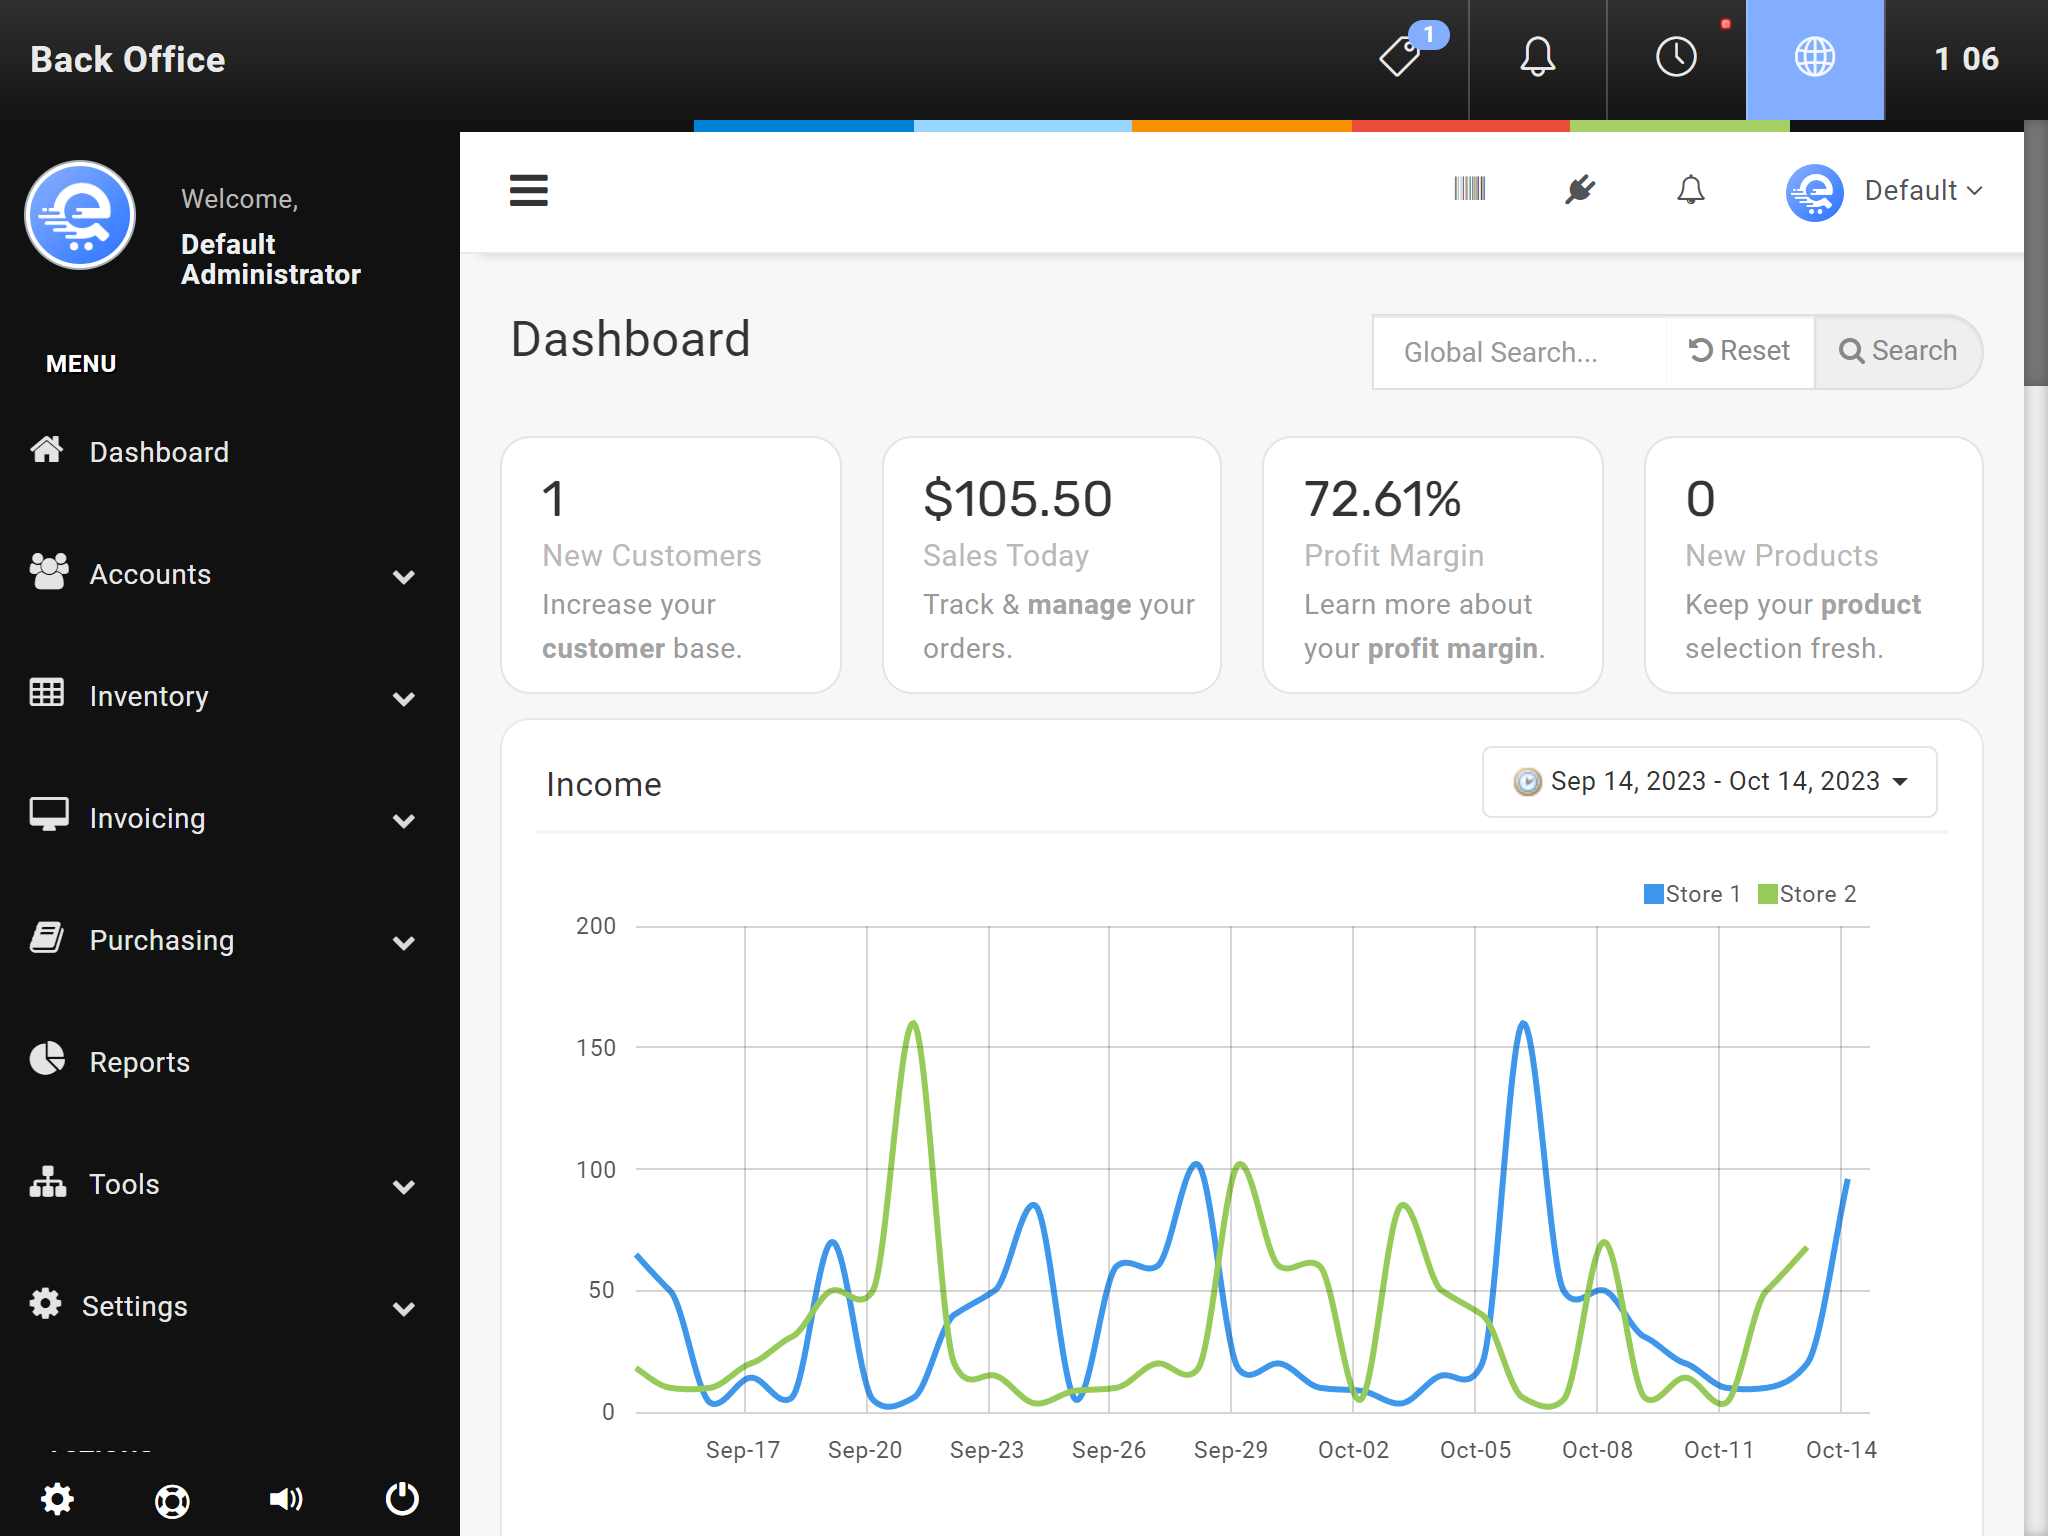
Figure D
Inside the Dashboard in the Back Office area.
Completing A Sale
A sale is the first step in the process of selling inventory. A sale will turn into an invoice once it has been held, or completed. This guide will explain the work-flow of completing a sale. Once a sale is completed or held, inventory will be deducted from the warehouse stock bucket. A held sale can also be cancelled, or completed. A completed sale can only be refunded.
- Adding items to the Sale
- Adding a customer to the Sale (if applicable)
- Finalising Sale details (add coupons, discounts, or notes)
- Adding a payment to the Sale
Adding Items
There are multiple ways to add an item to a sale. In this example, we will explain the easiest method; using the top search bar. The top search bar works like any search engine. For example, if you were adding a Large Red Shoe to the order; simply search "large red shoe", and select the proper product on the drop down. If the product you are adding also has a barcode (EAN-13, UPC-A, UPC-E, etc...) you can also scan that into the top search bar.
Once items have been added to a sale; attributes like discount, price, tax, quantities, and notes can be changed.
- Search the product name in the top search bar (see Figure A). You can also scan the product barcode into the top search bar.
- Once the search list populates, use the up/down button on your keyboard to select the correct product, and press your keyboards "Enter/Return" key to add it to the sale. You can also click on it with your mouse, or tap it with your figure if you use a touch screen (see Figure B)
- The product will appear on the item list.
- To change quantities, or edit attributes like discounts, price, or tax: Select the item, and the menu will change to allow you to change price, quantity, or discount.
Figure A
Default sale screen.

Figure B
Use the top search bar to search products by name, or barcode.
Attaching A Customer
Assuming the customer alreaded exists in your system, you can quickly add customers to orders. Adding customers to orders allows you to quickly lookup previously purchase items, award loyalty points (if enabled), and use Account Credit (if enabled). There are multiple ways to add a customer to a sale. In this tutorial, we will focus on the easiest method which is using the top search bar.
- In the top search bar, begin by typing the customers: name, phone number, or e-mail address.
- A list of results will appear in the search drop down (see Figure C).
- Select the desired customer by using your keyboard's up and down key, or your mouse (or finger for touch screens).
- After the customer has been added, you will see the customer's details appear above the item list (see Figure D).
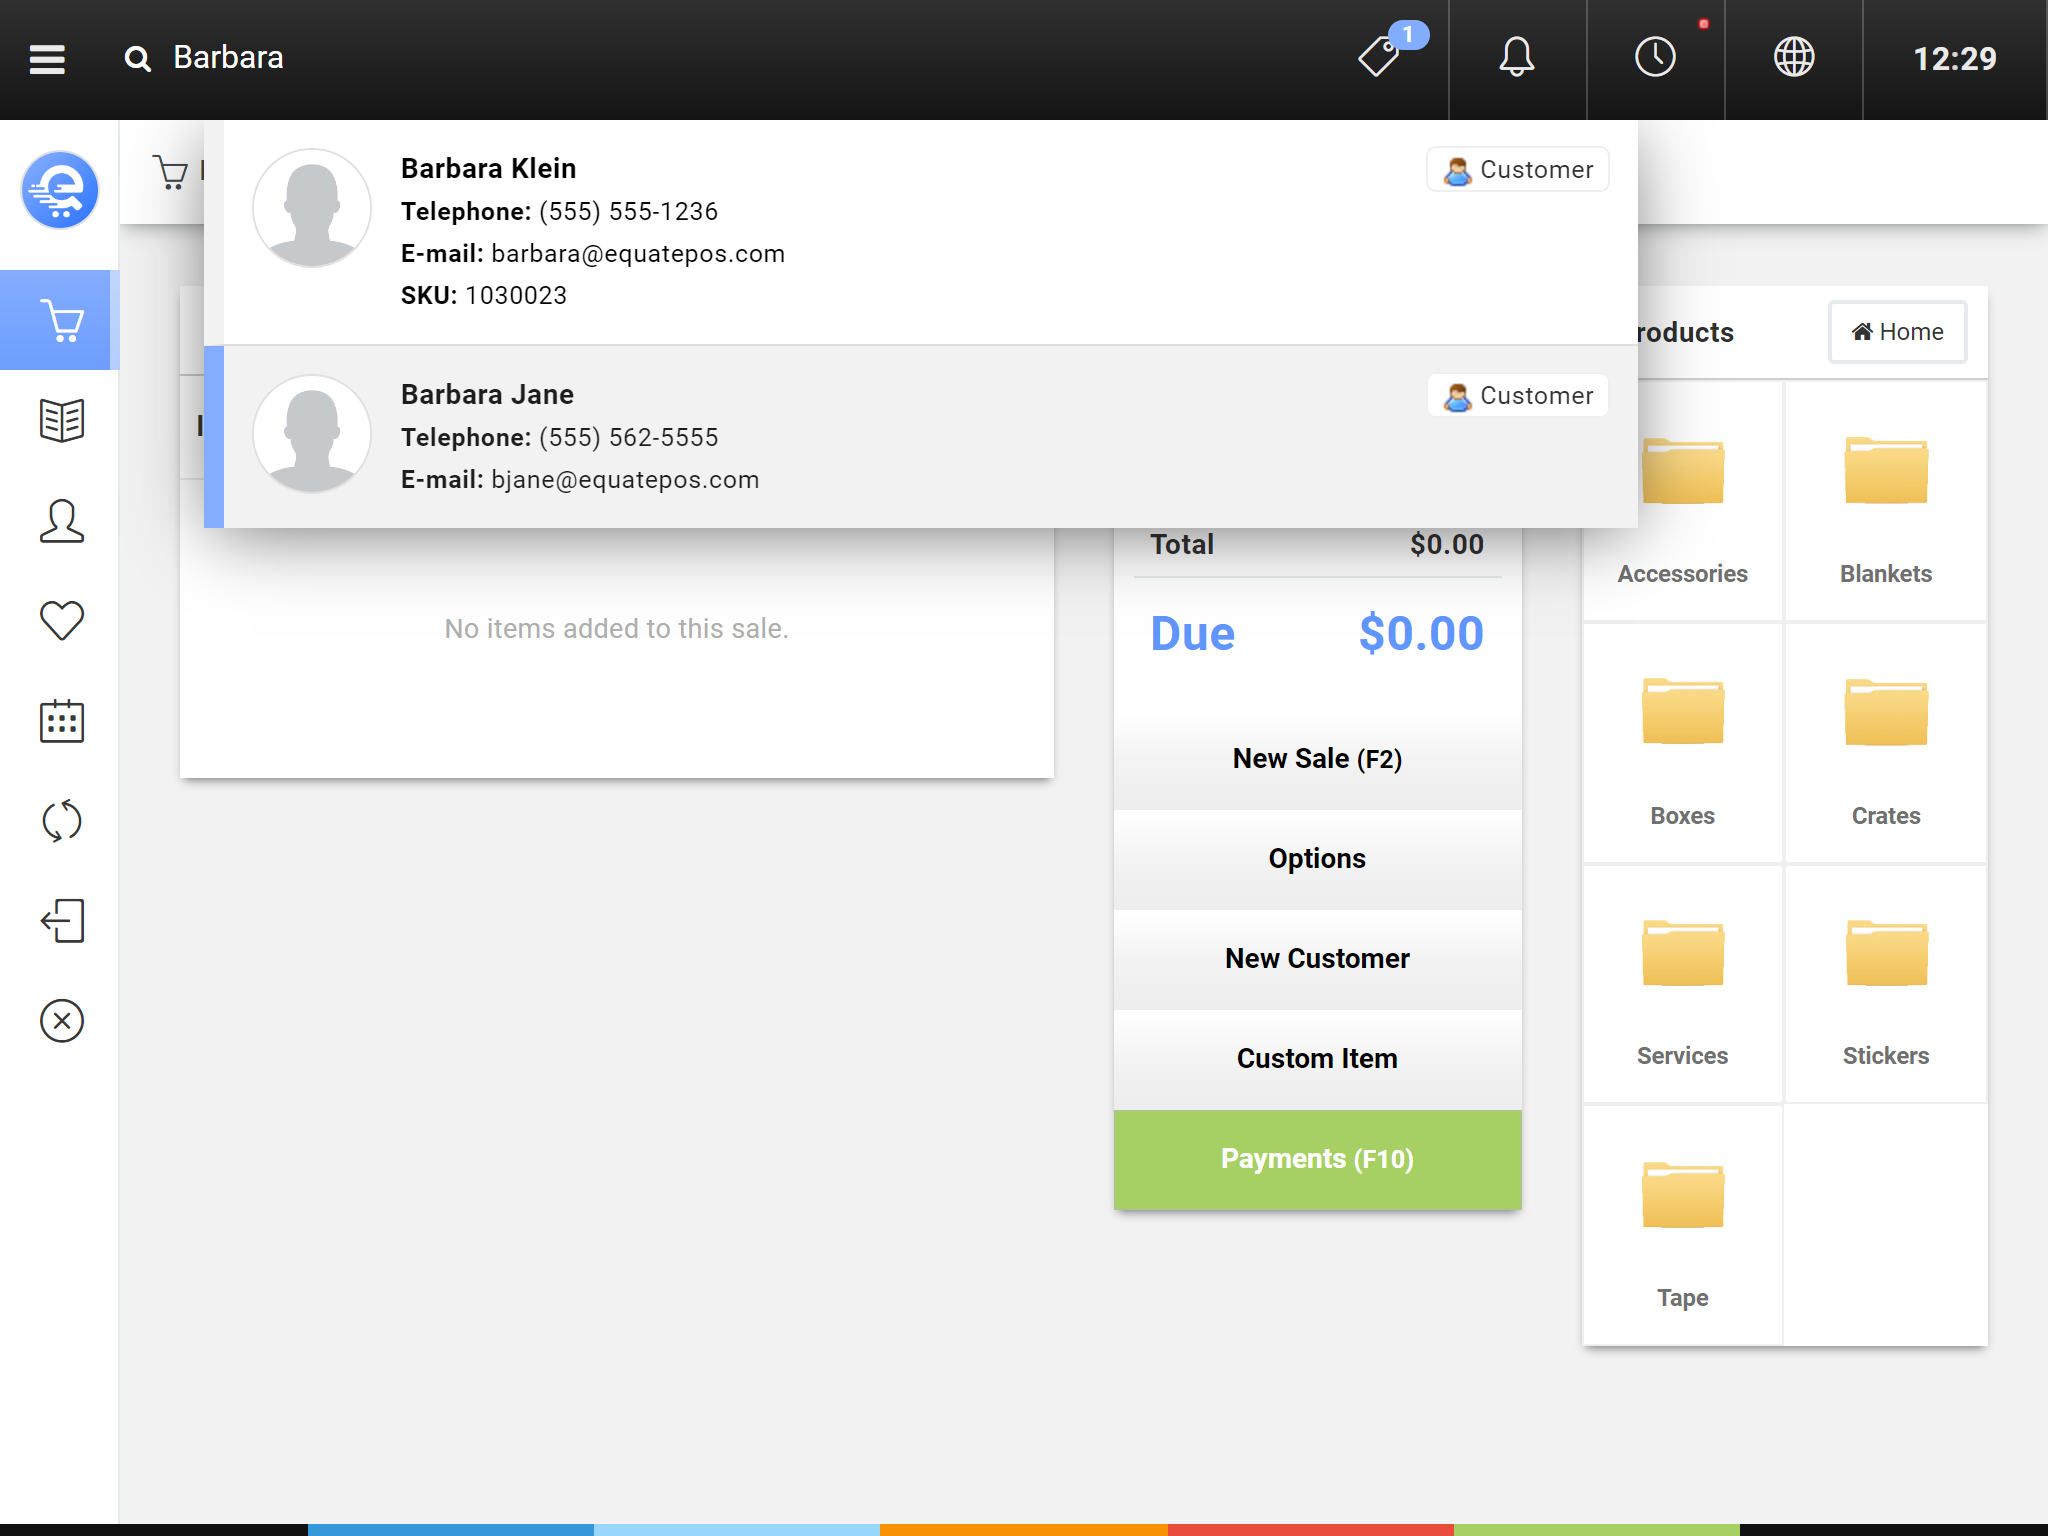
Figure C
Using the top search bar to find customers by name, e-mail, or phone number.
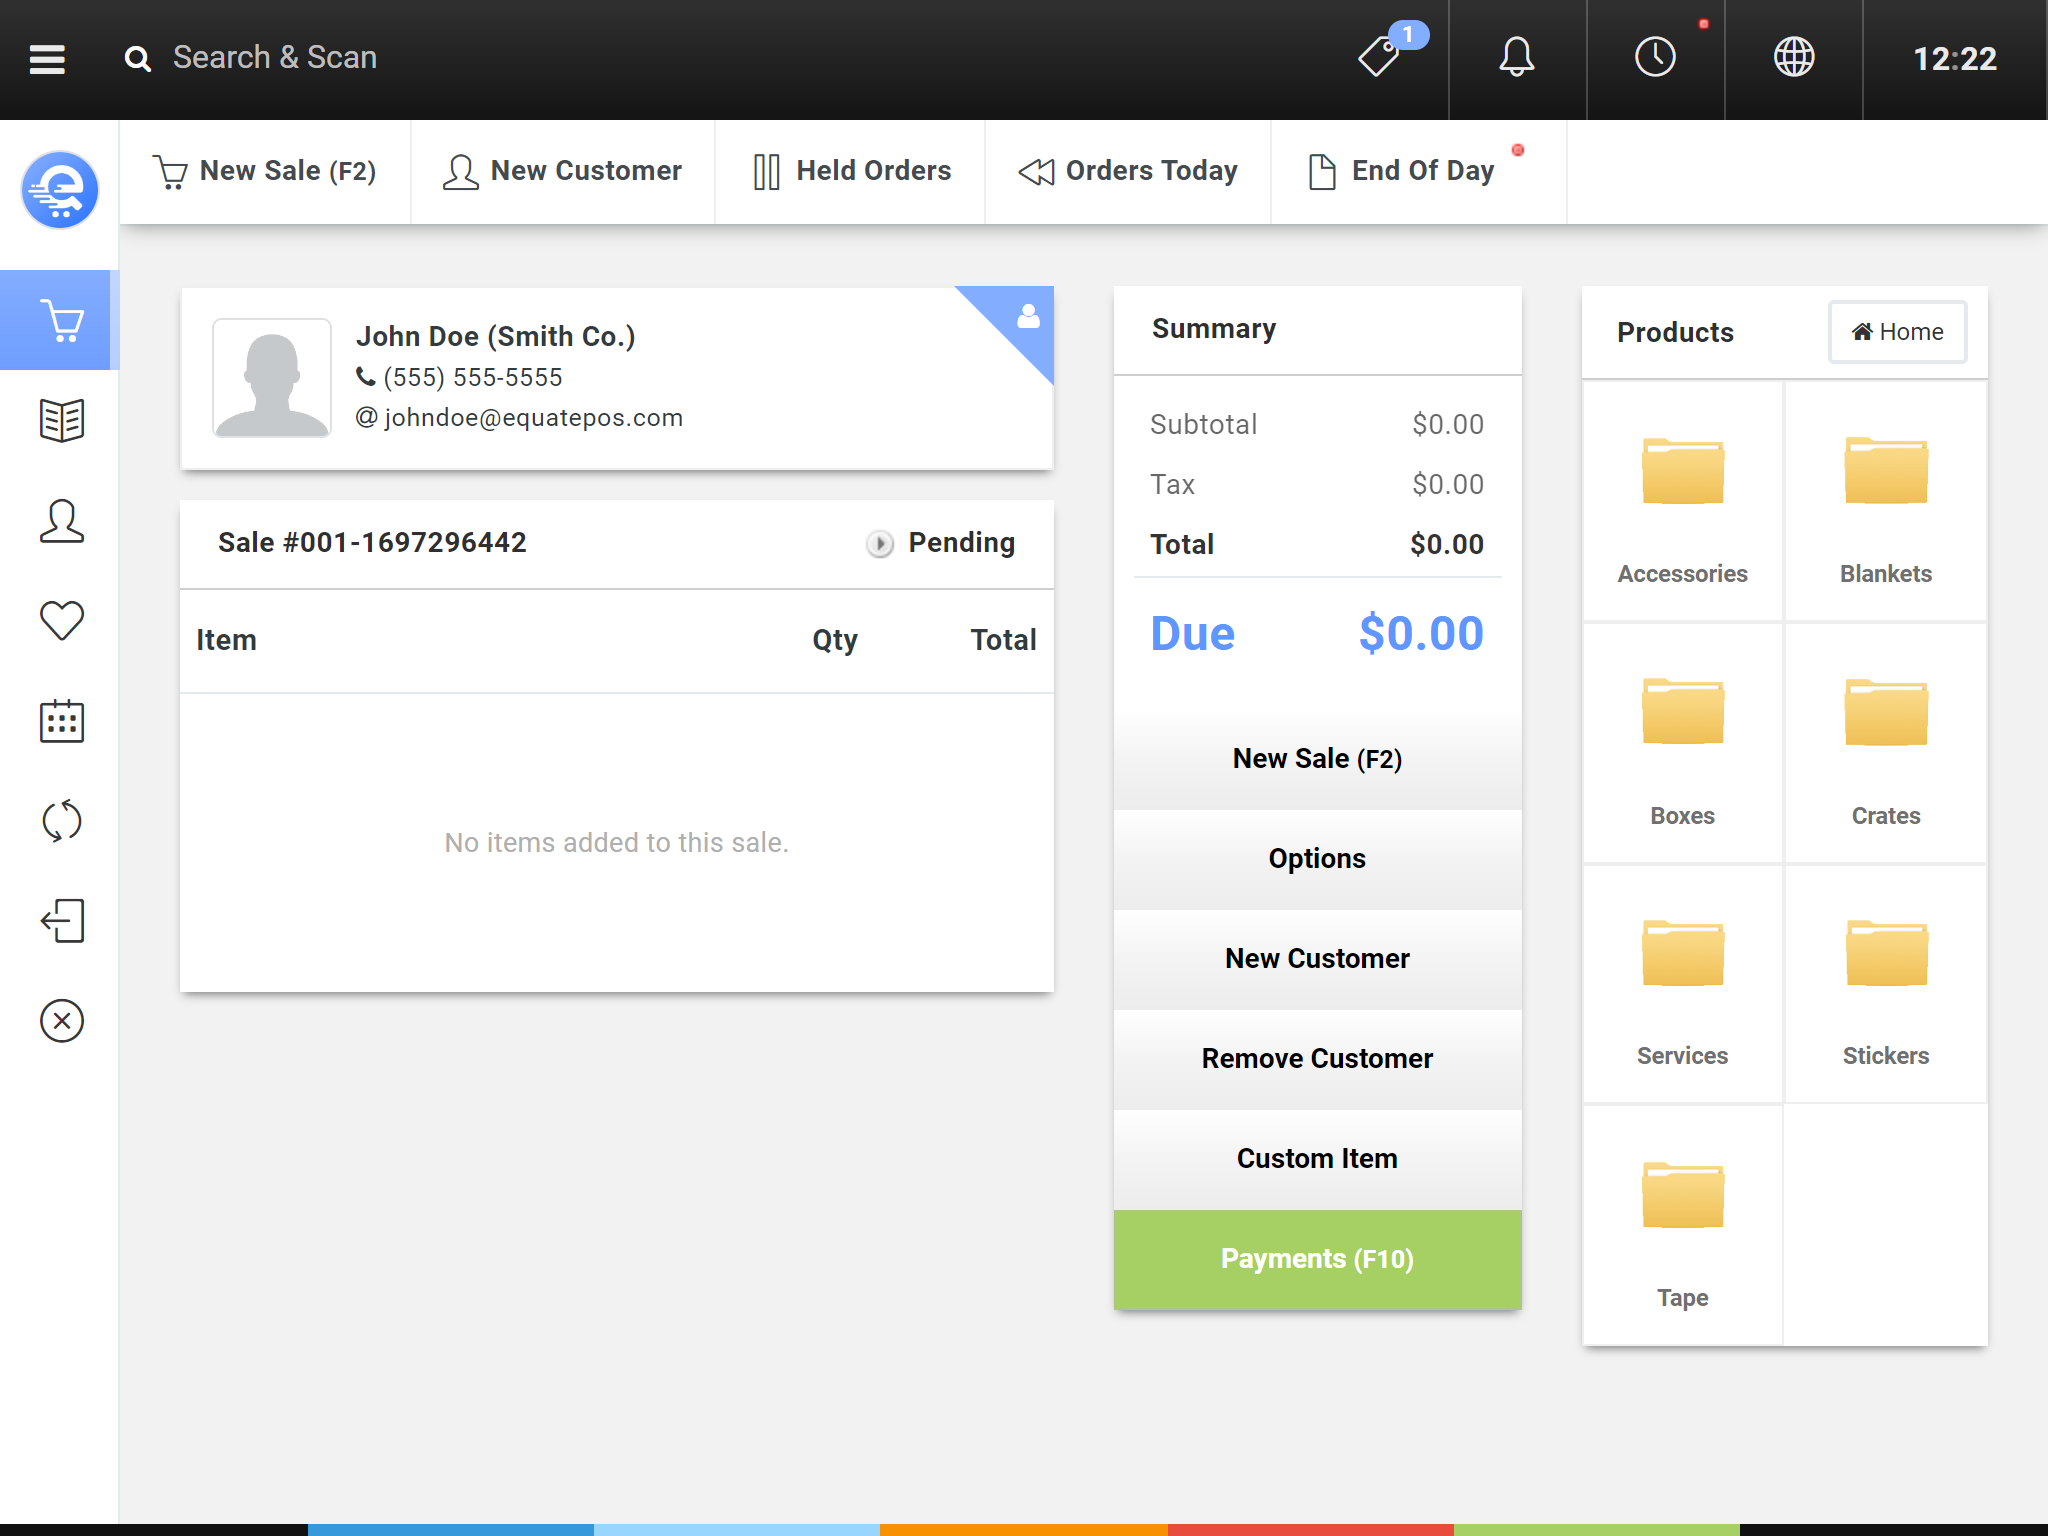
Figure D
When a customer is added to an order, the customer's details will appear above the item list.
Completing The Sale
Once you've added your items, and customer to the sale (if applicable); you may want to also adjust any extra variables; like discounts and coupons. The final step in any sale is to add a payment. The payment must be greater, or equal to the amount owing for the order to be finalised and moved into "Complete" status. You can also put an order on hold if you are not ready to complete the sale. Completed and held orders have their inventory deducted from your warehouse stock buckets. If a sale is held, and then cancelled, inventory is automatically returned into the originating stock bucket.
- On the Sale screen, click on the green "Payments" button (see Figure E).
- Fill in the total amount paid in the desired payment method, and press "Add" (see Figure F).
- If the payment method is cash, it will present a return change screen if the amount paid was greater than the amount due.
- If the payment method is gift card, it will ask you for the gift card SKU before adding the payment.
- If the payment method is loyalty or account credit, the system will first check if the loyalty/credit balance has sufficient credit to cover the payment.
- Once the total payments have exceeded the amount due; the transaction will automatically change to "Complete" status and the receipt print window will prompt (see Figure G).
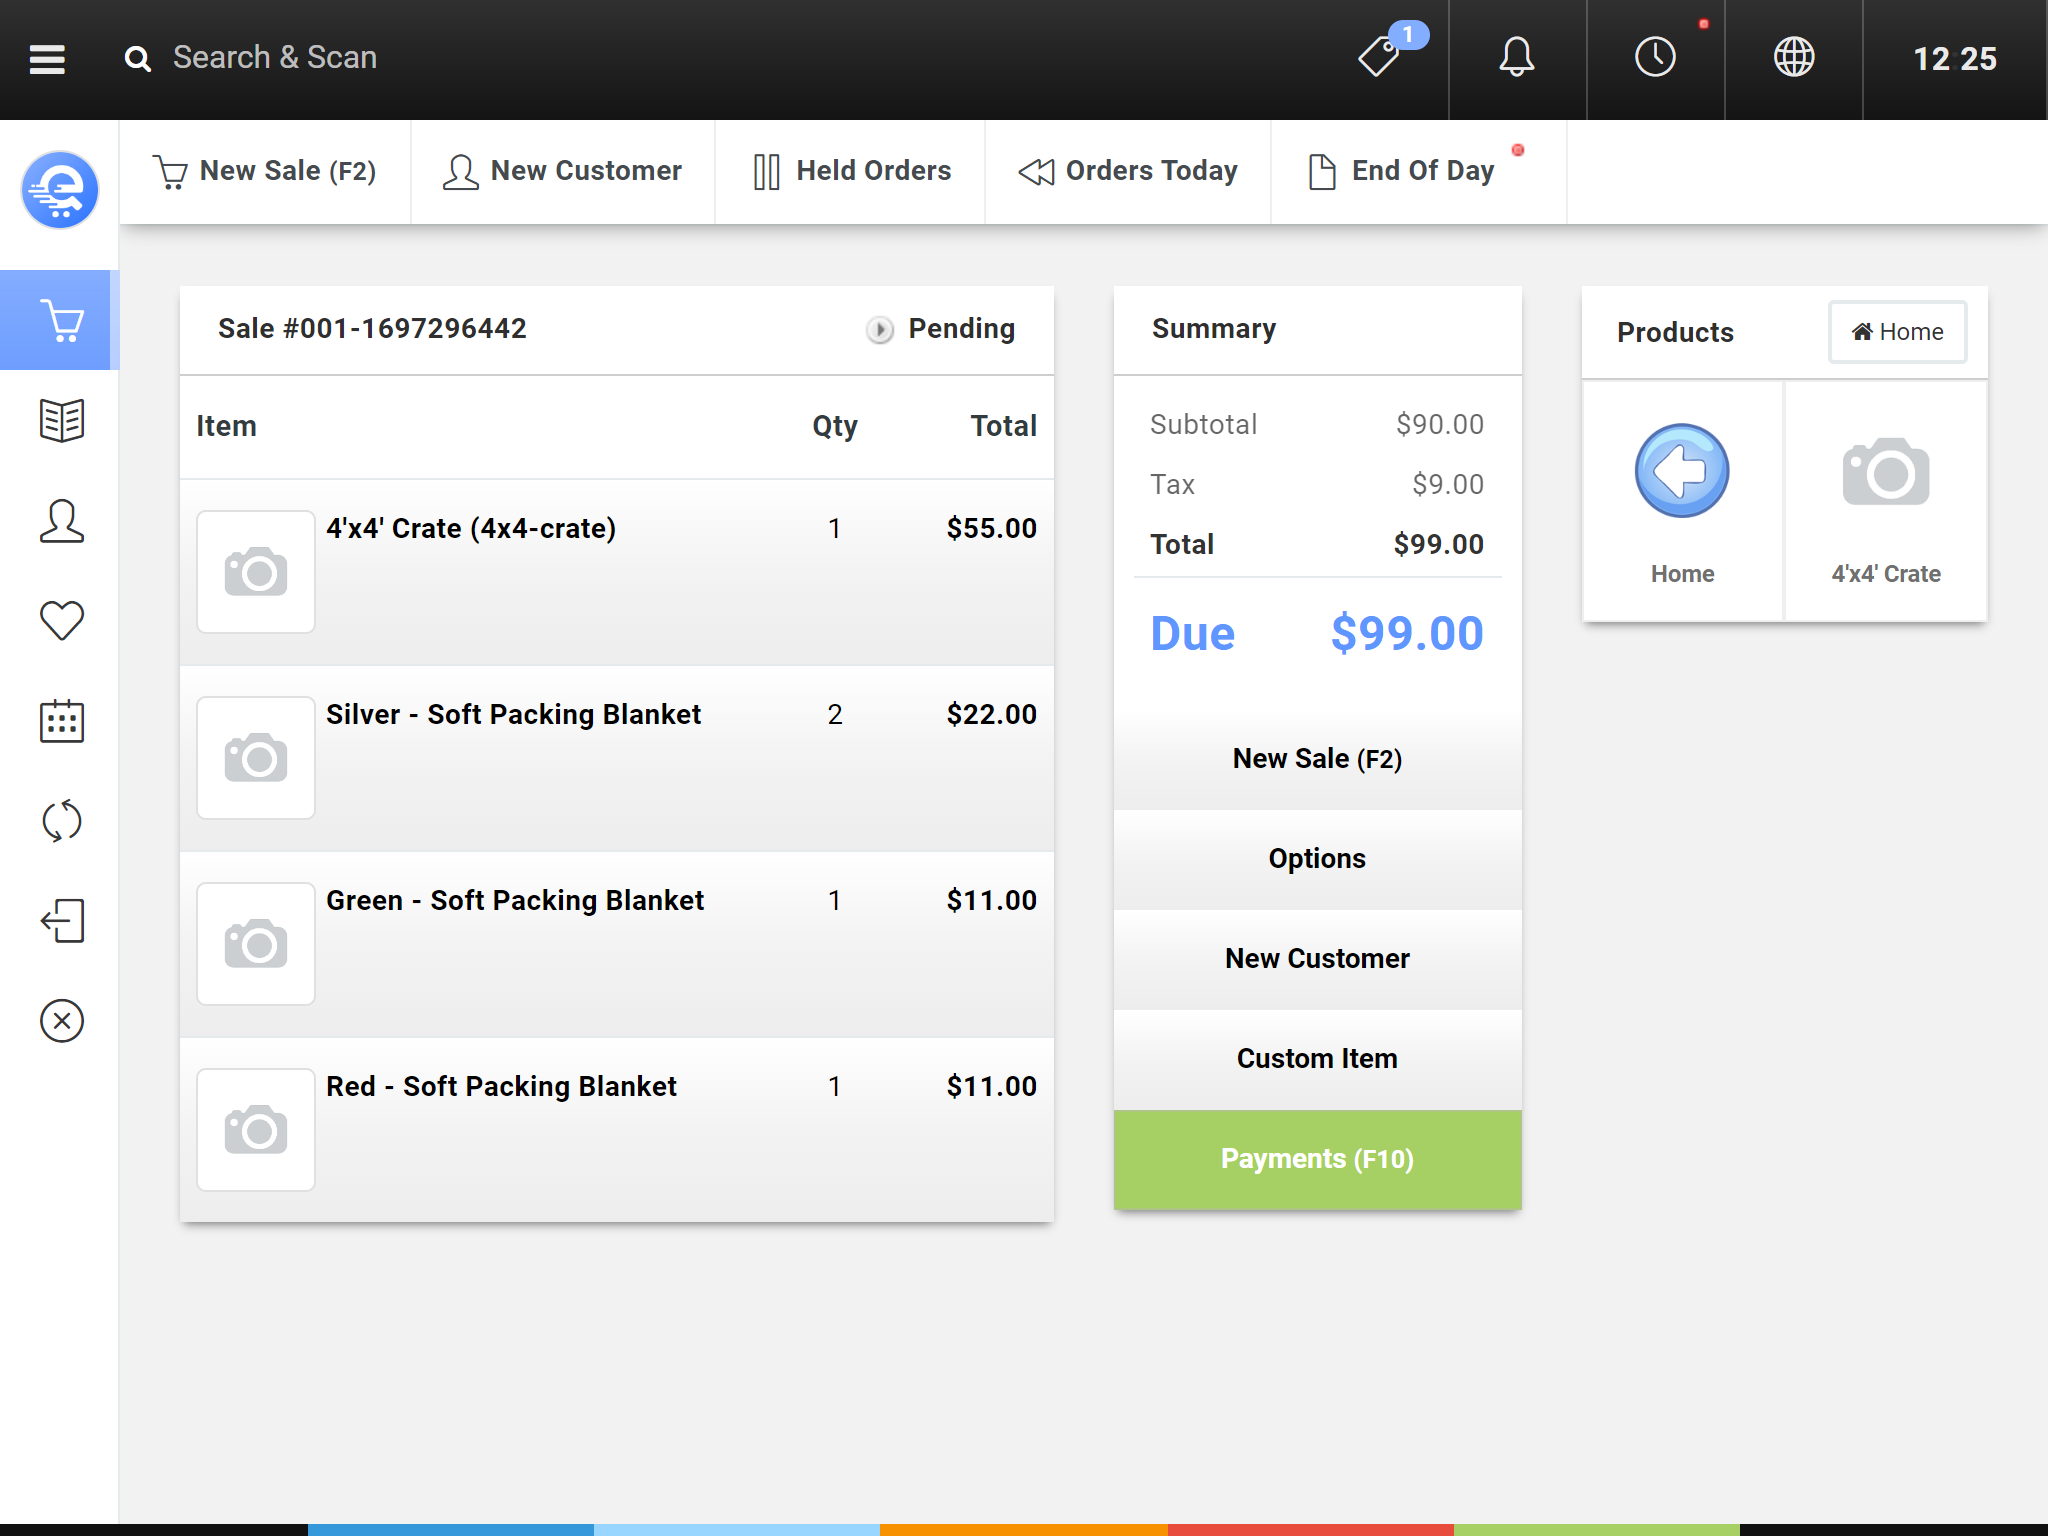
Figure E
When you are completed your order, click "Payments" to add a payment to the order.

Figure F
Enter the amount in the text box, and press "Add".
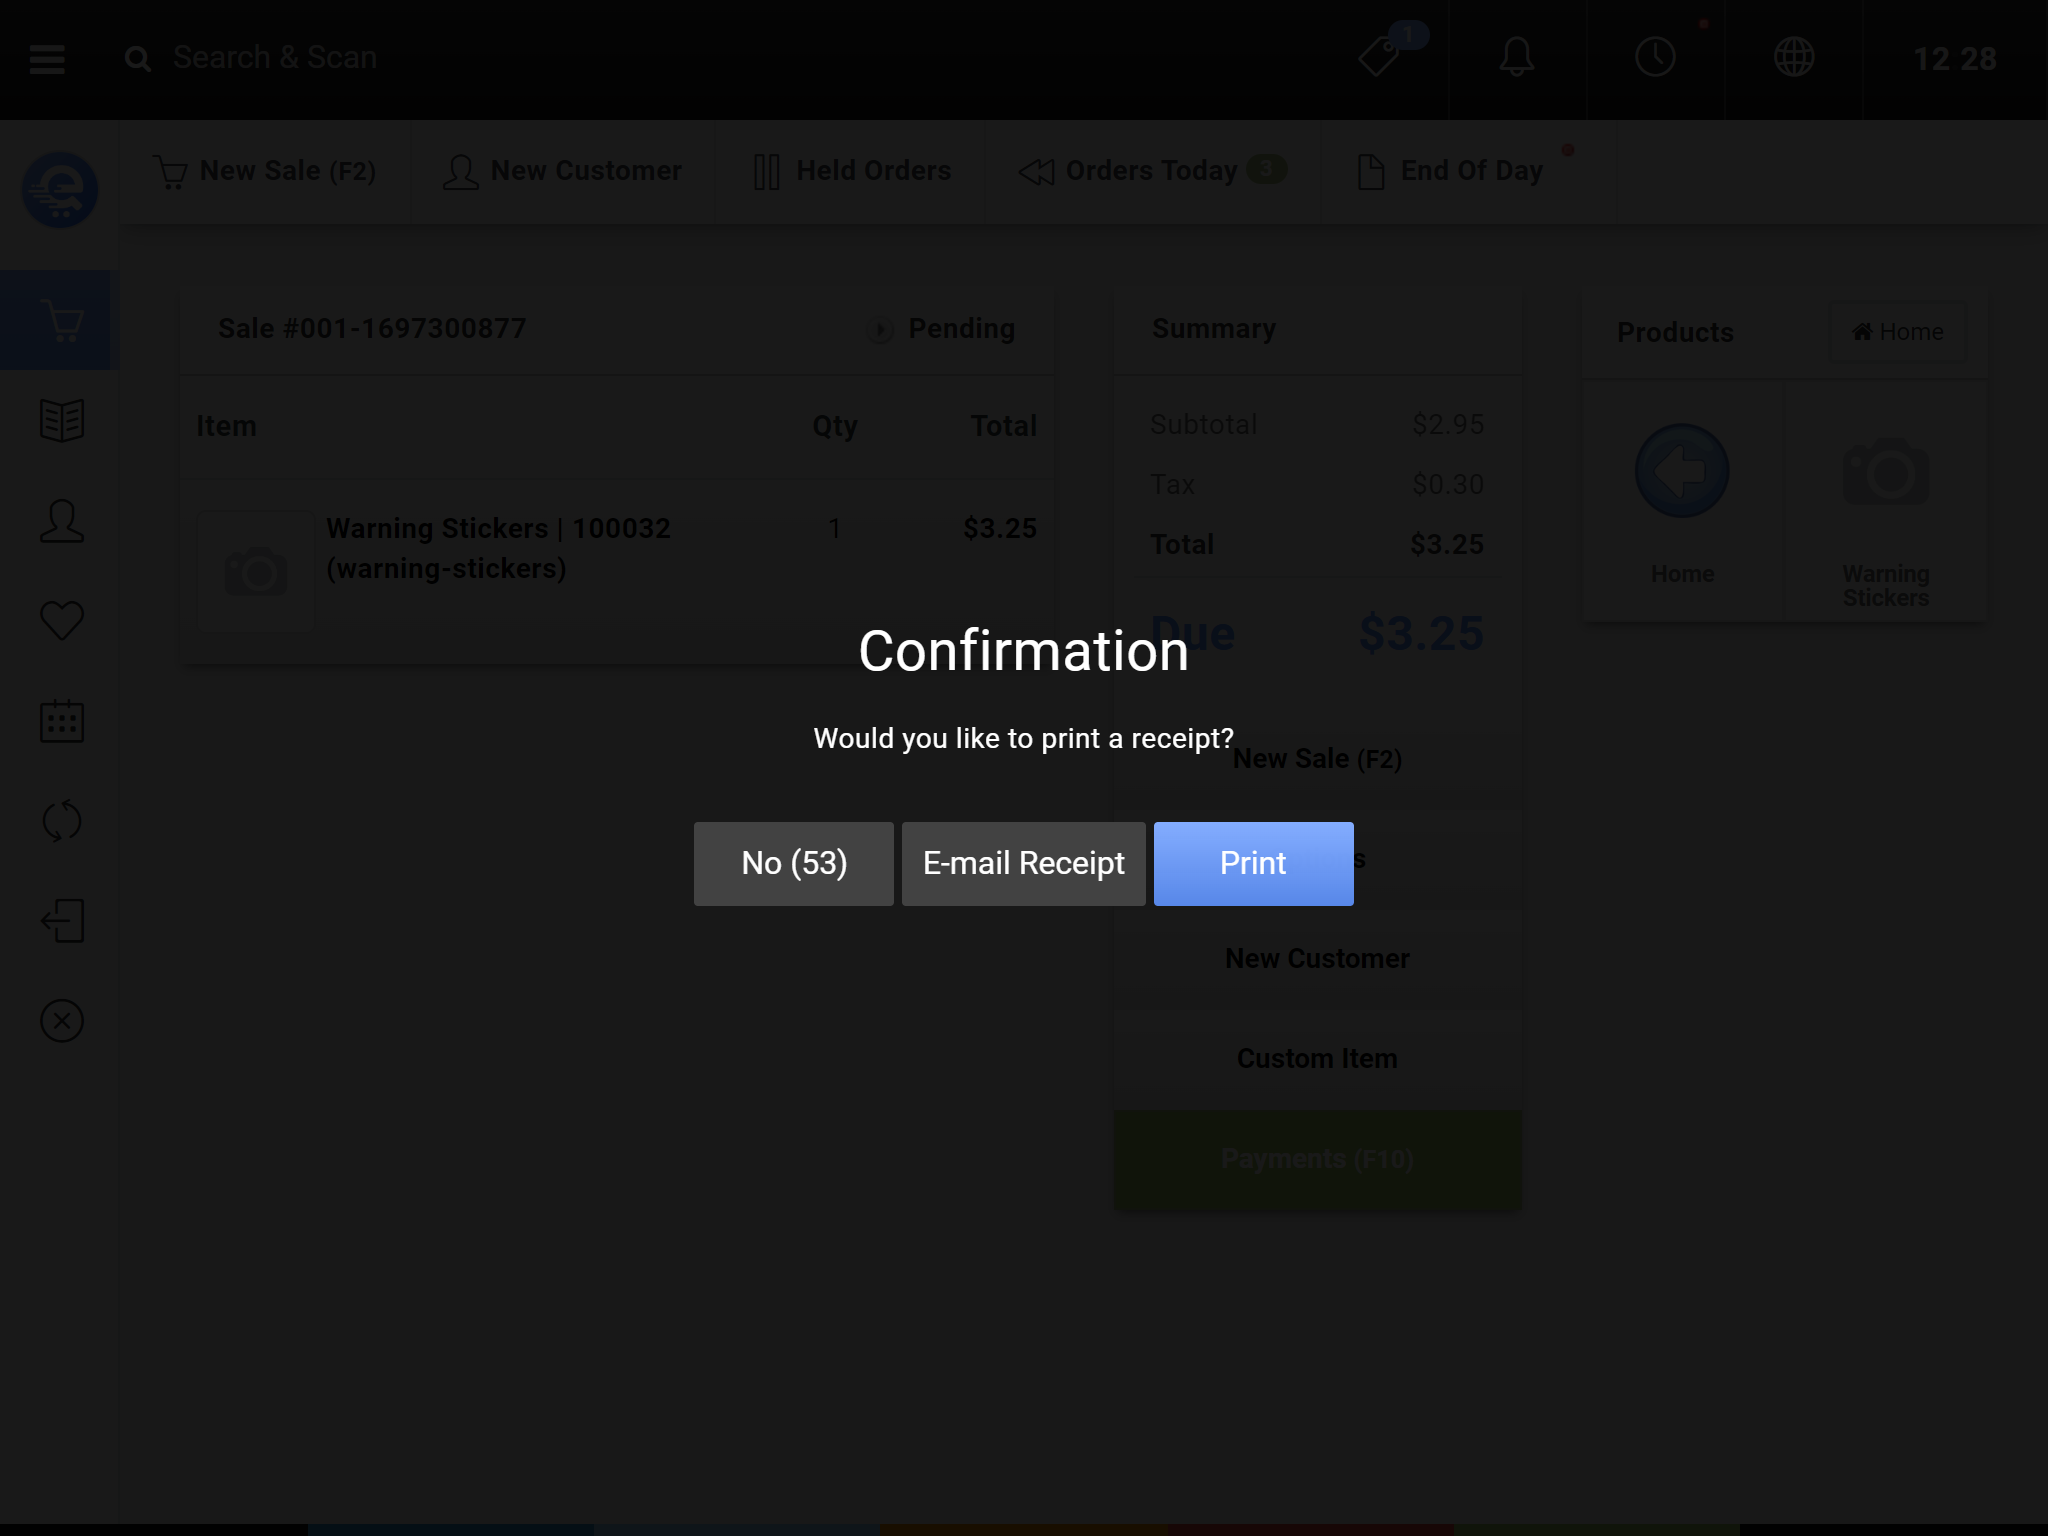
Figure G
After adding payments to order; a window will prompt to print a receipt.
Managing Held Sales
Sales can be put in a "Held" status. This allows you to hold inventory for a customer, and even take partial payments. Any item placed on a held order will have their respective inventory bucket deducted. If the sale is cancelled or the item removed, inventory will return back into the stock bucket.
Inventory can take up to 10 minutes to be added or deducted into to their stock buckets (depending on your synchronization frequency).
Putting A Sale On Hold
After you've finished adding all of the items you wish to sell on the sale screen, you can place the order on hold. Once the order is on hold, the items will be deducted from the available stock inventory bucket.
- From the Sale screen click "Options" (see Figure A).
- From the Options menu, click "Hold Sale" (see Figure B). The sale must be in Pending status to put it on hold.
- Confirm you want to put the Sale on Hold status.
- The status of the Order will be changed to "Held" (see Figure C).
- You can then start a New Sale or Log Off.

Figure A
From the Sale screen, click the "Options" button.

Figure B
From the "Options" menu, select "Hold Sale".

Figure C
View the status of the Sale by looking on top of the item list.
Cancelling A Held Sale
Sometimes the sale will need to be cancelled. When the sale is cancelled, all inventory will be returned back in their available inventory bucket.
- From the Sale screen click "Options" (see Figure D).
- From the Options menu, click "Cancel Sale" (see Figure E). The sale must be in Held status to cancel it.
- Confirm you want to put the Cancel sale. After the sale is cancelled, you cannot put it back on hold, or complete it. (see Figure F).
- The status of the Order will be changed to "Cancelled".
- You can then start a New Sale or Log Off.

Figure D
From the Sale screen, click the "Options" button.

Figure E
From the "Options" menu, select "Cancel Sale".
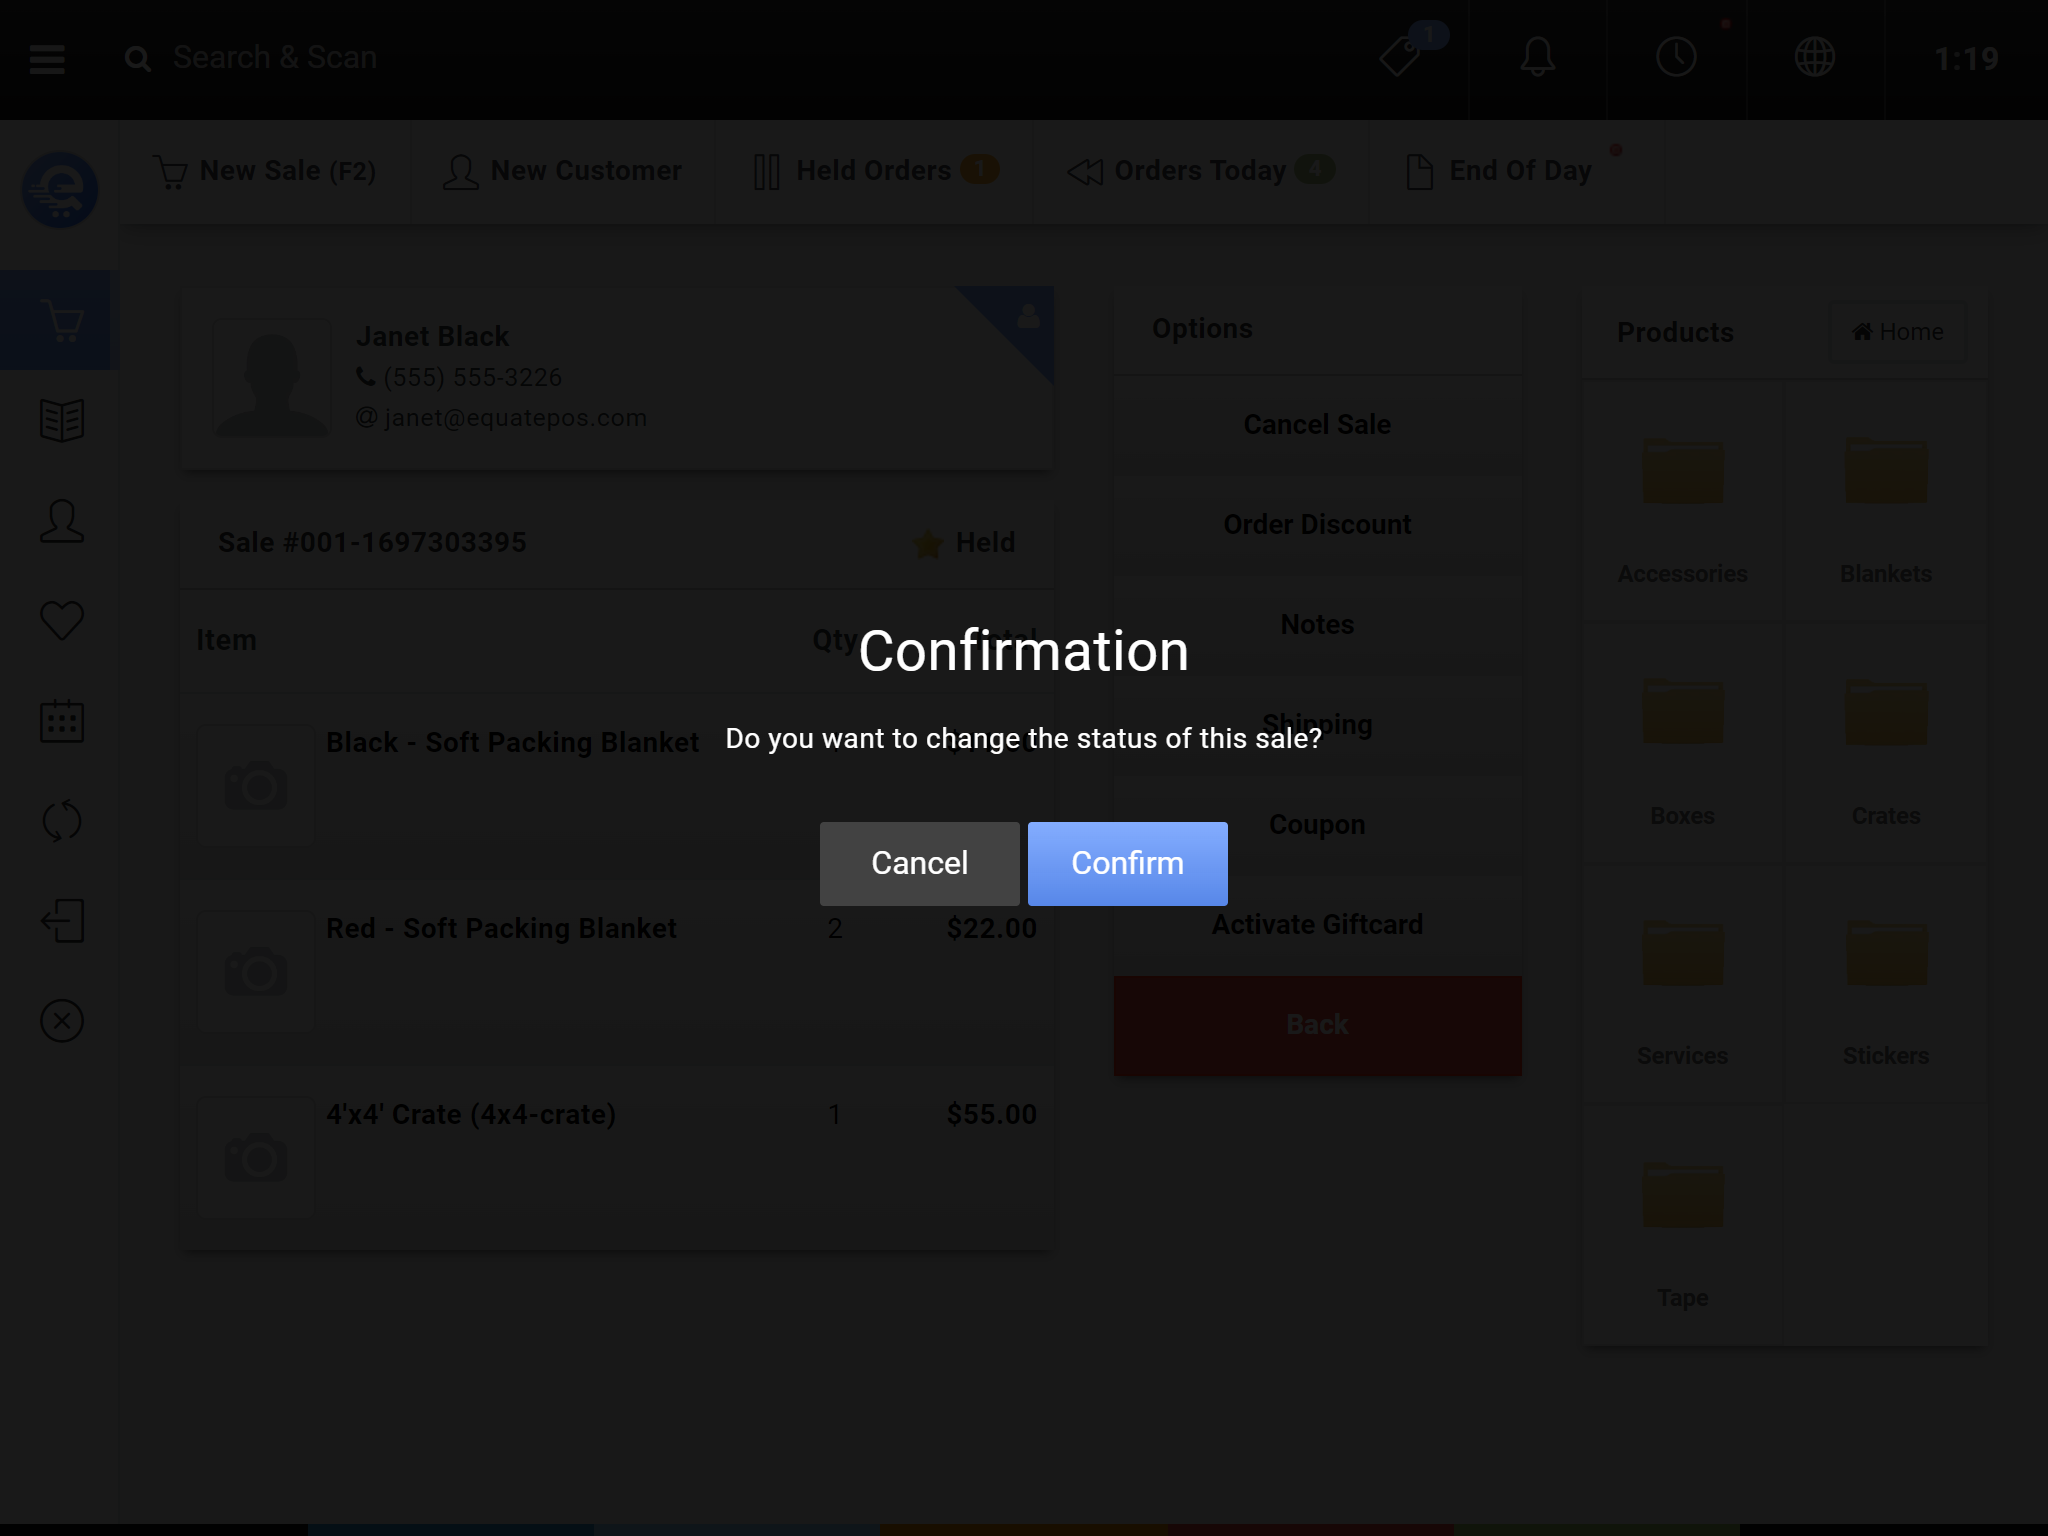
Figure F
Confirm that you want to Cancel the Sale.
Refunding An Item
If your store offers an in-store warranty, or refunds; you can process them using the Terminal. Refunds can only be completed on invoices that have been completed. Refunds do not automatically get added back to your inventory. When a refund is completed, it is added to a queue in the Back Office (Inventory > Refunds). This queue is where you can decide of the product can be resold (put back into inventory), or discarded.
Refunding An Item
You can refund individual items on an invoice. You can also select and refund multiple items on an order.
- Find and open the Invoice/Order you want to return an item on.
- Select the items on the order you want to refund. You can select multiple items by clicking on each one until they highlight blue.
- Click the red "Refund" button in the Item menu.
- Complete the refund screen by specifying how many to refund, and the reason for the refund. Press "Save Changes" when complete.
- A new sale will be generated with a negative amount owing. You can either add a negative Payment (return the money to the customer), or add new items to replace the value (exchange). If the value is $0 owing, you will need to add a $0 Cash payment.
- The returns are complete. To return the inventory into your stock bucket, you will need to use the Back Office (Inventory > Refunds).
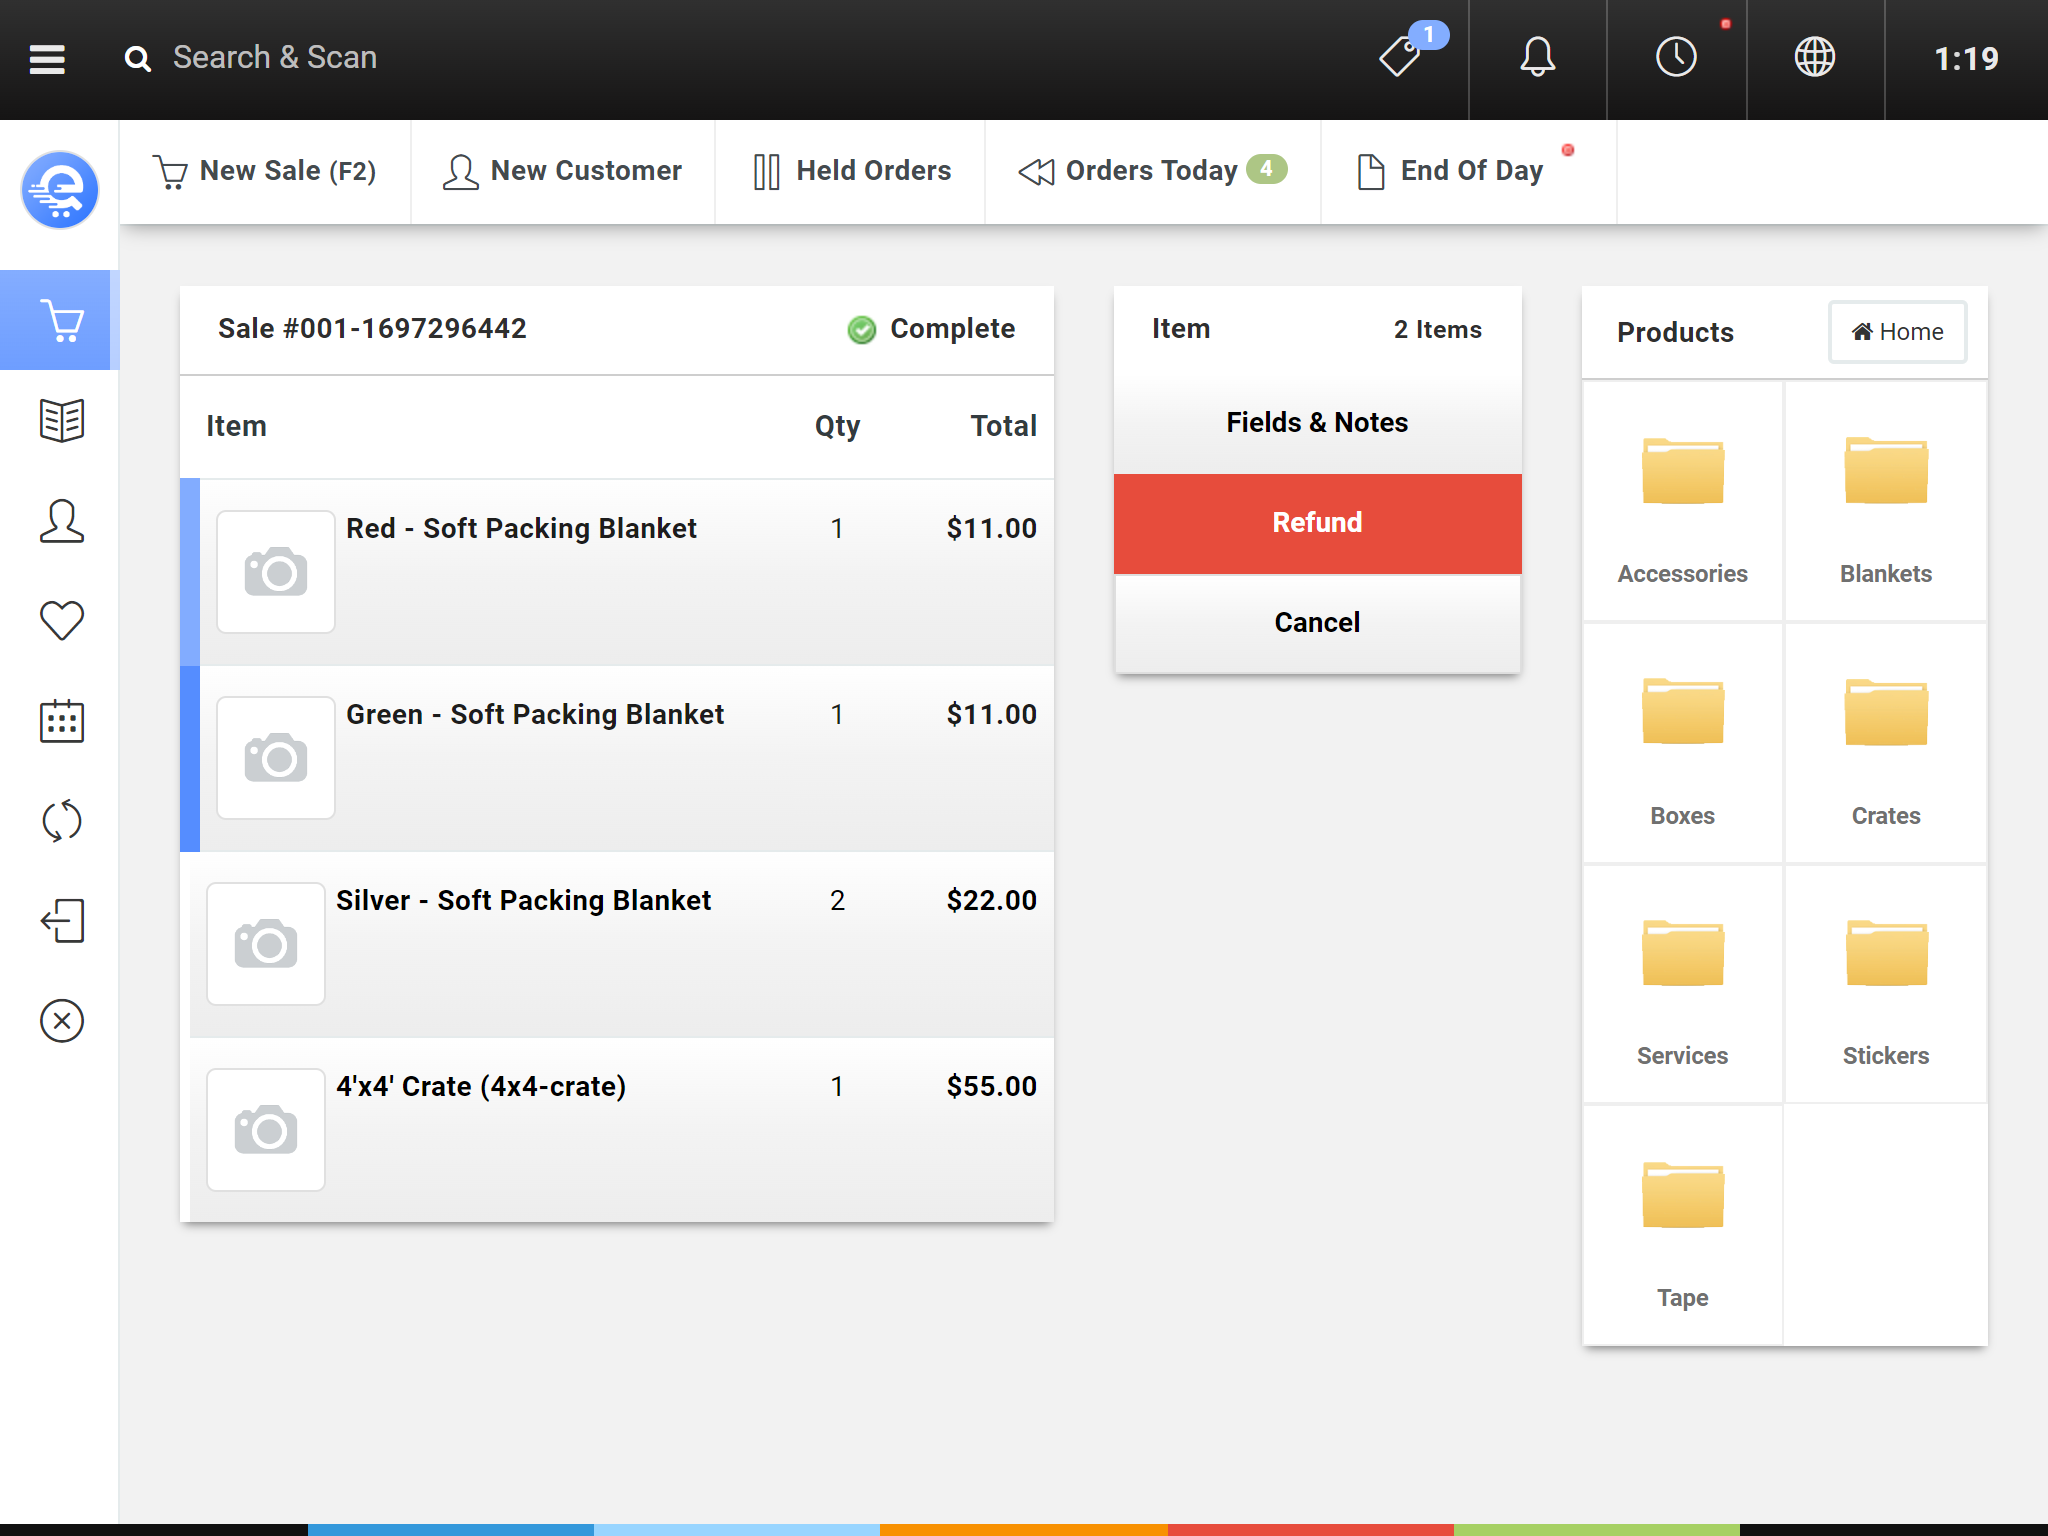
Figure A
Select the items you want to return. They will highlight blue. Then select the red "Refund" button in the item menu.
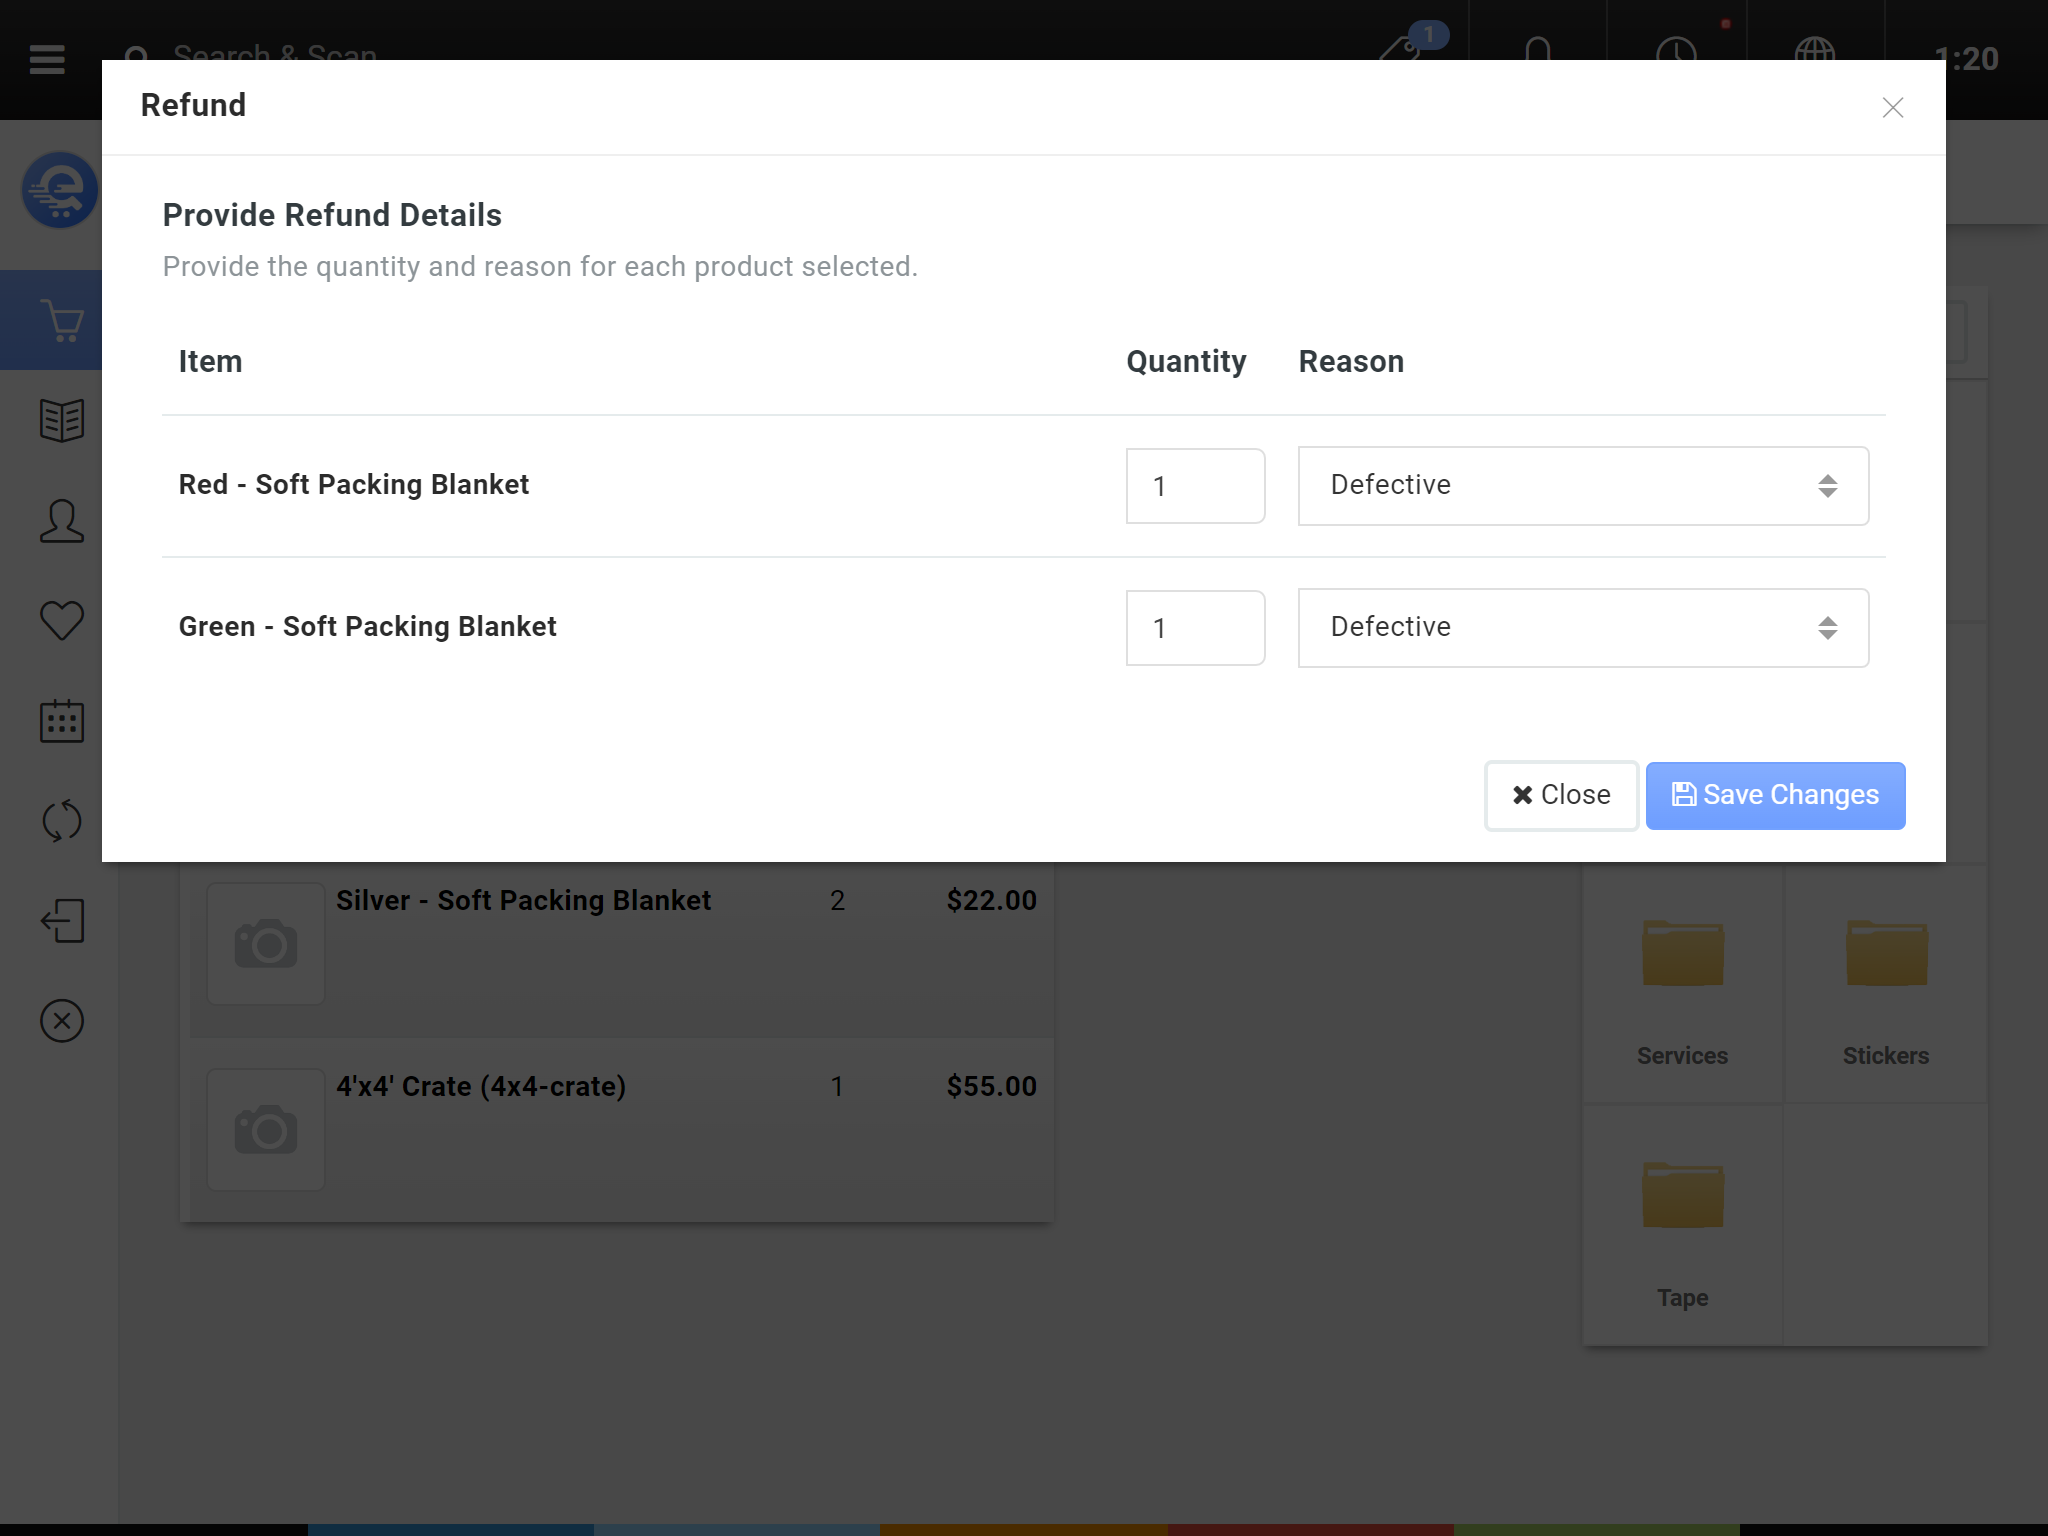
Figure B
Complete the refund details, the quantity refunded, and the refund reason then press "Save Changes".
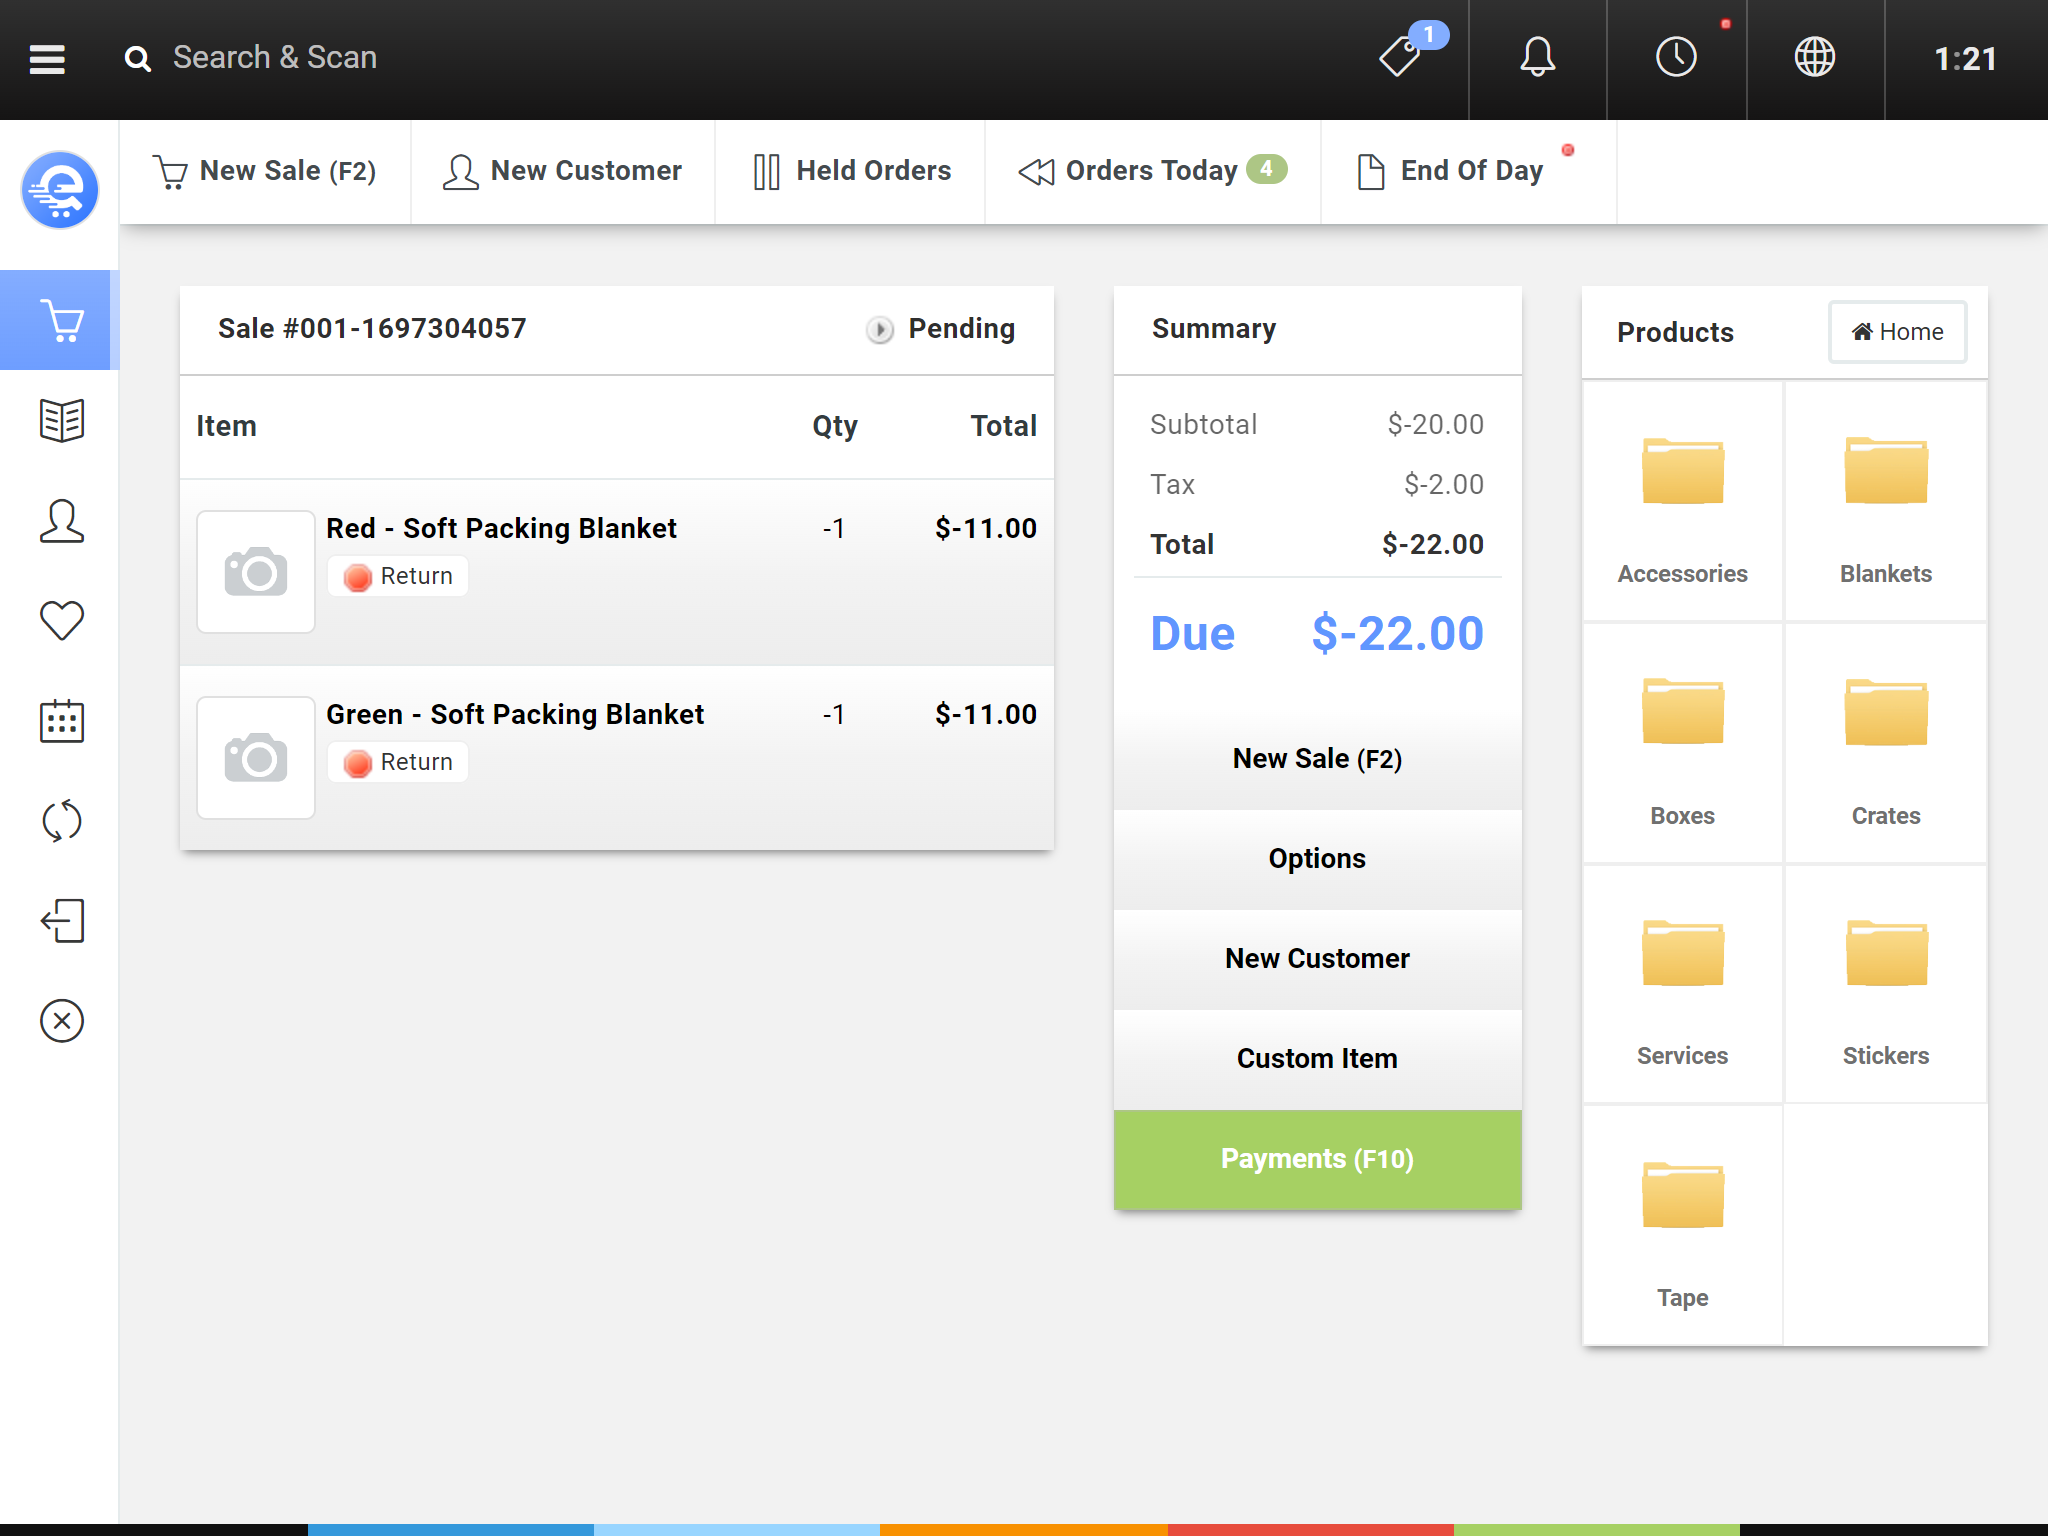
Figure C
A new sale will be generated and you can either add a replacement item to the order, or just add a Payment to the order by clicking the "Payments" button.
Using Gift Cards
You can activate and also redeem gift cards using the Terminal. You can automatically generate gift card SKU's (barcodes on gift cards), or you can manually scan/enter them in. eQuate POS supports UPC-A, UPC-E, EAN-13, or Code 39 barcodes on gift cards. Gift Cards can also be assigned to a customer, or given an expiration date. Once a Gift Card has been completely redeemed, it cannot be used for future purchases. Gift Cards can be used multiple times until the amount added to the gift card has been met.
Although Gift Card balances are debited immediately on the local Terminal, it may take up to 5 minutes for other Terminals to see the new gift card balance.
Activating Gift Cards
Assuming you have a Gift Card product created, you can add a gift card to a regular sale, and then complete the sale. After this, you should then activate the gift card so the user can use it for future purchases. This is a two step process (selling the gift card, and then activating it).
- From the Sale screen click "Options" (see Figure A).
- From the Options menu, click "Activate Giftcard" (see Figure B).
- Enter the Dollar Value of the gift card in the Value text box.
- This barcode can be set to automatically generate (default). If you need to use your own gift card SKU, replace this Barcode.
- Press "Save Changes" when complete.
- The Giftcard is now activated.
Figure A
From the Sale screen, click the "Options" button.
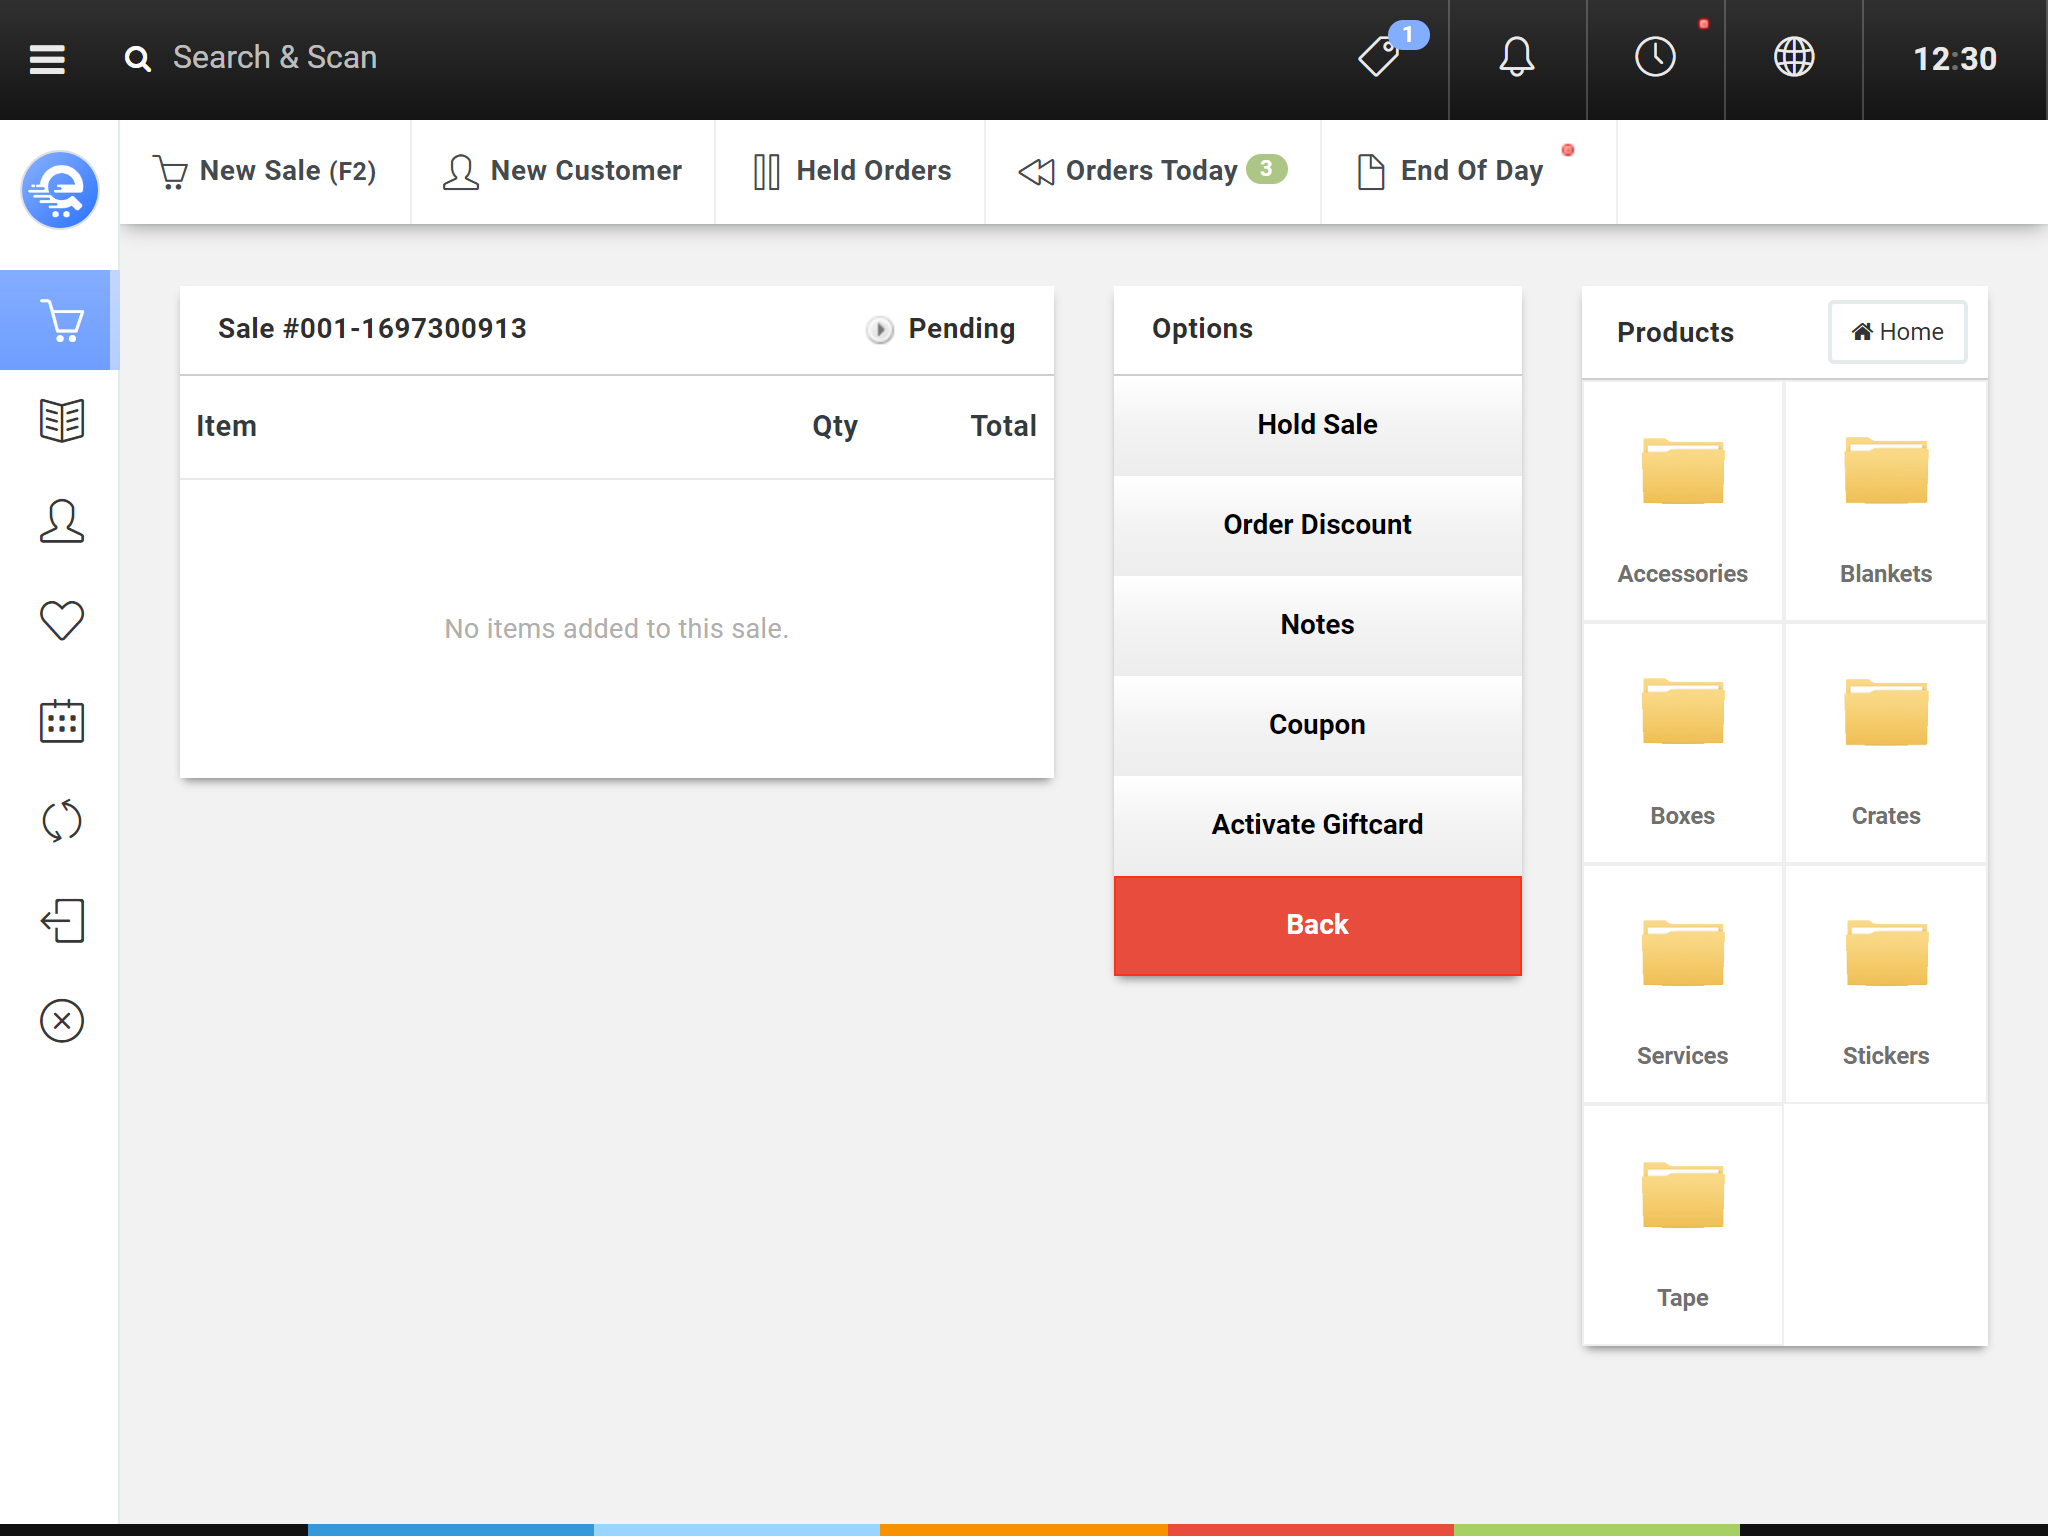
Figure B
From the "Options" menu, select "Activate Gift Card".
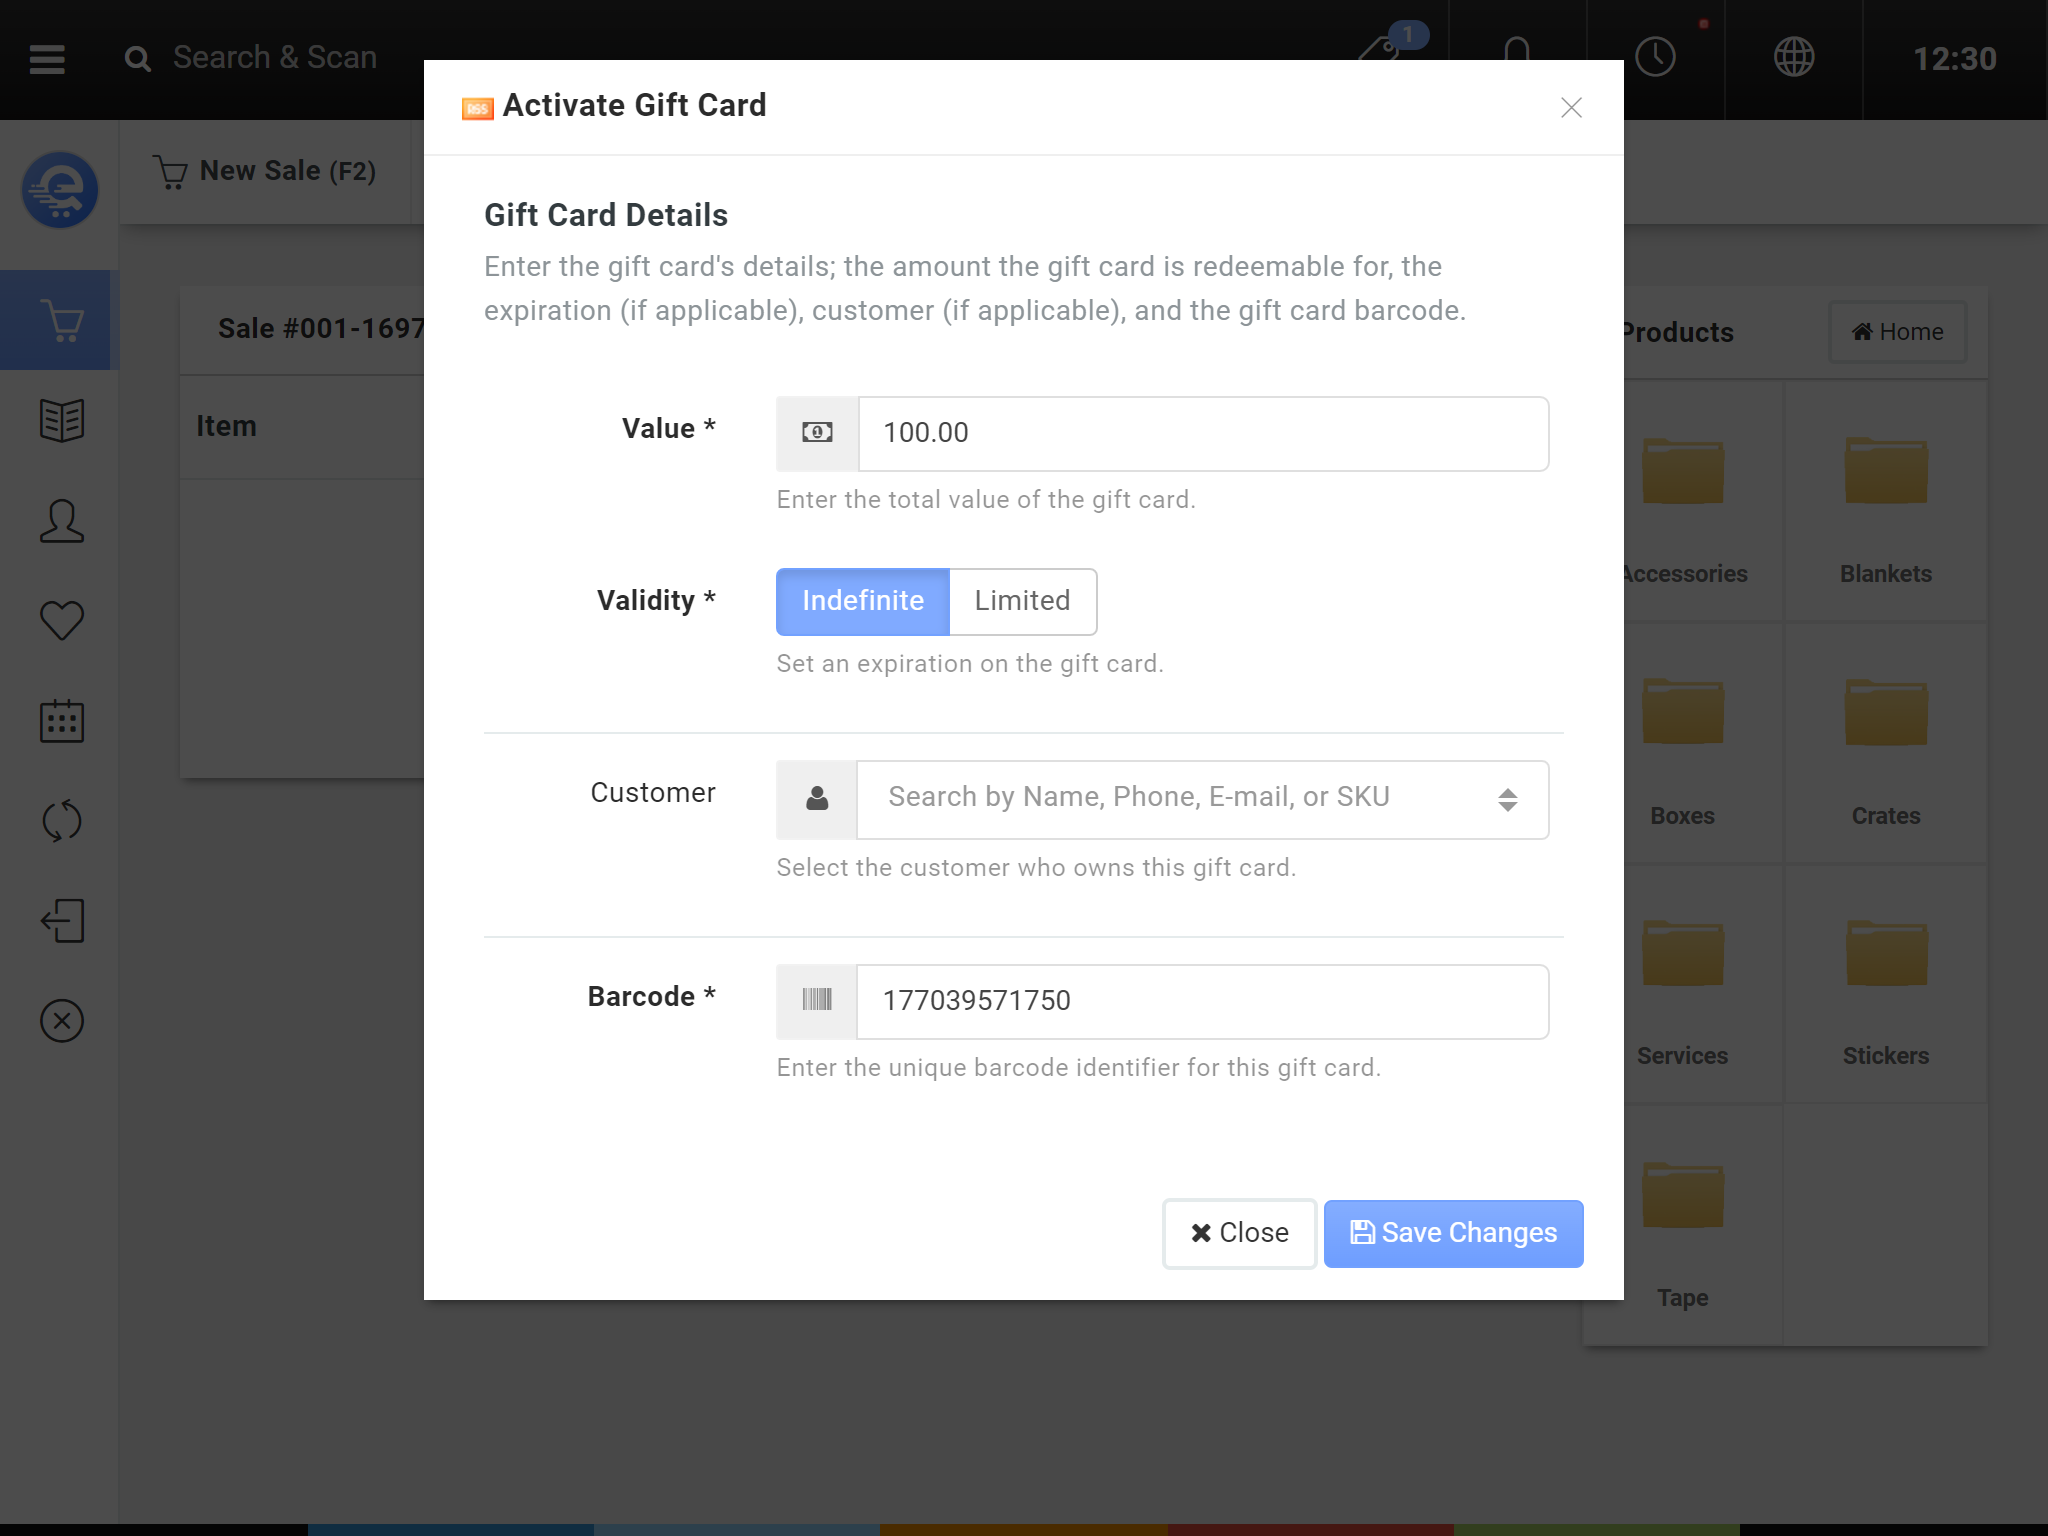
Figure C
Complete the details of the gift card, then press "Save Changes" when complete.
Redeeming Gift Cards
You can redeem a gift card through the Terminal. A gift card can be redeemed by adding a Payment to the order, and specifying the amount you want to charge the gift card. A new window will popup and ask you to scan/enter the gift card barcode.
- From the Sale screen click the green "Payments" button.
- Enter the amount to tender against the Gift Card in the Payments screen and press "Add" (see Figure D).
- A new window will popup and you will need to enter the Barcode SKU (Card #) and press "Save Changes" when complete (see Figure F).
- If the gift card has enough balance, a payment entry will be made. If it does not have enough balance, it will present an error and you will need to try again and reduce the amount charged.
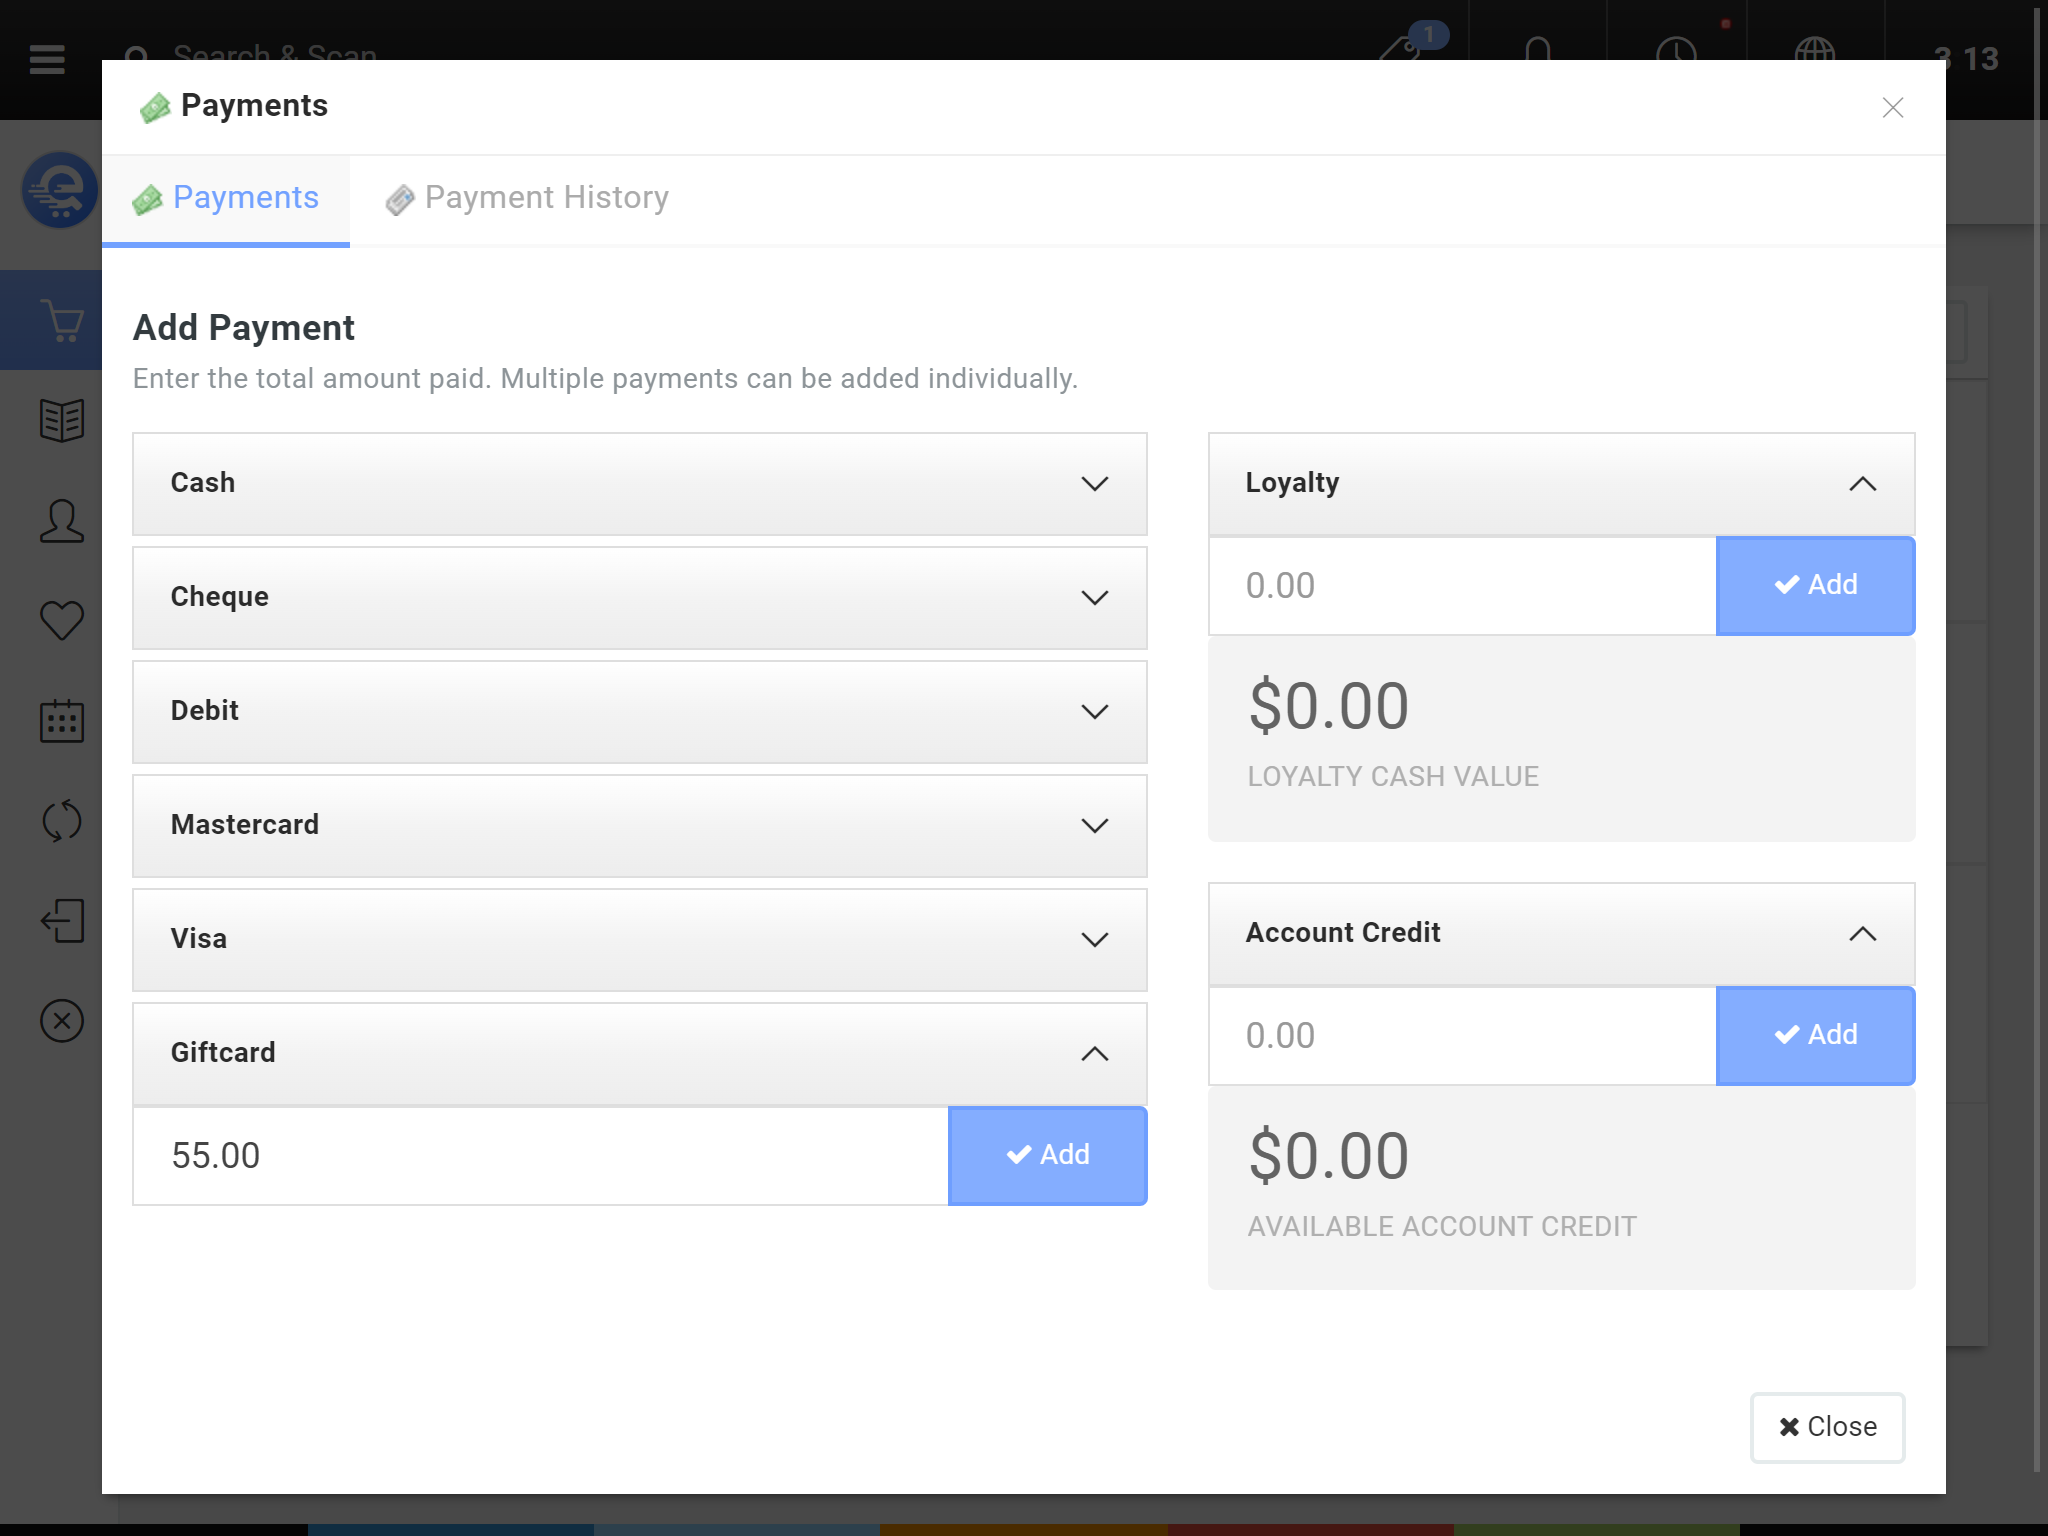
Figure D
Enter the amount you want to charge to the Gift Card and press "Add".
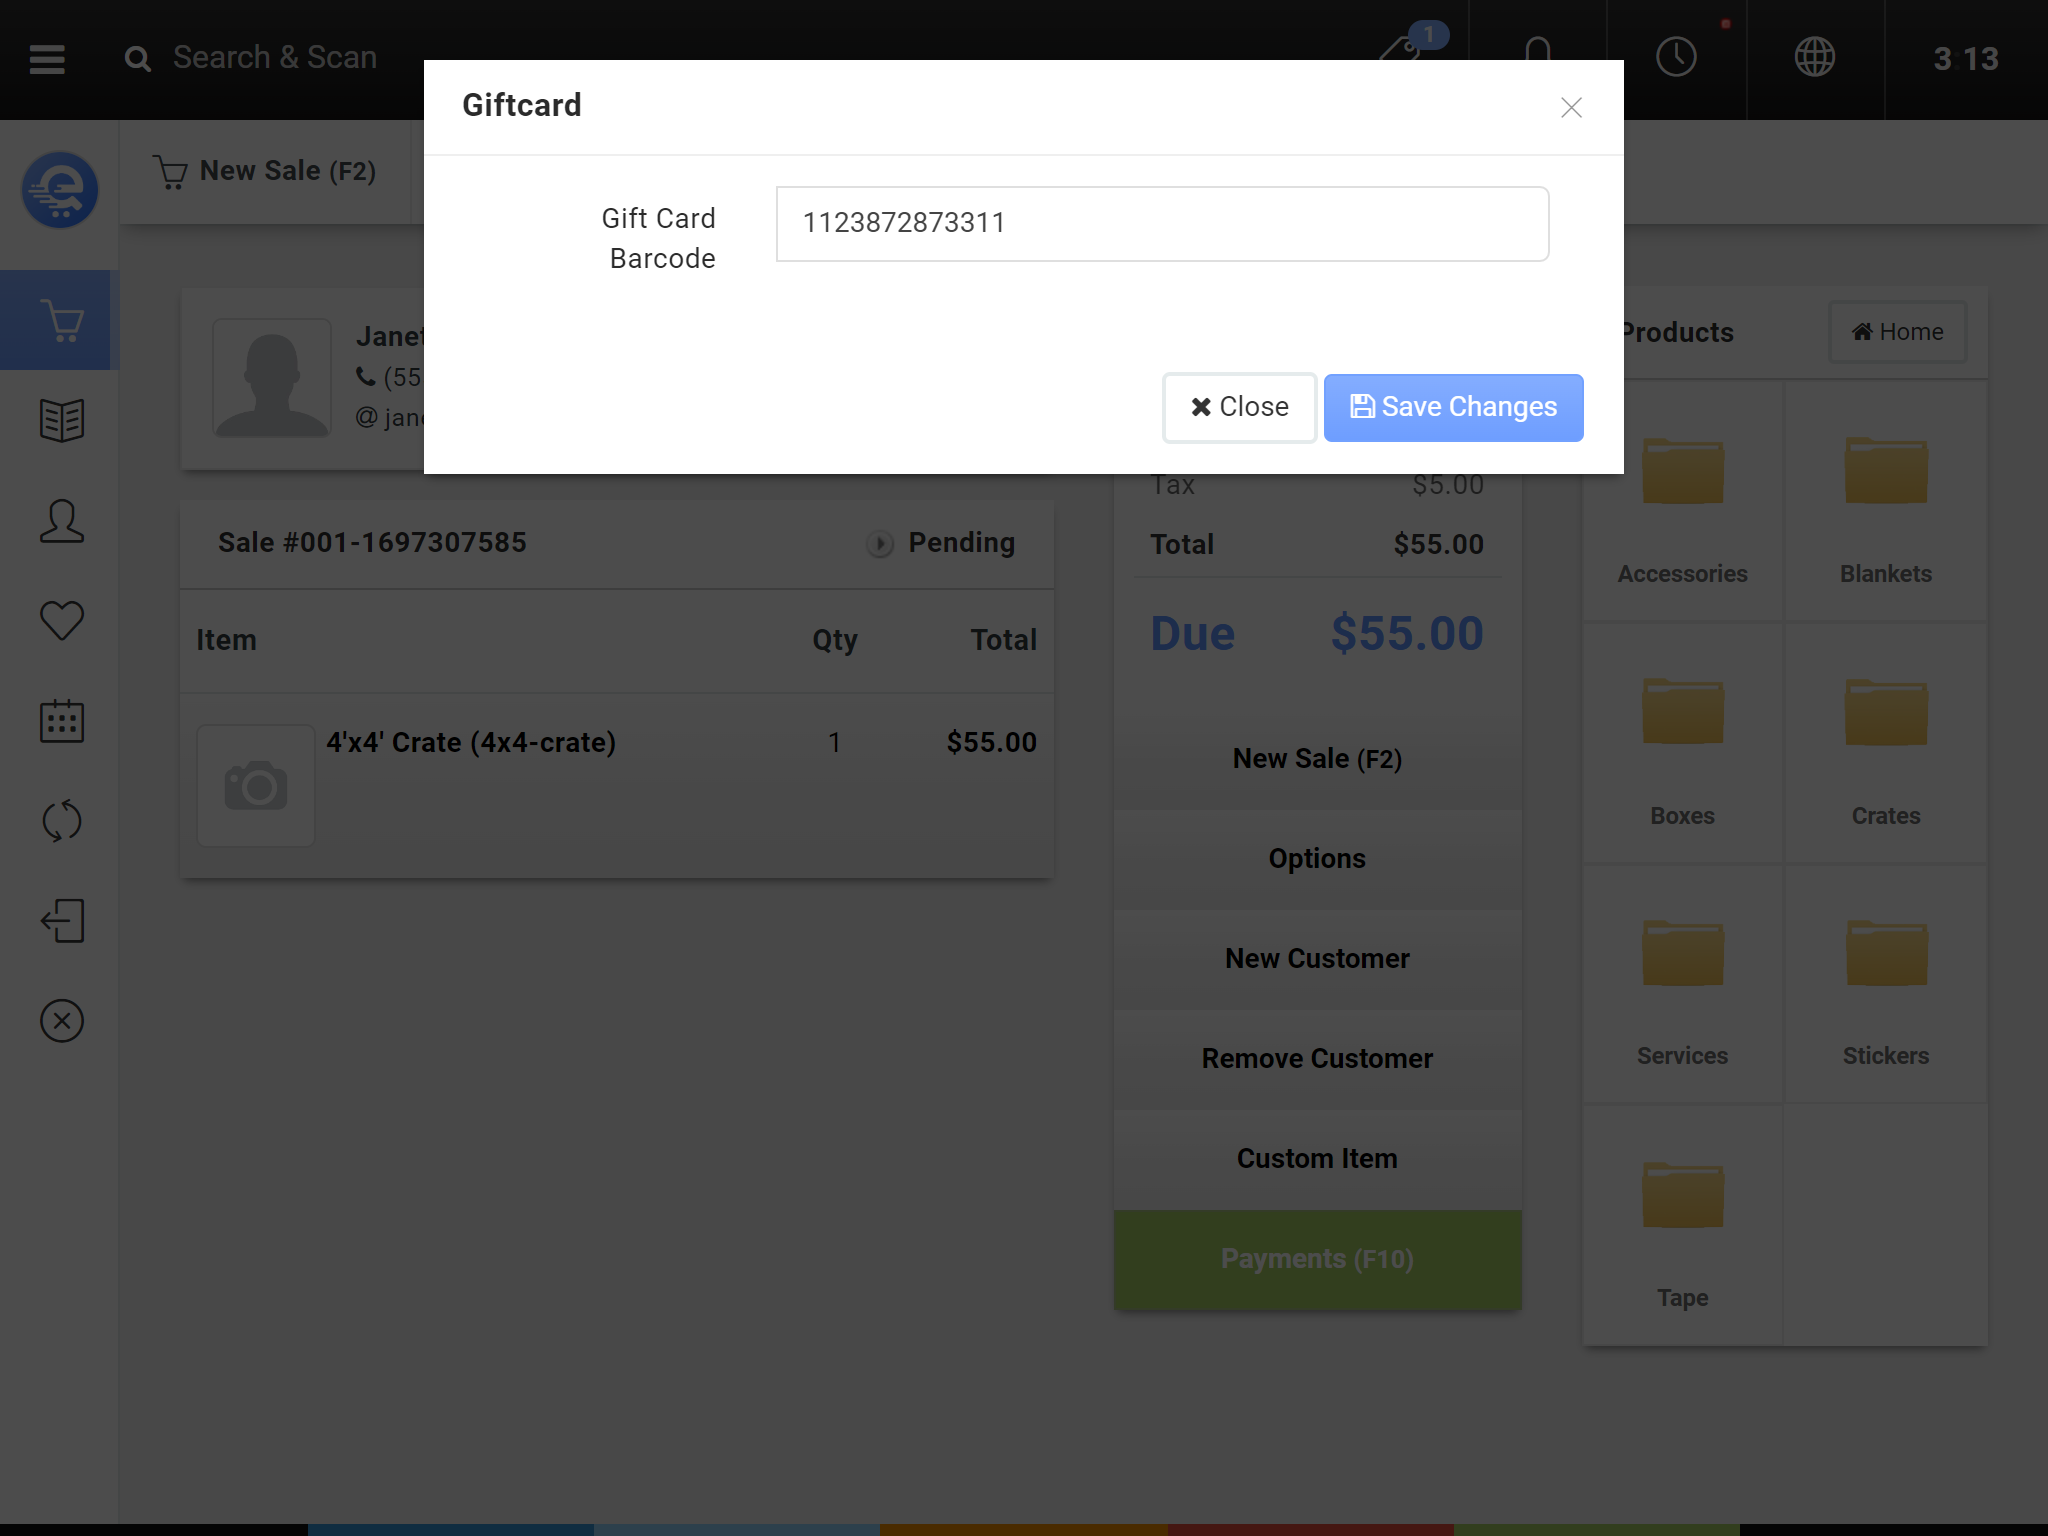
Figure E
Scan or enter the Barcode SKU of the Gift Card in the Card # text input field