Inventory
Introduction to Inventory
Having inventory to sell is a critical factor in any business. eQuate POS has the ability to track and manage inventory across all multiple stores and warehouses. You can transfer and adjust inventory on the fly, or create Transfer Orders to track large bulk transfers. Creating categories, and manufacturers help you organize your inventory better. Providing coupons and discounts can help you move inventory faster, and provide more value to your customers. You can also track after sale refunds, and process them with the ability to track the item from sale to refund.
- Attributes & Values
Adding attributes to products help condense the amount of products you need to manage. You can add any attributes, like Size, Colour, and more. Each attribute will have multiple values to select from. For example, an attribute like Size, may have values like Small, Medium, and Large associated to it. - Categories
Organize your products in a more efficient way for you and your customers. You can create and assign multiple categories to a product. You can also set discounts to apply to certain categories. - Manufacturers
Manufacturers supply the products you sell. You can assign various products to a single manufacturer. Manufacturers allow you to quickly search what products that manufacturer makes. You can also setup discounts to be given based on the manufacturer. - Coupons & Discounts
Coupons can be created to provide a quick discount based on a coupon being added. You can also add automatic discounts that apply to products under a certain condition (ie, minimum of 2 products, apply a discount). - Features
Product features allow you to increase/decrease the price of items sold at the point of sale. This is useful in restaurants and electronics, where a retail warranty can be added to the price of the item. - Products
Products can be sold to customers, and tracked. - Warehouses
A warehouse is a inventory bucket that you can add various stock counts for your products. Warehouses are an important reporting tool as well. You can report on products sold within a warehouse, as well as the profit margin for that specific warehouse. - Refunds
After sale care is important. It increases customer satisfaction. You can track refunds and add them back to stock, or discard them. - Stock Movement
Get a glance on where your stock is going. Using the Stock Movement screen, you can quickly see where and when a product was sold, or adjusted. - Transfers
Transfer product stock between various warehouses. - Adjustments
Adjust stock in mass, or one at a time. You can also track the adjustments in the Reporting area.
Adjustments
Adjustments can be made to inventory through the Back Office and the Terminal. Adjustments can be made to increase, or decrease stock. You can track the reason for adjustments by providing the Adjustment reason.
Stock adjustments take a few minutes to appear on other Terminals.
- Incorrectly sold the wrong item and need to correct the inventory
- Forgot to process a return properly
- Loss & Theft
- Unexpected inventory increases
- Damaged inventory
Individual Adjustments
Adjustments can be made to inventory through the Back Office and the Terminal. Adjustments can be made to increase, or decrease stock. You can track the reason for adjustments by providing the Adjustment reason.
- Navigate to the Back Office area
- On the left menu, click on "Inventory", then click on "Adjustments".
- Click on "New Adjustment" (see Figure A).
- Search for the product by Name, UPC, EAN13, or Reference.
- Select the Warehouse you want to adjust the inventory for.
- Fill out the adjustments details, like Type of adjustment (Increase or Decrease), the Reason, and the Quantity.
- Click "Save Changes" (see Figure B) when you are done entering the adjustment details.

Figure A
Access the New Adjustment option by using the Back Office.
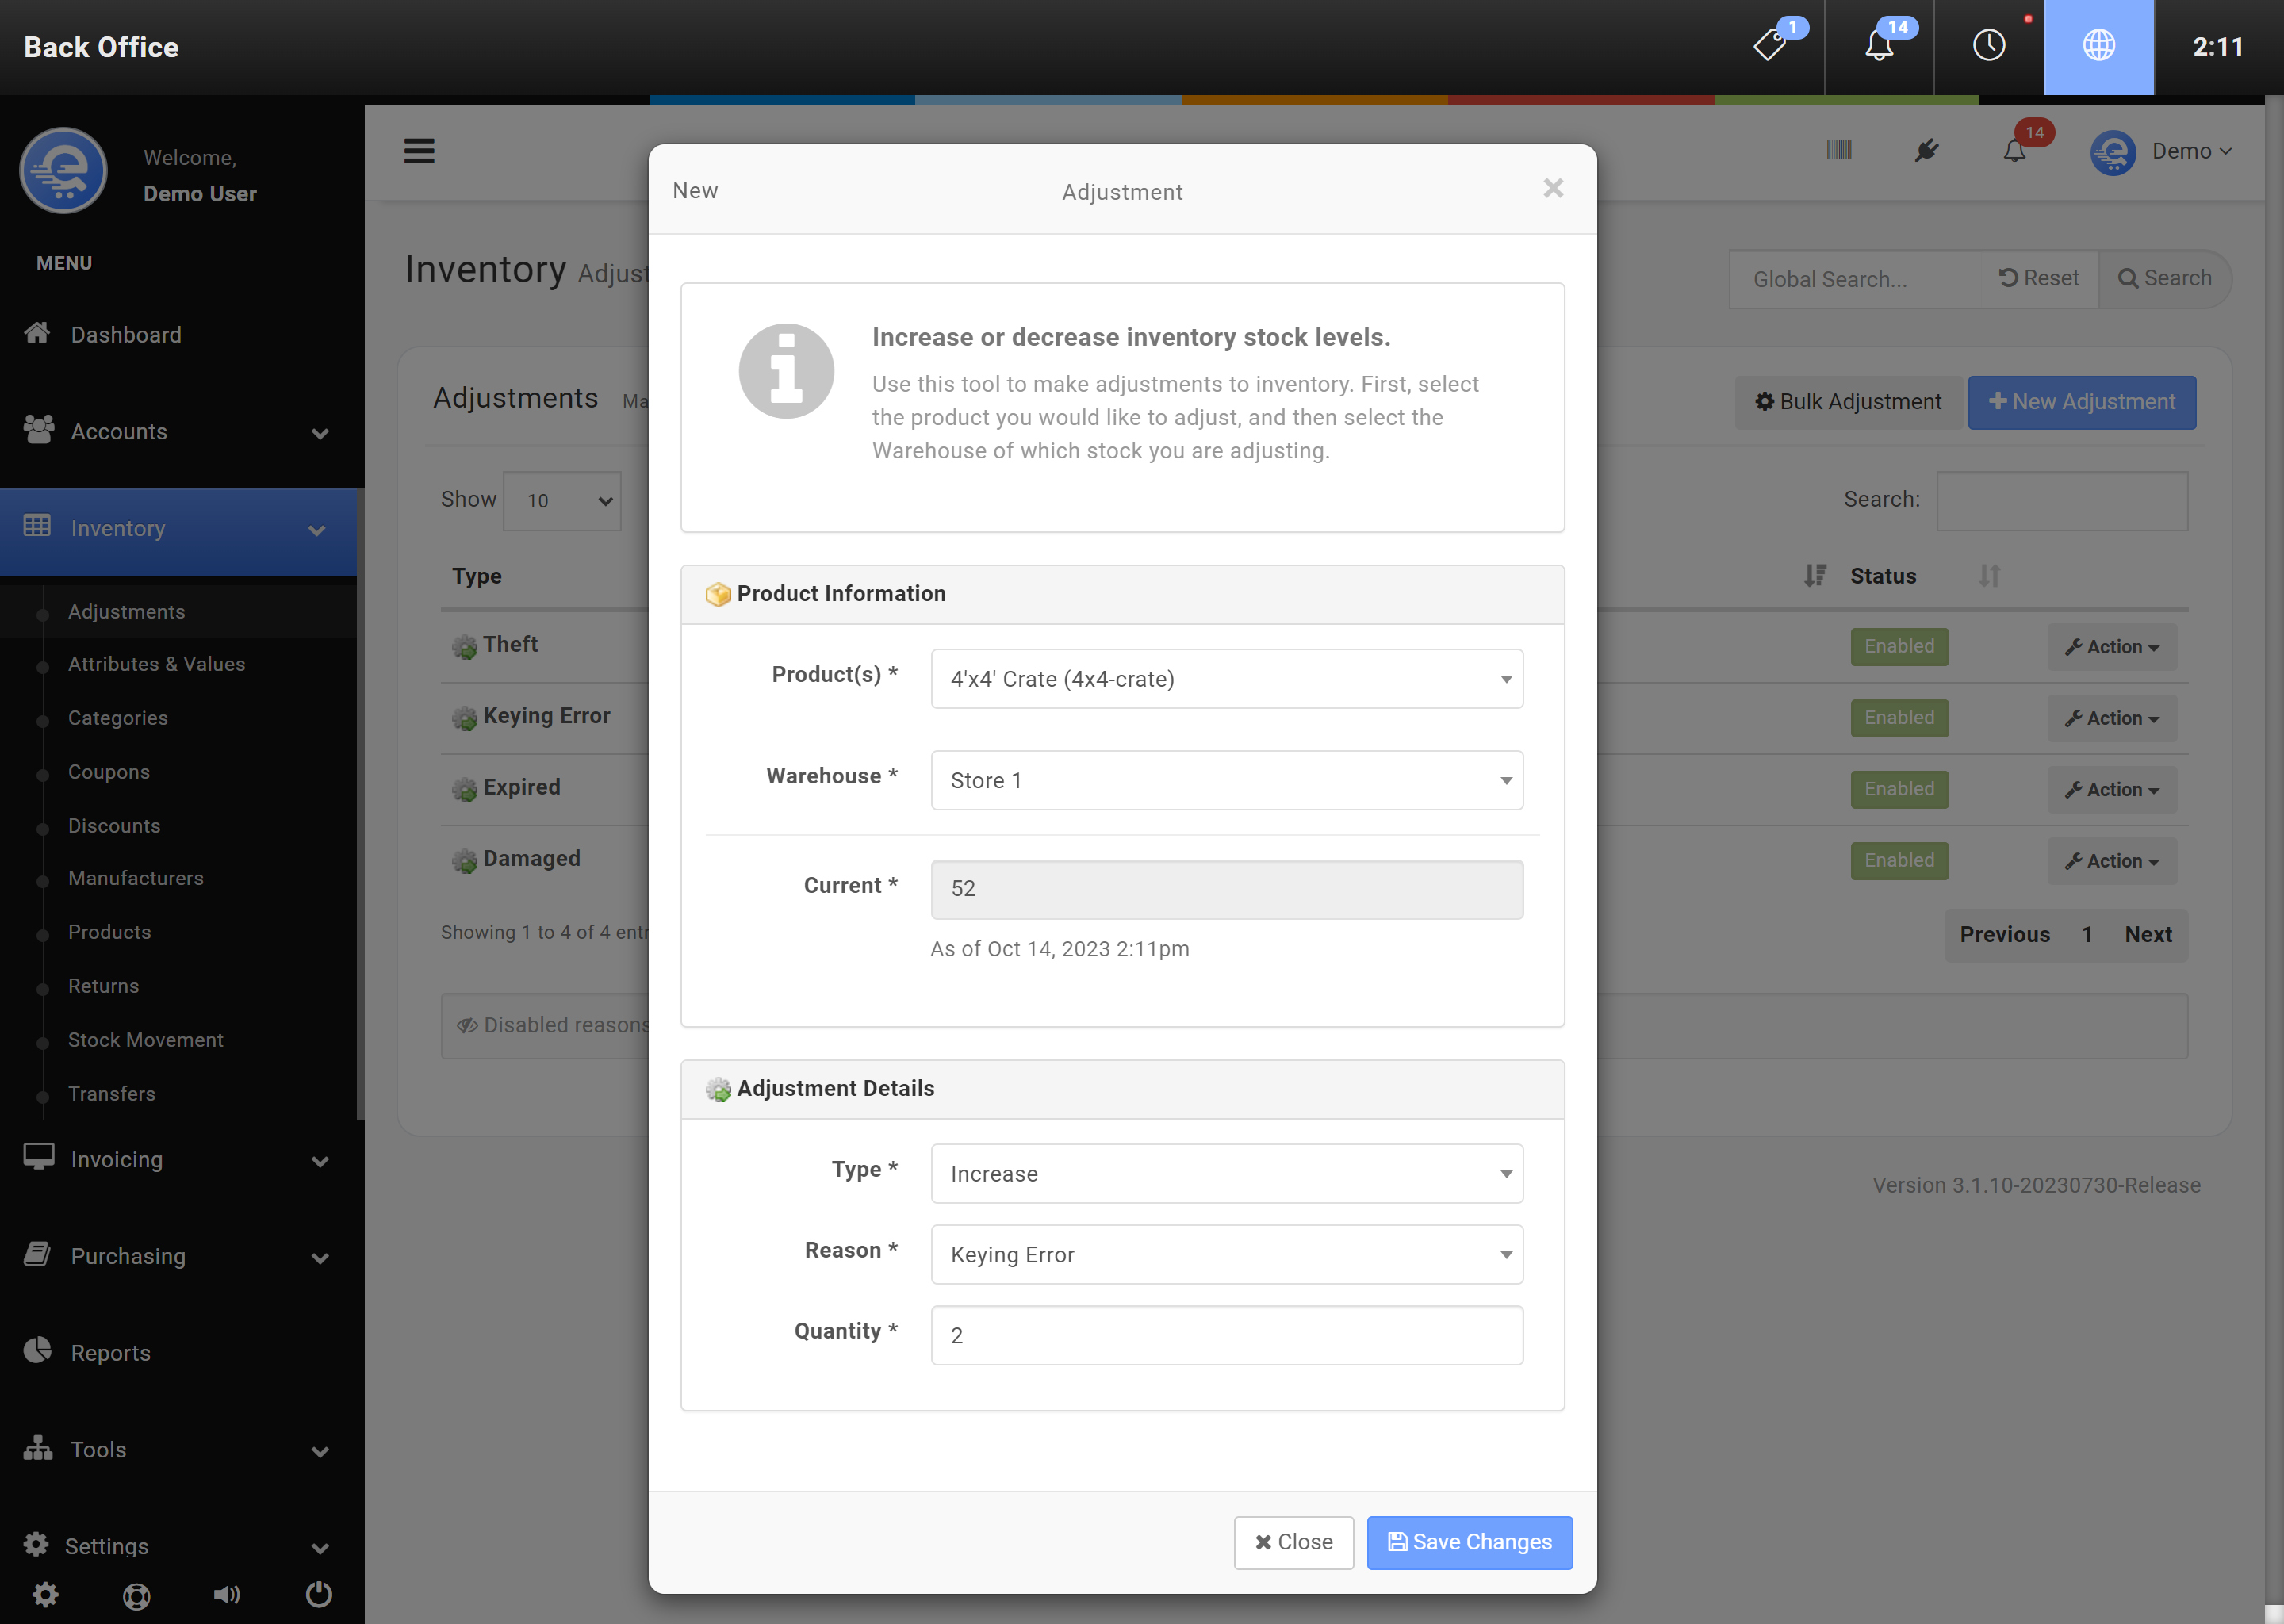
Figure B
Fill out the Adjustment details, and click "Save Changes" when complete.
Bulk Adjustments
Bulk Adjustments can be made to many different products at once. Bulk Adjustments are uploaded with a CSV file. An example file is included in the software.
- Navigate to the Back Office area
- On the left menu, click on "Inventory", then click on "Adjustments".
- Click on "Bulk Adjustment" (see Figure C).
- Download the reference file and edit it to your requirements (see Figure D).
- Upload the CSV file, and specify the CSV options (skip lines, delimiter, etc...) (see Figure E).
- After the file has processed, you will see a preview of the changes that will be made.
- Click "Save Changes" (see Figure B) when you have verified the changes. This operation is not reversible.

Figure C
Access the Bulk Adjustment tool in the Back Office.

Figure D
Use the example file to build your CSV file. When ready, click on "Upload CSV".
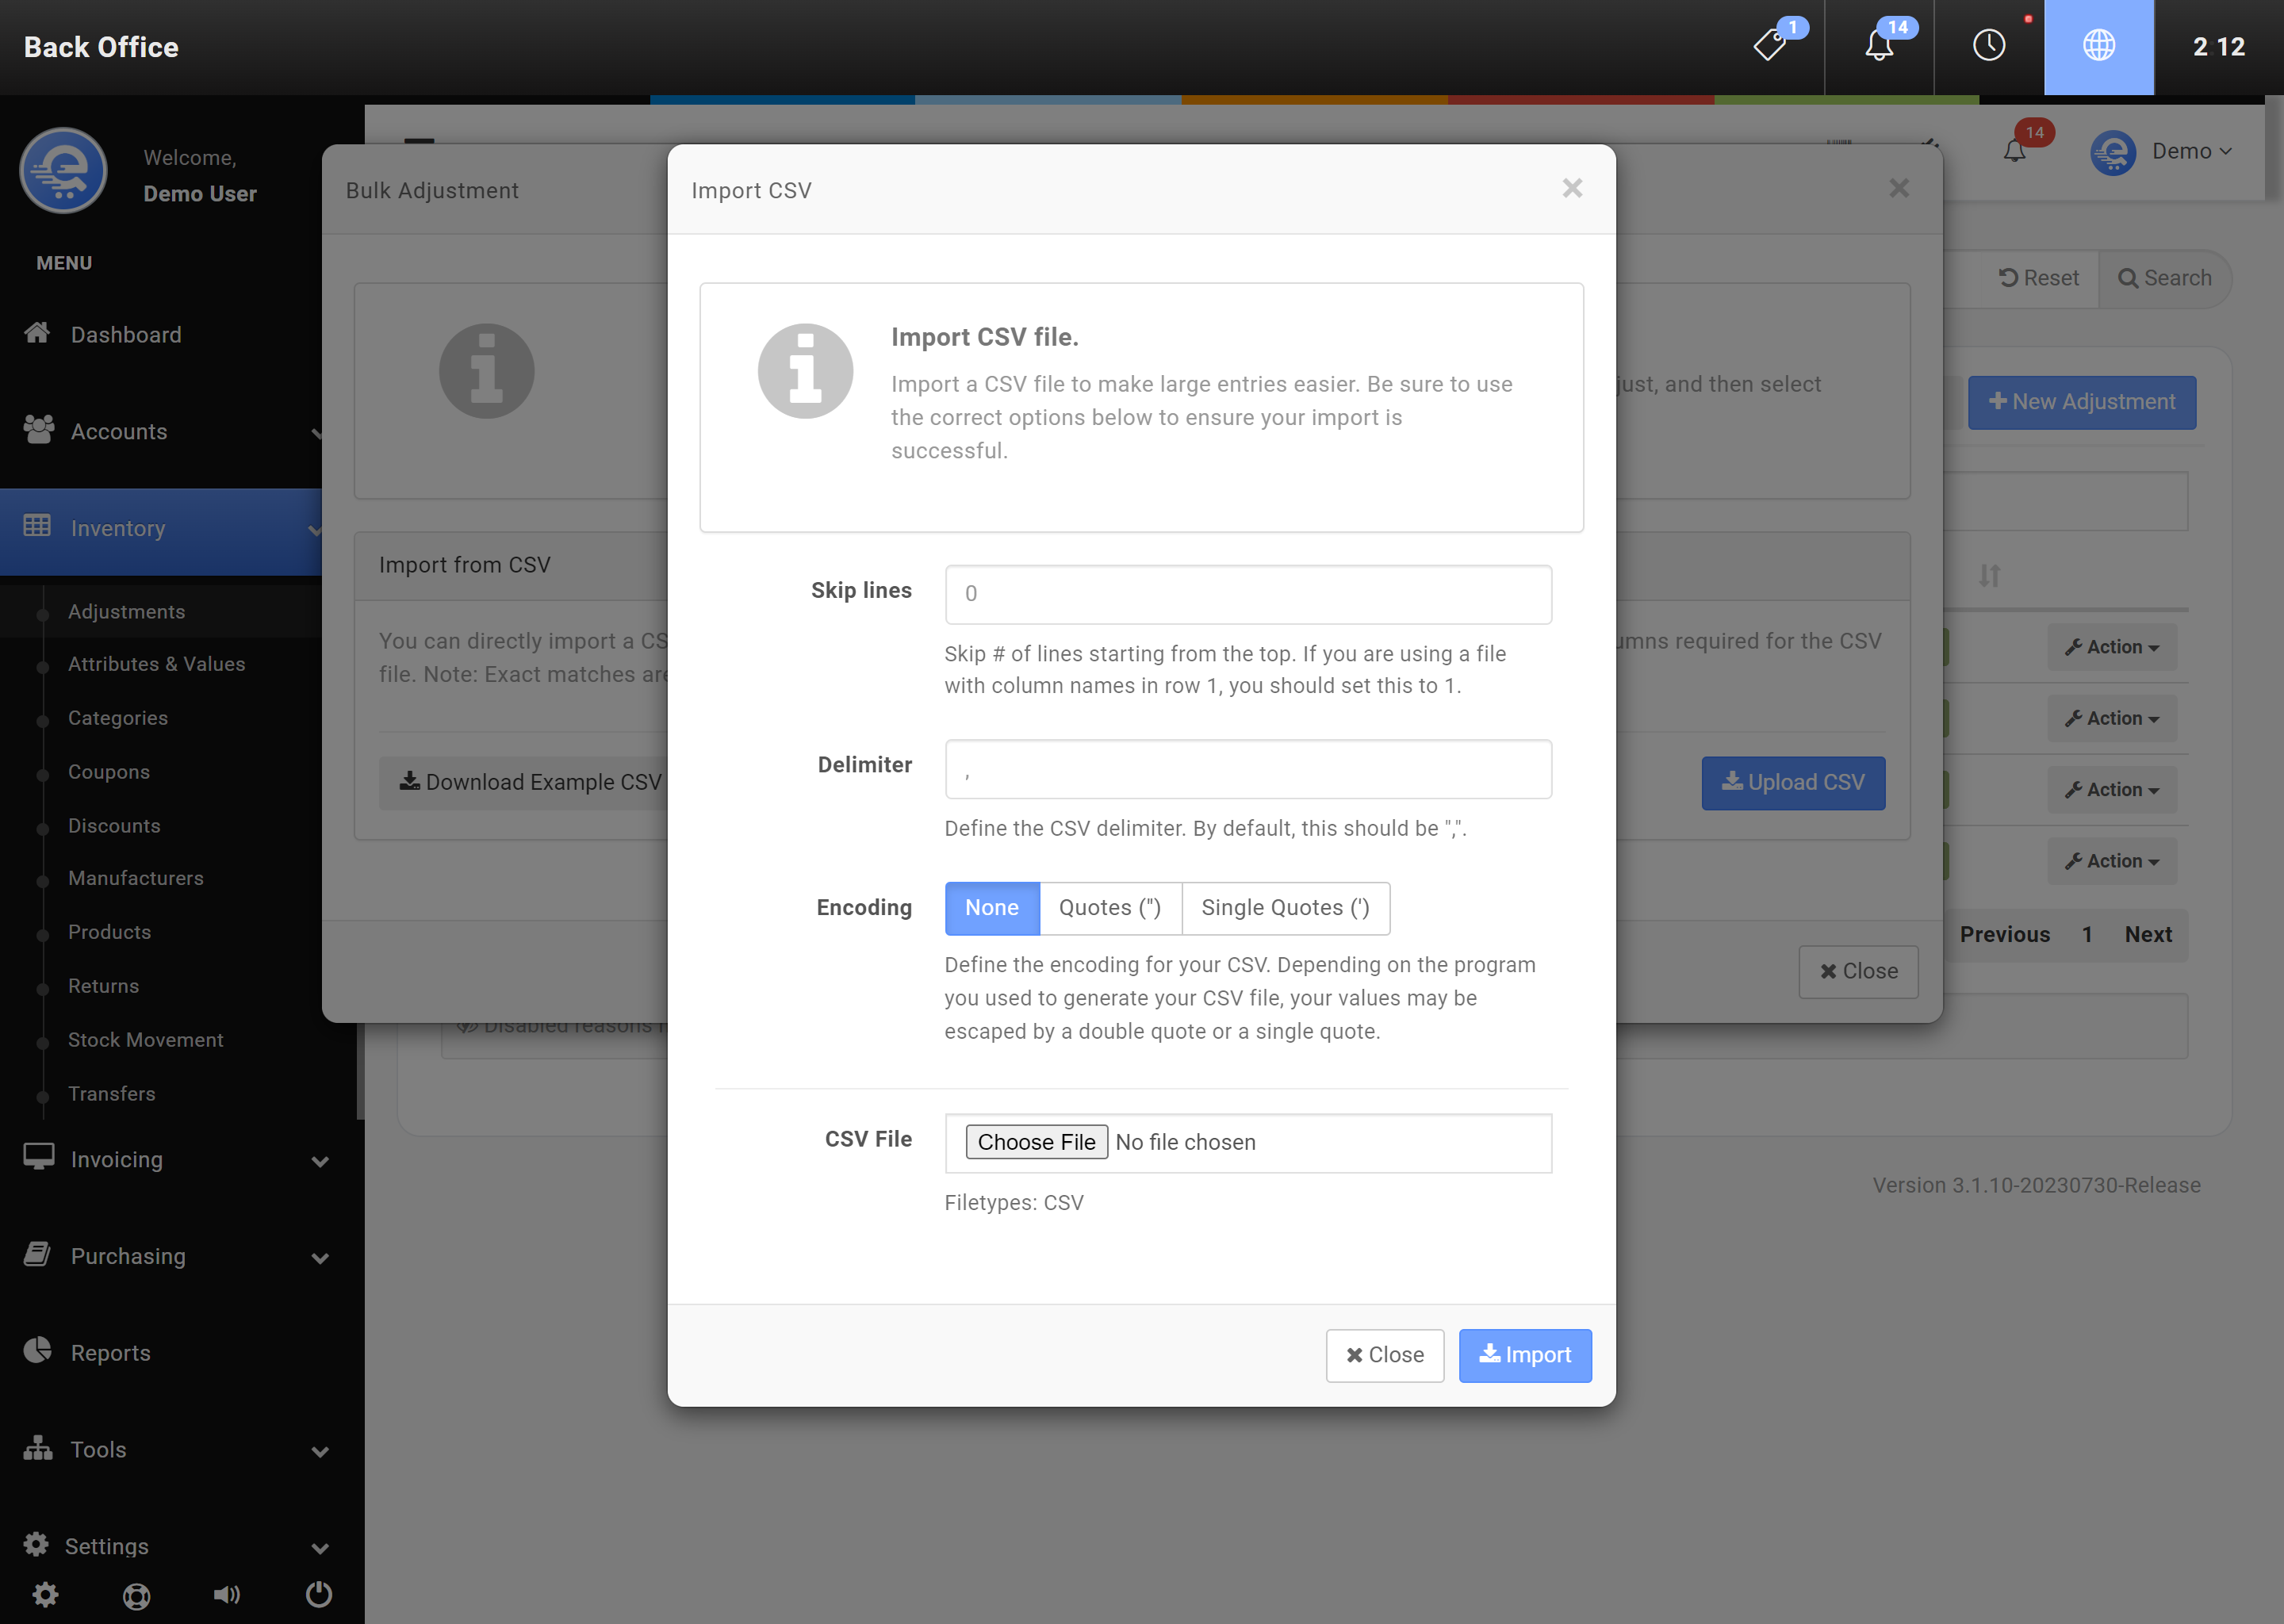
Figure E
Fill out the CSV details, and upload the file you created. Click "Import" when ready to start the import process.
Attributes & Values
By defining Attributes & Values during the product creation progress, you allow for more in-depth reporting on Product Sales. It also organizes your stock by rolling up similar products into one product. For example, if you sell Shoes, you may want to seperate them into Sizes and Colours. A product can have multiple attributes assigned to them.
Attributes
Attributes are the top level of a combination. Each Attribute contains Values. For an example, and Attribute may be called "Size", or "Colour". You would then create Values under each respective Attribute. A value would be Size 10, Size 9, or Blue or Red. You can create Attributes in the Back Office area. Once you create an Attribute, be sure to create Values under each Attribute.
- Navigate to the Back Office area
- On the left menu, click on "Inventory", then click on "Attributes & Values" (see Figure A).
- On the top tab menu, select "Attributes".
- Click on "Create Attribute"
- Name the New Attribute (like Colour, or Size).
- Click "Save Changes" (see Figure B).

Figure A
Create a new Attribute in the Back Office area.
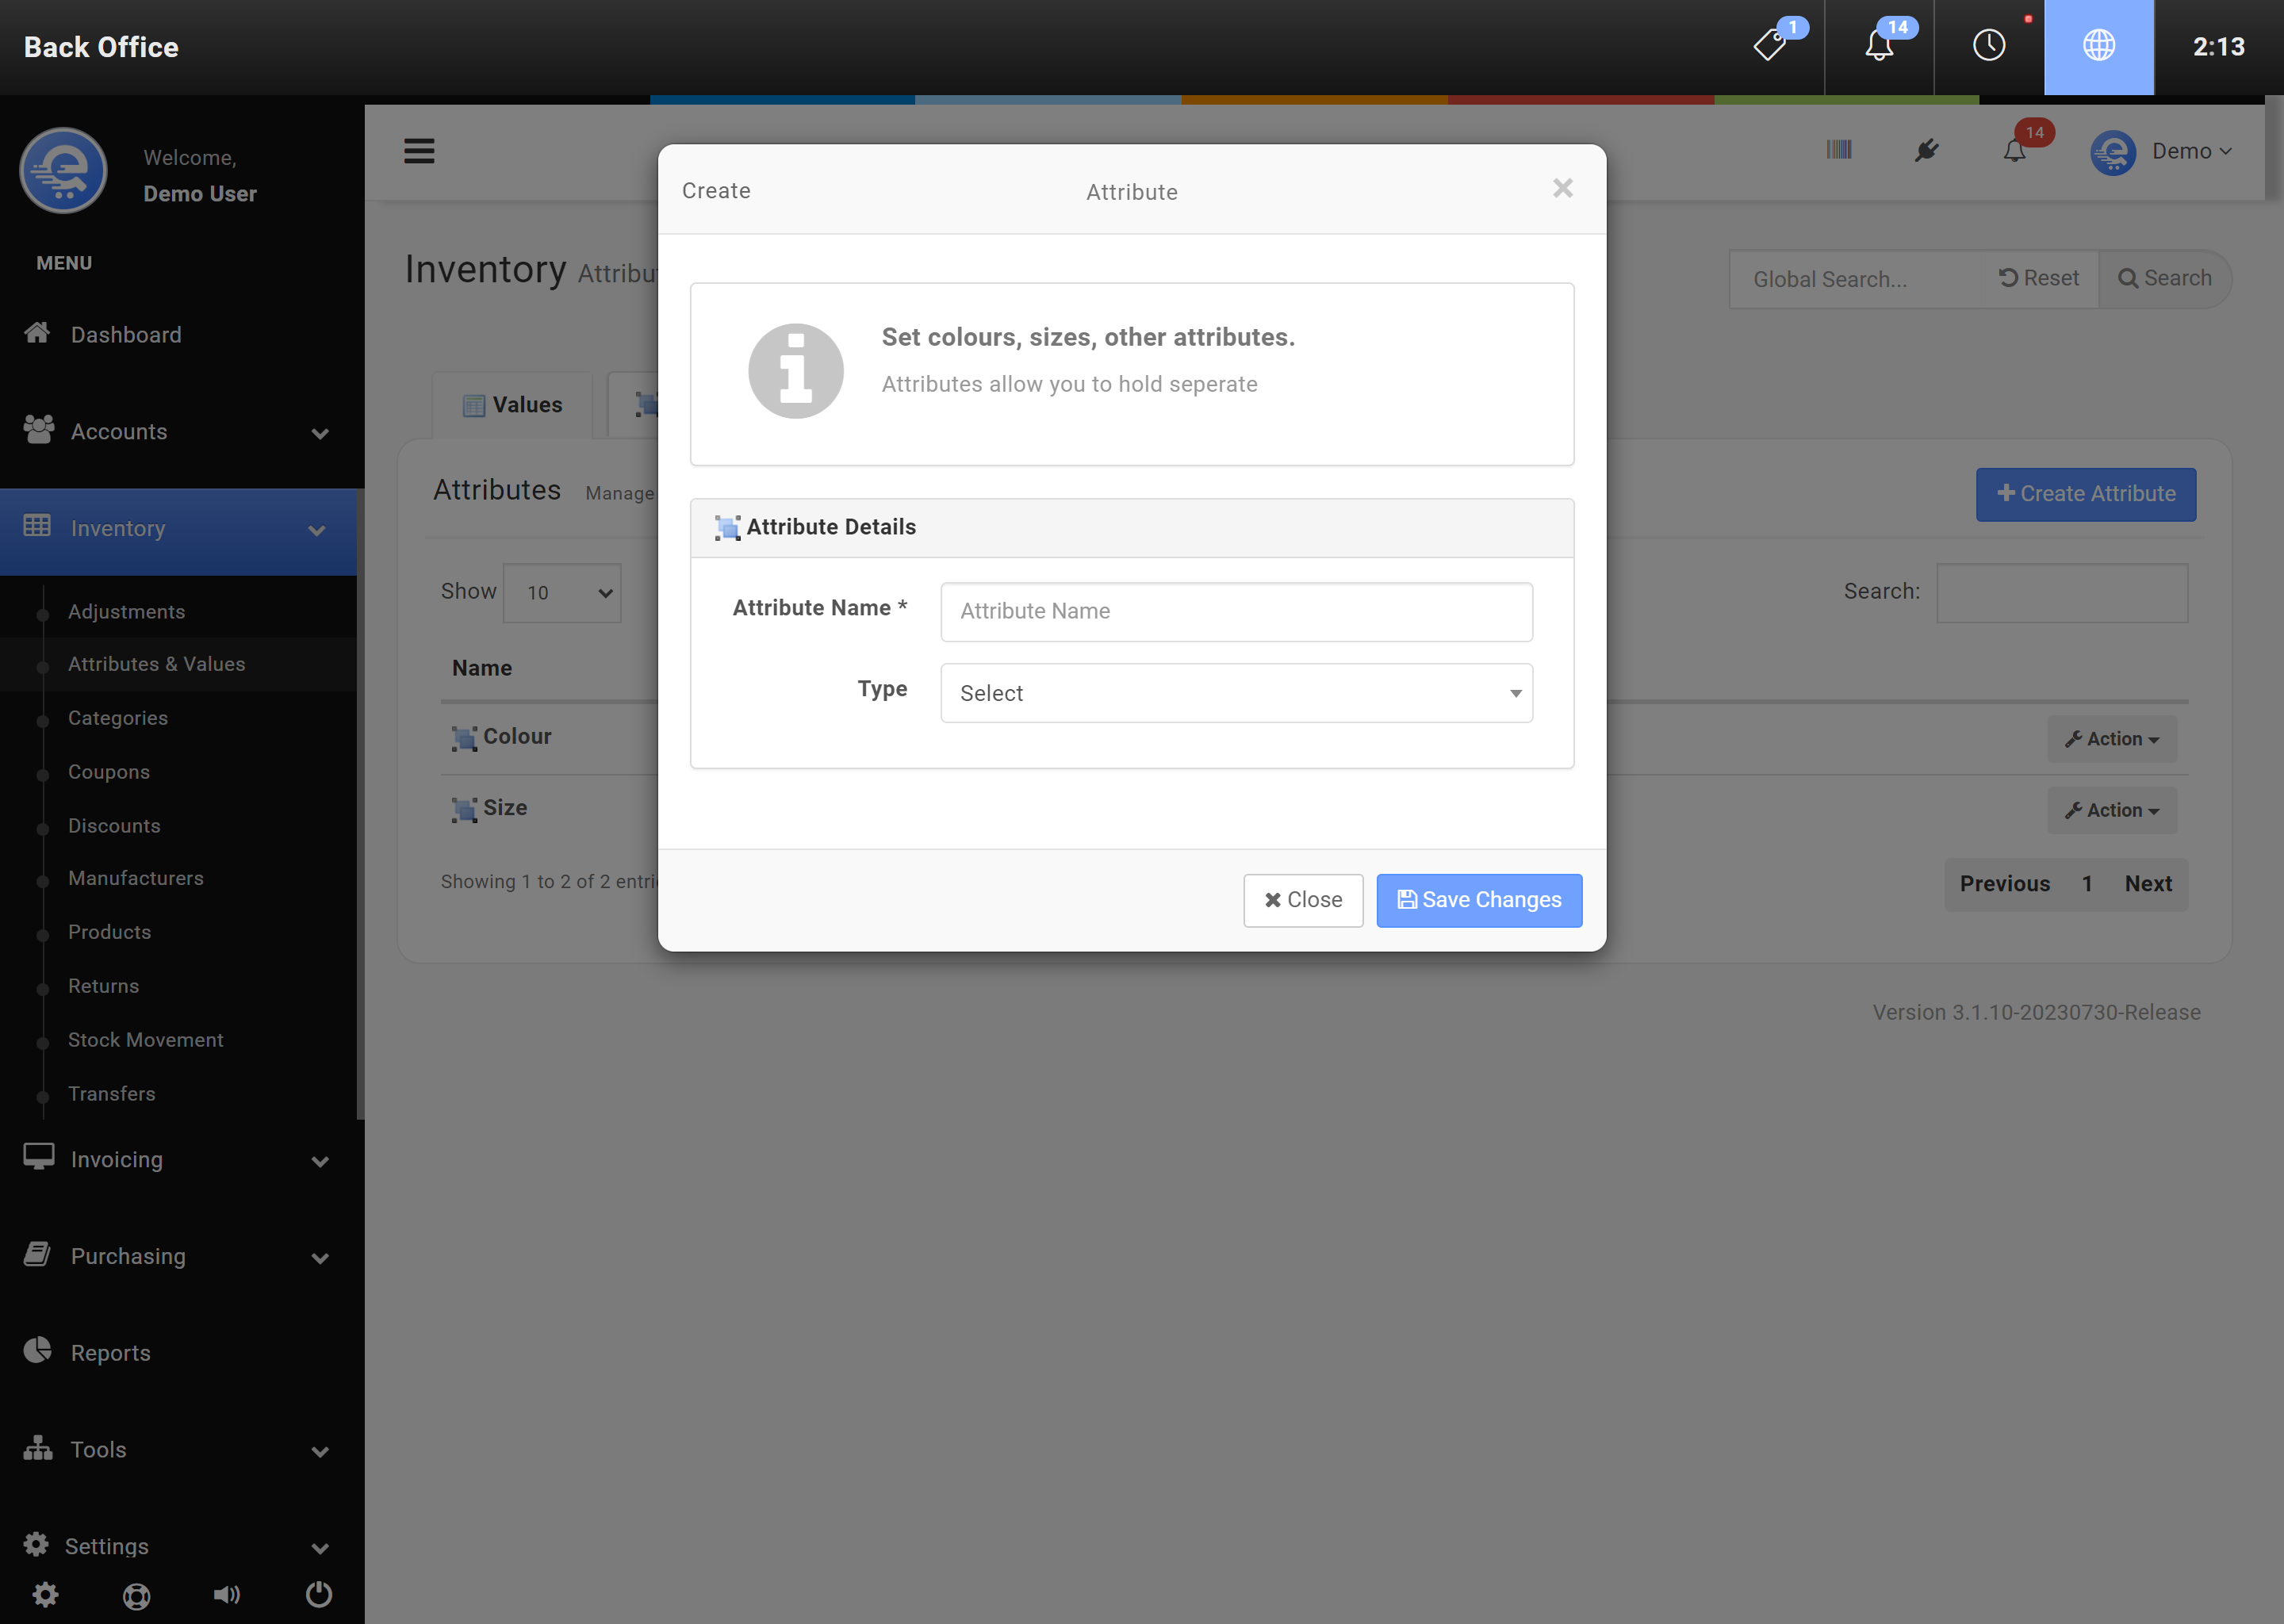
Figure B
Fill out the Attribute details, and click "Save Changes" when complete.
Values
Values are the second part of Attributes. A value lies below an Attribute. Values consist of related information, like sizes, or colours. For example, a Attribute called "Colour", may have multiple Values assosciated with it; like Blue, Red, or Green. When you are creating new Products, you can associate each new product with an Value if required. Values can only be added in the Back Office area.
- Navigate to the Back Office area
- On the left menu, click on "Inventory", then click on "Attributes & Values" (see Figure C).
- Click on the button labelled "New Value".
- Name the New Value (like Blue, or Green) and assign it to an Attribute that has already been created (like Colour).
- Click "Save Changes" (see Figure D) when complete.
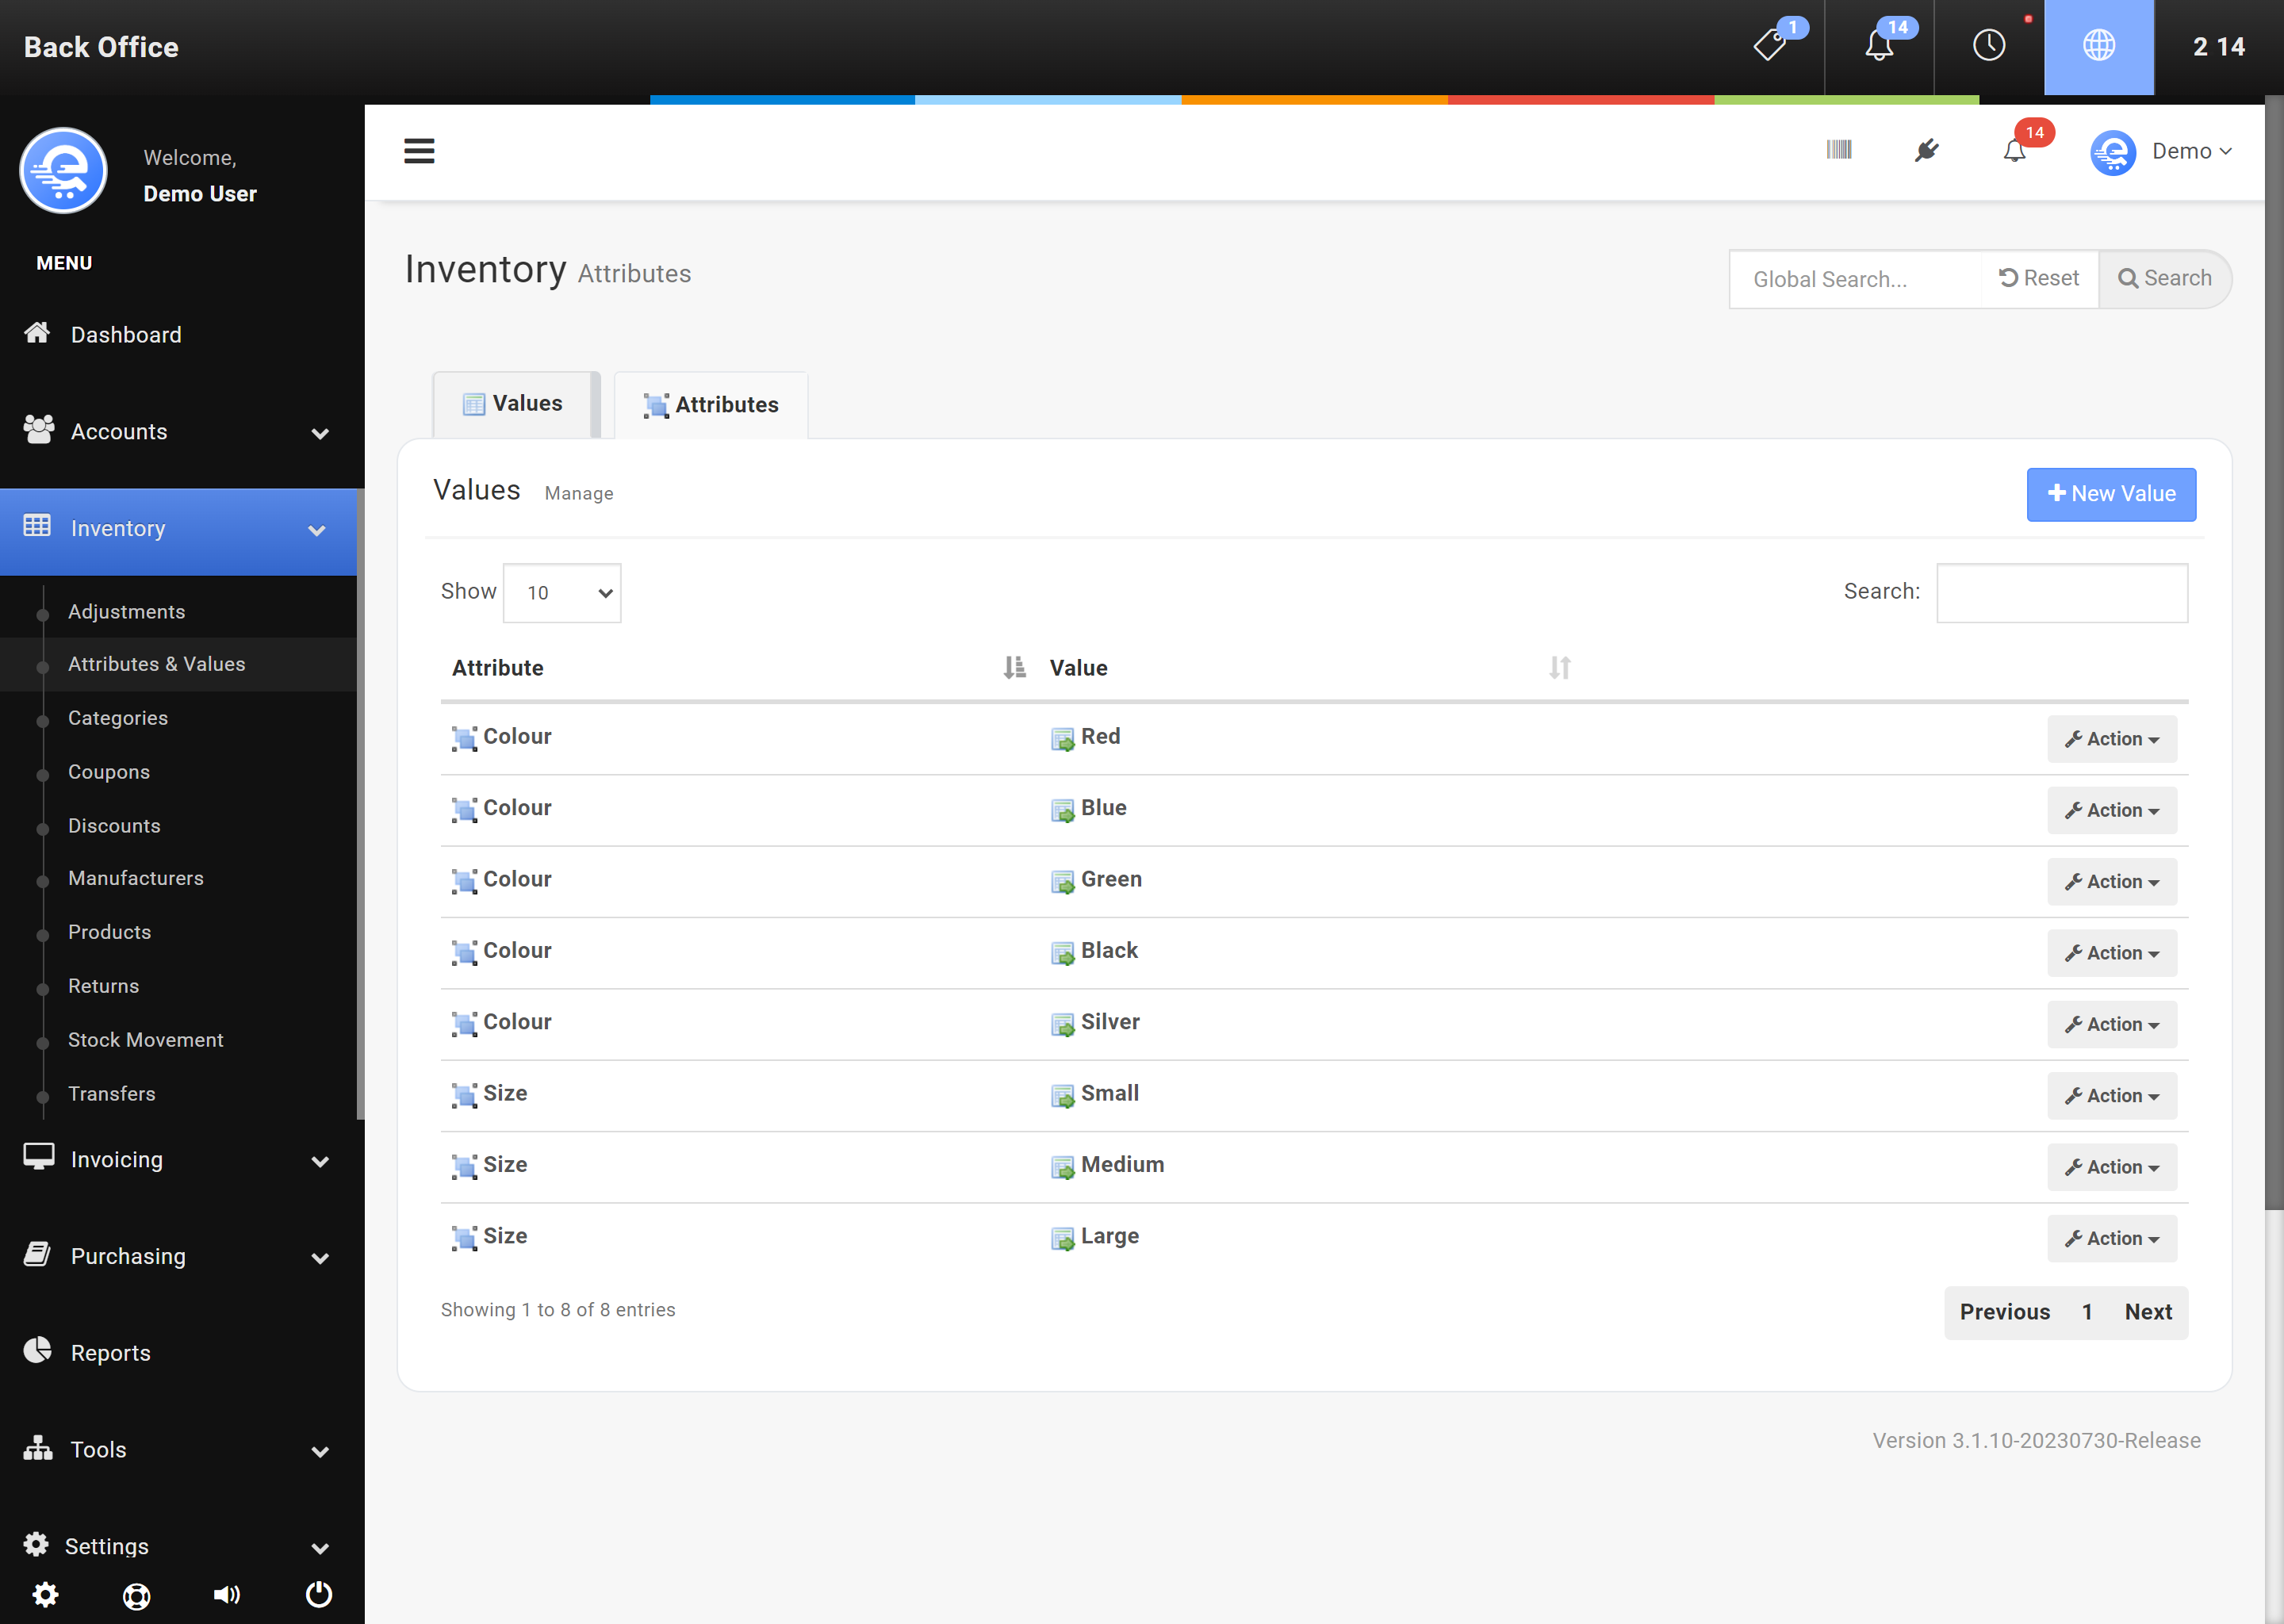
Figure C
Create Attribute Values in the Back Office area.

Figure D
Fill out the details of the new Value and click "Save Changes" when complete.
Categories
Organize your products with Categories to allow for greater reporting. Products can be associated with multiple categories. Discounts can also be associated with Categories, allowing you to provide category specific discounts for customers.
- Navigate to the eQuate Back Office
- On the left navigation bar, click "Inventory", then click "Categories".
- Click on the button labelled "Add Category" (see Figure A).
- If the category is a sub-category, be sure to set the parent category.
- Click "Save Changes" when complete (see Figure B).
- Navigate to the eQuate Back Office
- On the left navigation bar, click "Inventory", then click "Categories" (see Figure A).
- Using the table, find the Category row you want to edit and click "Action", then "Edit".
- Complete any changes required and click "Save Changes" when complete (see Figure B).

Figure A
Use the Back Office to add or edit Categories
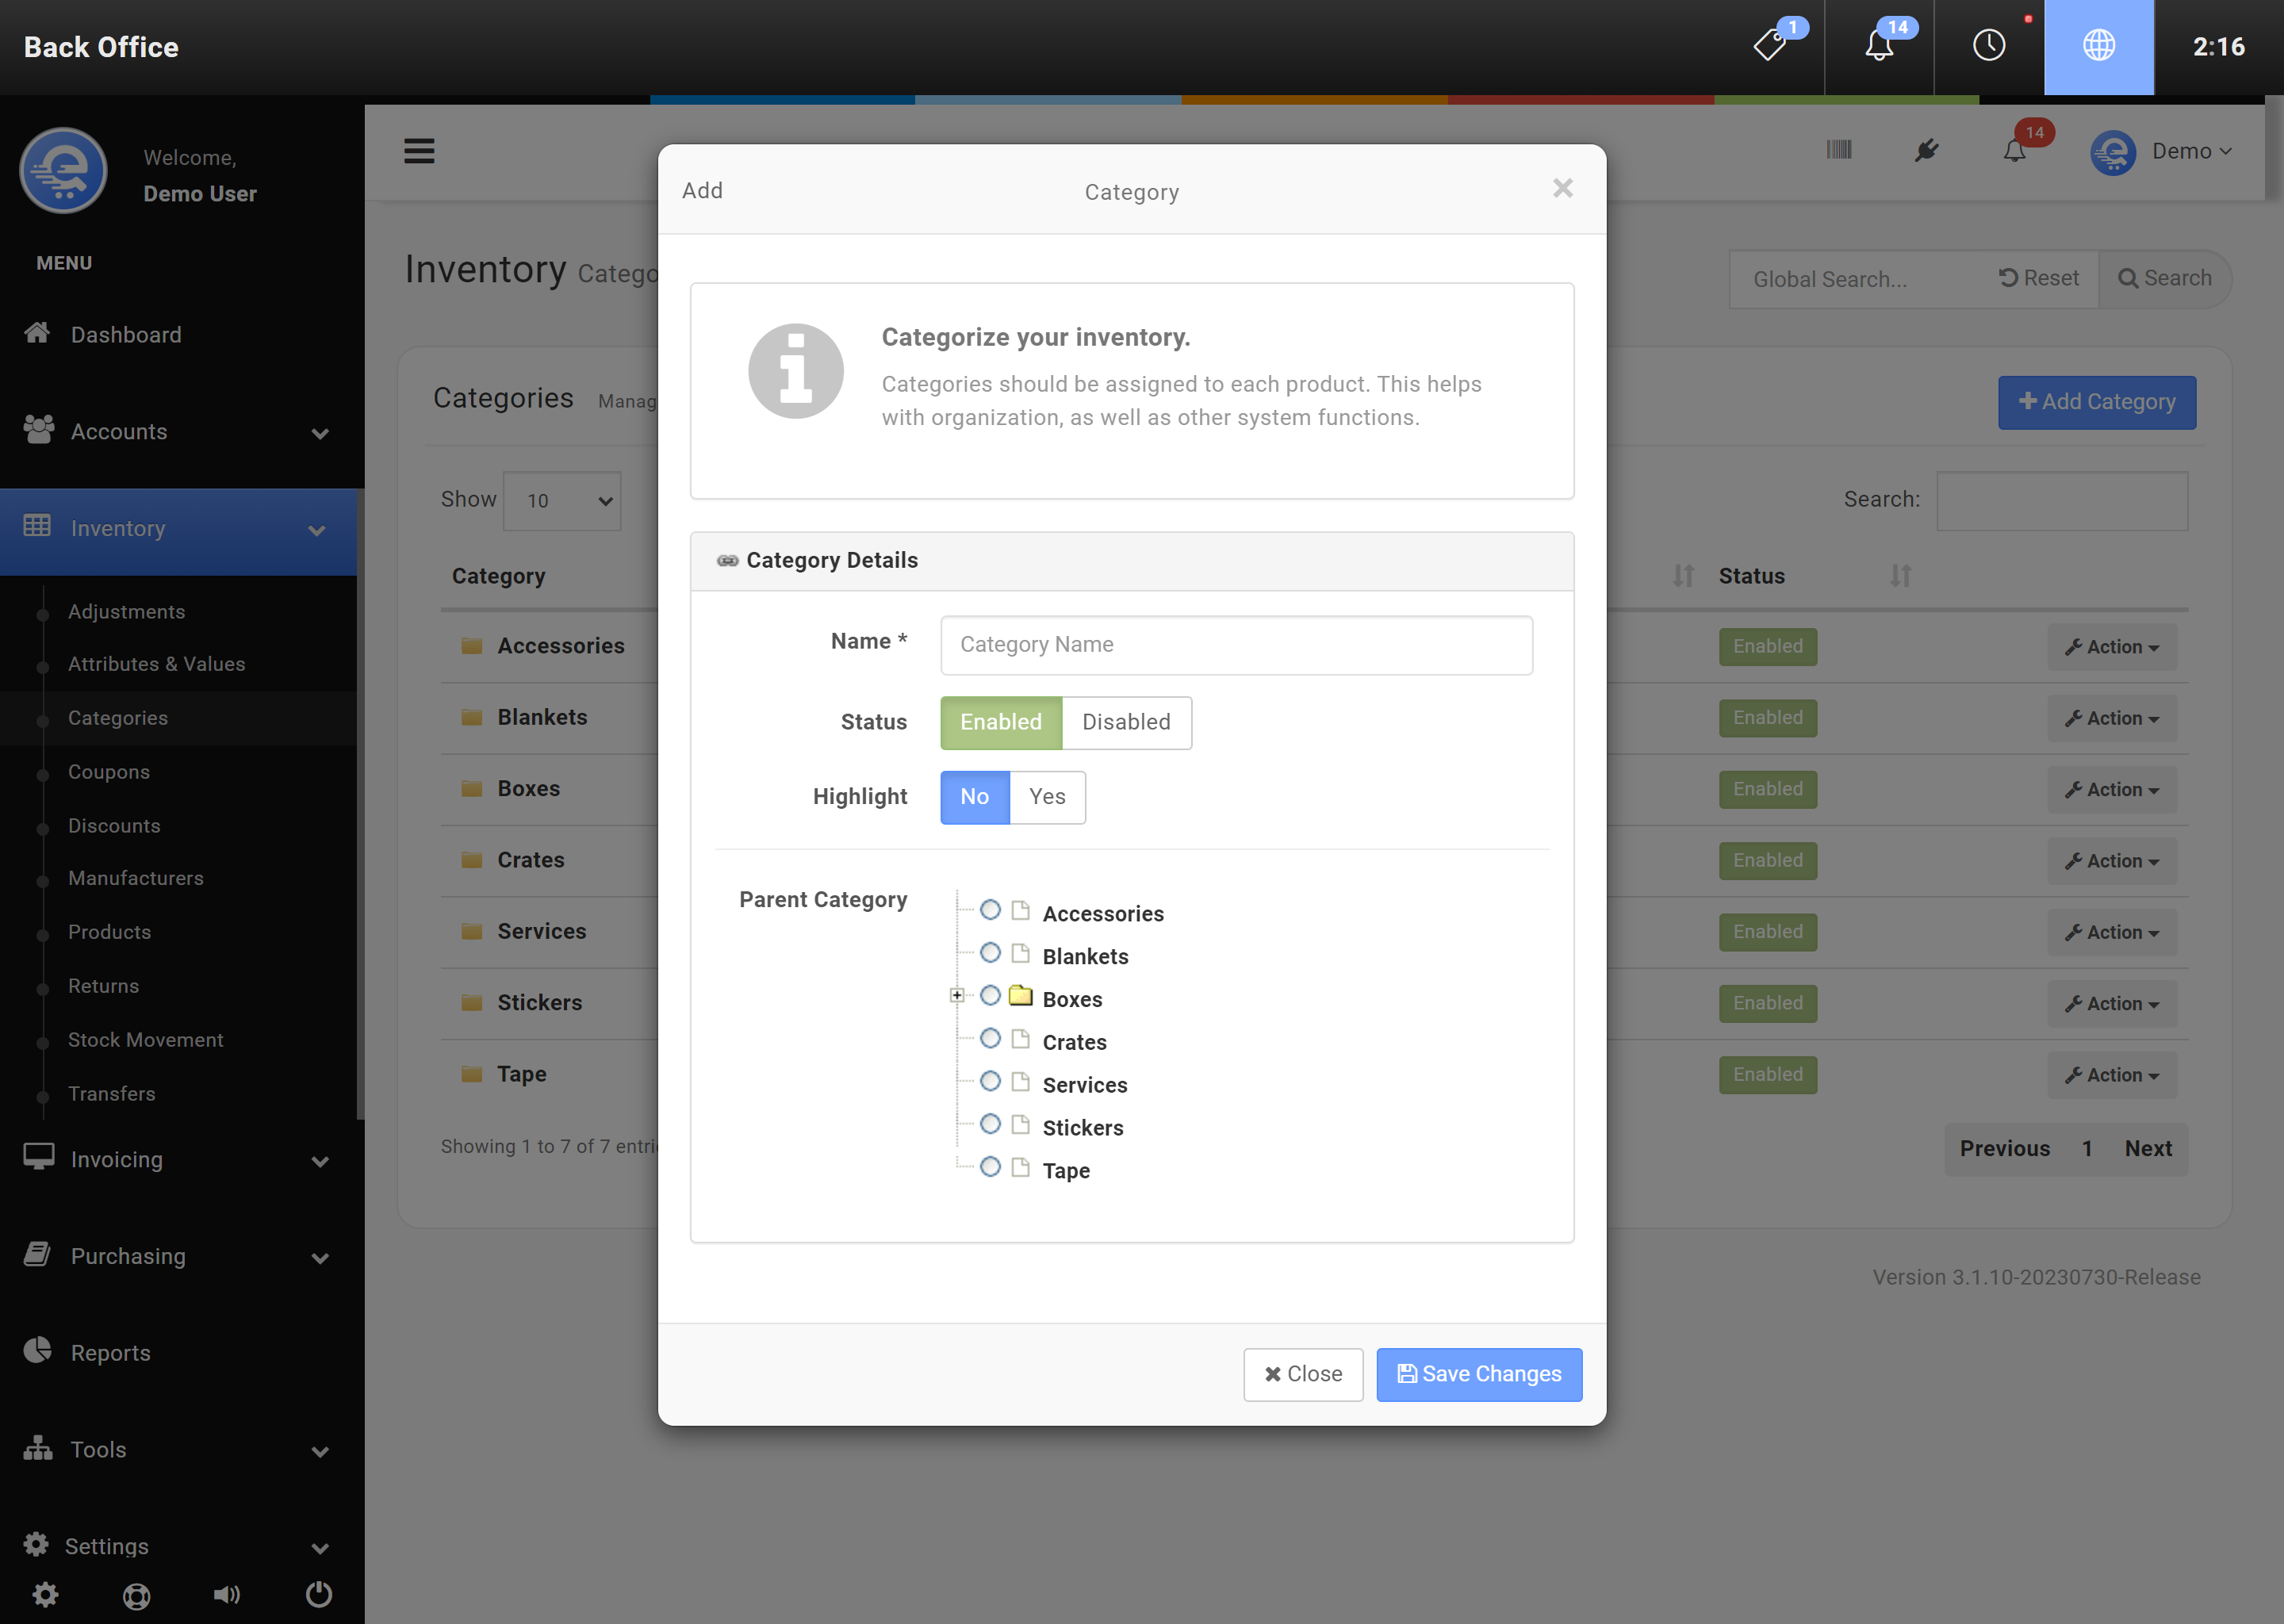
Figure B
Fill in the details of the Category and press "Save Changes" when complete.
Coupons & Discounts
Coupons and Discounts can be added to sales. Discounts can be automatic, based on conditions like Category or Manufacturer. Coupons can be added to sales orders by scanning a SKU, or manually adding a coupon to the sale. Coupons and Discounts reduce the total price charged. You can also track usage of various Discounts and Coupons with reports.
Coupons
Coupons can be added to a sale, which will then discount items based on the Coupon's conditions. For example, you can add a coupon that only provides discounts to certain products in a Category, or Manufacturer. You can also choose to provide a total discount on every item. Coupons can be attached to a SKU, allowing you to scan coupons during check-out. Coupons should always be added at the very end of the Sale process; after all items have been inputted into the Sale.
- Navigate to the Back Office area
- On the left menu, click on "Inventory", then click on "Coupons" (see Figure A).
- Click on button labelled "New Coupon".
- Fill out the Coupon details and click "Save Changes" (see Figure B).

Figure A
Create or modify Coupons in the Back Office.
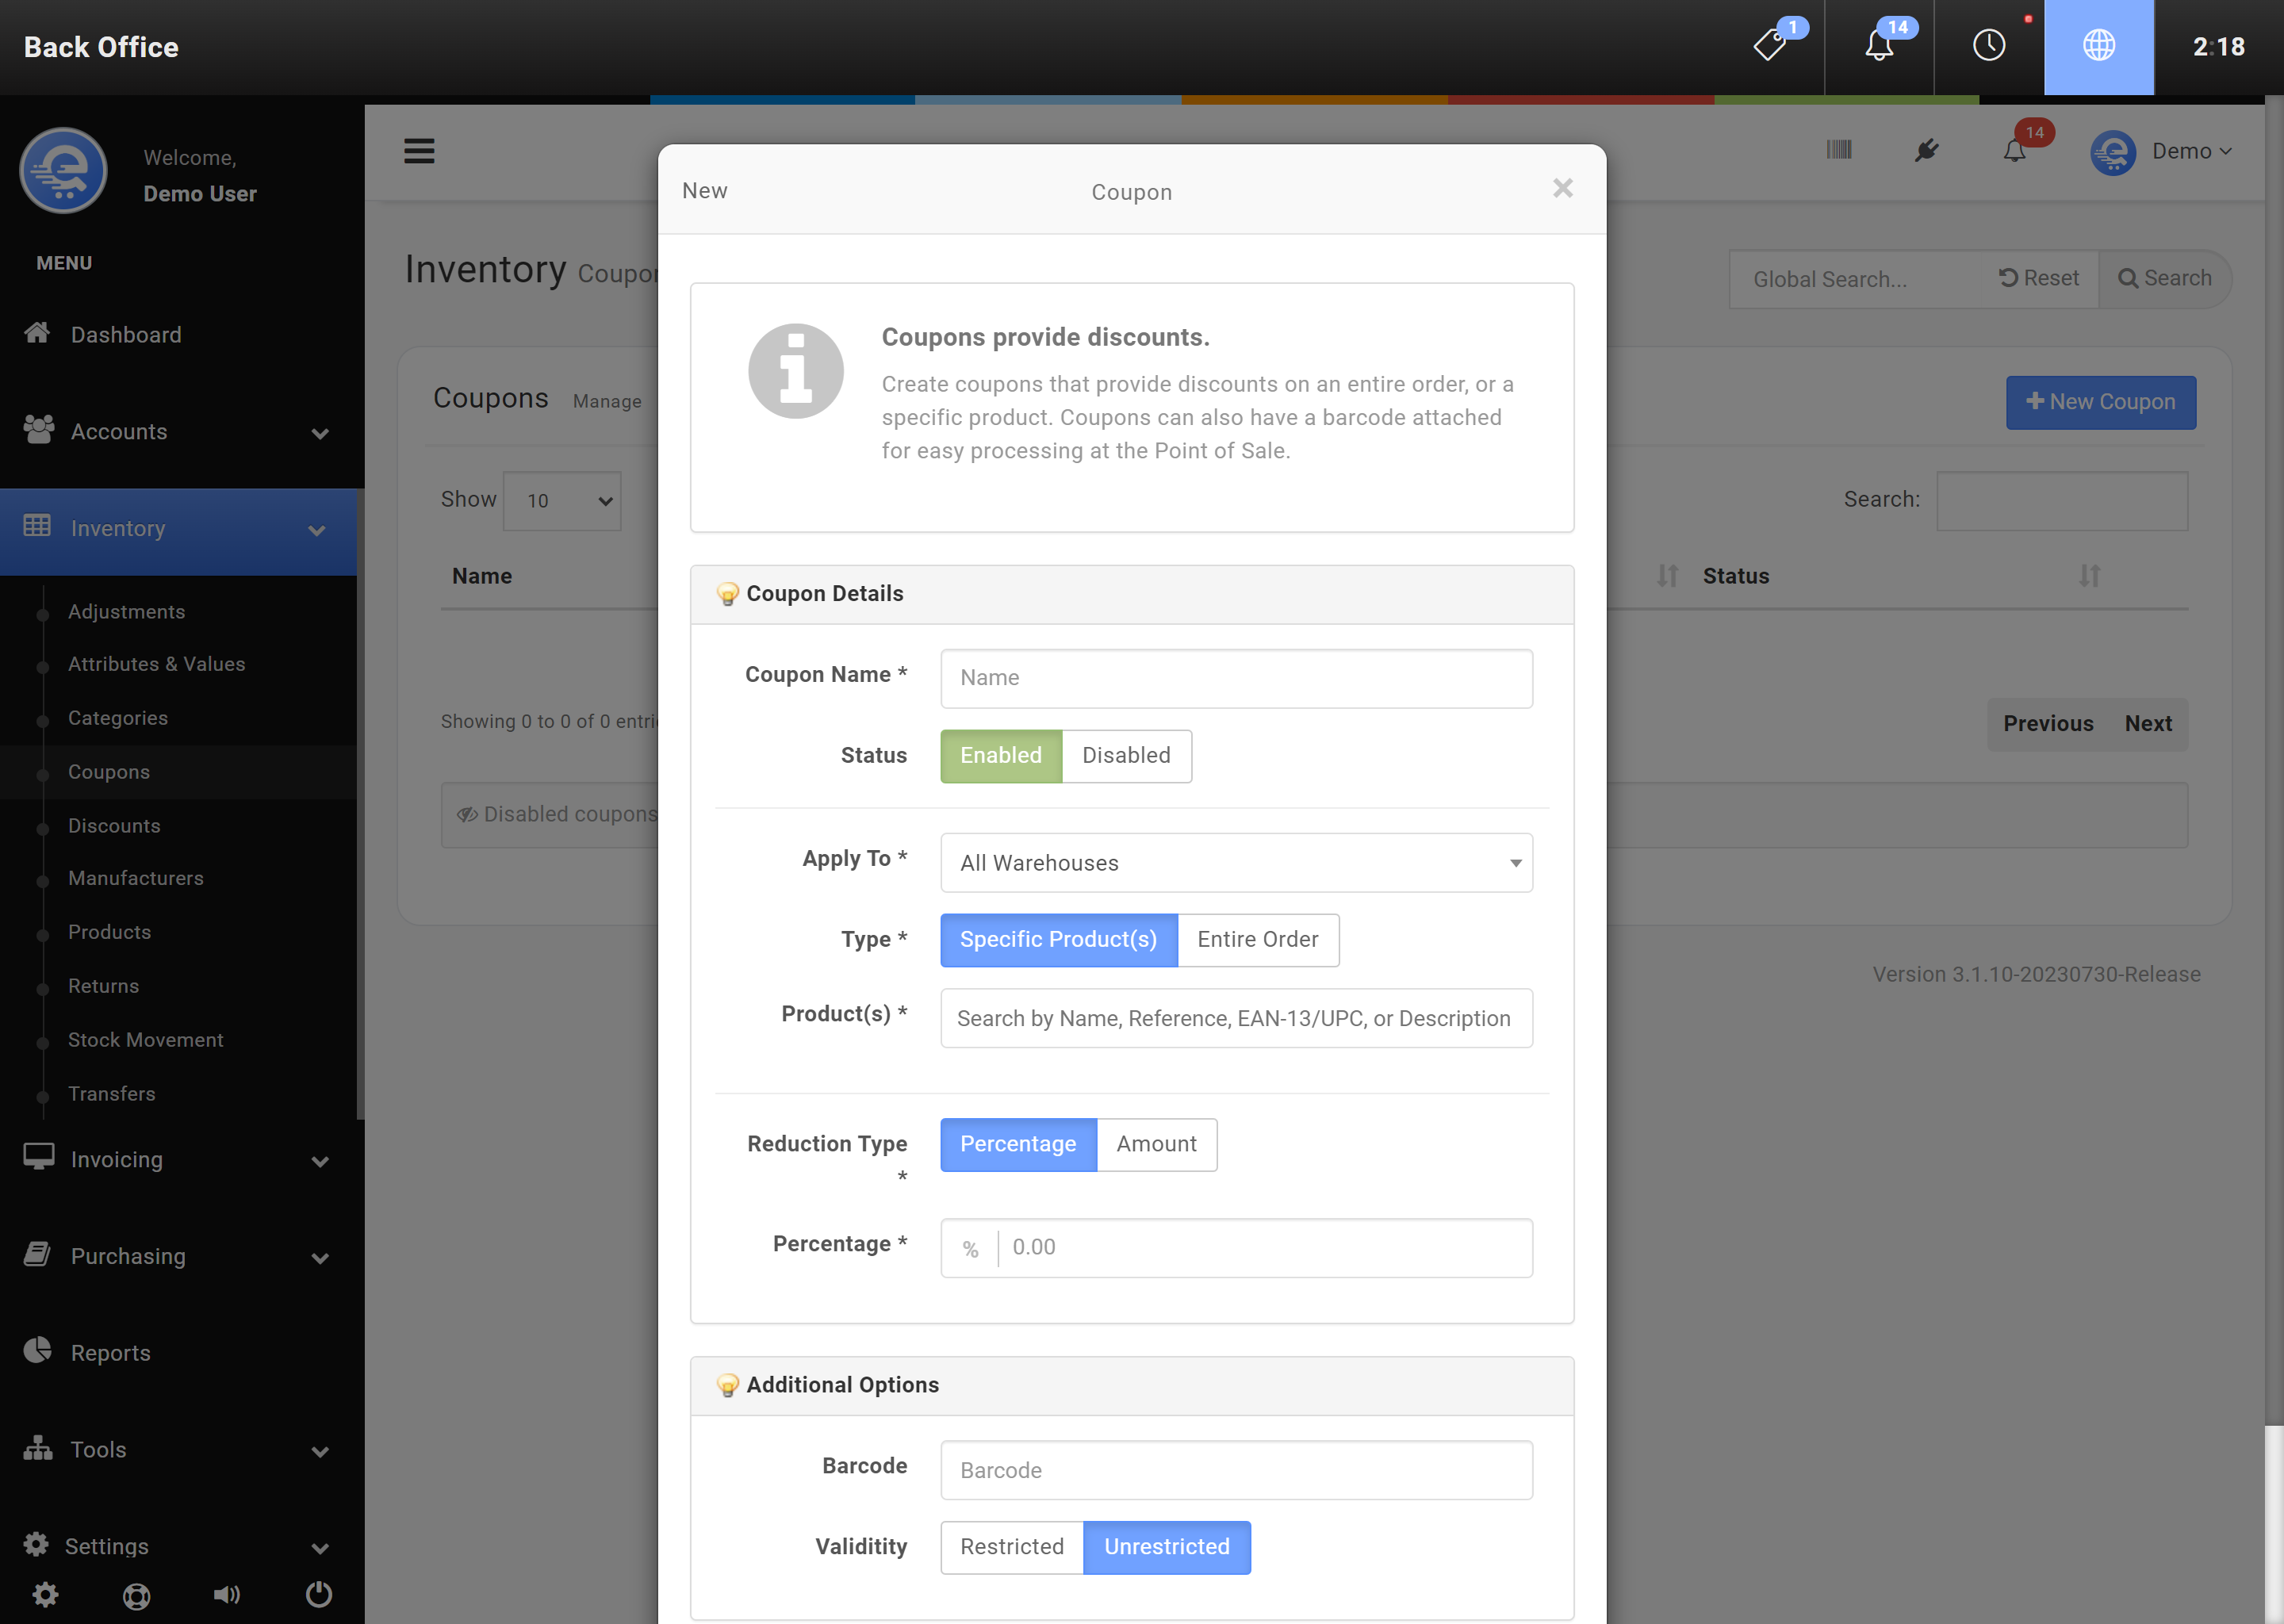
Figure B
Fill out the New Coupon details and click Save Changes when complete.
Discounts
Discounts can be given automatically during the check-out process. Discounts can be given certain conditions before applying a discount. For example, you can add a automatic discount based on Category, Manufacturer, and Quantities.
- Navigate to the Back Office area
- On the left menu, click on "Inventory", then click on "Discounts" (see Figure C).
- Click on button labelled "Create Discount".
- Complete the Discount details and click "Save Changes" (see Figure D).

Figure C
Create or modify Discounts in the Back Office area
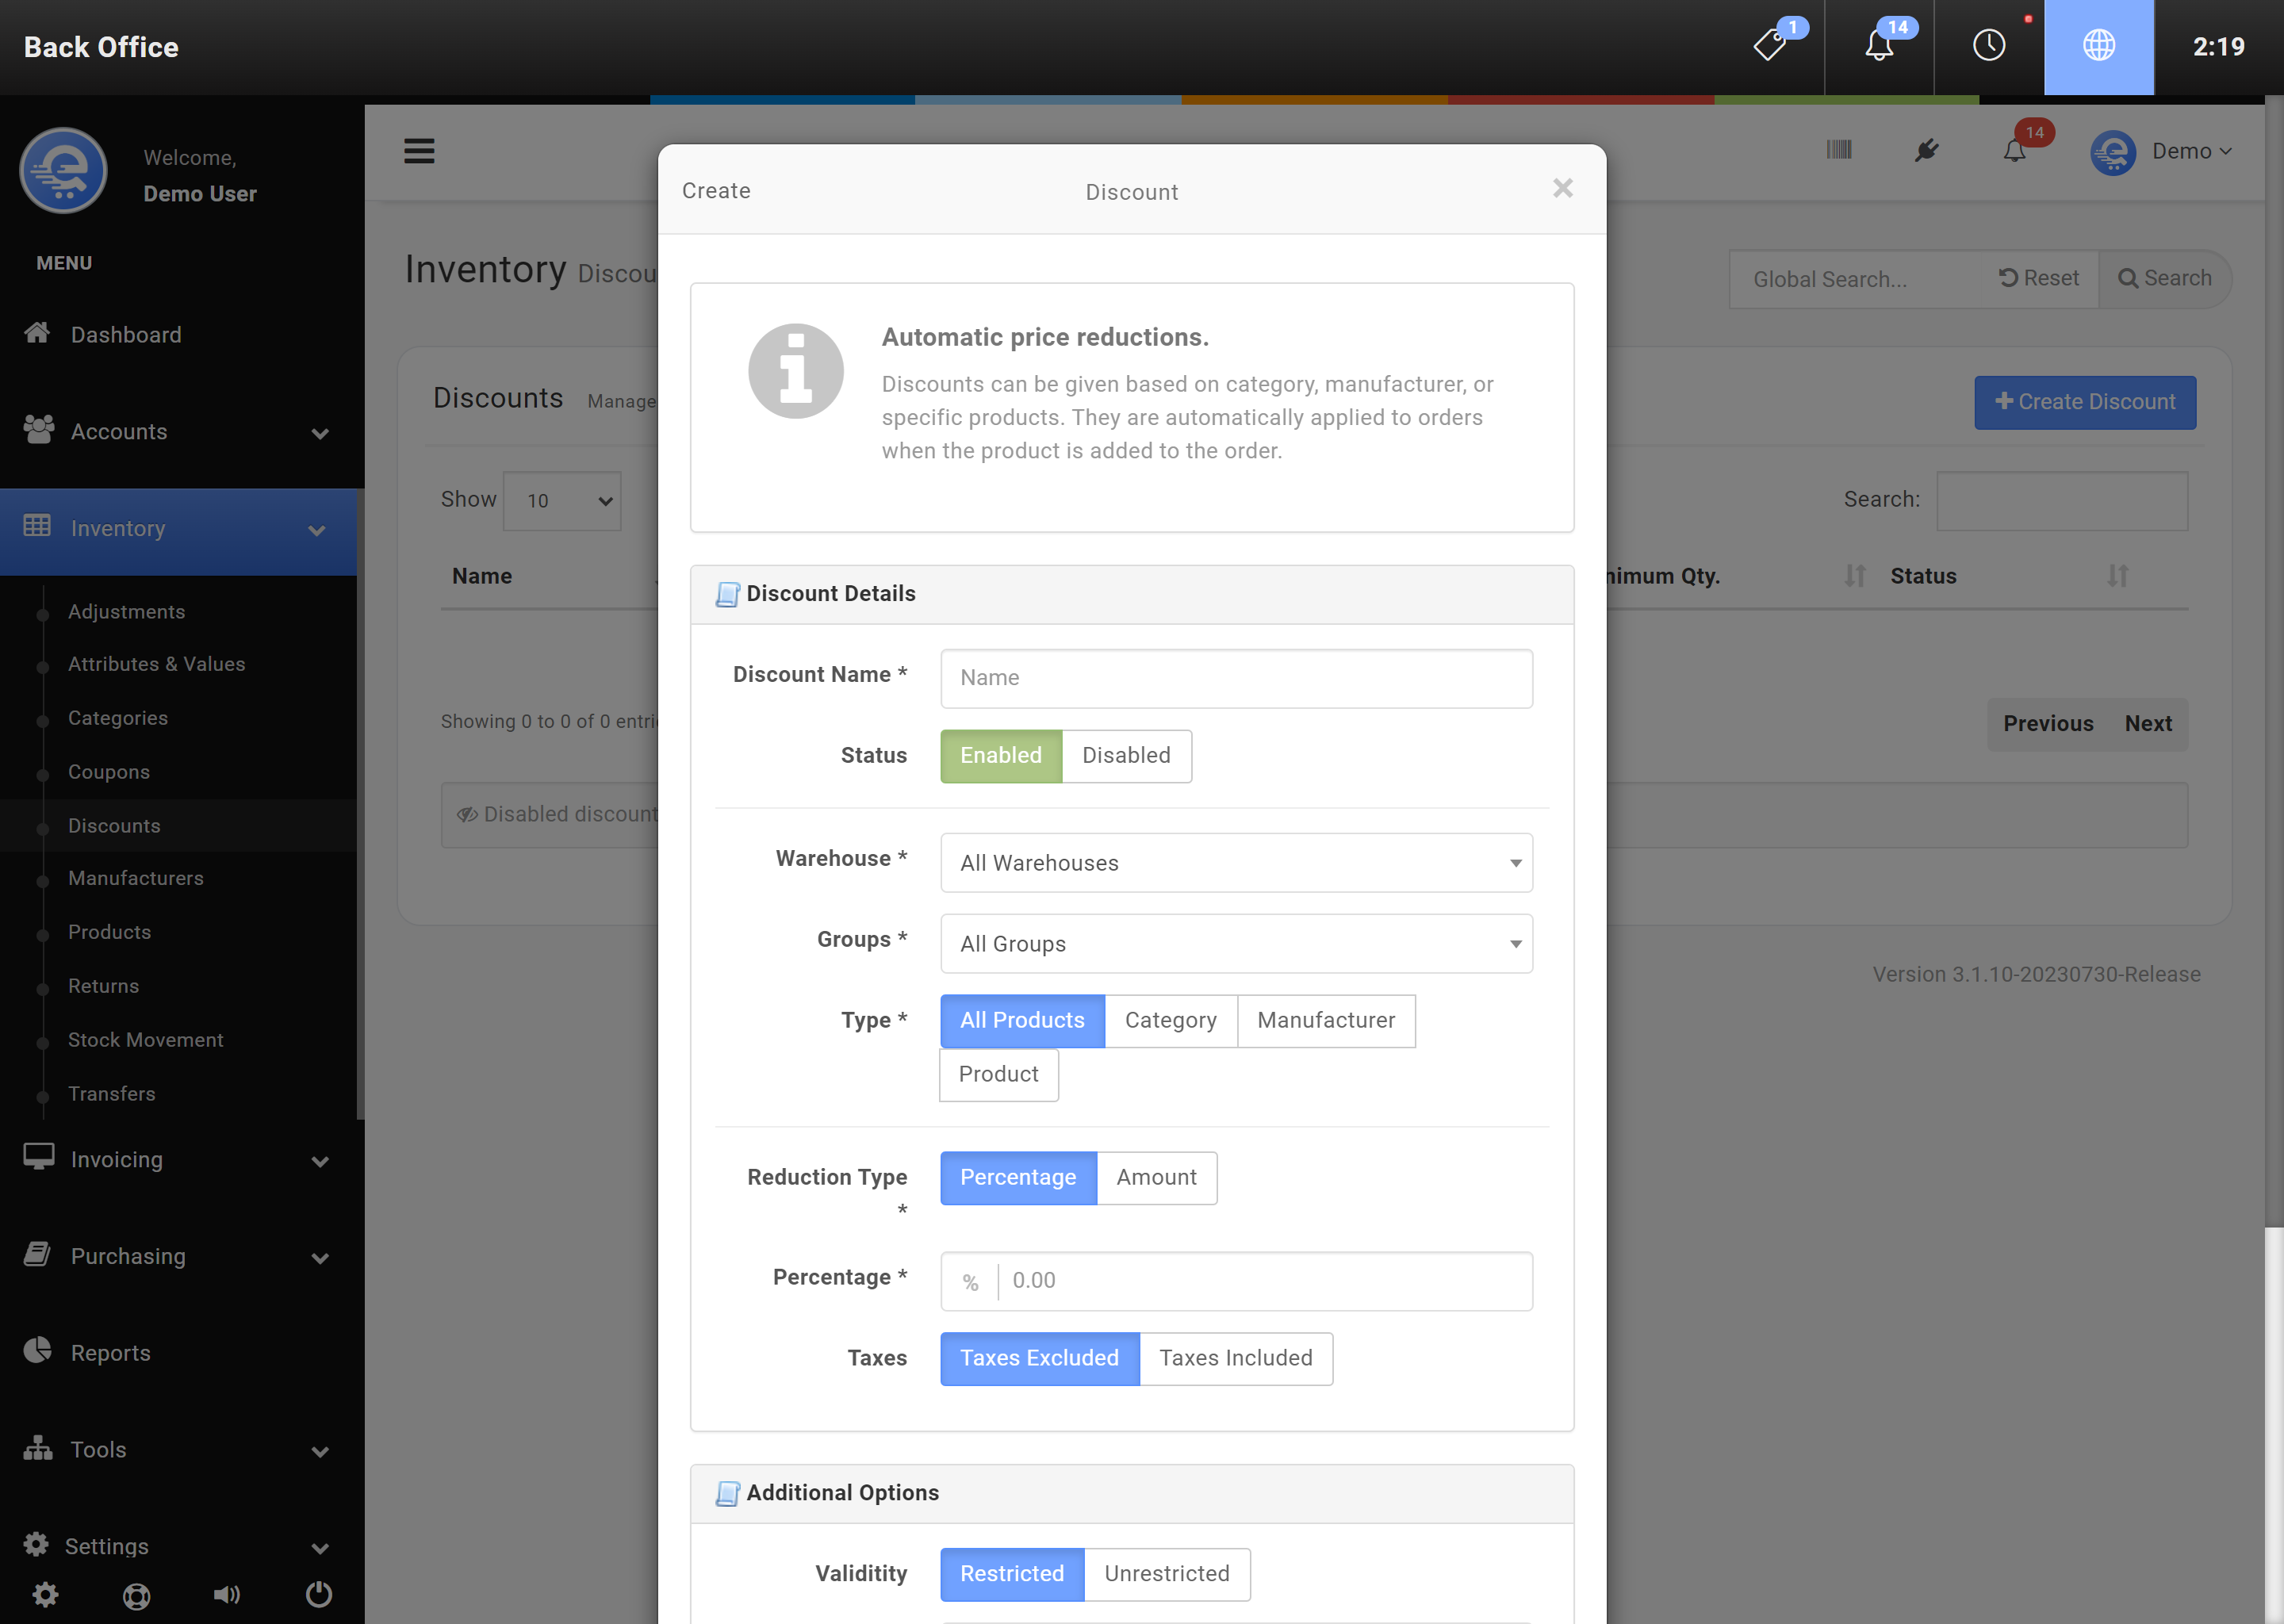
Figure D
Fill out the New Discount details and click Save Changes when complete.
Manufacturers
Manufacturers are the producers of certain products. You may carry multiple products from a single manufacturer. Discounts and coupons can also be setup based on product manufacturer. If you are using Supply Management, you can also automatically order products based on Manufacturer.
- Navigate to the eQuate Back Office
- On the left navigation bar, click "Inventory", then click "Manufacturers".
- Click on the button labelled "Add Manufacturer" (see Figure A).
- Fill in the details for the new Manufacturer and click "Save Changes" when complete (see Figure B).
- Navigate to the eQuate Back Office
- On the left navigation bar, click "Inventory", then click "Manufacturers" (see Figure A).
- Using the table, find the Manufacturer row you want to edit and click "Action", then "Edit".
- Edit the changes required and click "Save Changes" when complete (see Figure B).

Figure A
Use the Back Office to add or edit Manufacturers

Figure B
Fill in the details of the Manufacturer and press "Save Changes" when complete.
Products
A product is something you sell. A product can be an item that has stock, or an item with no stock associated with it (such as a service, or fee). Products can be added to invoices, purchase orders, and transfer orders. A product may also have attributes associated with it (like colours, or sizes). If a product contains multiple similar properties with each other, but in differ in colours, or sizes for example, you can define multiple product attributes under one product. Each of these product attributes would also have it's own stock bucket as well.
Products
Products are the top level placeholder for items you sell.
- Navigate to the Back Office area
- On the left menu, click on "Inventory", then click on "Products" (see Figure A).
- Click on "New Product"
- Fill out the new product details, use the left menu to assign various details to your product.
- Click "Save Changes" (see Figure B) when you are done entering the product information.
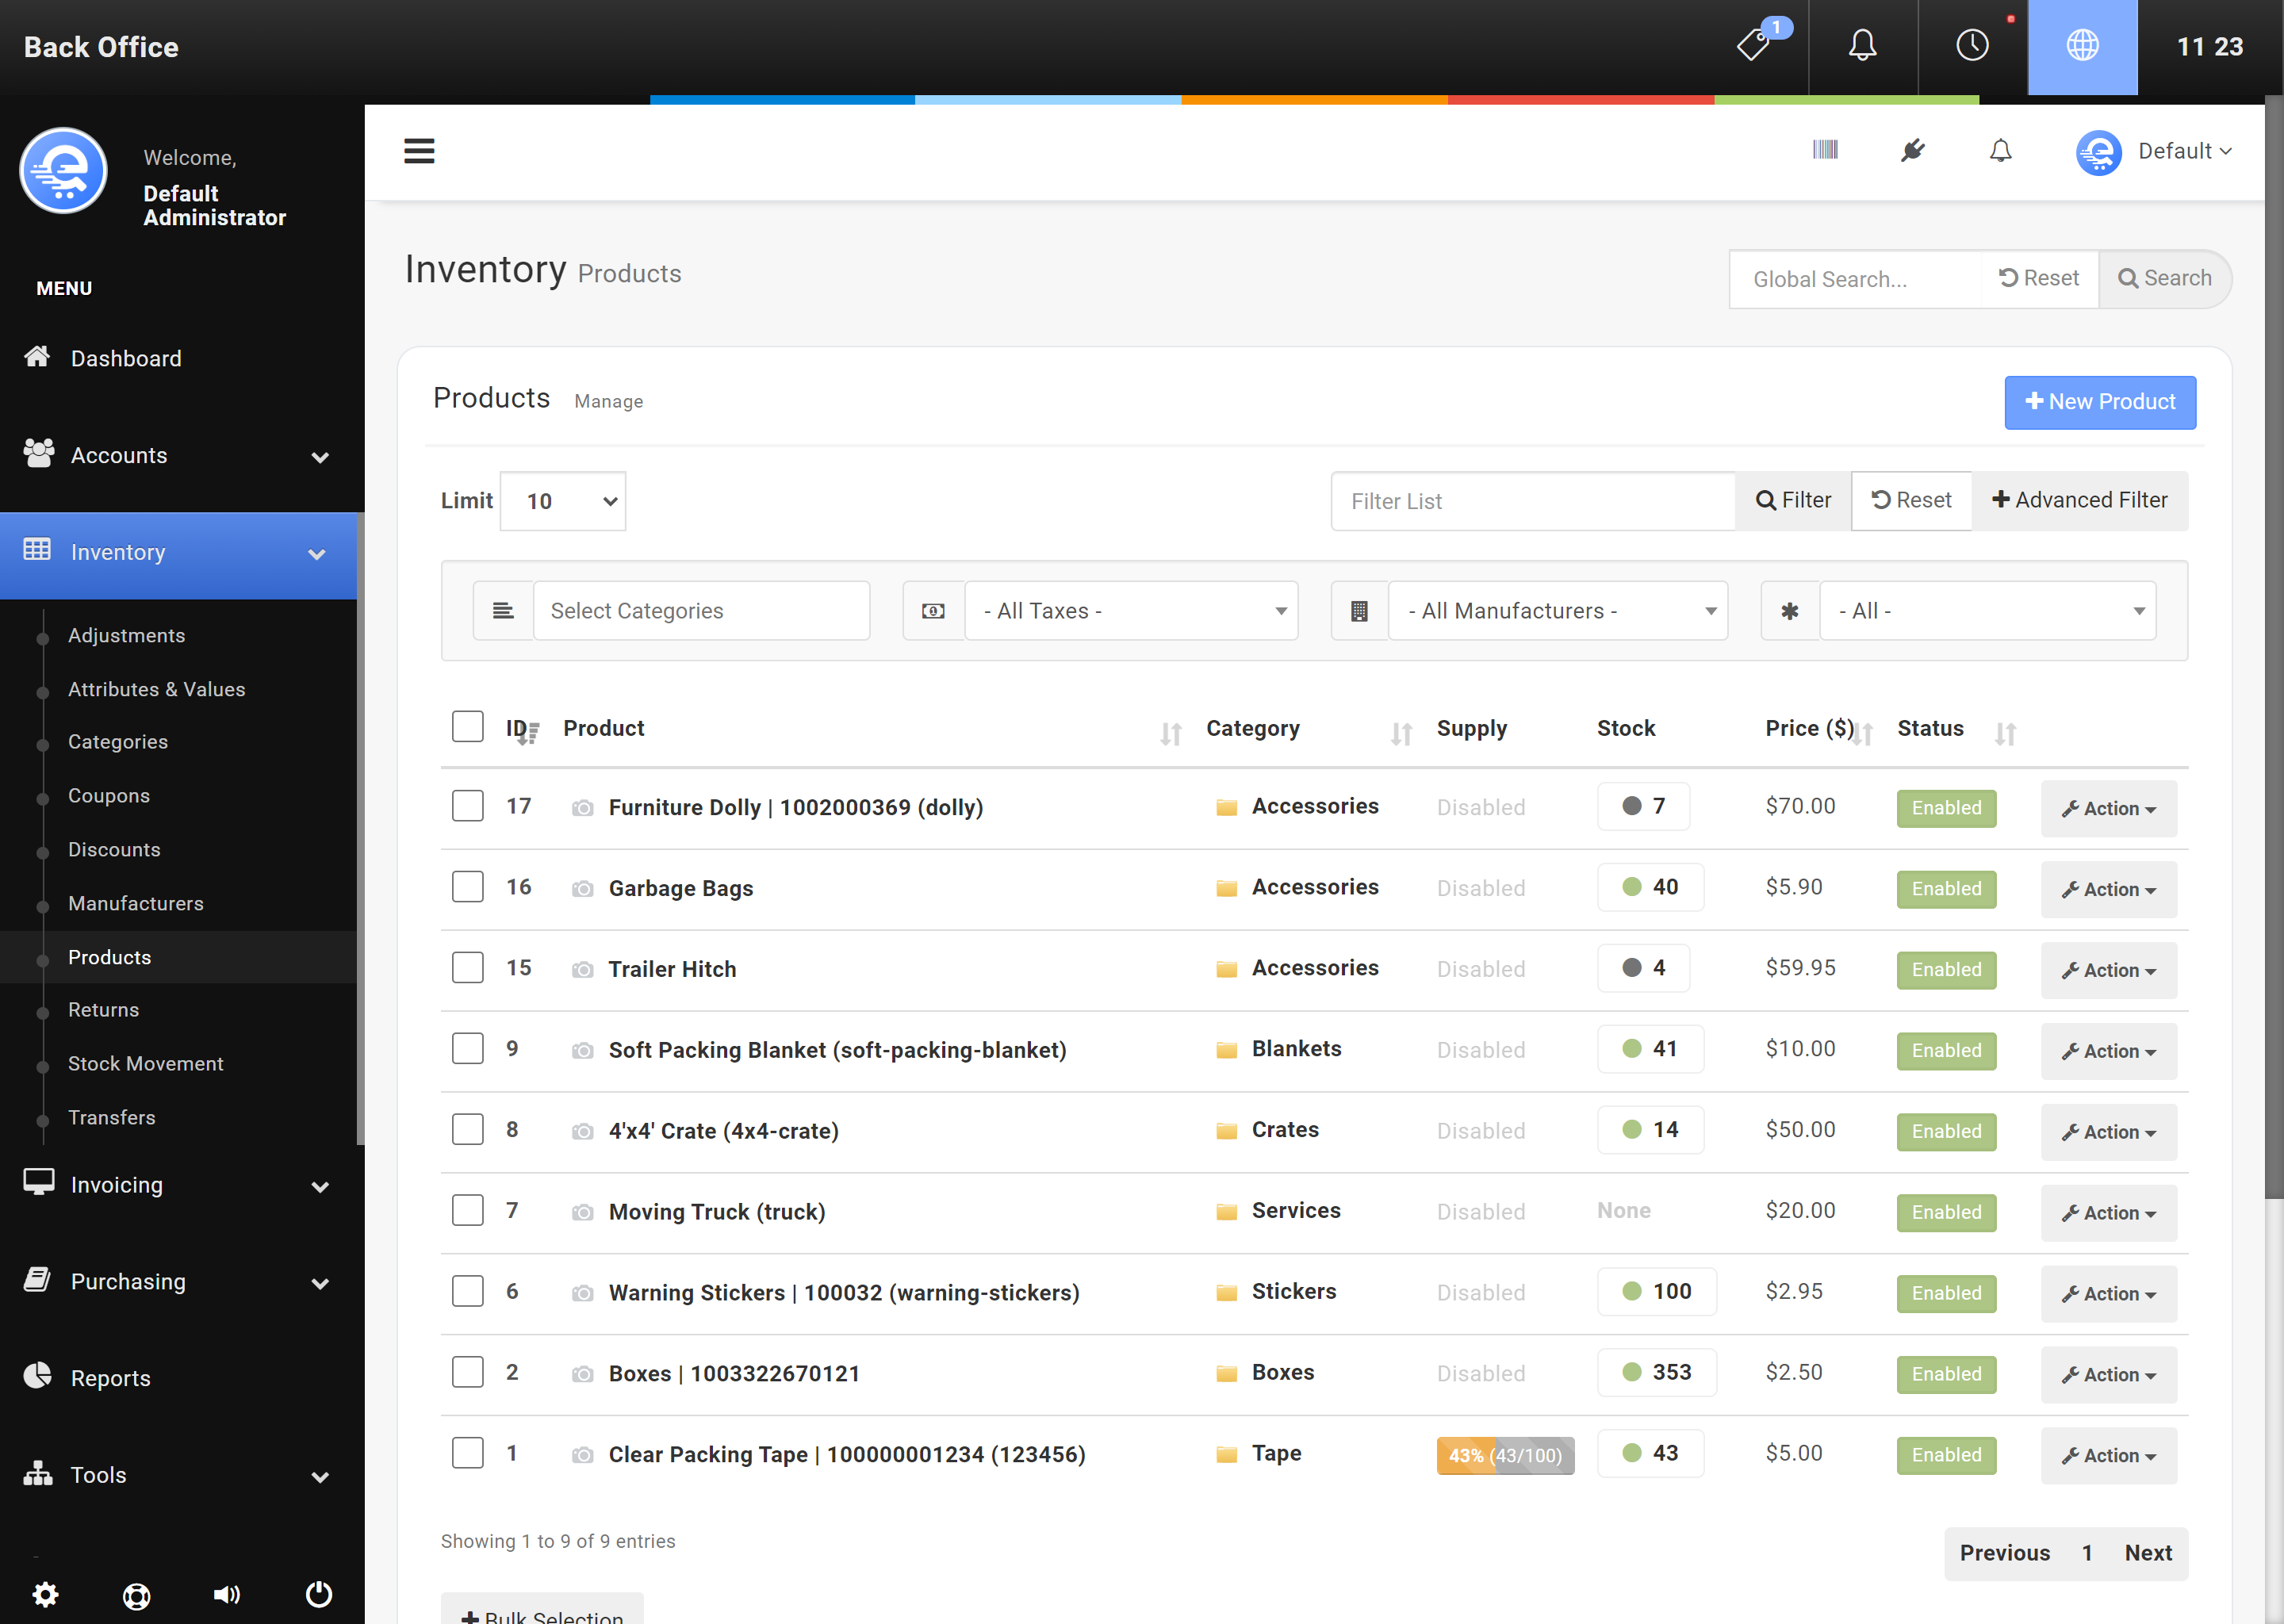
Figure A
From the Back Office, you can create New Products by going to the Inventory tab, then Products & Warehouses.
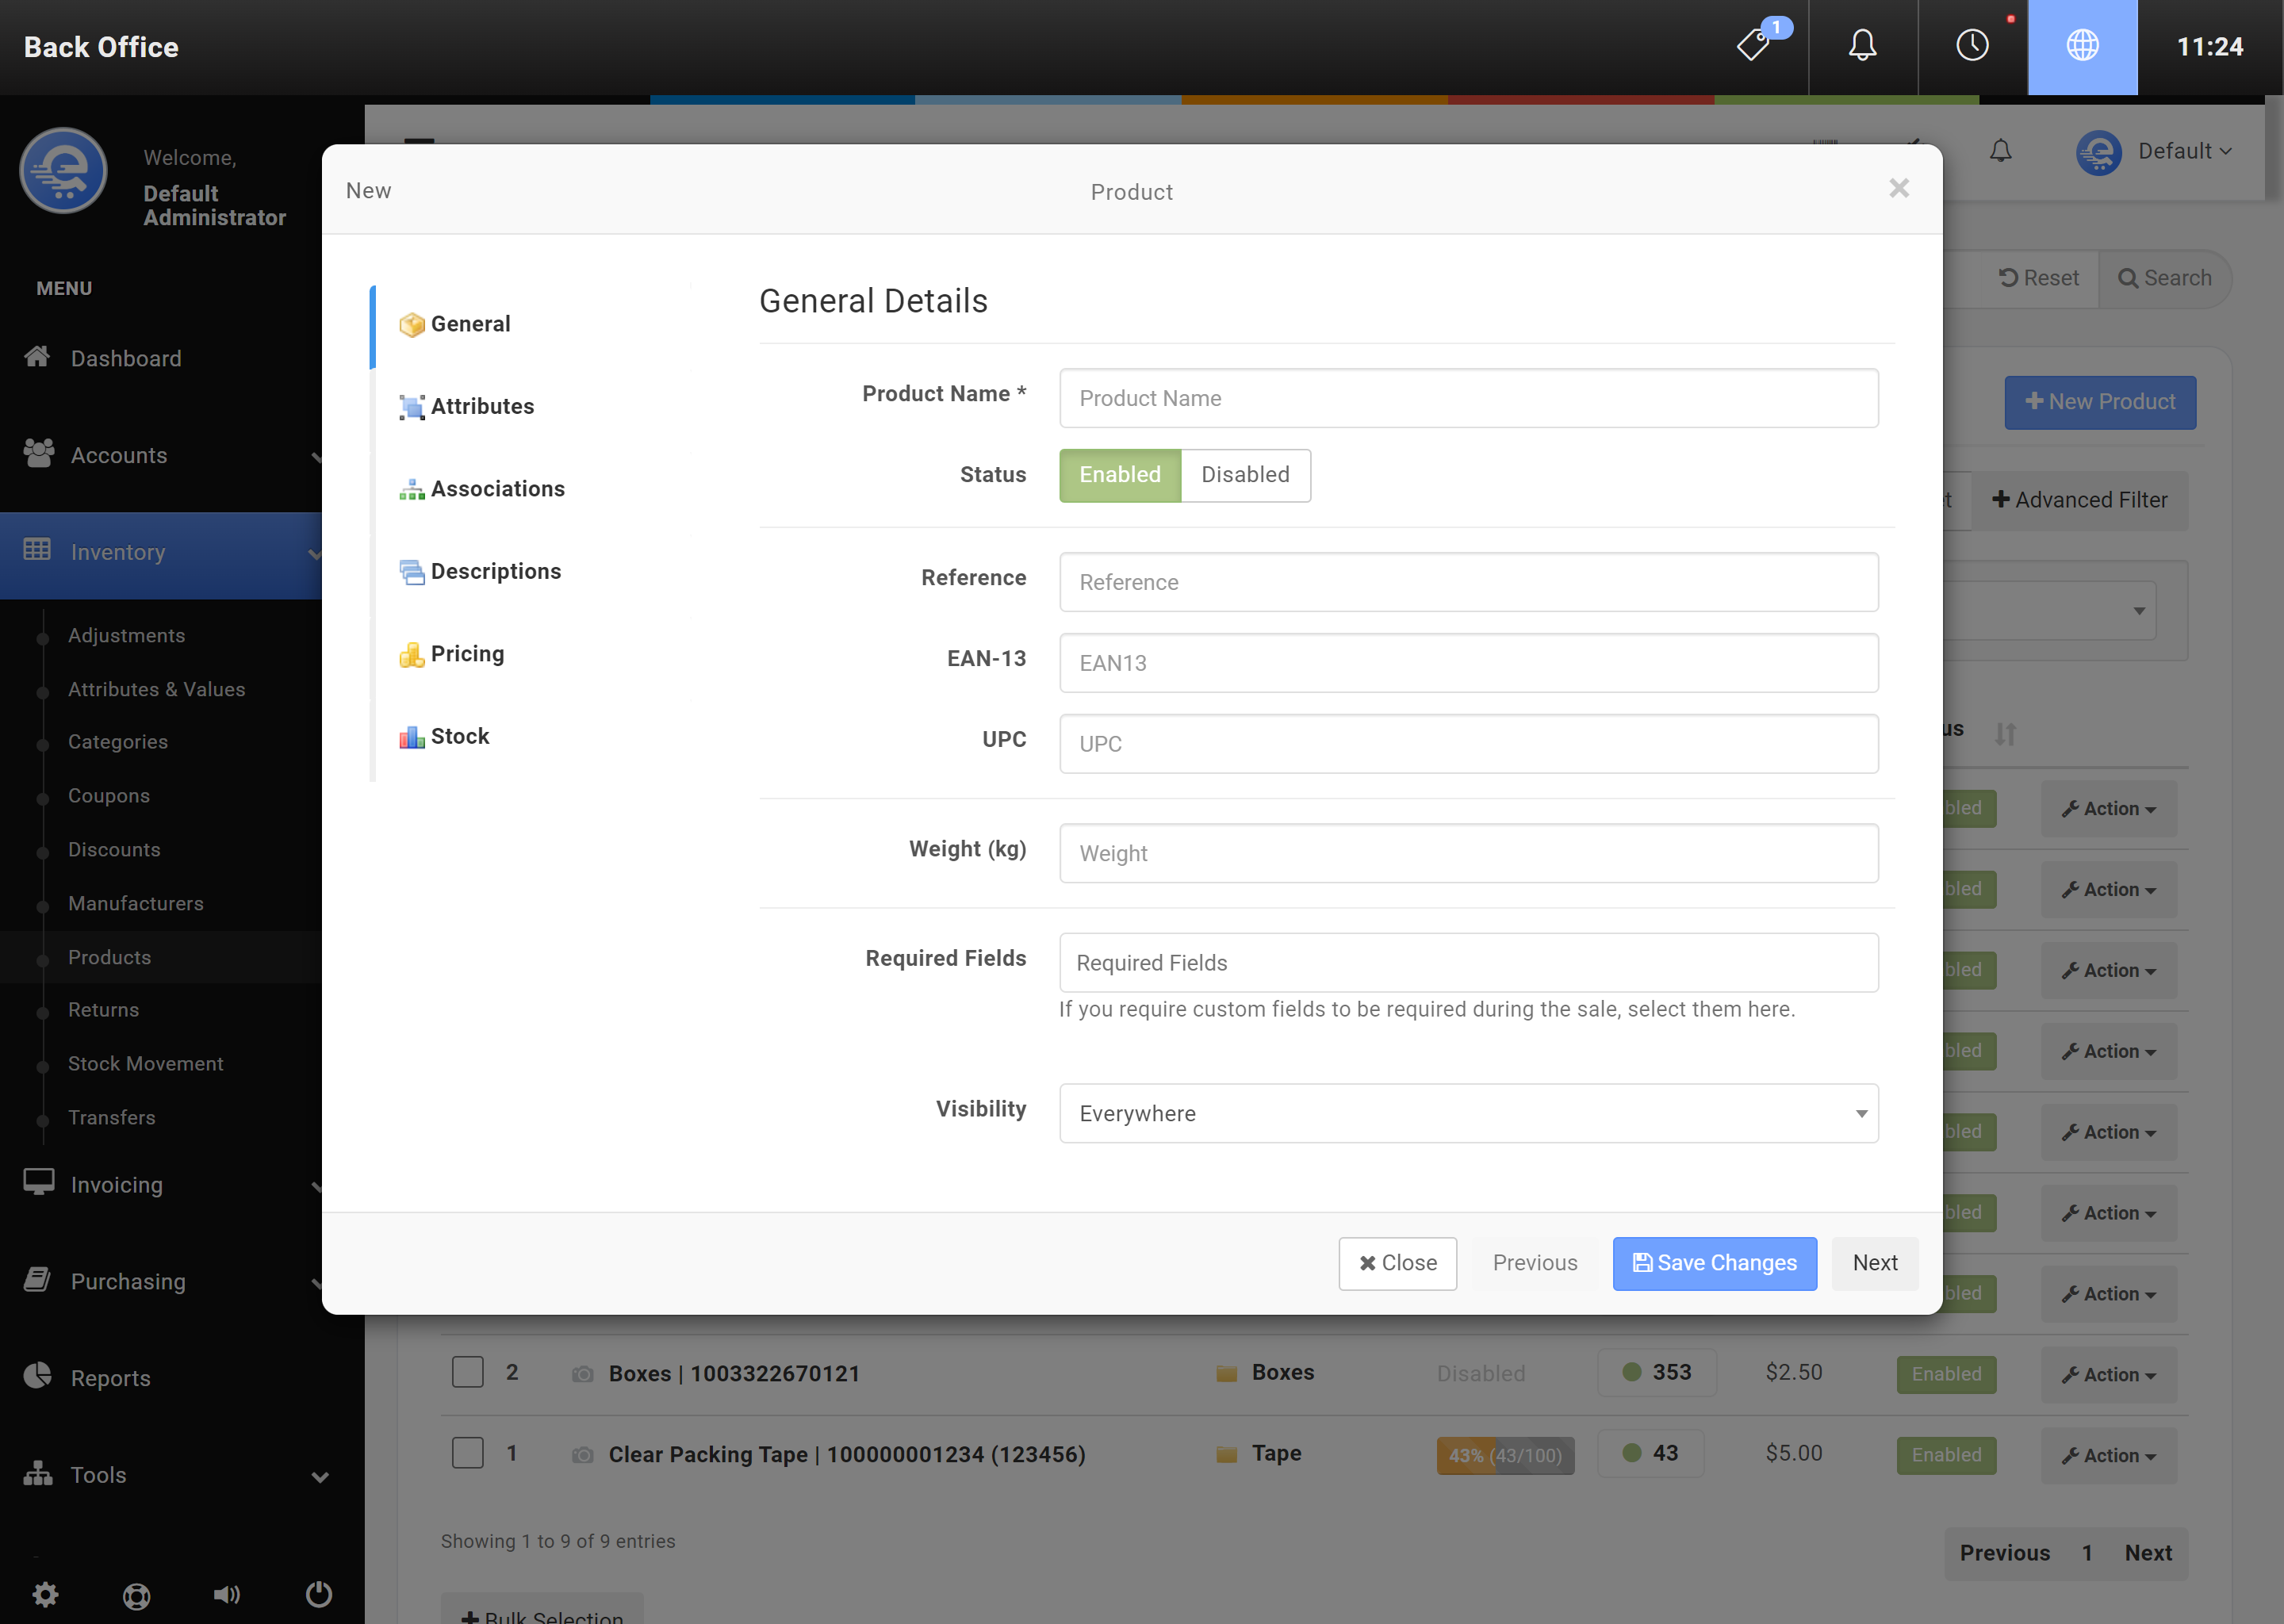
Figure B
Fill out the New Product details, and use the side left menu to add more details about your New Product. Click Save Changes when complete.
Product Attributes
Products are the top level placeholder for items you sell.
- Navigate to the Back Office area
- On the left menu, click on "Inventory", then click on "Products" (see Figure A).
- Click on "New Product"
- Fill out the new product details, use the left menu to assign various details to your product.
- Click "Save Changes" (see Figure B) when you are done entering the product information.

Figure C
From the Back Office, you can create New Products by going to the Inventory tab, then Products & Warehouses.
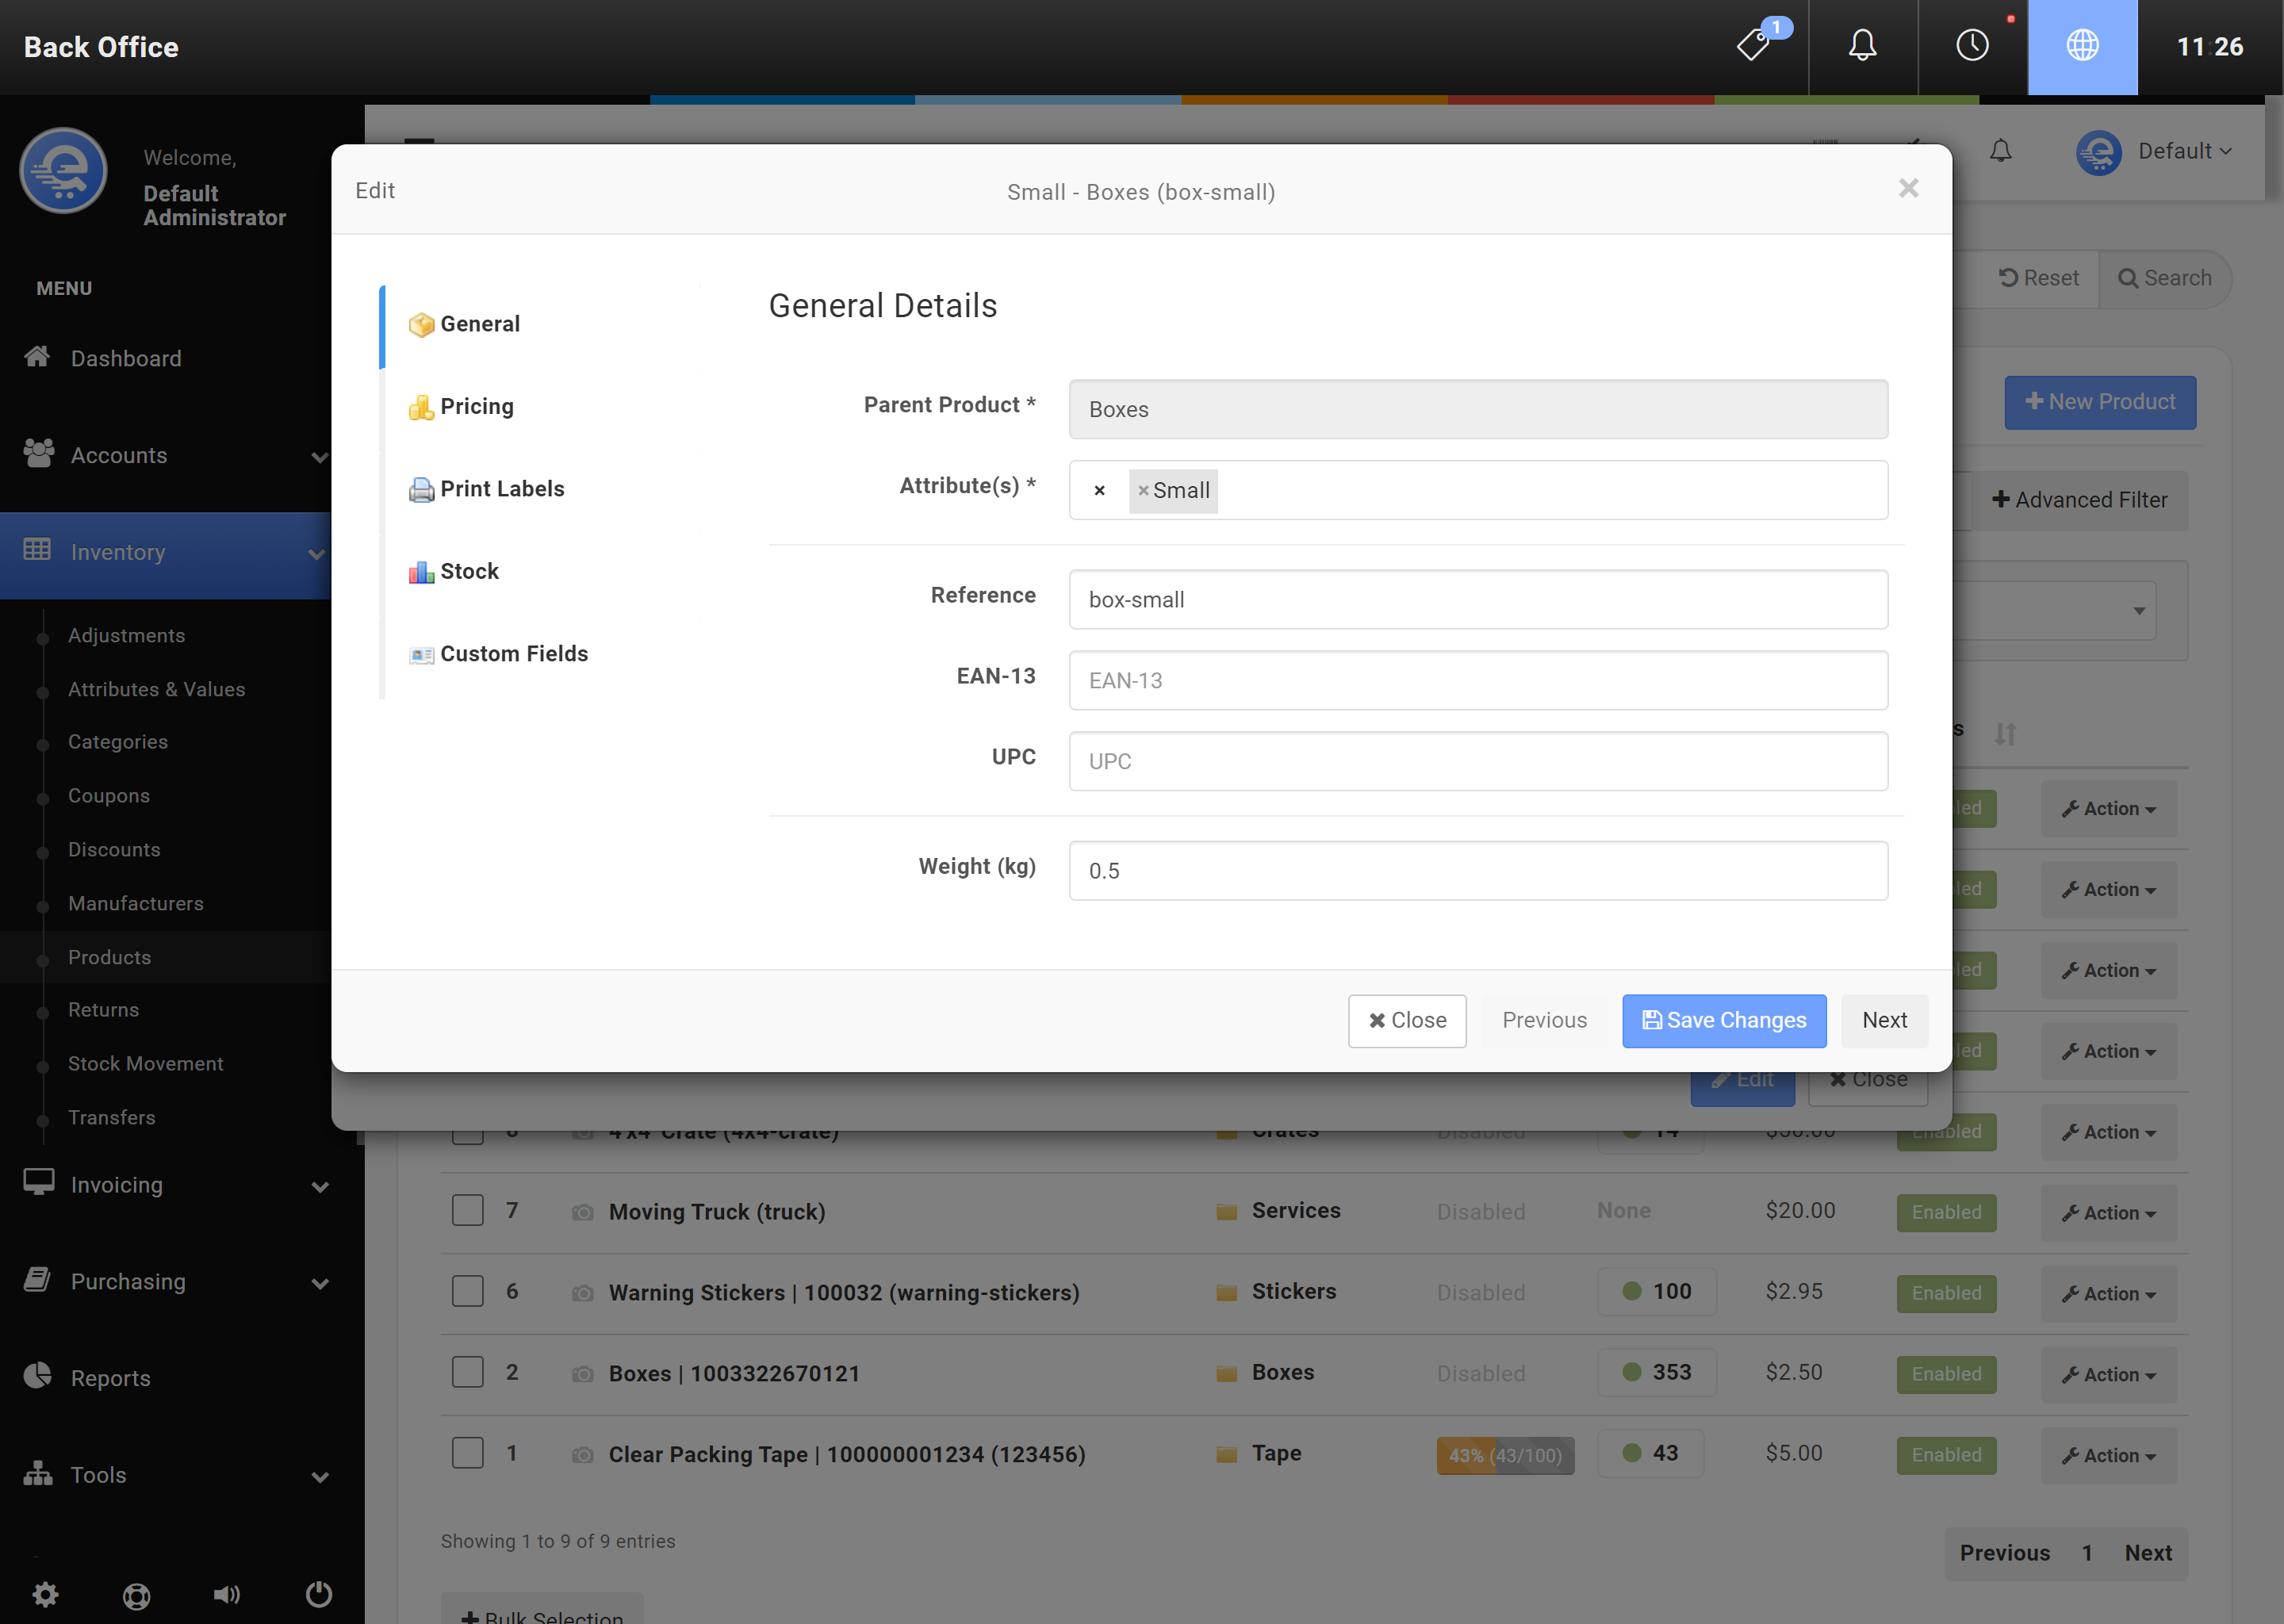
Figure D
Fill out the New Product details, and use the side left menu to add more details about your New Product. Click Save Changes when complete.
Warehouses
Warehouses can also be considered a "Store". If you have multiple locations (stores or warehouses), each location should be added as a Warehouse. Each Product in eQuate has inventory associated with a Warehouse.
- Navigate to the eQuate Back Office
- On the left navigation bar, click "Settings" select "Inventory", then click "Warehouses" (see Figure A).
- Click on the top right button labelled "Add Warehouse".
- Fill out the Warehouse details, including Address information.
- Click "Save Changes" when complete (see Figure B).
- Navigate to the eQuate Back Office
- On the left navigation bar, click "Settings" select "Inventory", then click "Warehouses" (see Figure A).
- Click on the top right button labelled "Add Warehouse".
- Fill out the Warehouse details, including Address information.
- Click "Save Changes" when complete (see Figure B).
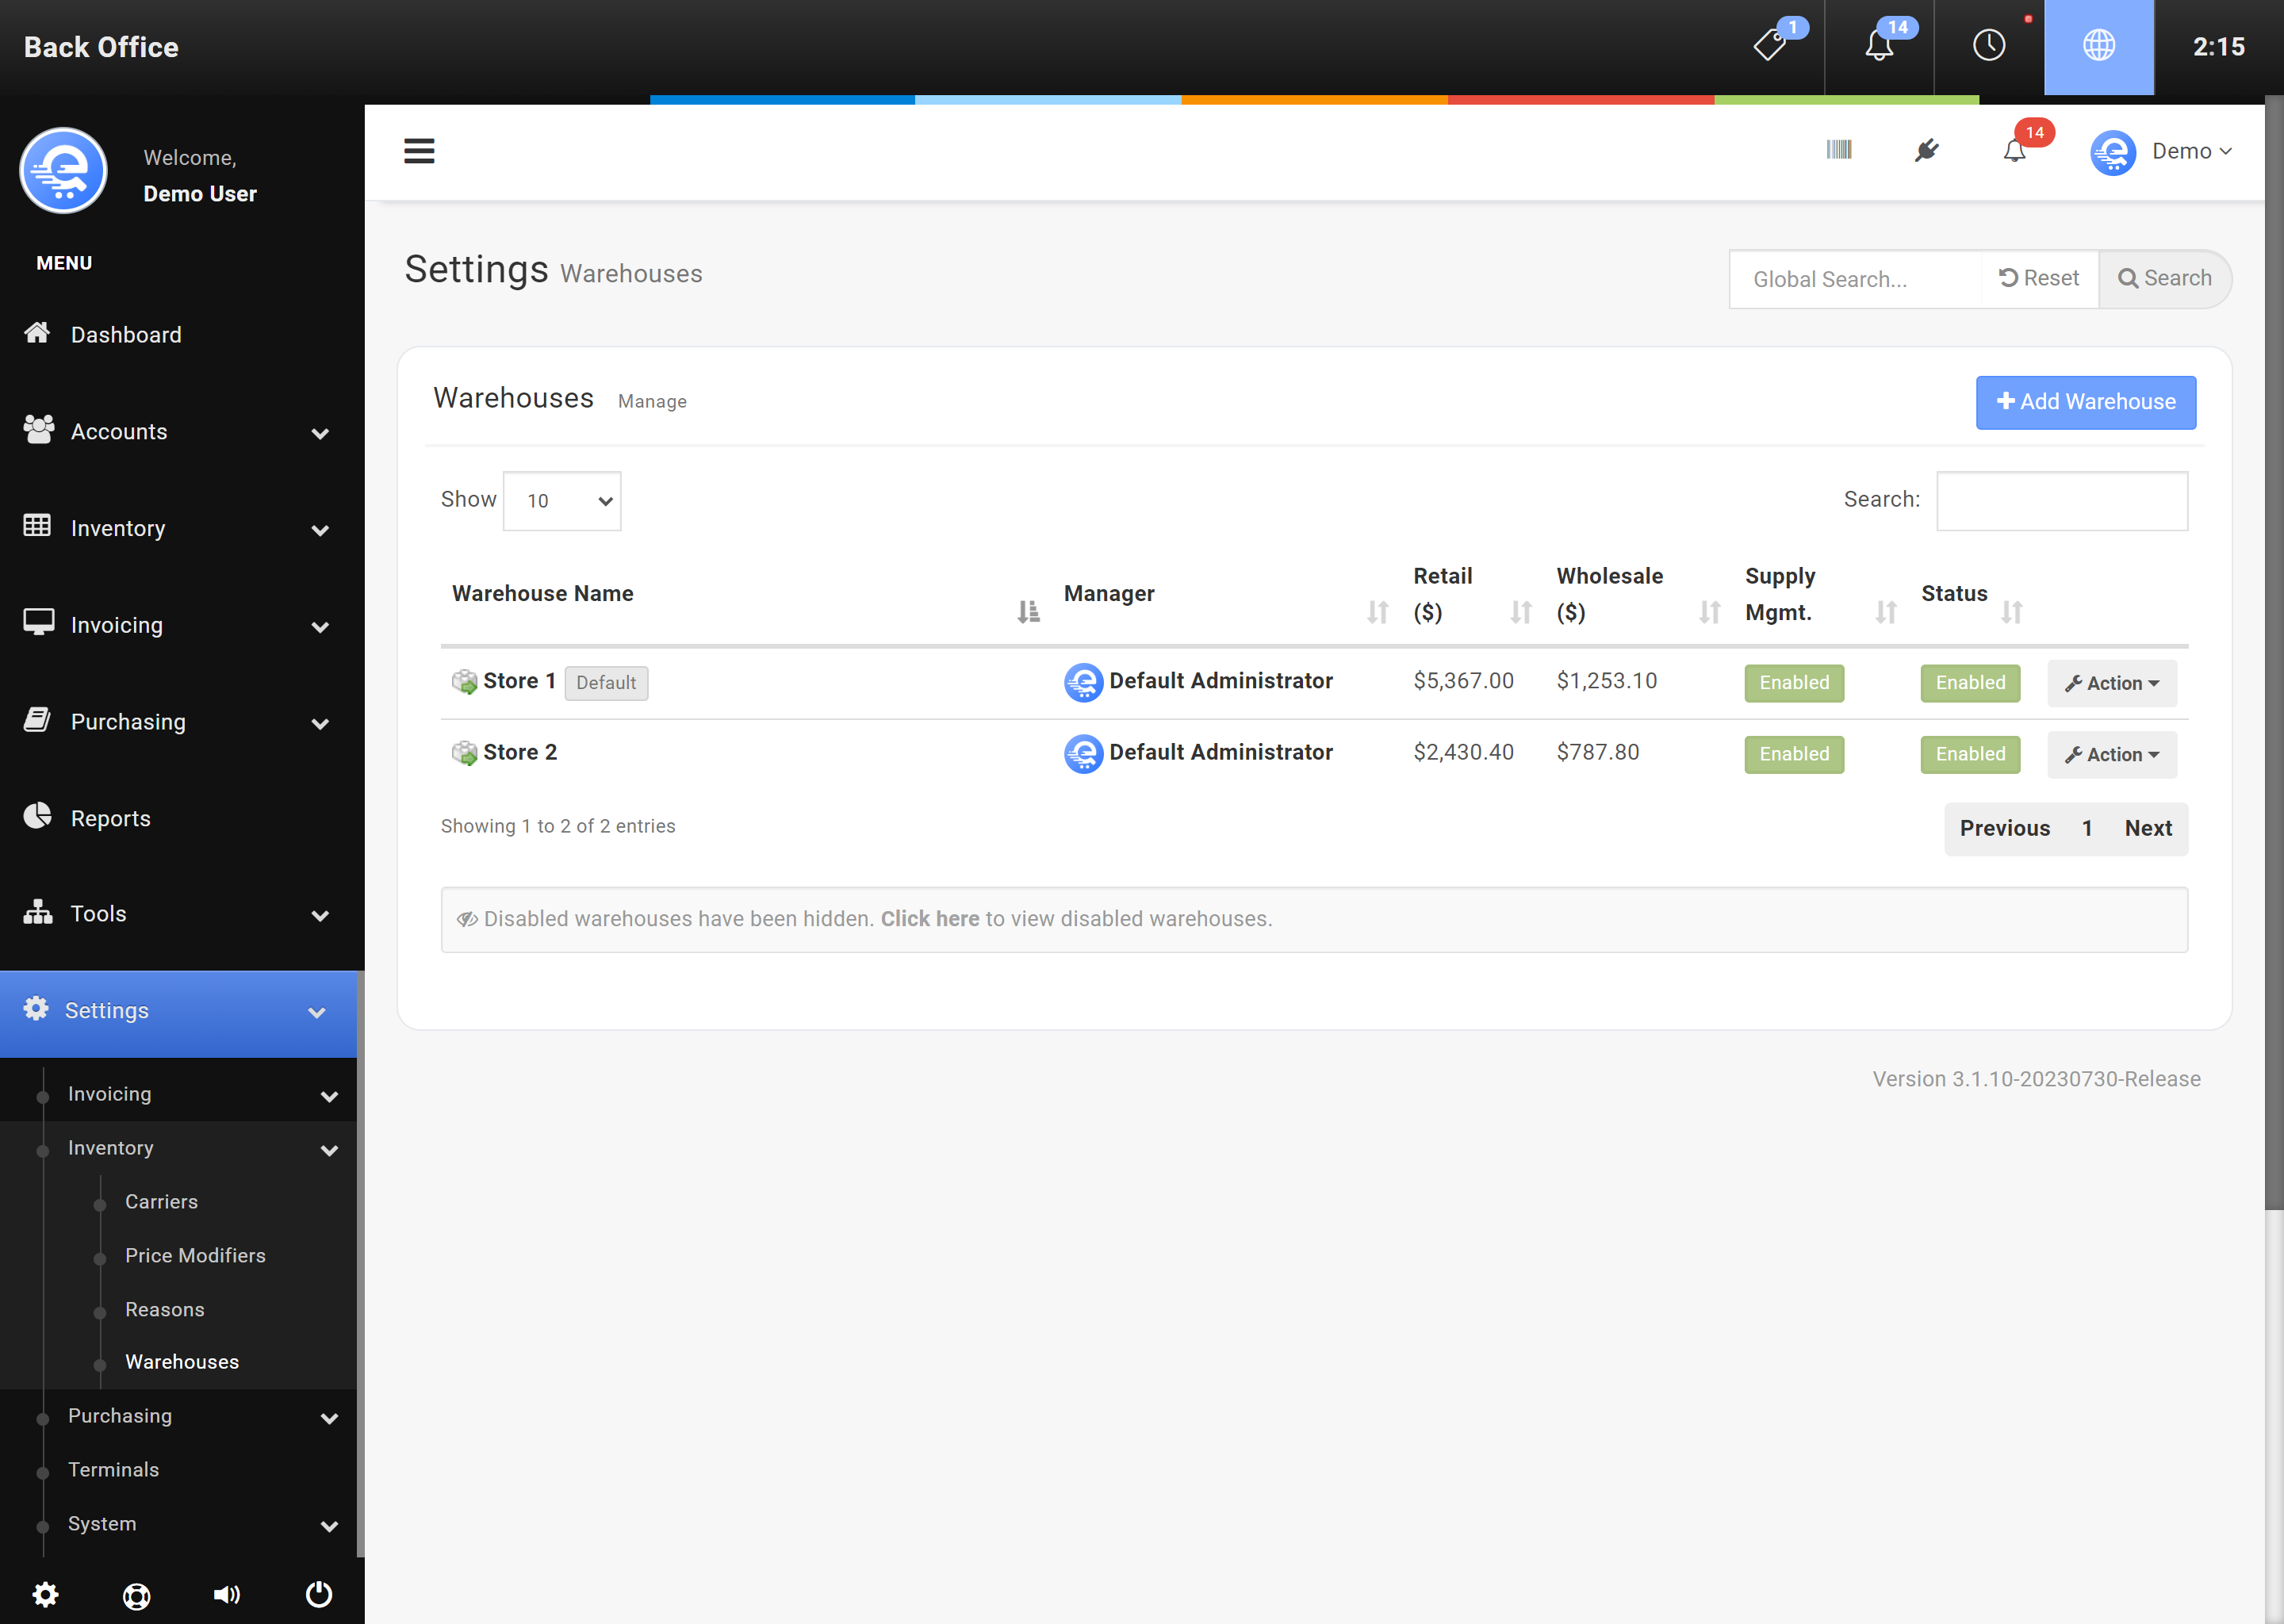
Figure A
Use the Back Office to find the Customer entry.
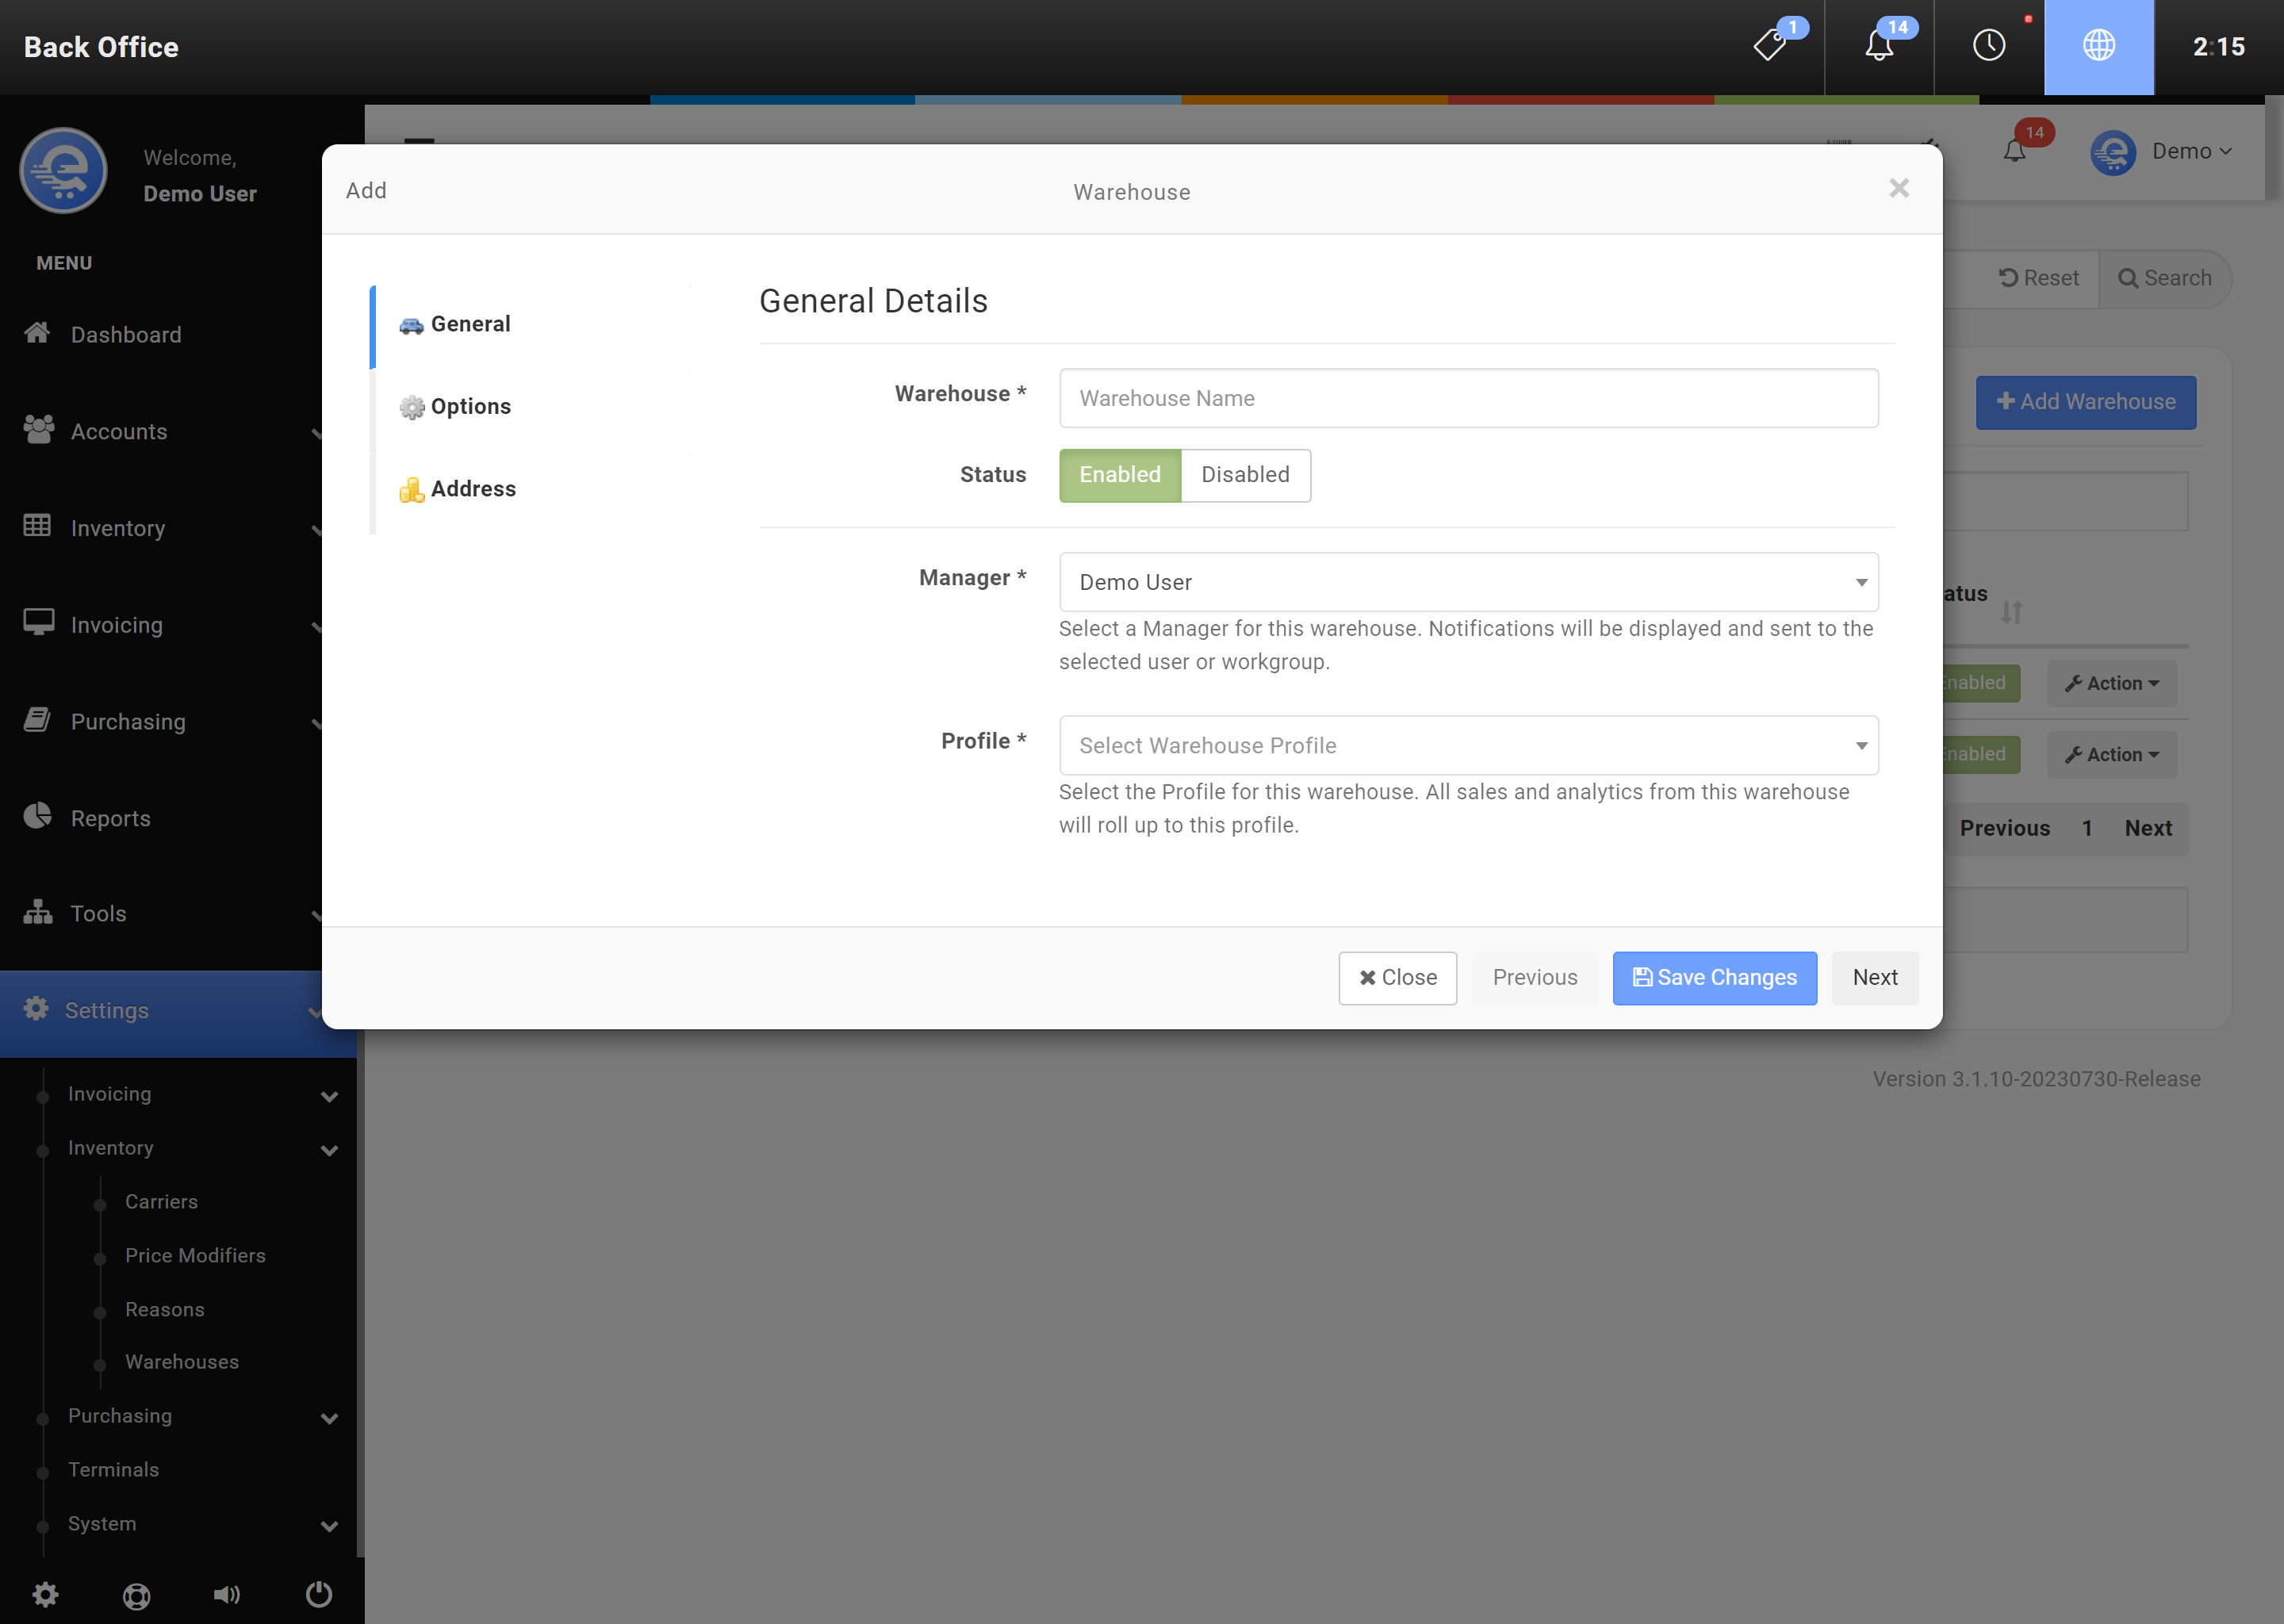
Figure B
Use the left "Credit" menu to edit the New Limit for the Customer. Press "Save Changes" when complete.
Refunds
After a successful refund, the refund will still need to be validated. Validating your refunds allows you to return the stock to inventory, or discard the product if it is broken or not able to be sold again. You can manage your refunds in the Back Office area. Refunds do not automatically return to stock.
When returning stock to inventory from a Refund, it can take a few minutes to appear on other Terminals.
- Navigate to the Back Office area
- On the left menu, click on "Inventory", then click on "Refunds" (see Figure A).
- Find the refund in the results table, and click "Action", then "Edit".
- Select the "Status" of the return; "Complete" means the refund has been returned to inventory, or discarded. "Held" allows you to revisit the refund at a later date (for example, if a Manufacturer sends you a replacement, you can return it to stock at a later date)
- Click "Save Changes" (see Figure B) when complete.

Figure A
Create or modify Coupons in the Back Office.
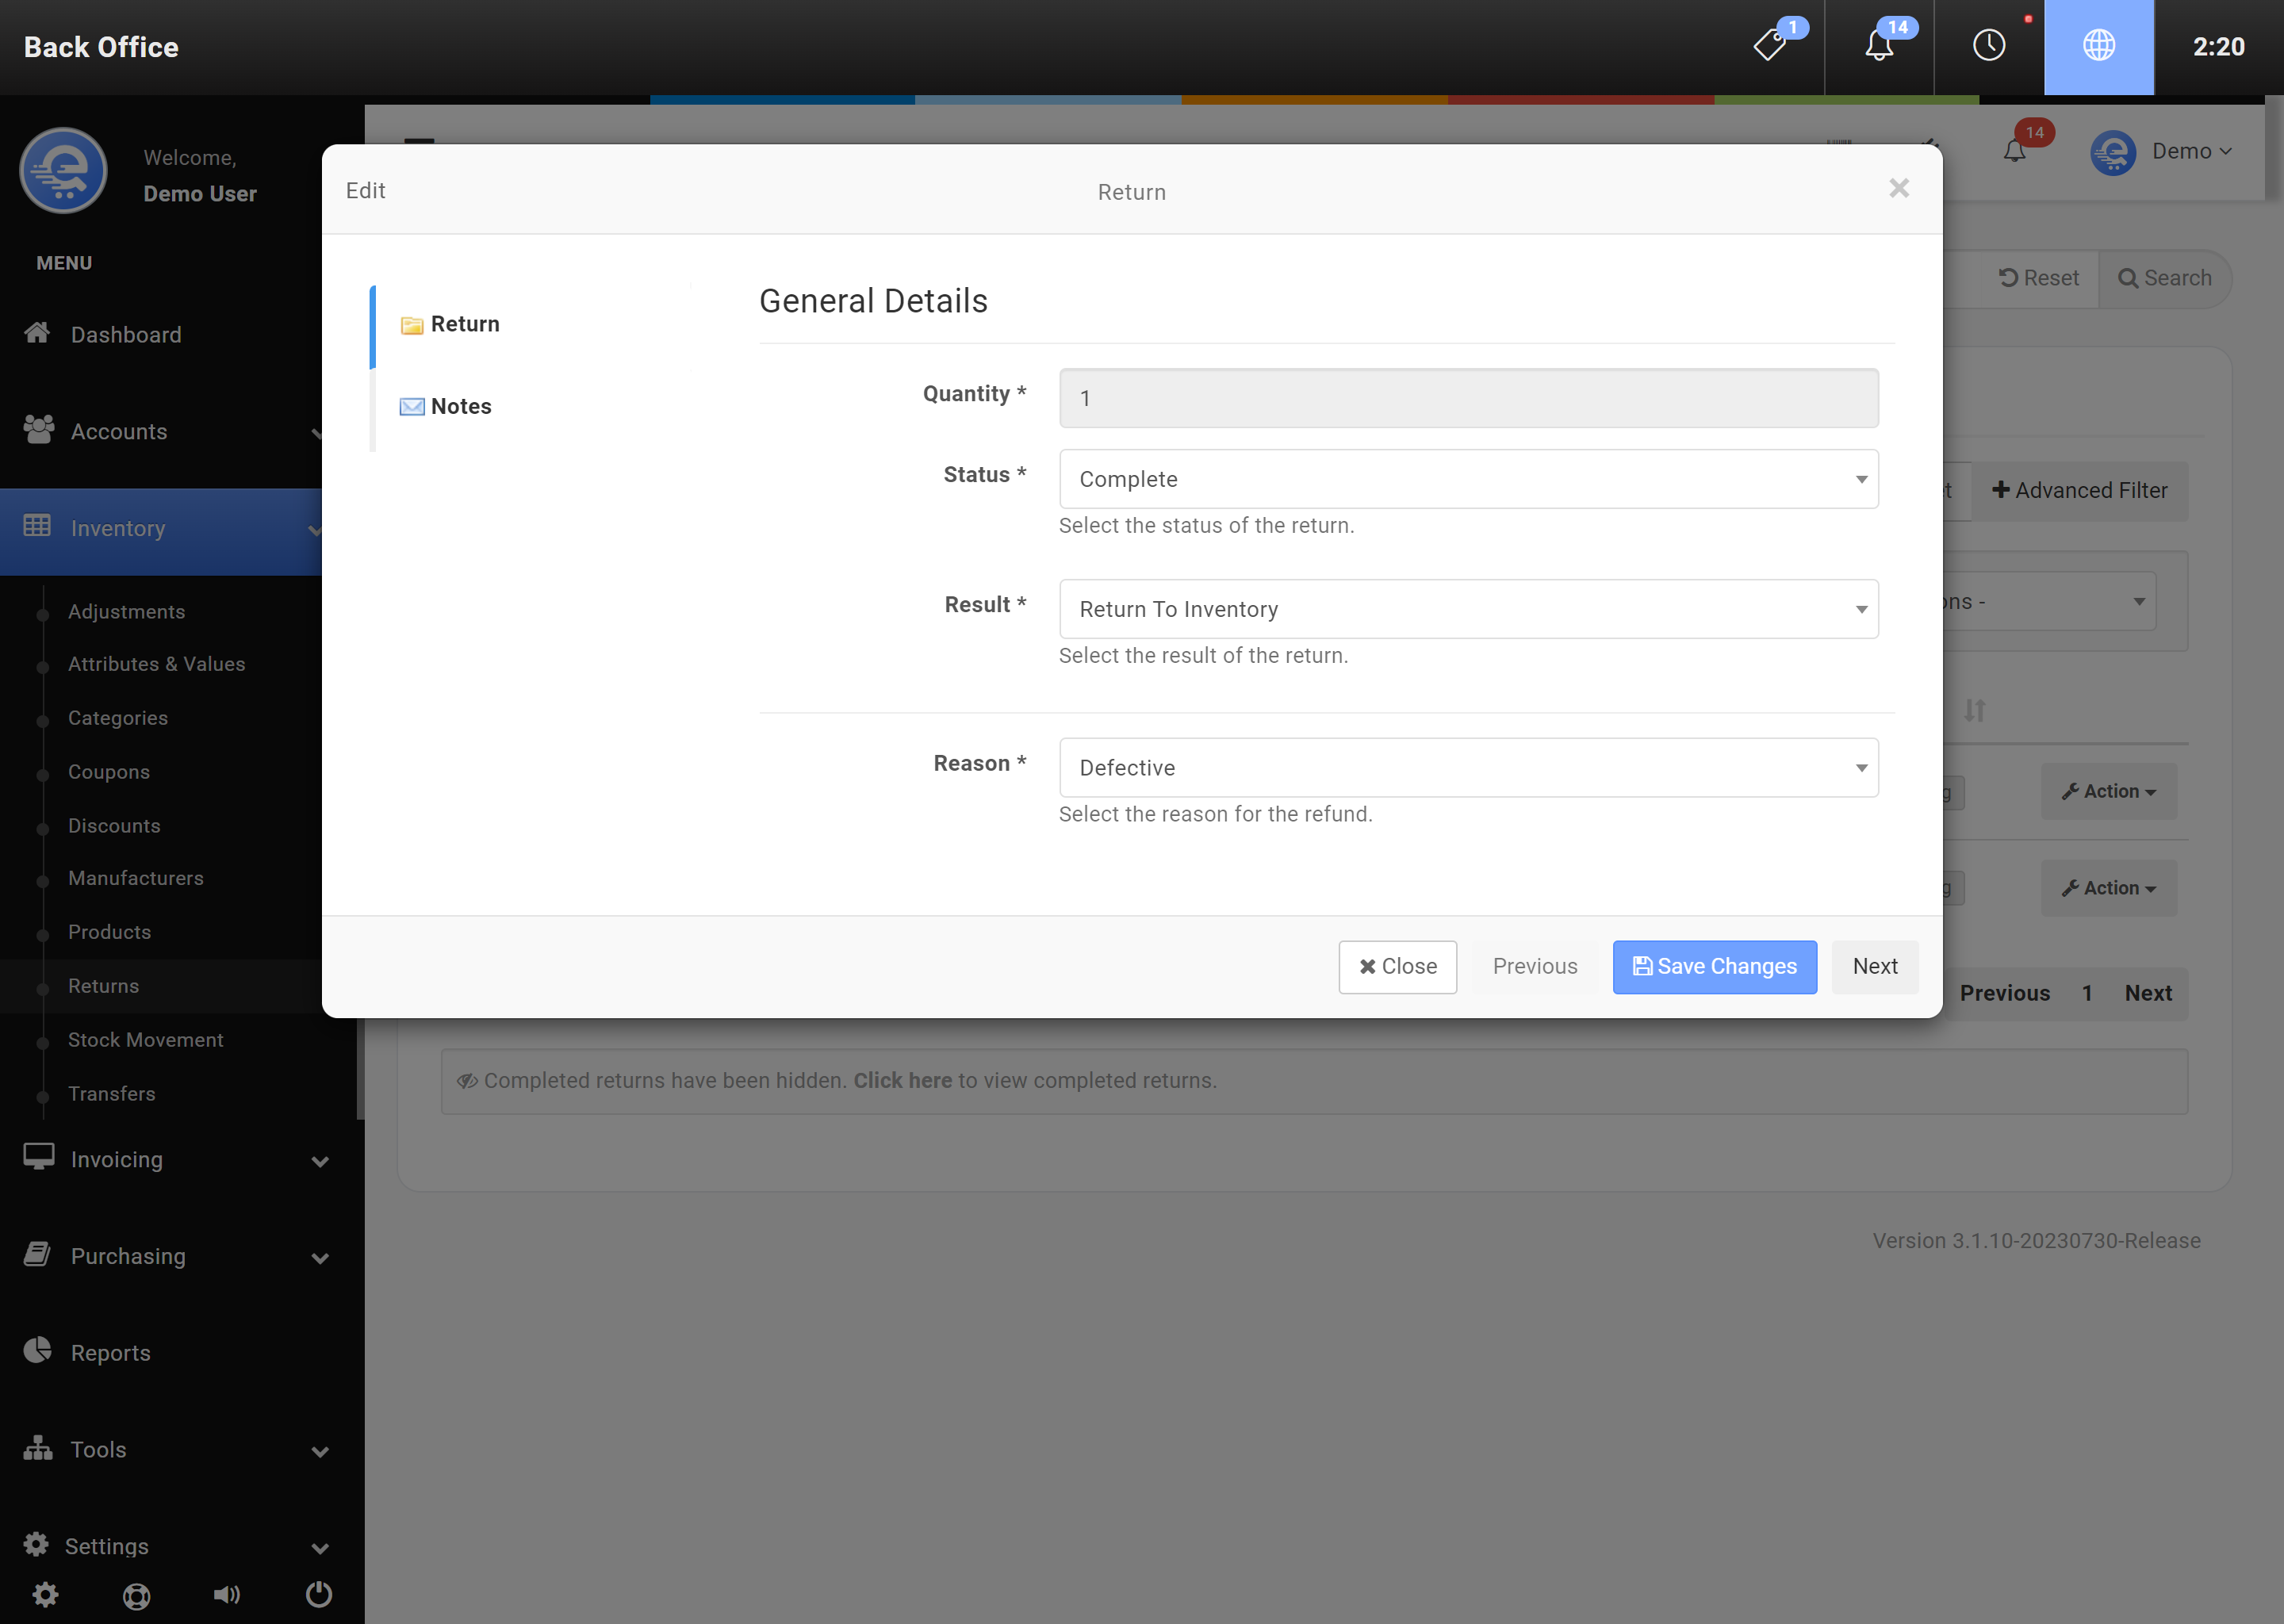
Figure B
Fill out the New Coupon details and click Save Changes when complete.
Transfers
If you have multiple warehouses, you can transfer inventory between them. You can create a Transfer, with multiple products added from one source, going to multiple (or a single) destination. Transfers are not included as an adjustment. Transfers can also be completed using the Quick Transfer tool. The Quick Transfer tool allows you to transfer single products between warehouses.
Transfers can take a few minutes to appear on other Terminals.
Transfers
A standard Transfer allows you to create a trackable list of multiple items being transferred. You can only transfer out from one source, but you can specify multiple destinations if you require.
- Navigate to the Back Office area
- On the left menu, click on "Inventory", then click on "Transfers & Adjustments" (see Figure A).
- Click on button labelled "New Transfer".
- Fill out the details of the transfer, including the Source where the product inventory should be deducted from.
- Specify the items you want to transfer in the Items tab, and set the destination for each item.
- Specify the status of the transfer:
- Pending = No inventory modified
- Sent = Inventory deducted from source warehouse
- When you are complete, click "Save Changes" (see Figure B).
- Navigate to the Back Office area
- On the left menu, click on "Inventory", then click on "Transfers" (see Figure A).
- Locate the Transfer you wish to receive in the table, then click "Action", then "View".
- Receive each item into the desired warehouse by clicking on the Receive button on the right column of the table.
- When a Transfer is completely received, the status will automatically change to "Received".

Figure A
Create Transfers in the Back Office area
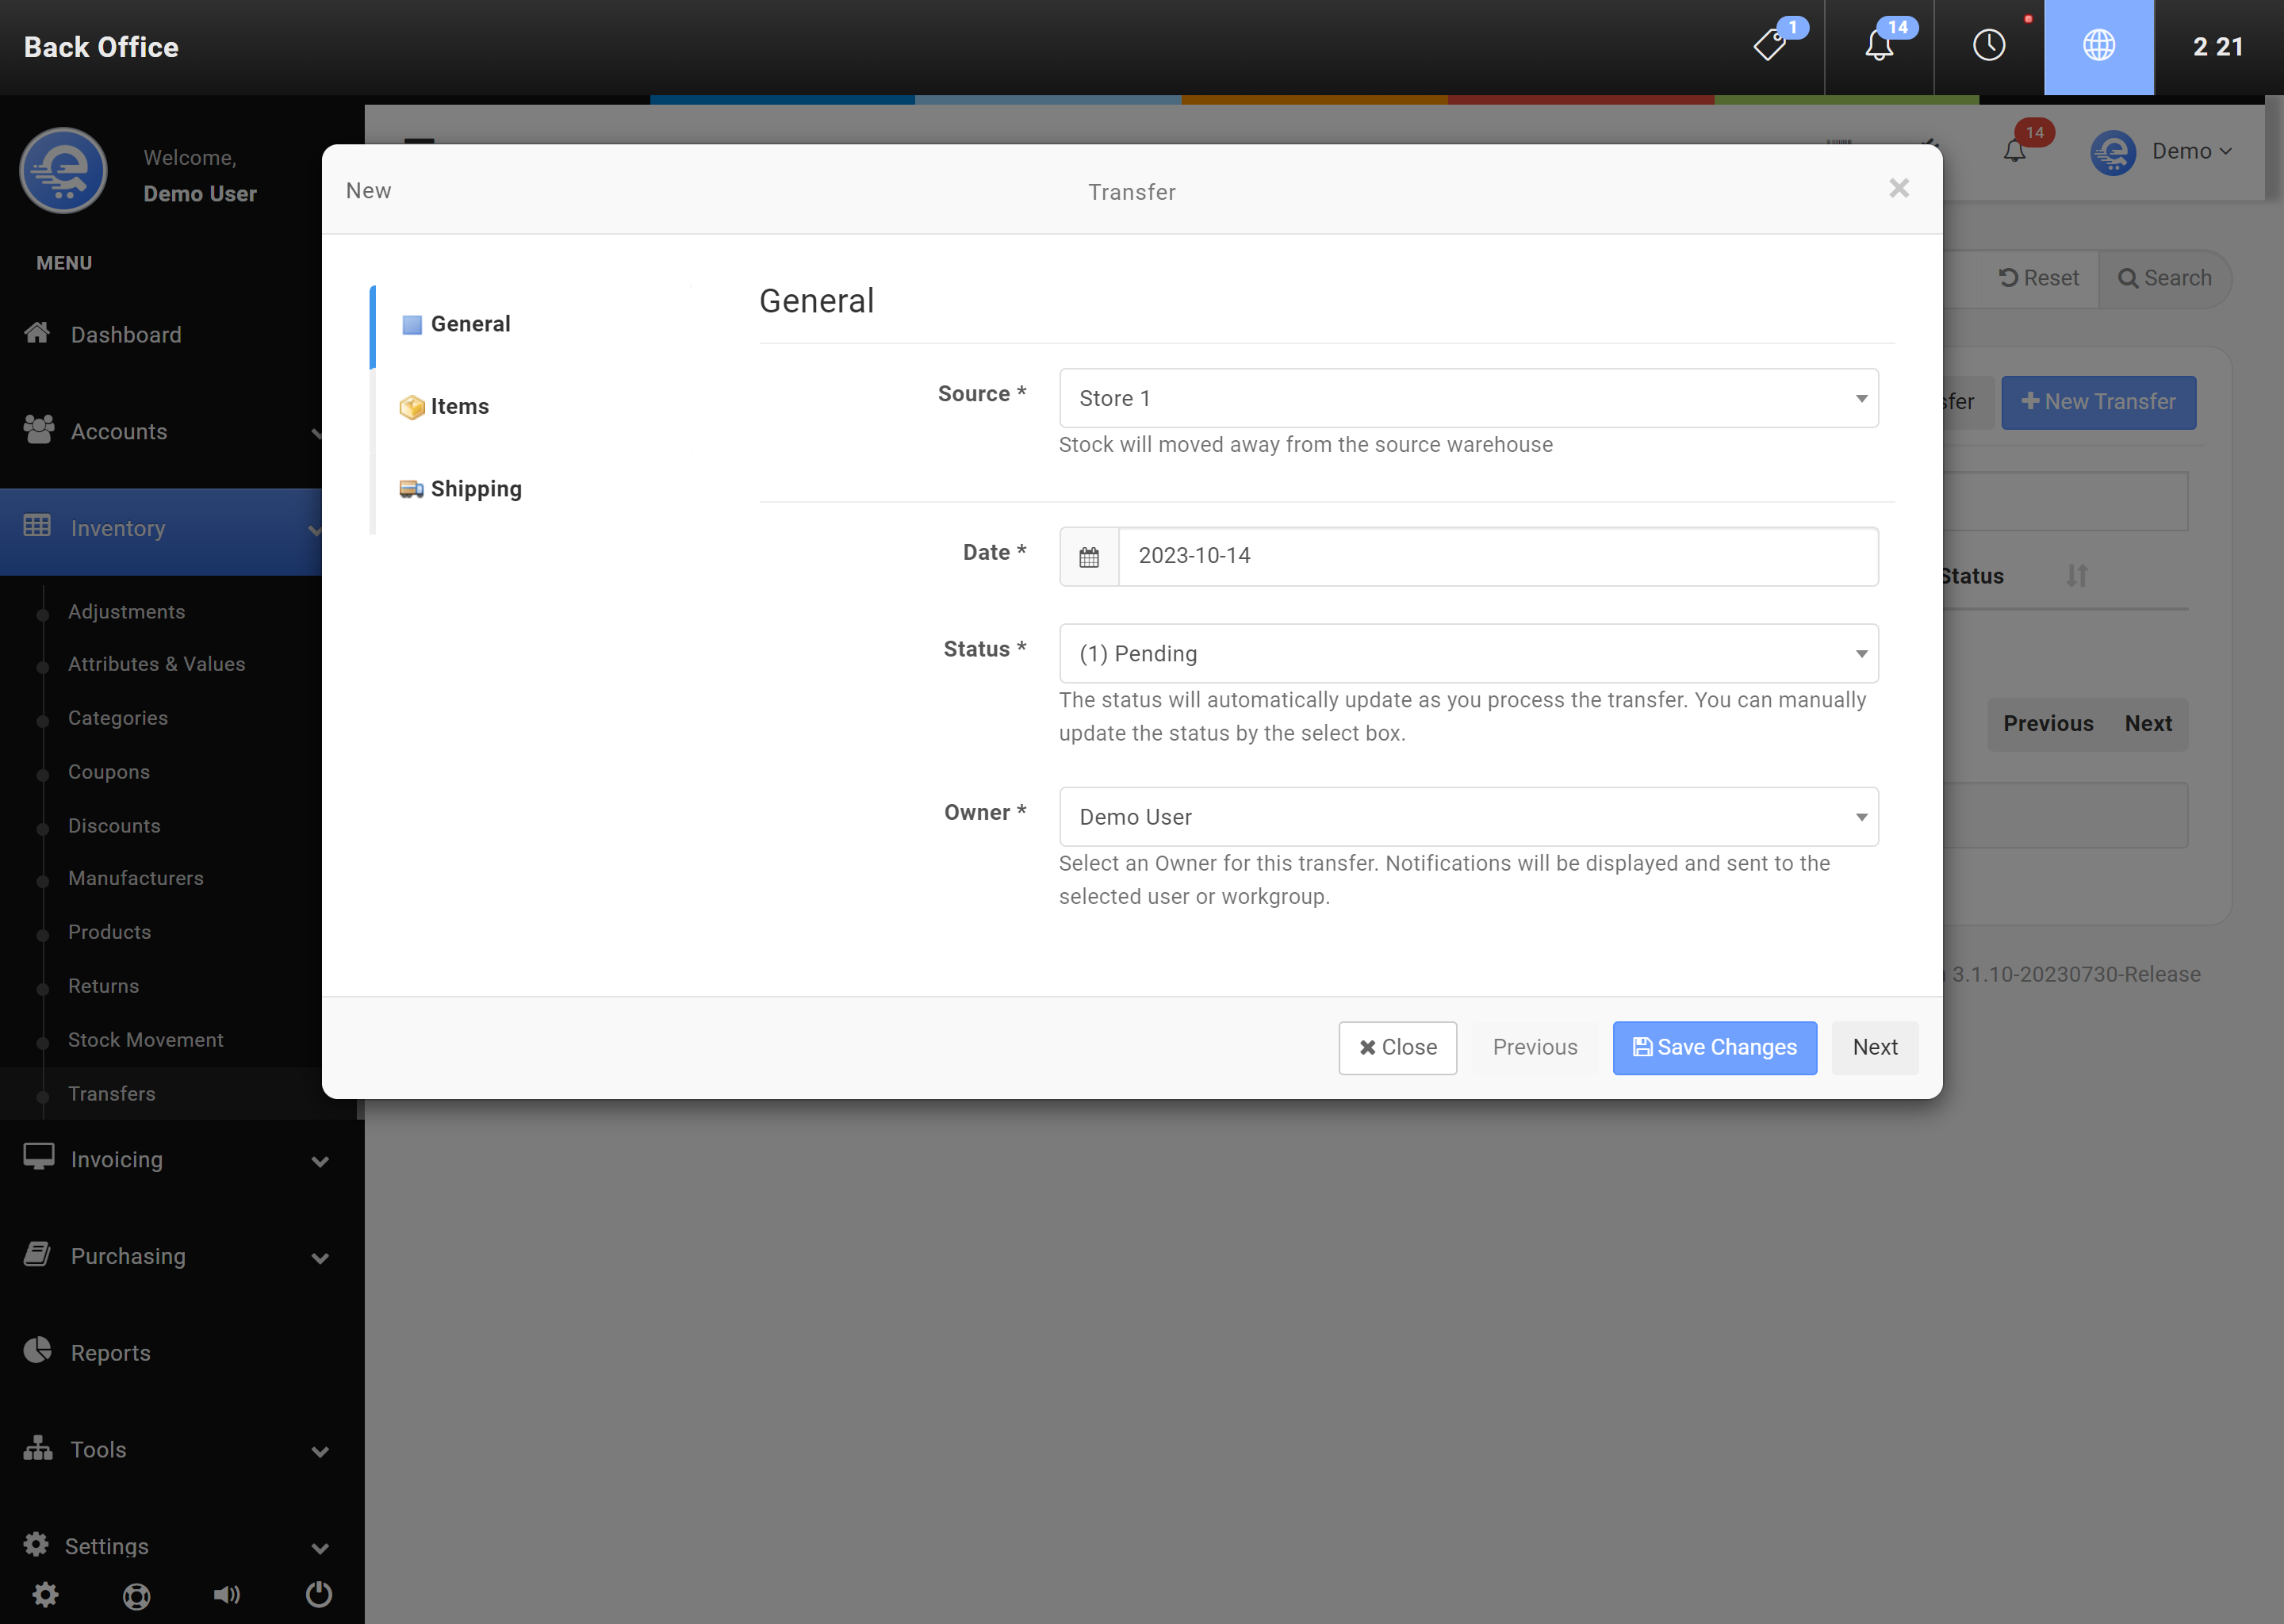
Figure B
Fill out the details of the Transfer and click Save Changes when complete.
Quick Transfers
Transfers can be done one at a time using the Quick Transfer tool.
- Navigate to the Back Office area
- On the left menu, click on "Inventory", then click on "Transfers" (see Figure C).
- Click on button labelled "Quick Transfer".
- Search for the product you want to transfer.
- Select the Source and the Destination and input desired Quantity you want to transfer.
- Click "Save Changes" (see Figure D) when complete.

Figure C
Access Quick Transfers in the Back Office area
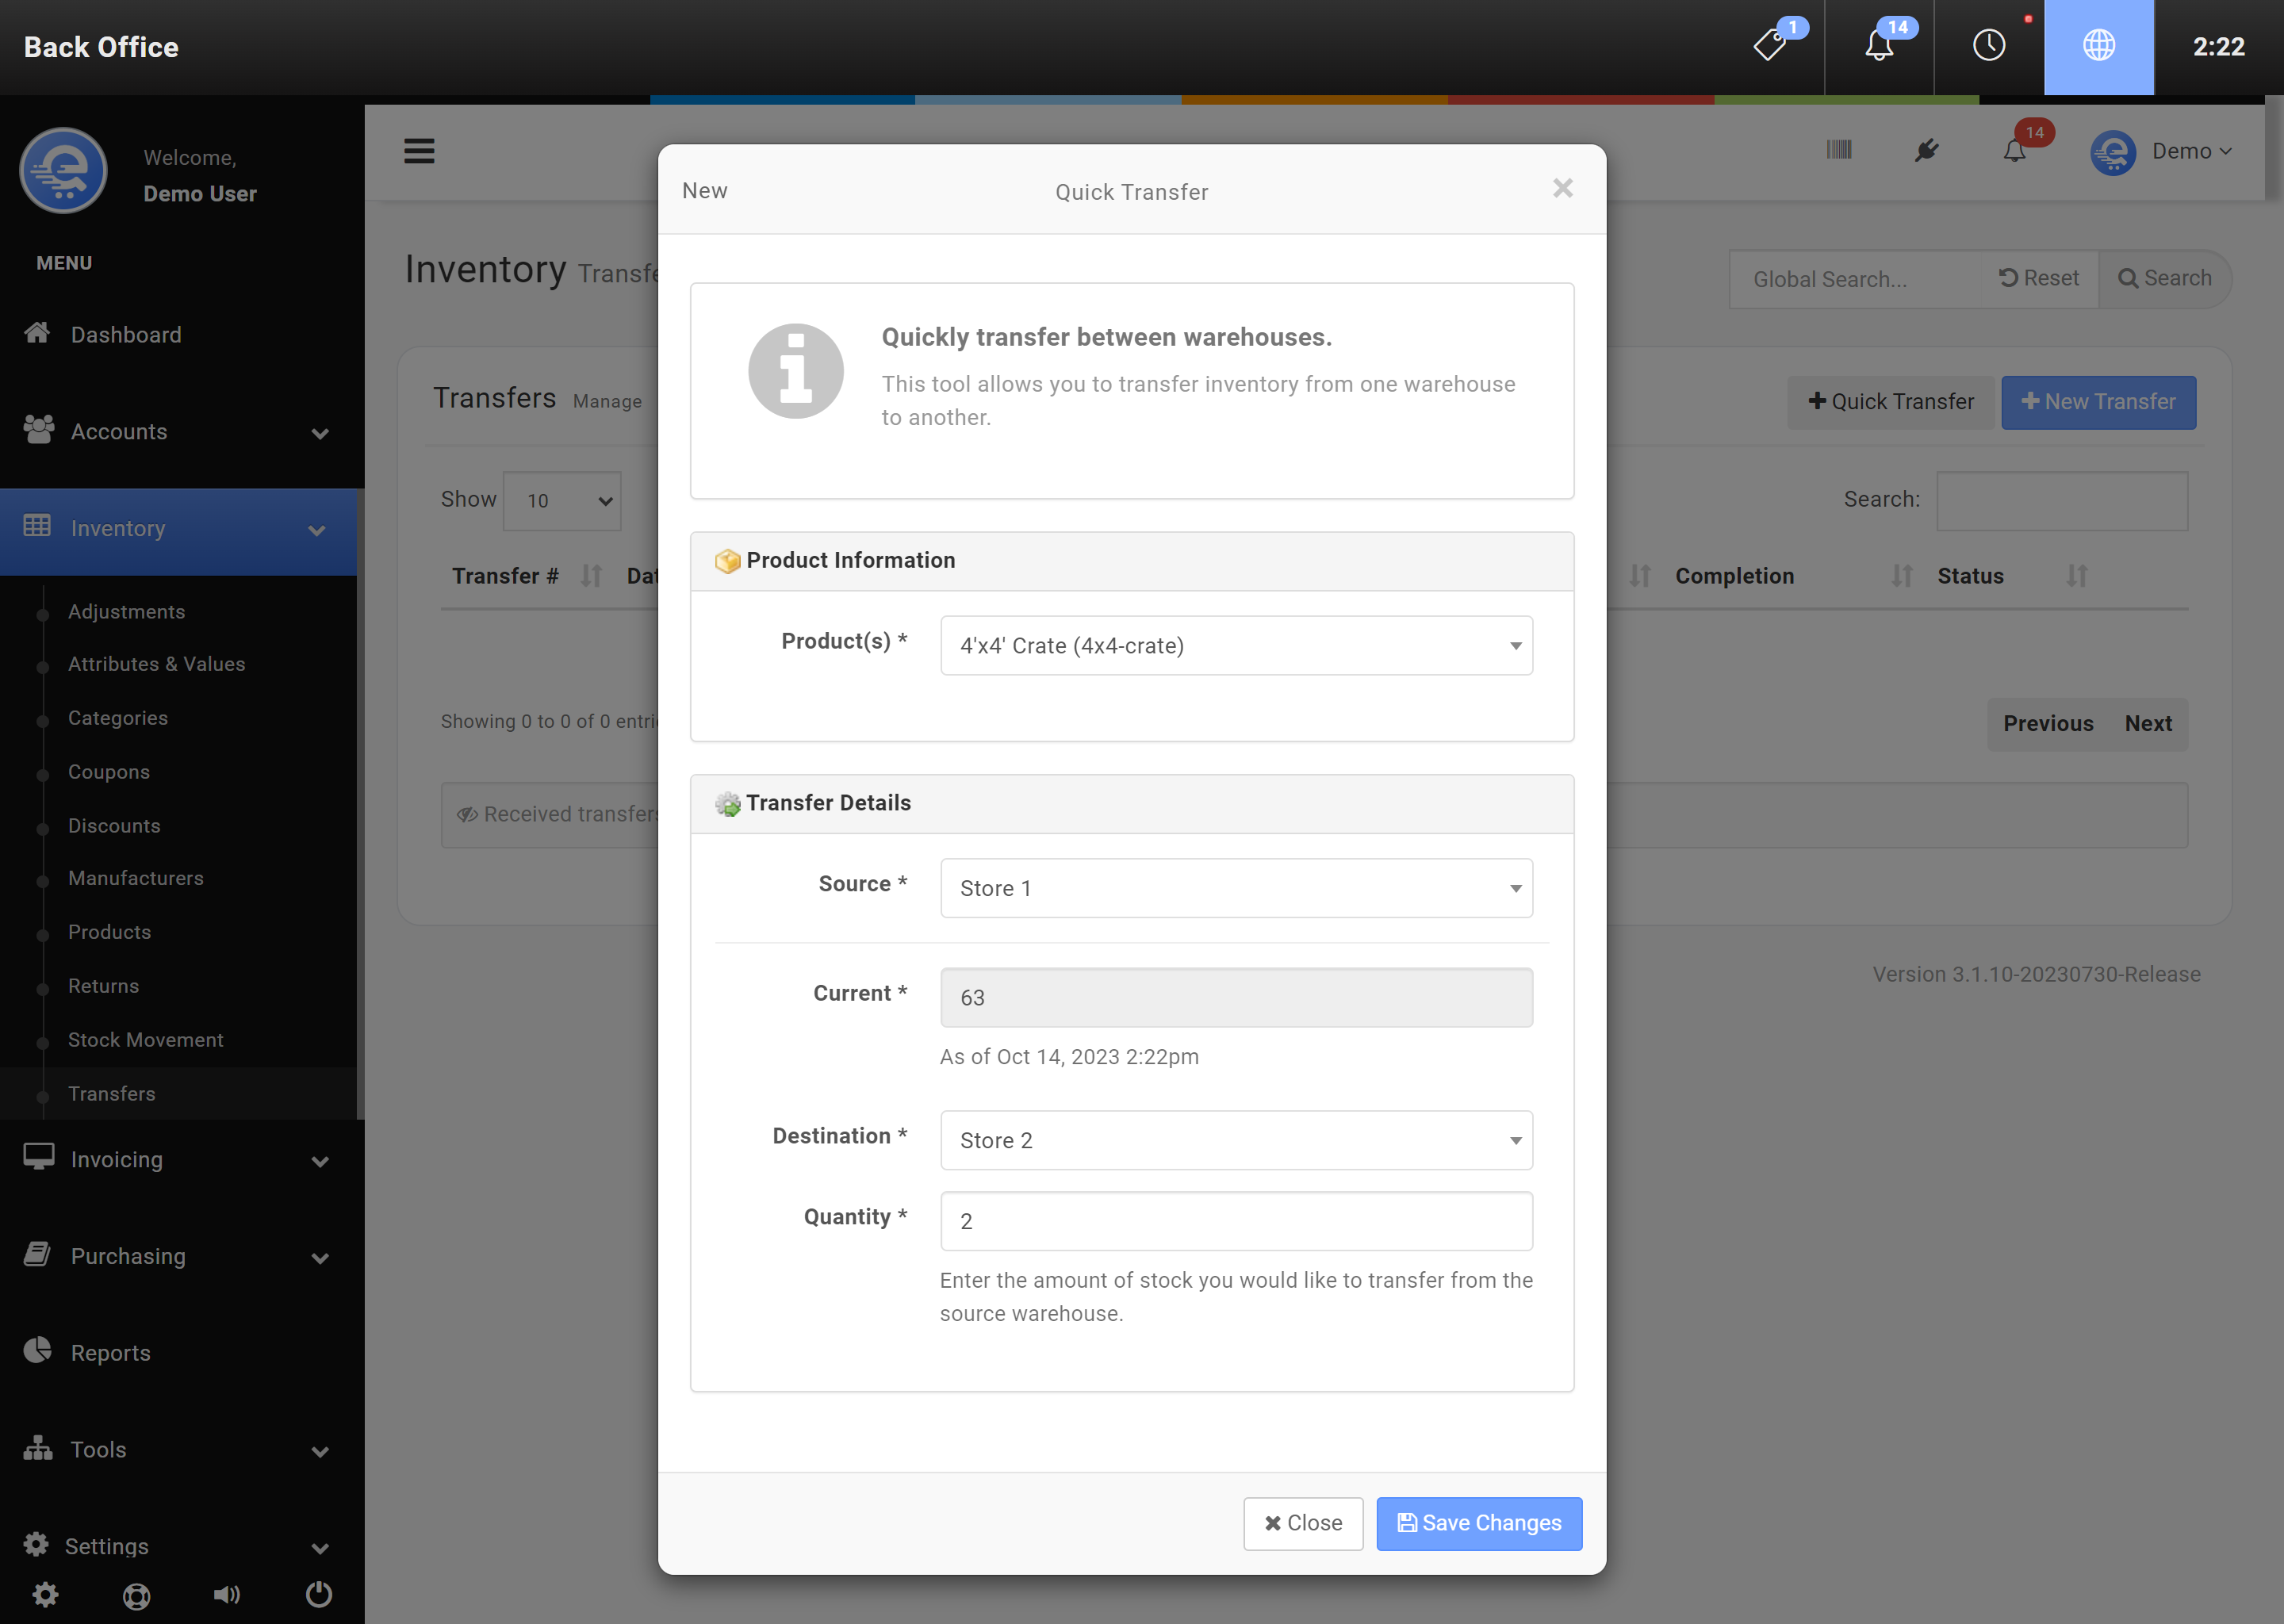
Figure D
Fill in the Transfer details and click Save Changes when complete.