Connecting to PrestaShop
PrestaShop is an open source based shopping cart available for free. PrestaShop allows you to customize your website with a large choice of available templates in their marketplace. PrestaShop also has many addon's that are compatible with eQuate POS.
Always make a back-up copy of your PrestaShop database before adding it to eQuate POS.
eQuate POS can connect to your PrestaShop database and synchronize orders, products, and customers with your in-store operation. Some functions that eQuate offers may not be available in PrestaShop. See below for the full list of supported features:
| eQuate Feature | PS 1.5 | PS 1.6 | PS 1.7 |
|---|---|---|---|
| Attributes | Yes | Yes | Yes |
| Customers | Yes | Yes | Yes |
| Discounts | Yes | Yes | Yes |
| Gift Cards | Yes | Yes | Yes |
| Images | Yes | Yes | Yes |
| Inventory | Yes | Yes | Yes |
| Loyalty | No | No | No |
| Multi Store | Yes | Yes | No * |
| Orders | Yes | Yes | Yes |
| Stock Adjustments | Yes | Yes | Yes |
* PrestaShop discontinued native Advanced Stock Management starting in version 1.7.x. You can add additional stores in eQuate POS, but only one can deduct from PrestaShop inventory. You can choose to share inventory between PrestaShop and a store, or you can also have them as seperate inventories.
Before connecting eQuate POS to PrestaShop, you may need to make adjustments to your PrestaShop installation.
Database:
- Always make a backup of your PrestaShop database before adding it to eQuate POS.
- Remote SQL connections to your PrestaShop database is required.
Some shared web hosting providers may require you to contact them to allow our server to connect through their firewall. If you have dedicated a server for your web hosting, you may need to allow access from our server if you have a firewall enabled. You can find your eQuate POS server hostname when you login to your eQuatePOS.com account.
Adding Prestashop to eQuate POS
Once you have backed up your Prestashop database, you can proceed to add the connection between Prestashop and eQuate POS from the Back Office.
- Login to the Back Office.
- On the left menu, select "Settings", under "System", select "Online Stores".
- Click "Add Online Store" button (see Figure A below).
- Enter the Prestashop SQL database details and press "Save Changes" (see Figure B).
- Configure the default settings for Prestashop and "Save Changes" (see Figure C).
- Allow some time for the data to synchronize. Depending on the size of your Prestashop database, this could take anywhere from 1 to 60 minutes.
- Refresh the page to check the status of the synchronization.
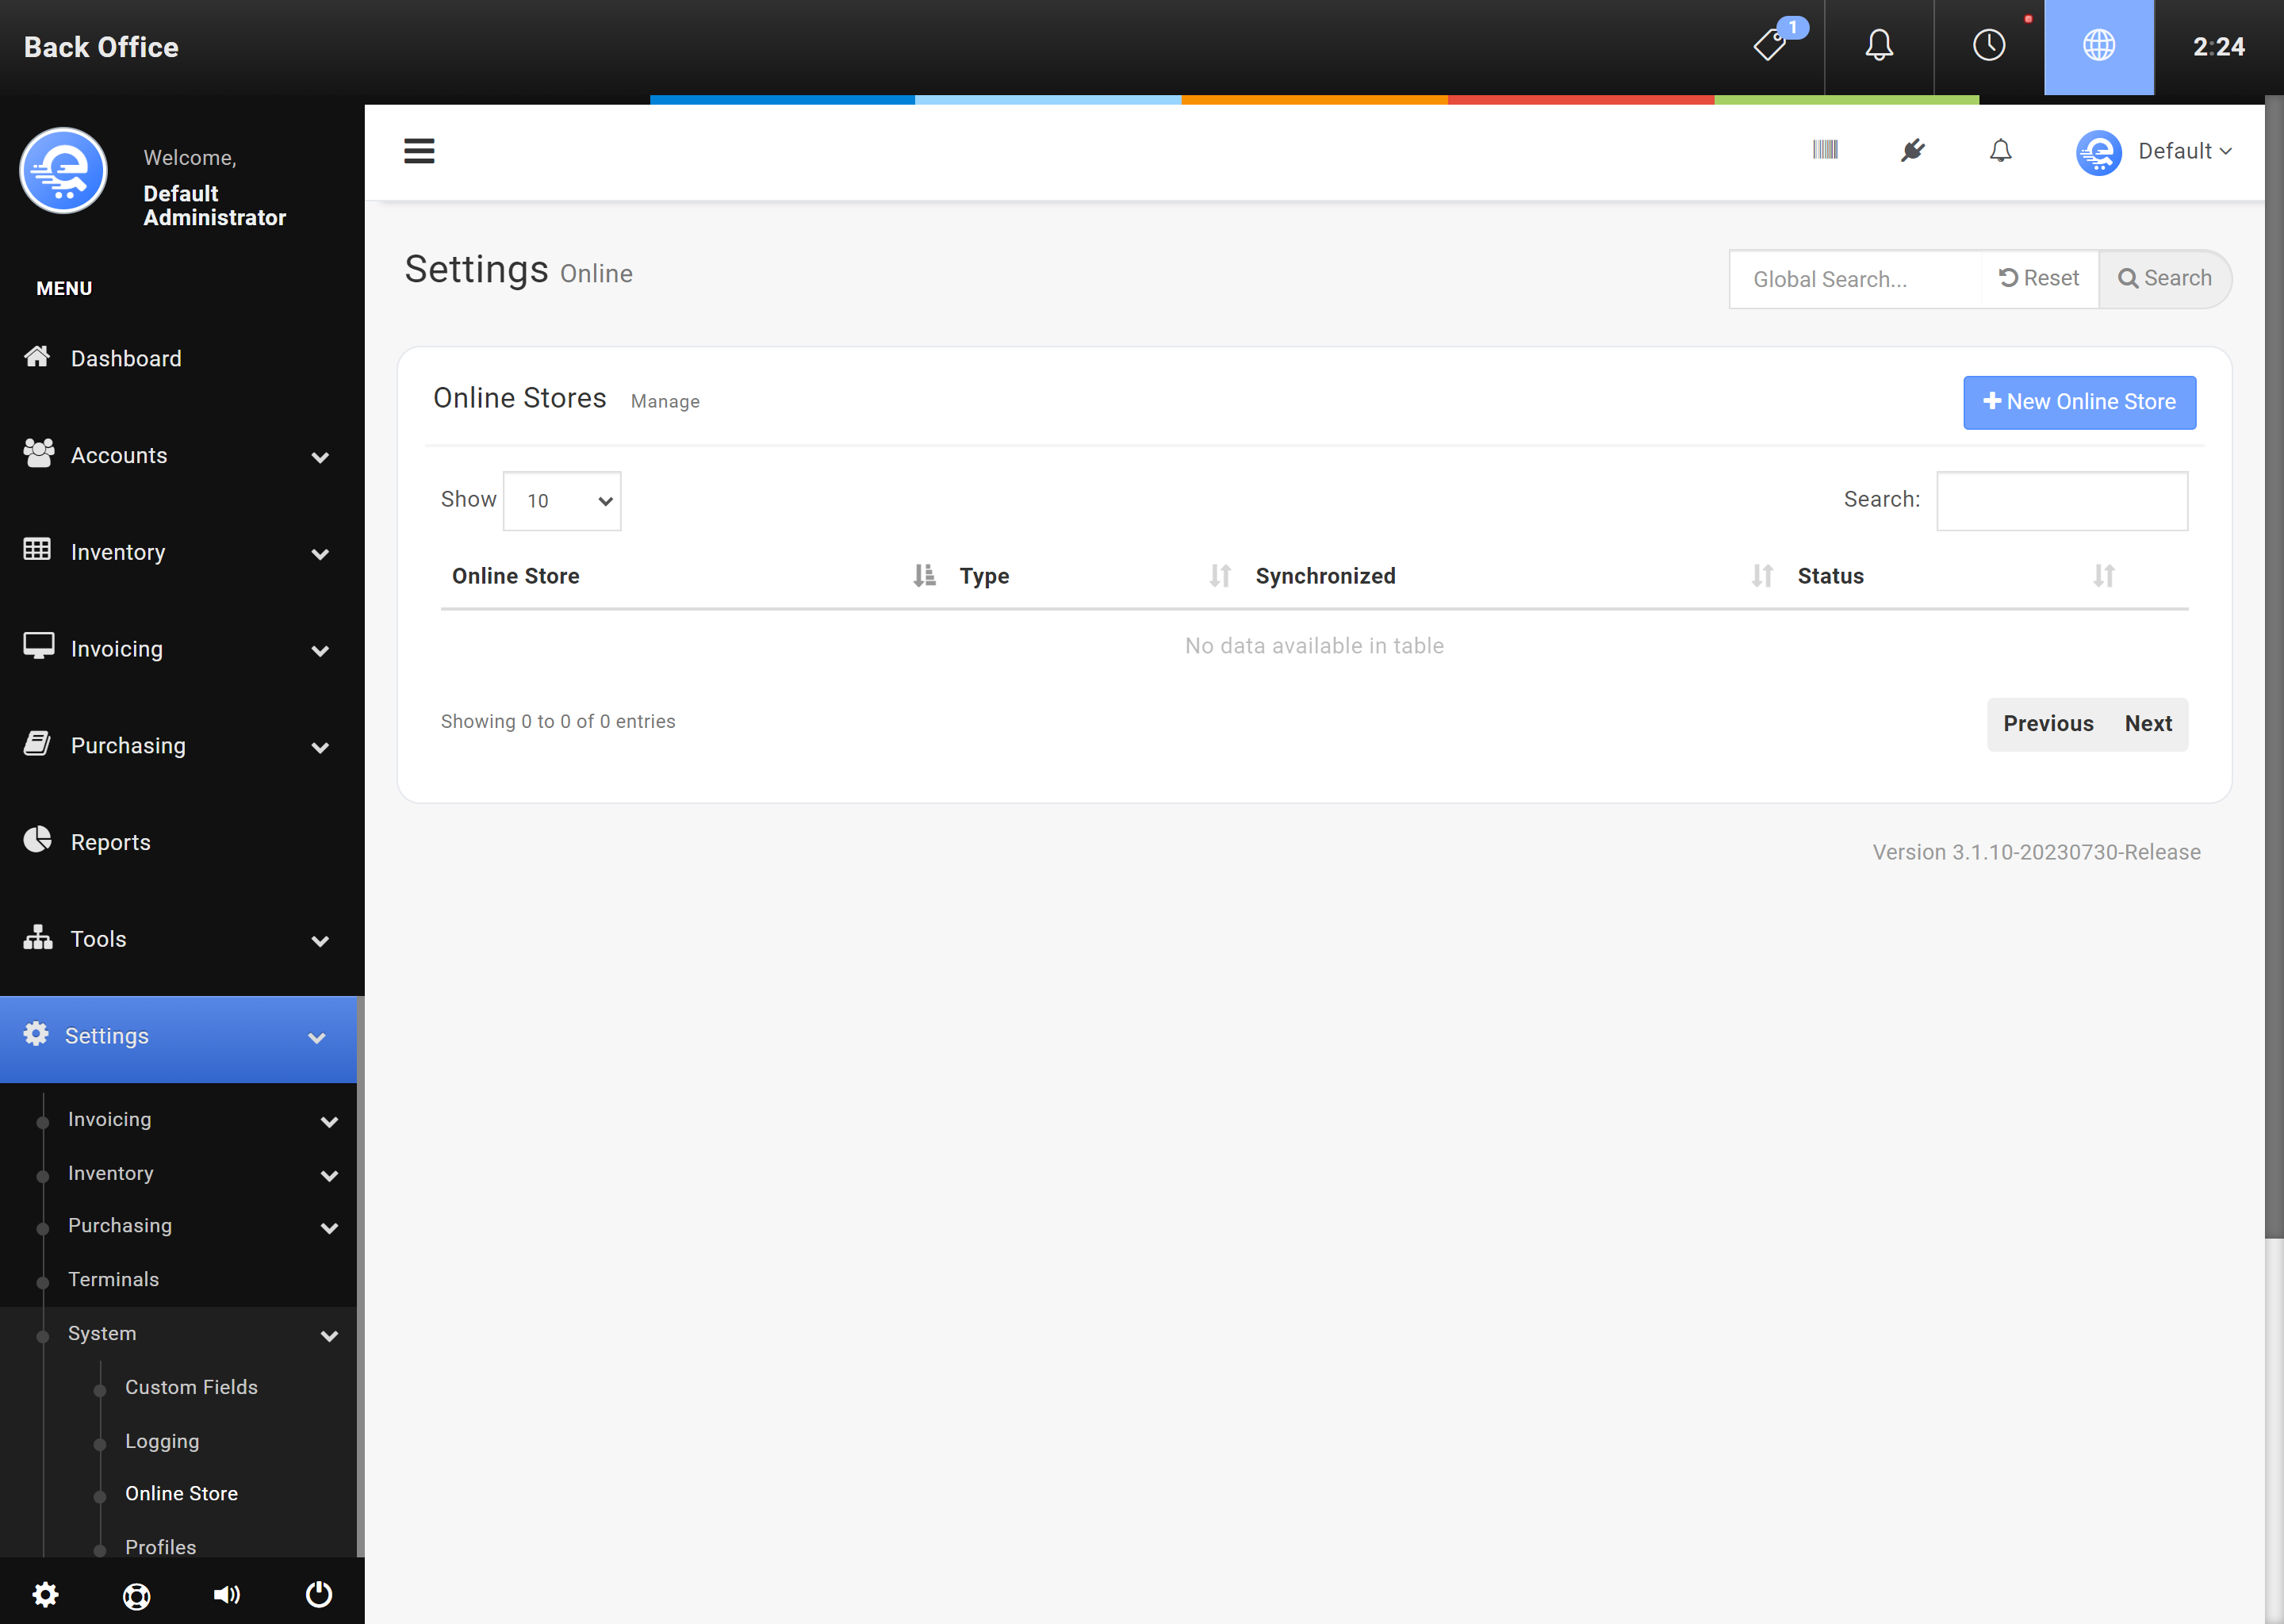
Figure A
Add your online store in the Back Office area. Select "New Online Store".
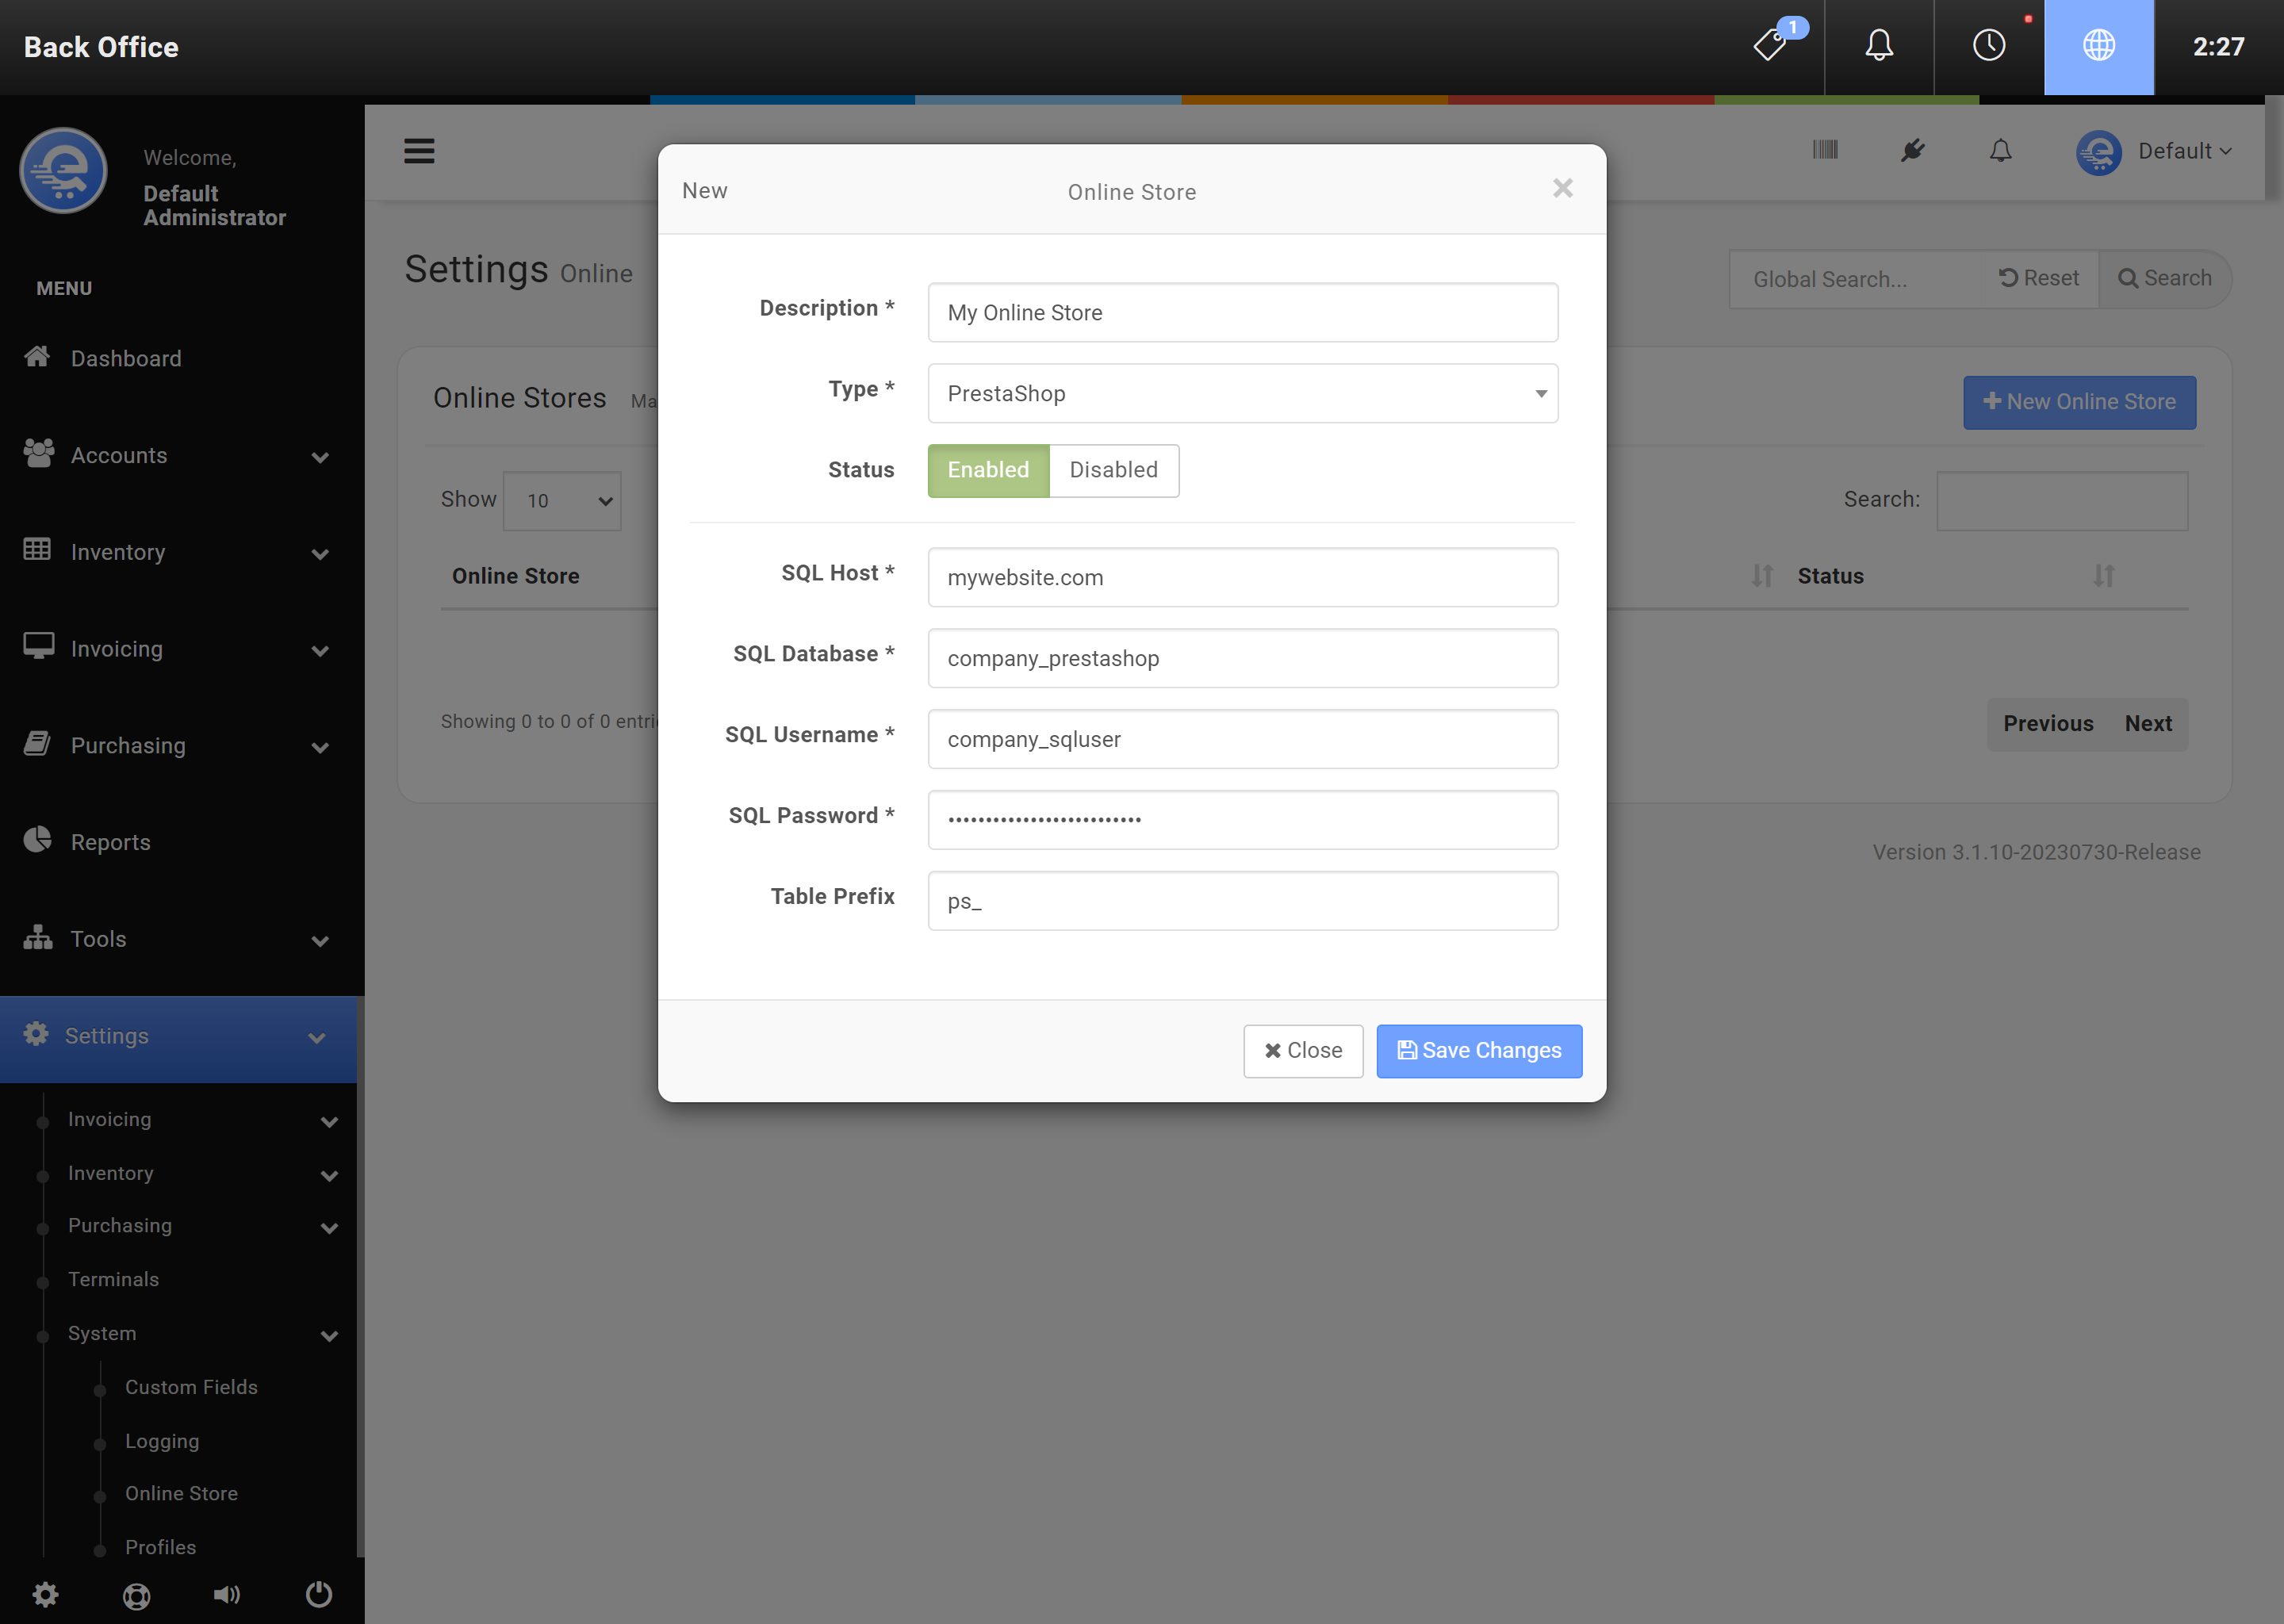
Figure B
Enter your Prestashop SQL details and press "Save Changes".
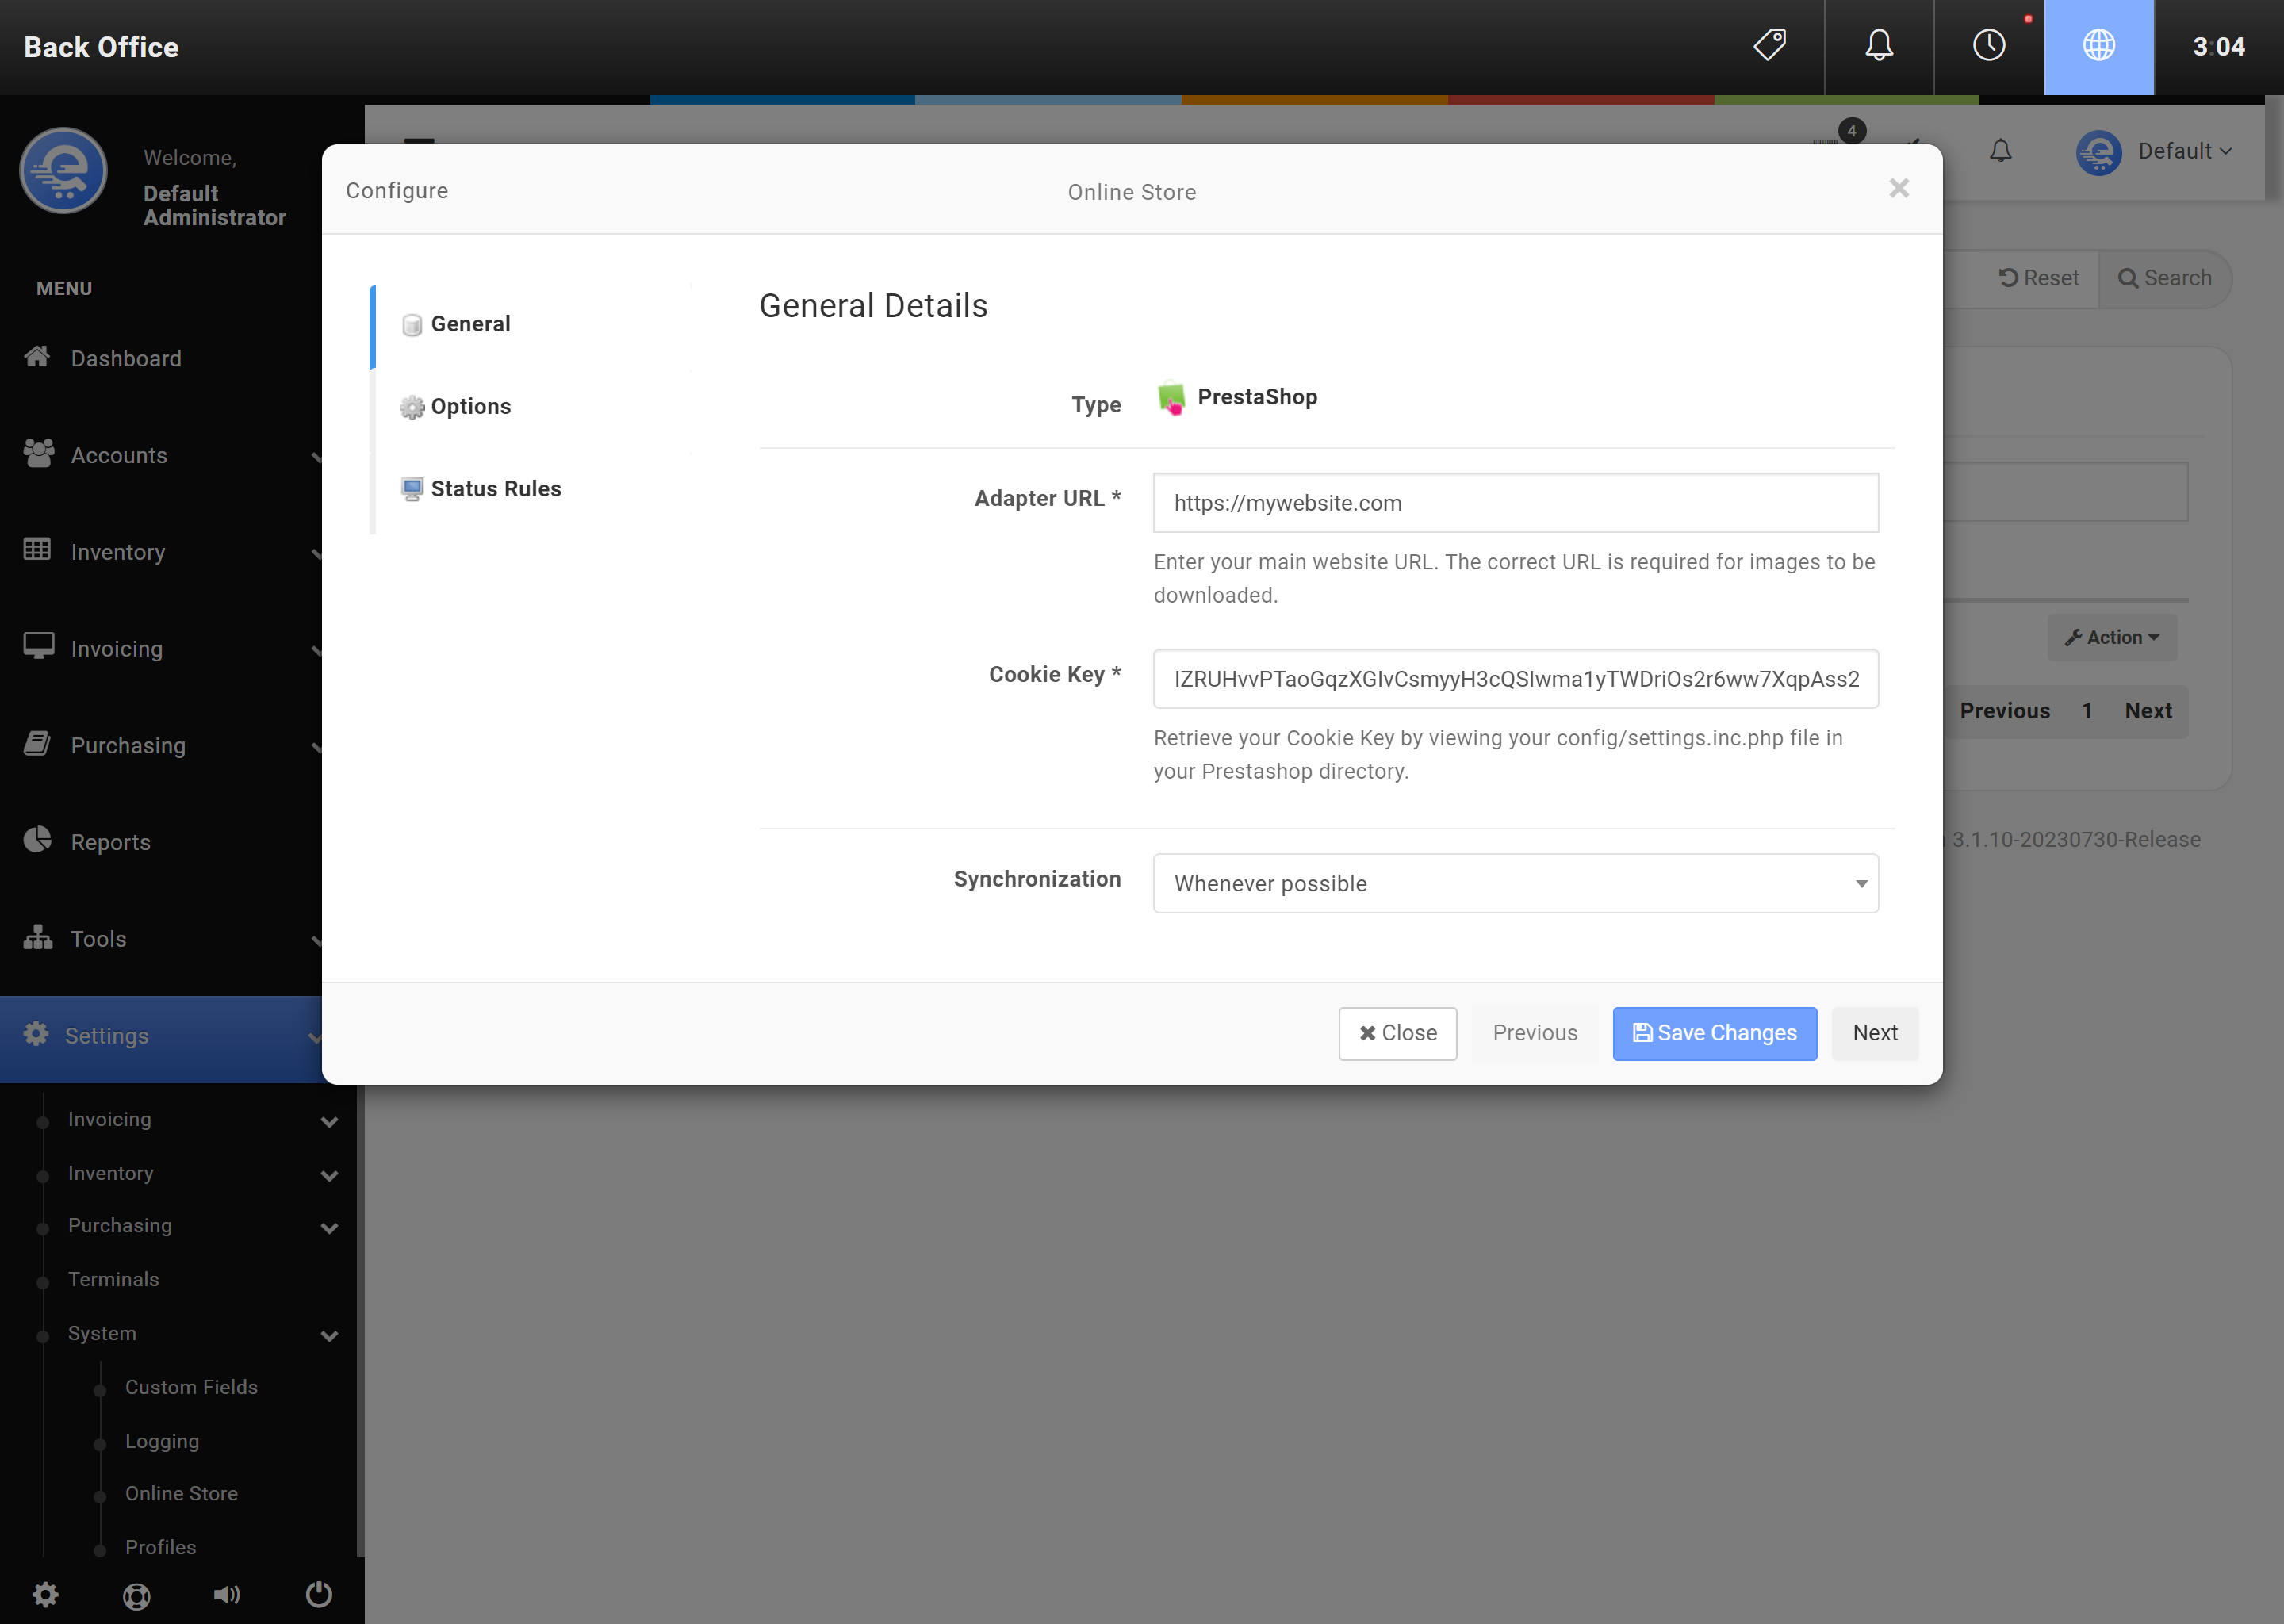
Figure C
Configure the connection between Prestashop & eQuate POS.
- Login to the Back Office.
- On the left menu, select "Settings", under "System", select "Online Stores".
- Select your online store and under the Actions column, select "Action", then "Edit" (see Figure D).
- You must ensure the database you are editing is the same database that was previously synchronized (see Figure E).
- Click "Save Changes" when complete.
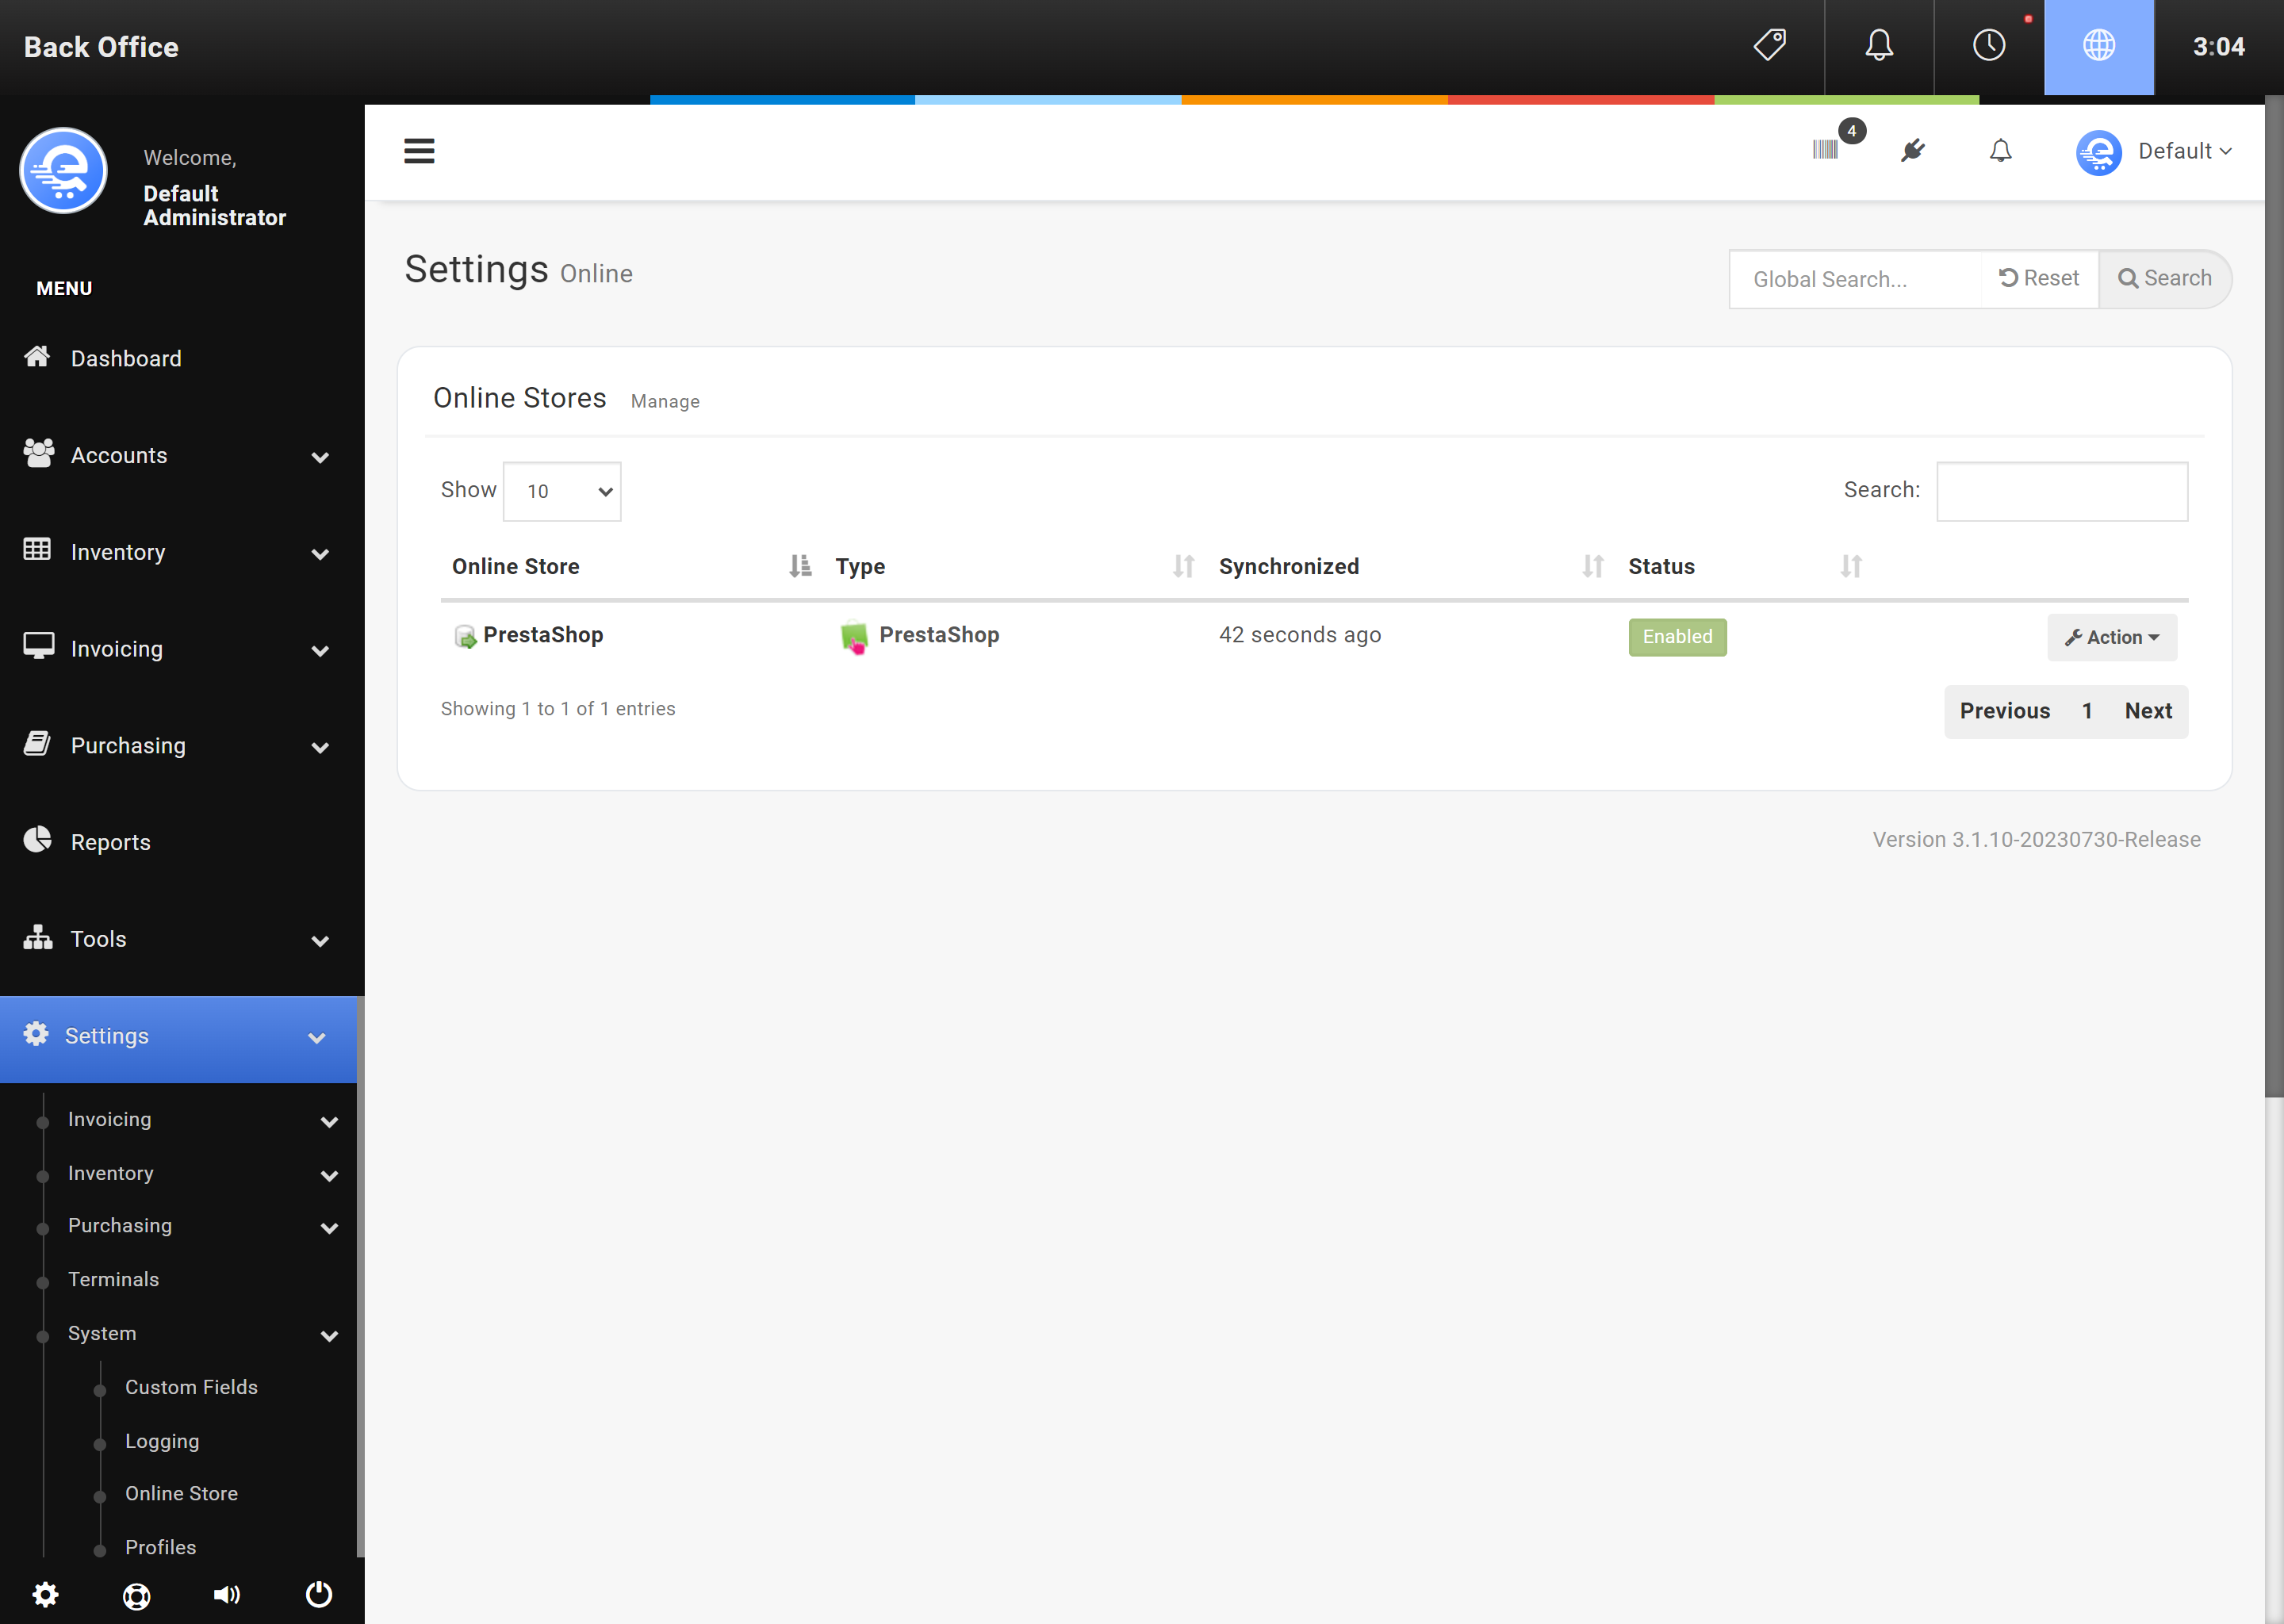
Figure D
After saving your online store to eQuate POS, you will see "Pending" until the system has synchronized.

Figure E
To disable the synchronization, select "Edit" under Actions and set the status to Disabled and press "Save Changes".