Purchasing
Introduction to Purchasing
Purchase orders allow you to keep track of your inventory purchasing. You can create purchase orders quickly using CSV import, or adding items manually. Tracking these purchases allow you to report how much you've spent with a certain supplier or manufacturer. You can enhance your purchasing by enabling Supply Management, which will automatically place orders with your suppliers.
Purchase Orders are the recommended way to keep track of your ordering, and inventory adjustments. You can also add expenses on to your Purchase Orders to track exactly the cost of your inventory supply.
- Expenses
Track your expenses easily and create reports based on expense categories. You can add expenses for everything; bill payments, purchase orders, and more. - Purchase Orders
Purchase orders allow you to track orders placed with external vendors. You can receive these purchase orders directly into your inventory, allowing for easy reporting. When creating a Purchase order, you can use a manufacturer or a supplier as the source. - Suppliers
A supplier is also known as a distributor. A supplier supplies products from various manufacturers. You can automatically submit purchase orders to suppliers based on invoice total, or number of days elapsed. - Supply Management
Keep your warehouses stocked with Supply Management. This feature must be enabled in the settings. Automatically submit purchase orders to your vendors based on dollar amount, or dates. Directly receive these purchase orders into your inventory.
Expenses
Track outgoing expenses with the Expense function. An expense is any outgoing money from your business. You can create custom expense categories for custom reporting. Expenses can also be assigned to a Purchase Order.
Expenses
An Expense is any outgoing cost to your business. Phone bills, hydro bills, inventory from your suppliers, and more. You can add expenses in the Back Office. Expenses can also be reported on. Expenses can be assigned a category, or warehouse. Expenses can also have attachments attached to them.
- Navigate to the eQuate Back Office
- On the left navigation bar, click "Purchasing", then click "Expenses".
- On the top button menu select "New Expense" (see Figure A).
- Add the details of the expense and click "Save Changes" when you are complete (see Figure B).
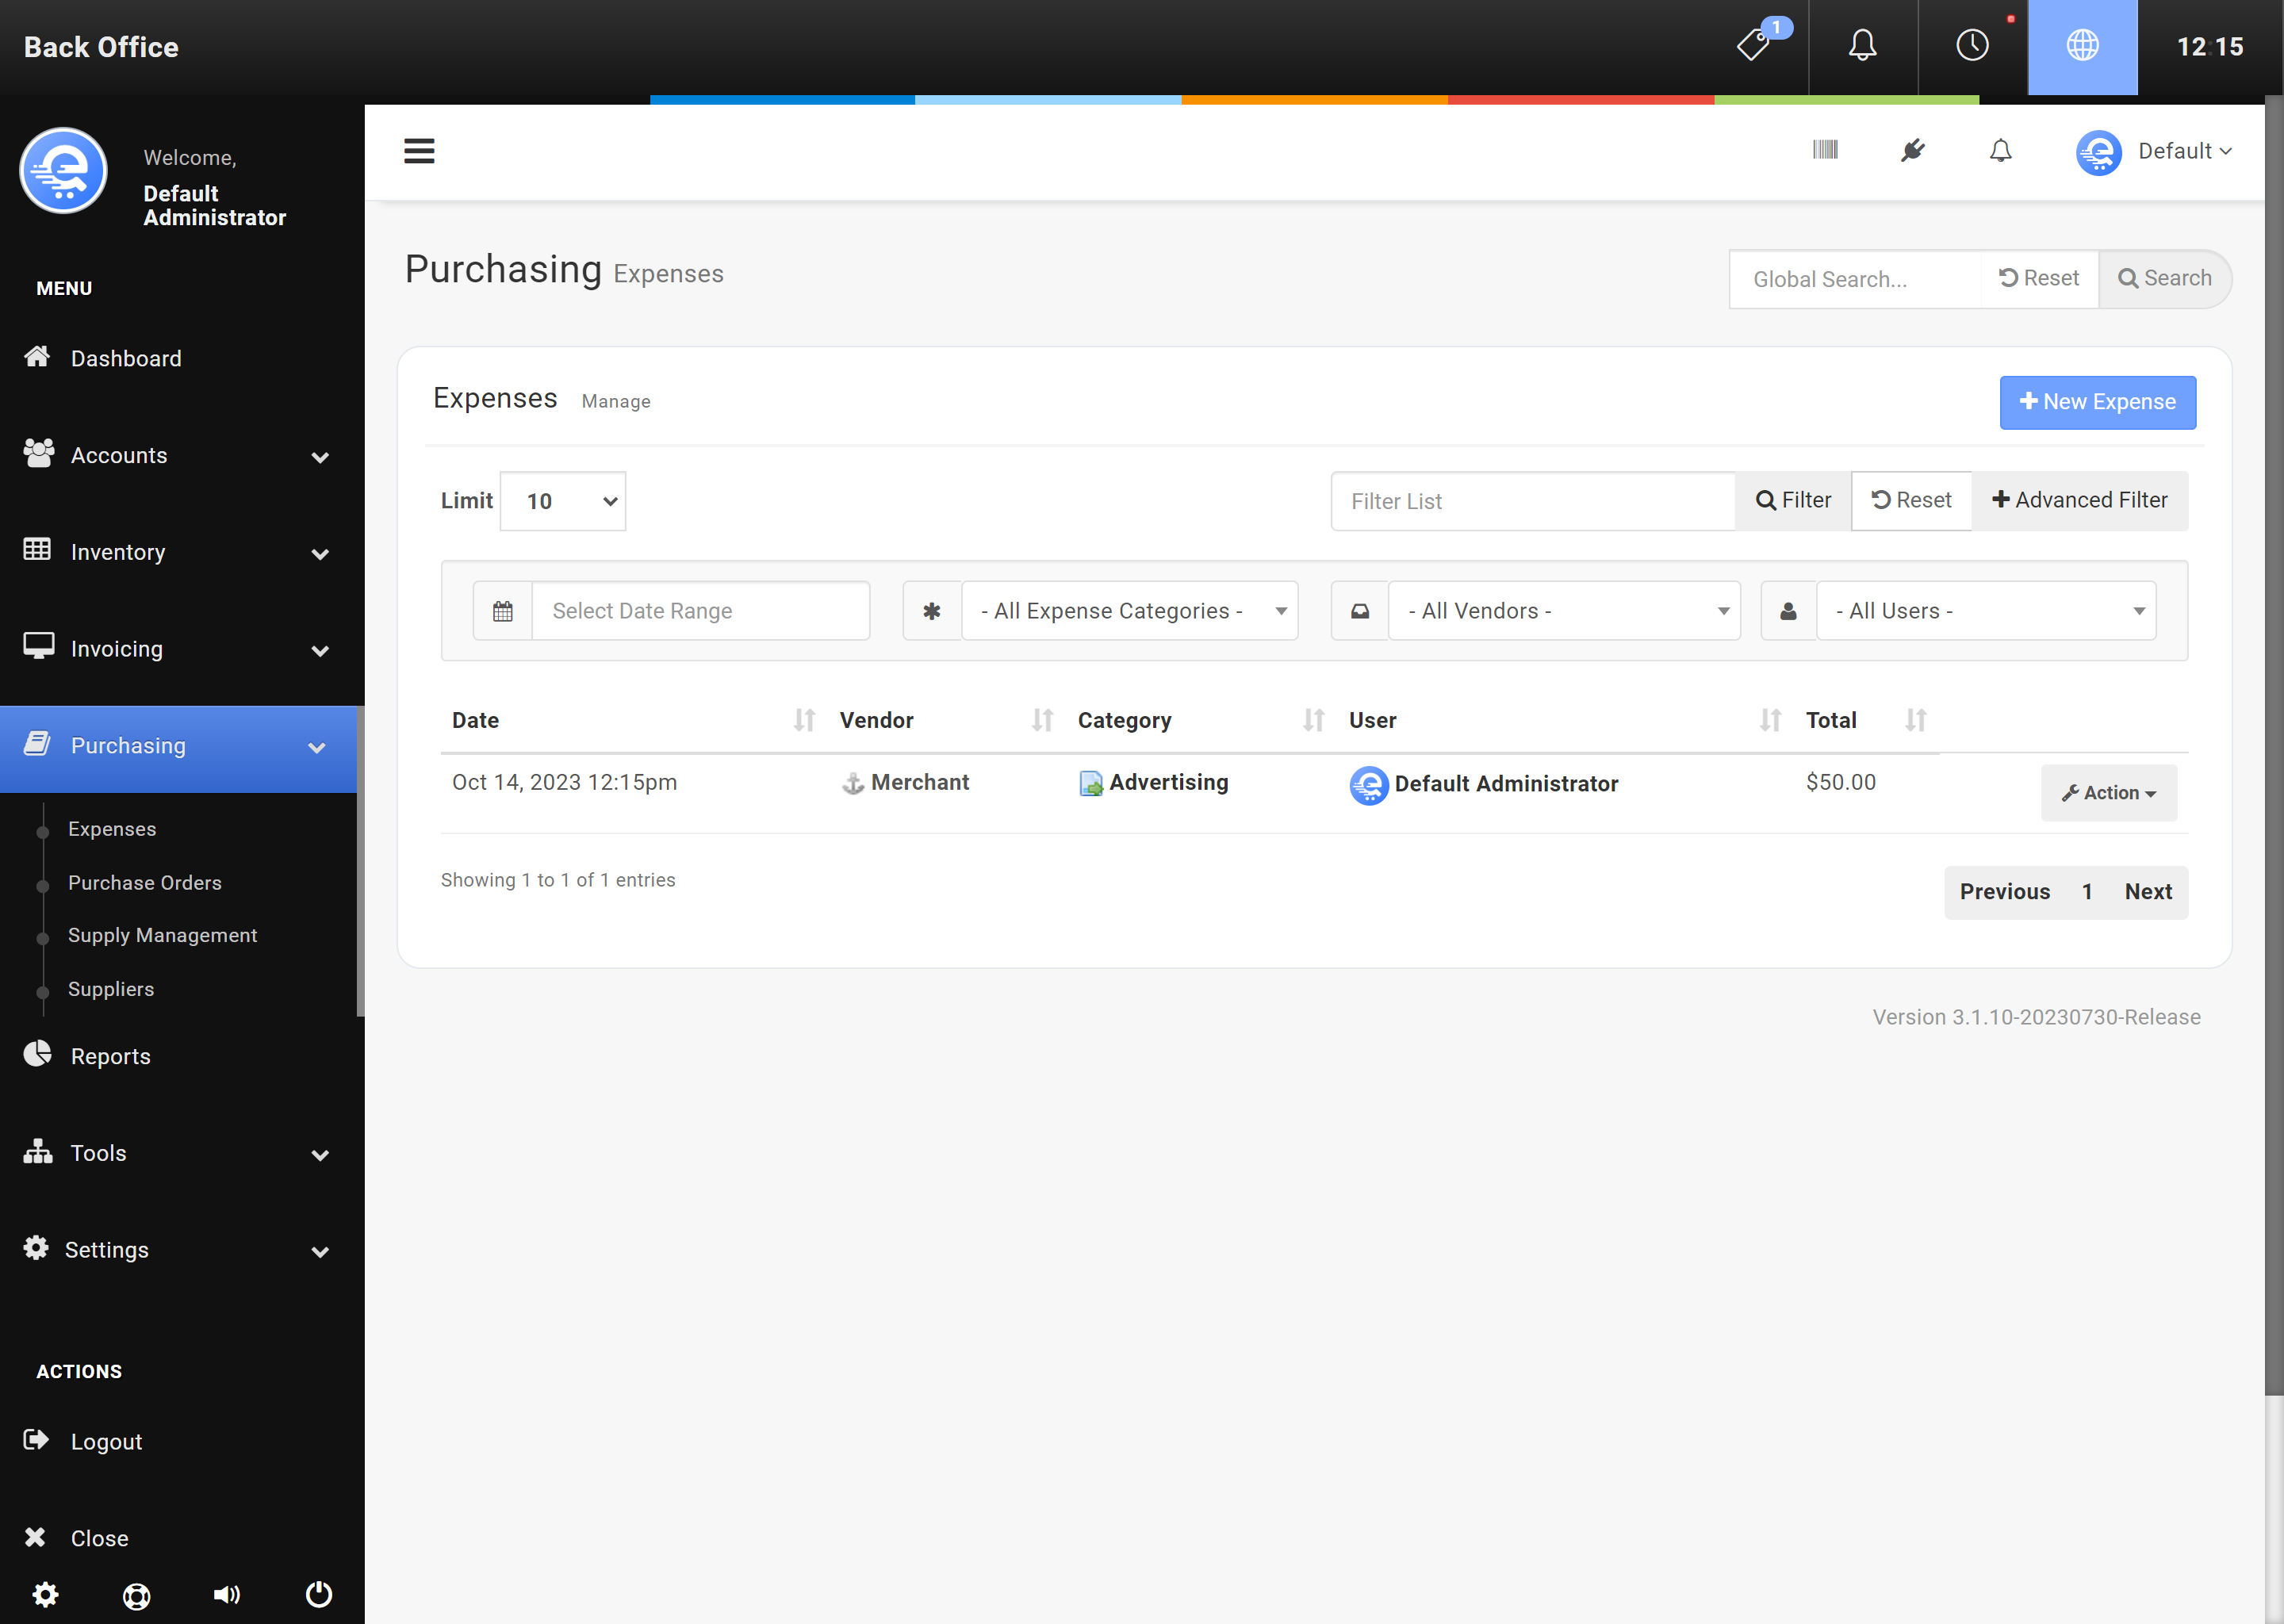
Figure A
Adding a new expense in the Back Office area.
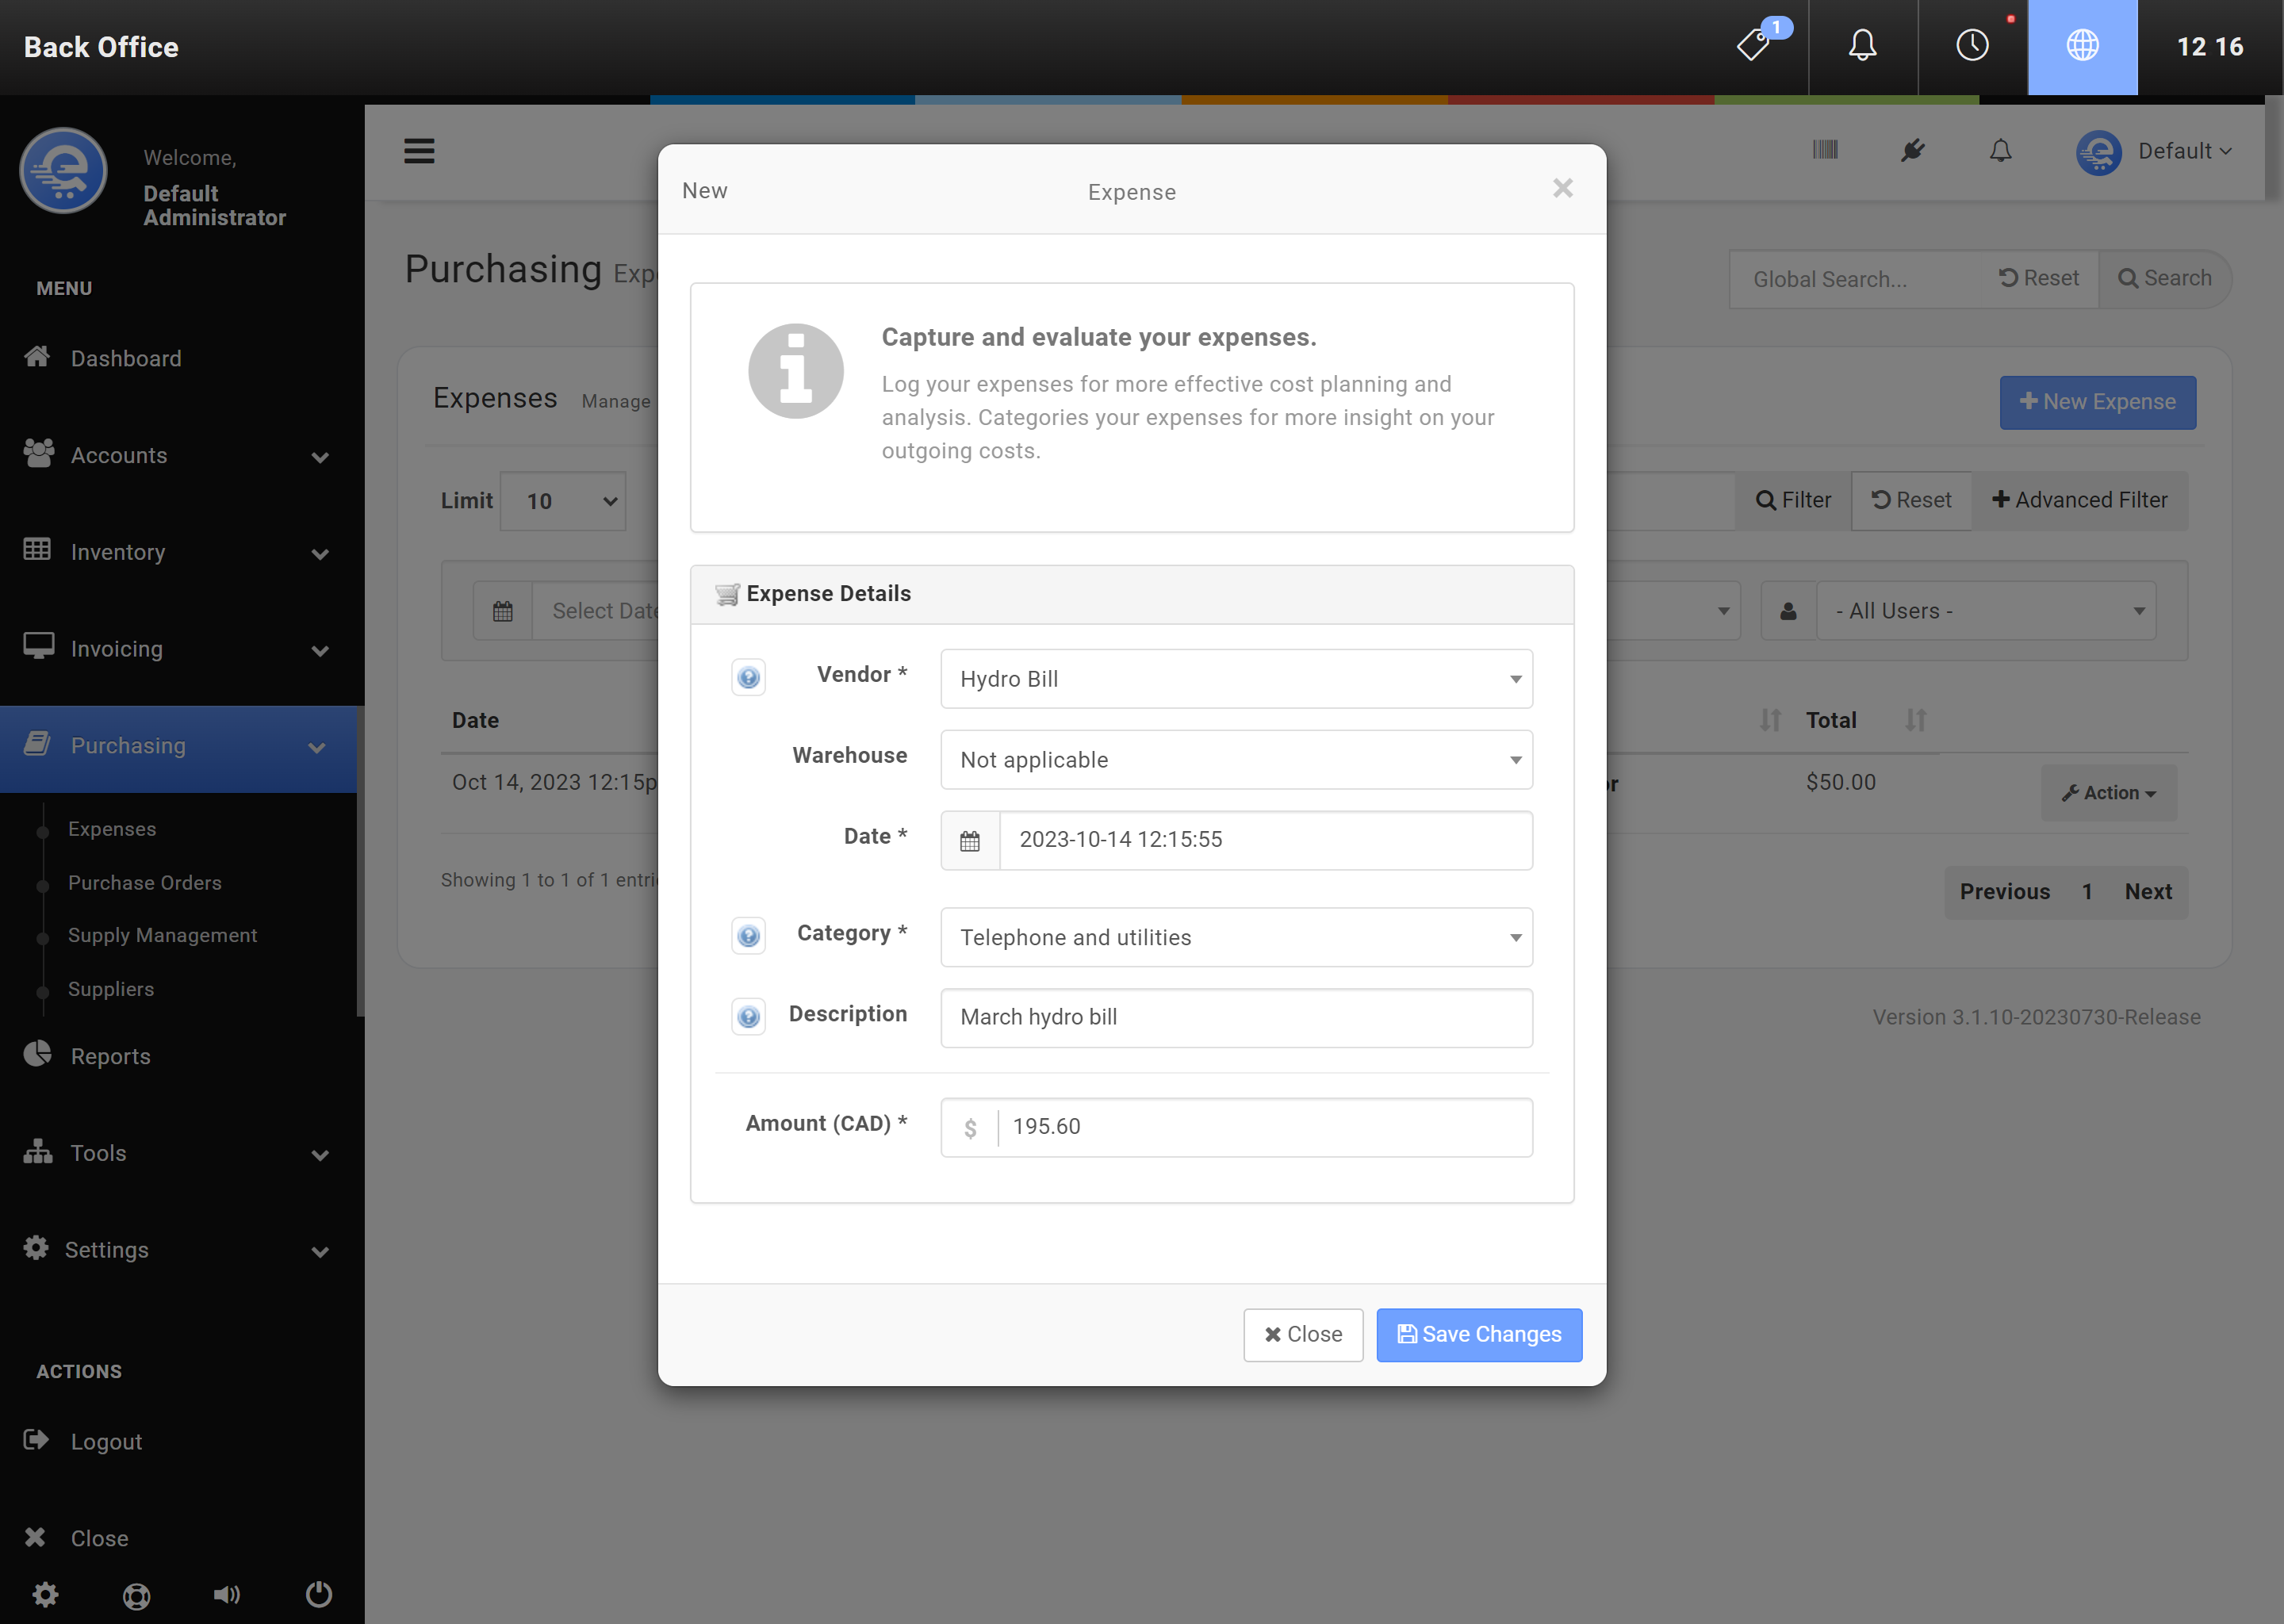
Figure B
After creating/modifying the Expense, click "Save Changes".
Expense Categories
Expense Categories help organize your various expenses. Depending on the nature of your business, you may require additional or less expense categories. Expense Categories can be edited in the Back Office. You can also run reports based off expense categories which allows you to track overall expenses in an organized matter.
- Navigate to the eQuate Back Office
- On the left navigation bar, click "Settings", then click "Purchasing", then "Expense Categories".
- On the top button menu select "New Expense Category" (see Figure C).
- Add the details of the ticket and click "Save Changes" when you are complete (see Figure D).
- Navigate to the eQuate Back Office
- On the left navigation bar, click "Settings", then click "Purchasing", then "Expense Categories".
- Find the expense category you want to edit in the table, and click on "Action" then "Edit".
- Modify the details of the expense category and click "Save Changes" when you are complete (see Figure D).
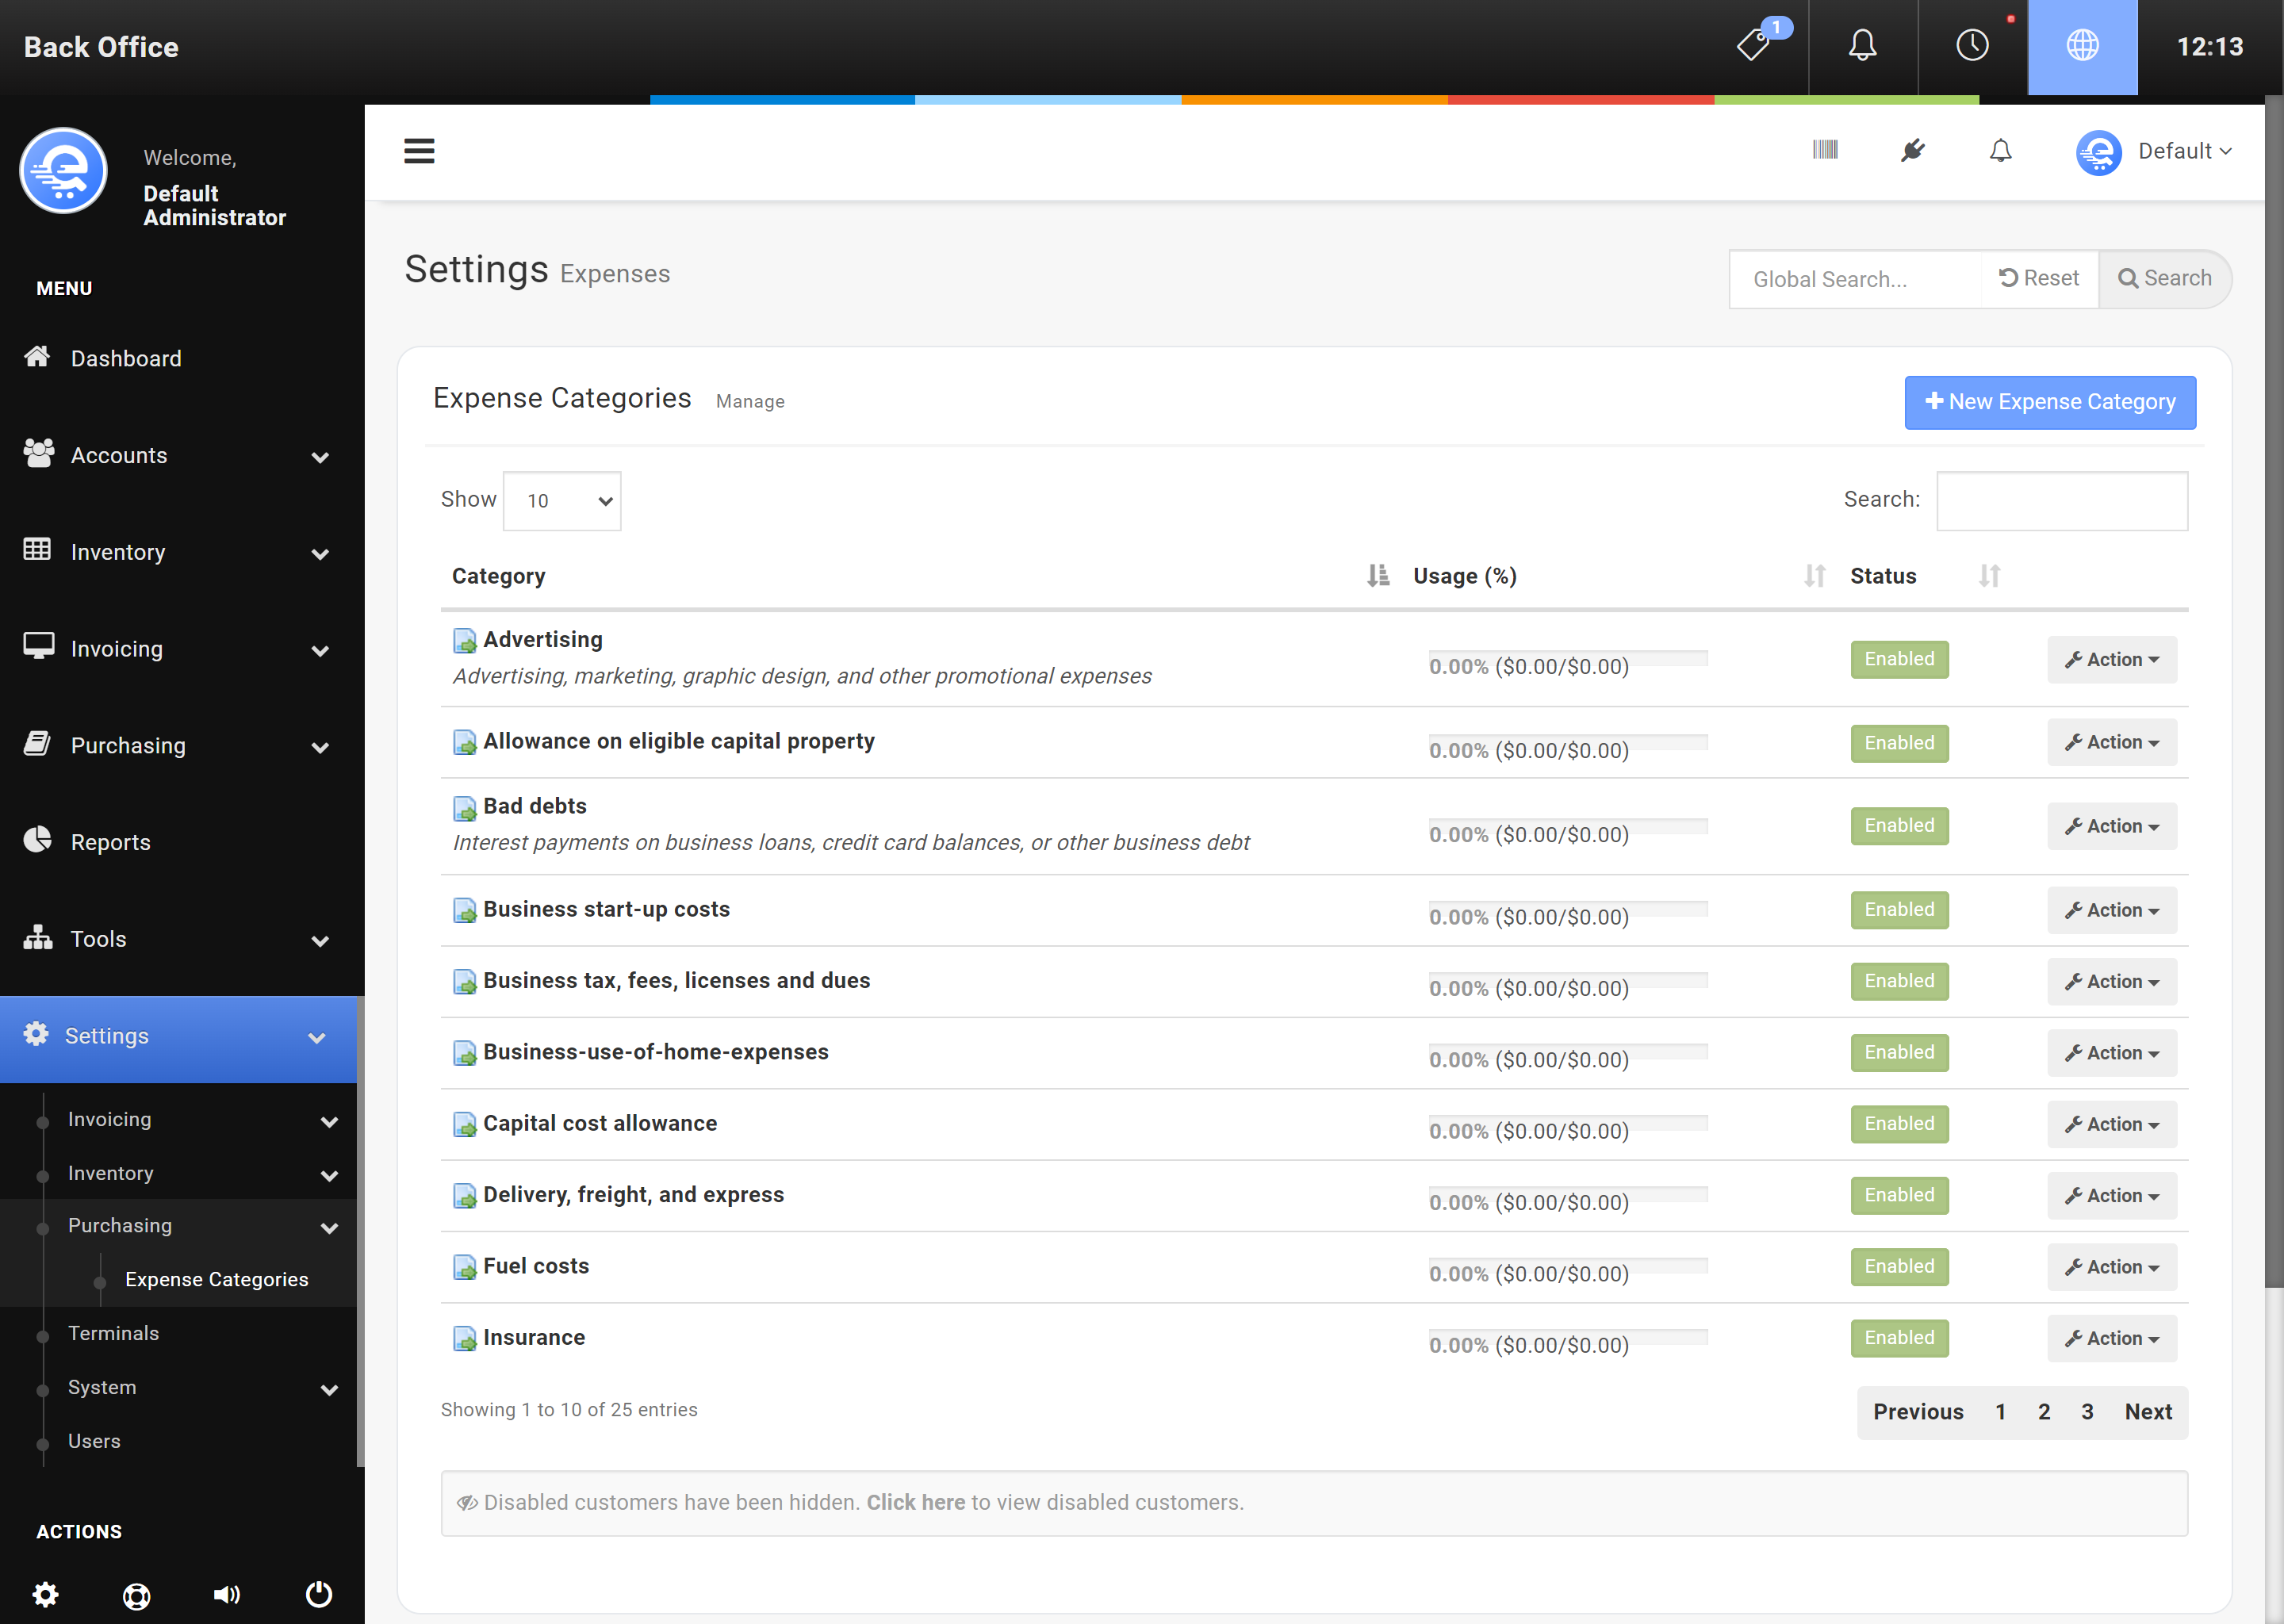
Figure C
Adding a new expense category in the Back Office area.
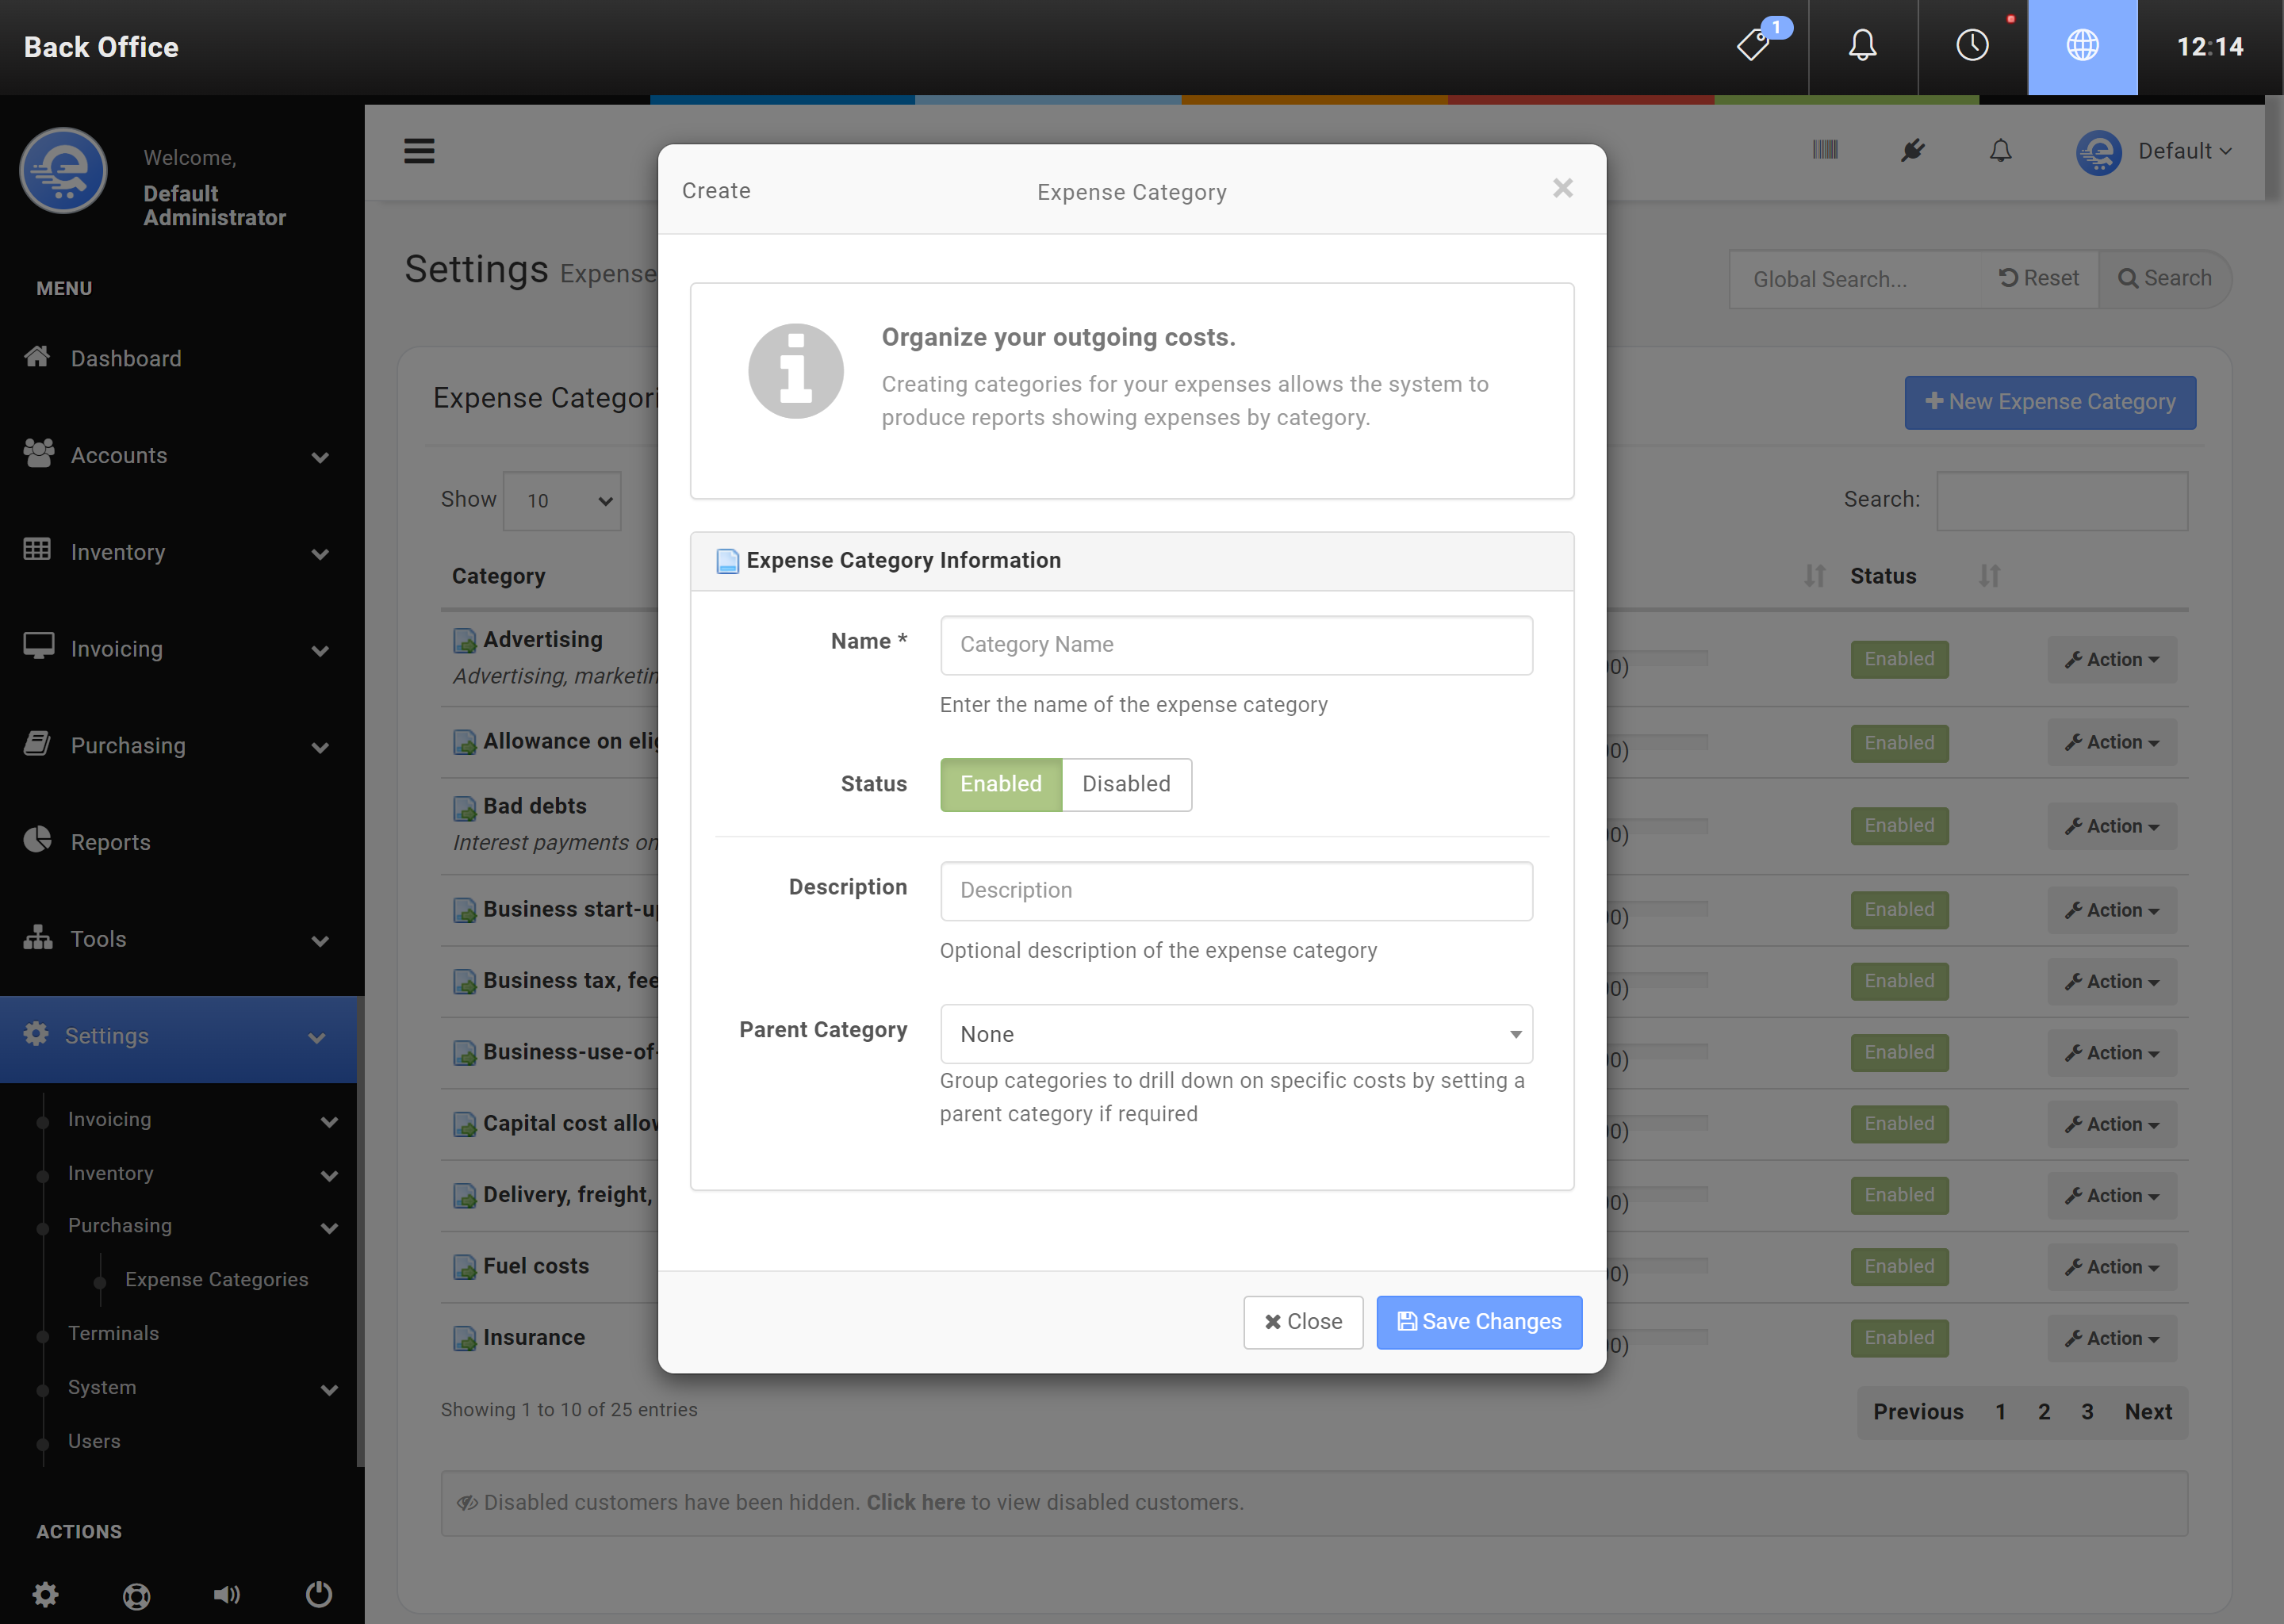
Figure D
After creating/modifying the expense category, click "Save Changes".
Purchase Orders
Purchase Orders are a way for you to track your inventory supply orders. Purchase Orders can be directly received into your various warehouse inventory stock buckets. Allowing you to track exactly where and when stock was replenished. Purchase Orders can be assigned to a User, Warehouse, Supplier, and Manufacturer. Purchase Orders can also be automatically generated using Supply Management. Purchase Orders can also be automatically submitted to its' vendor automatically, based on date, value, or a combination of both.
Statuses
Purchase Orders have various statuses, or stages. When creating a Purchase Order, the initial status will be Pending by default. In the pending status, the items cannot be received into inventory. Once a Purchase Order status is changed to Submitted, Paid, or Shipped, the contents can then be received into inventory stock buckets. Once a Purchase Order is marked Completed, it will no longer be considered "Open", and no longer display in the list by default.
- Pending
The Purchase Order is pending edit, and items cannot be received. If the Purchase Order was generated by Supply Management, it may be modified automatically while in Pending status. - Submitted
When a Purchase Order is in the Submitted status, it means that the Purchase Order has been sent to the vendor and no additional changes are expected. - Paid
When an Expense is added that is greater than the value of the total due for the Purchase Order, the status will automatically update to "Paid". - Shipped
When a Purchase Order has a tracking number, it will automatically change to "Shipped" status. - Complete
A complete Purchase Order indicates all items on the Purchase Order have been received into inventory stock buckets. This status is automatically generated when a Purchase Order has been fully received. - Cancelled
Cancelled Purchase Orders will not be considered "Open". These Purchase Orders will not display in the list by default.
Changing a status can be done manually, or the system will automatically change the status for you. As you progress along your Purchase Order, the status will change. For example, when you add an expense on the Purchase Order, the status will automatically update to Paid. When you completely receive the Purchase Order, the status will change to Complete.
- Navigate to the eQuate Back Office
- On the left navigation bar, click "Purchasing", then click "Purchase Orders".
- Using the table, find the Purchase Order you want to receive and click "Action", then "Edit".
- Change the Status in the Purchase Order, then click "Save Changes" when complete.

Figure A
Find the Purchase Order within the Back Office area.

Figure B
After modifying the Purchase Order status, click "Save Changes".
Vendors
A Vendor can consist of either a Supplier, or a Manufacturer. You may choose to supply some products directly with the Manufacturer, or you can also supply products through a Supplier, who supplies various products with different manufacturers (also known as a Distributor). You can also enter a Custom vendor.
By setting up a Supplier, or Manufacturer, you can automatically submit your Purchase Orders through e-mail. Specify an e-mail address on the Supplier, or Manufacturer for this feature to be enabled.
Purchase Orders
You can manage, create, and remove your Purchase Orders in the Back Office. By default, only "Open" Purchase Orders are displayed. When a Purchase Order status is Completed or Cancelled, it is considered "Closed". You can use Purchase Orders to track your inventory purchasing, and directly receive items into your inventory stock counts.
Purchase Orders can automatically be generated by Supply Management, or manually created. You can also import items into Purchase Orders using CSV.
- Navigate to the eQuate Back Office
- On the left navigation bar, click "Purchasing", then click "Purchase Orders".
- On the top button menu select "Create Purchase Order" (see Figure A).
- Complete the details of the purchase order, and then use the "Items" tab on the left menu, and add the items. Click "Save Changes" when you are complete (see Figure B).
- Navigate to the eQuate Back Office
- On the left navigation bar, click "Purchasing", then click "Purchase Orders".
- Using the table, find the Purchase Order you want to modify and click "Action", then "Edit".
- Edit the details of the purchase order and click "Save Changes" when you are complete (see Figure B).
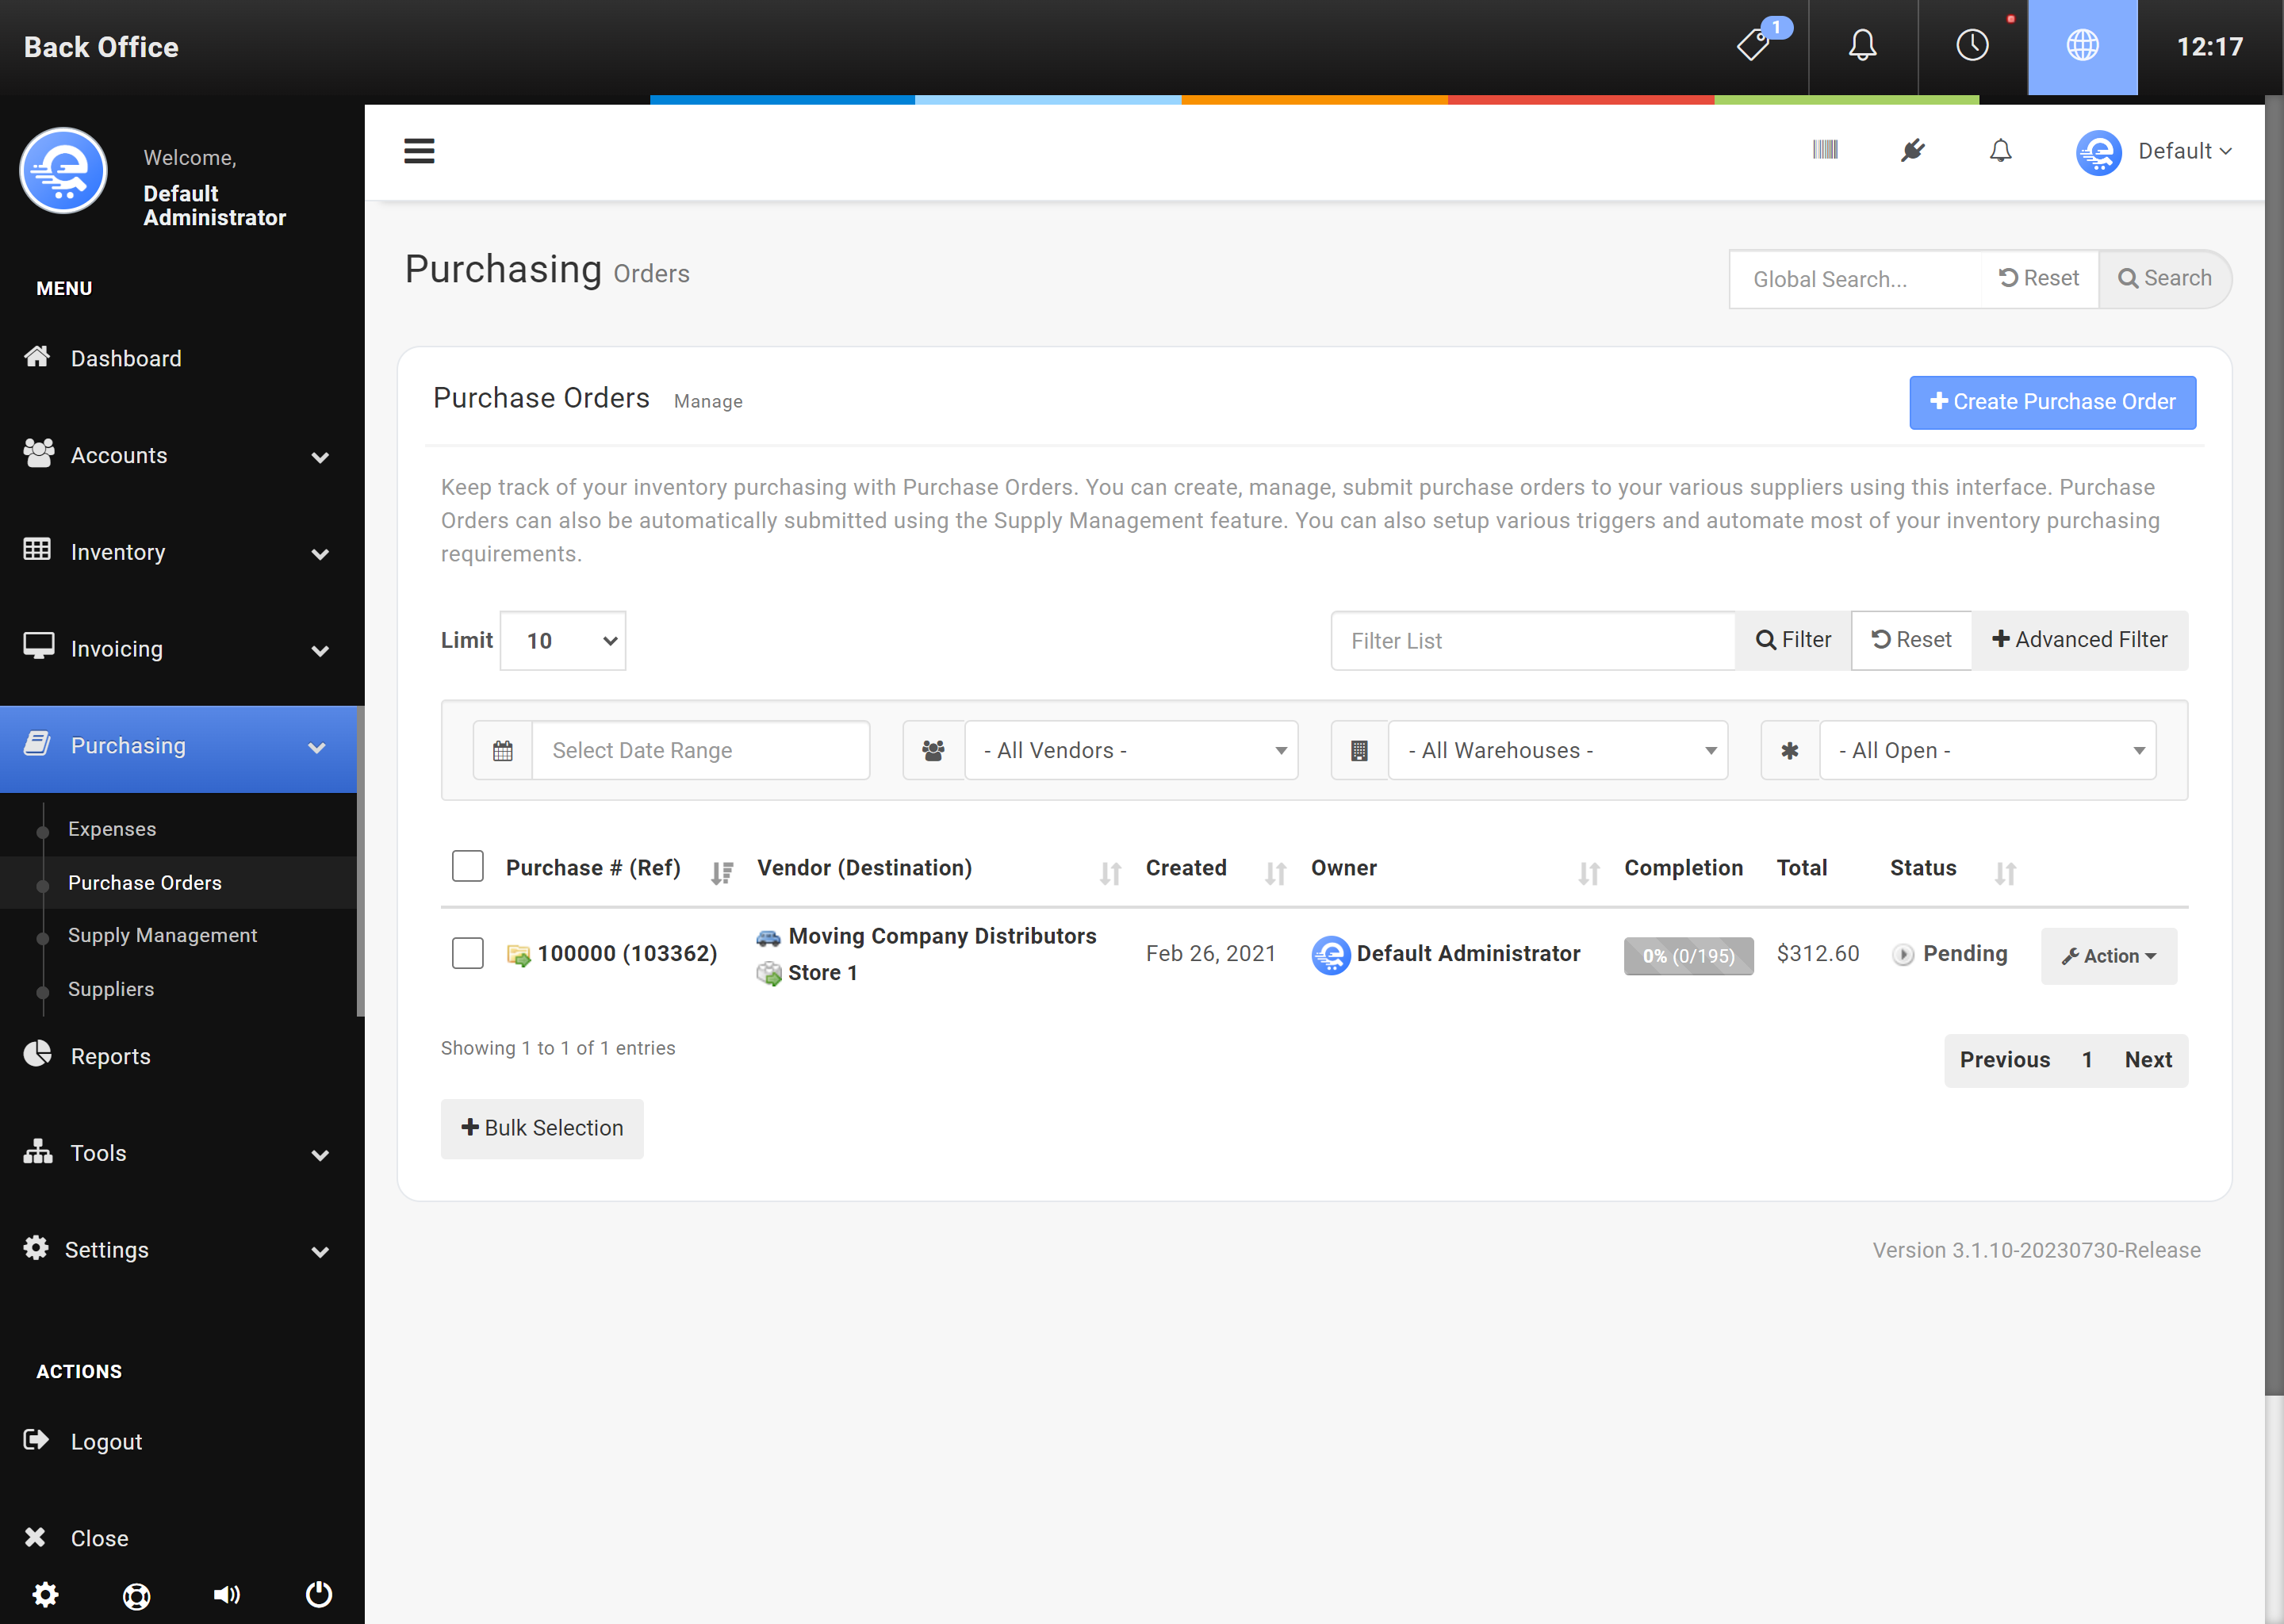
Figure C
Create a new Purchase Order in the Purchasing section of the Back Office.
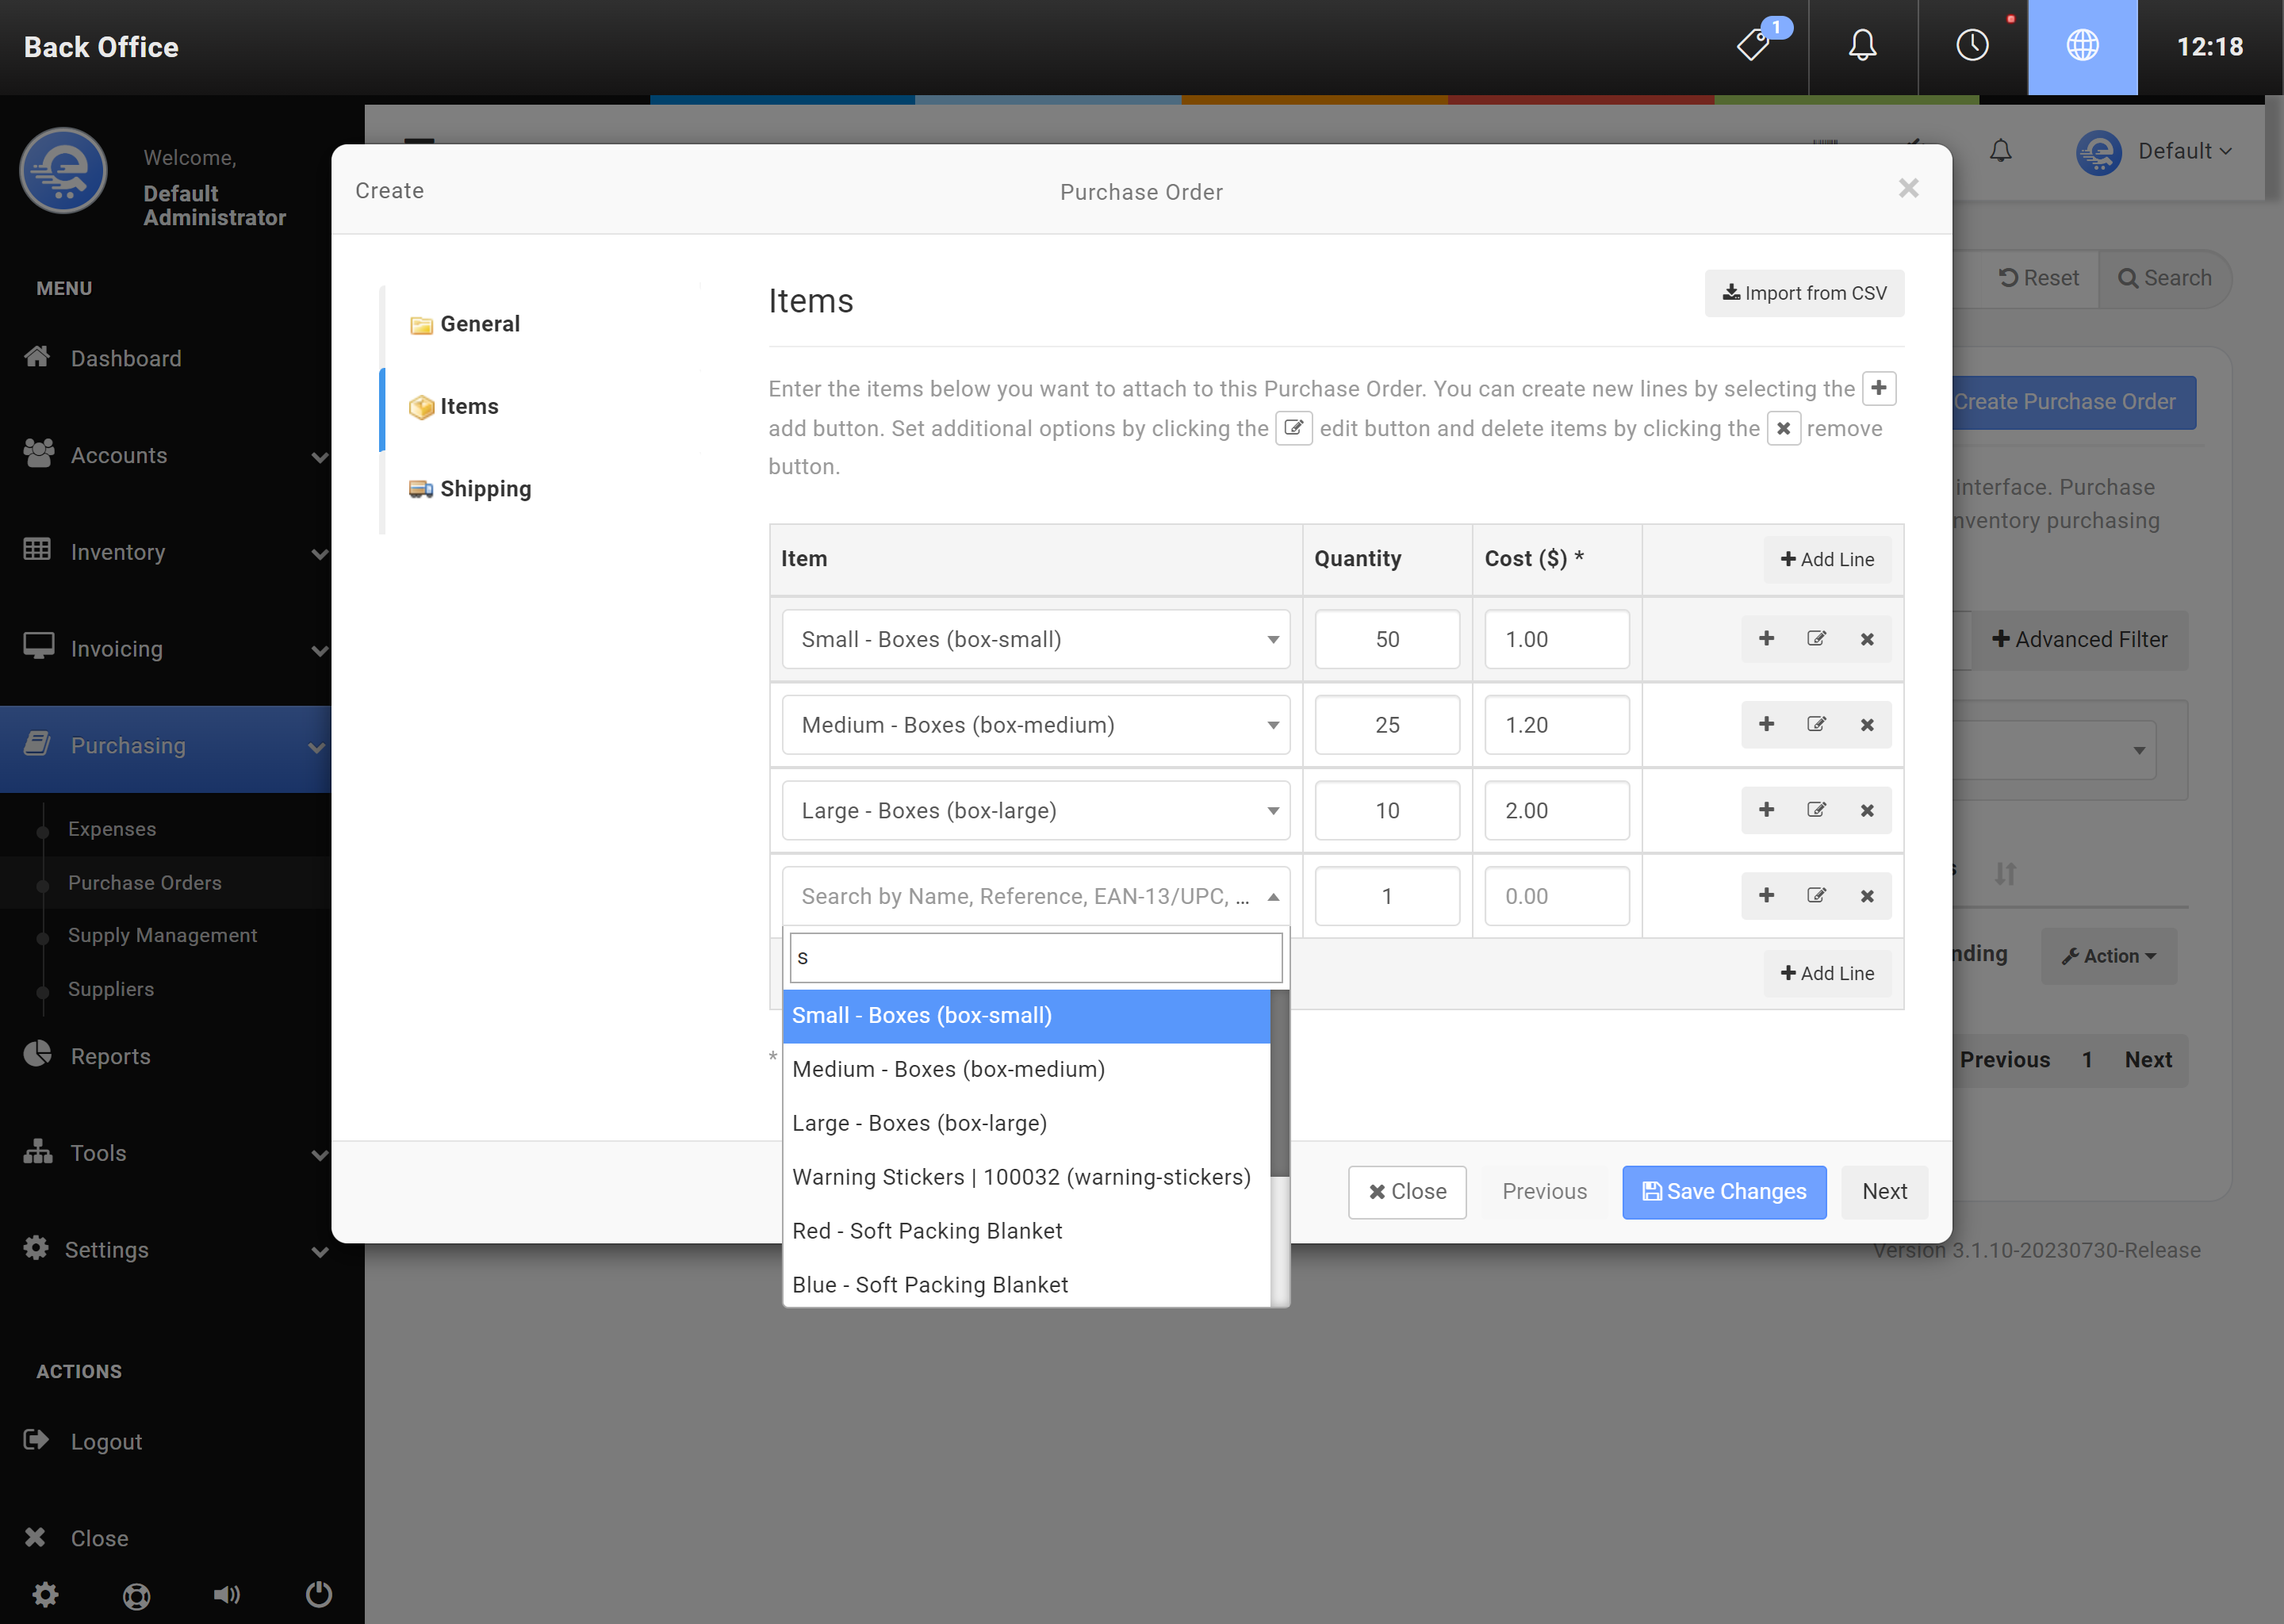
Figure D
Click "Save Changes" when done creating or modifying the Puchase Order.
Receiving
After a Purchase Order has been sent to you by the vendor; you may want to receive the ordered items directly into your inventory. You can complete this task while viewing a Purchase Order. You can also define what warehouse/store receives the inventory increase. Once a Purchase Order is completely received, the Purchase Order will automatically change the status to "Complete", and be considered "Closed".
Purchase Orders cannot be received in Pending status
- Navigate to the eQuate Back Office
- On the left navigation bar, click "Purchasing", then click "Purchase Orders".
- Using the table, find the Purchase Order you want to receive and click "Action", then "View".
- Note: The Purchase Order must not be in Pending status.
- On the right side of each item, click Receive - a new window will open and you can define which warehouse to receive the inventory into (see Figure F). Or you can also receive all by selecting the check boxes on the view left of the item, and then selecting "Receive Selected" (see Figure E).
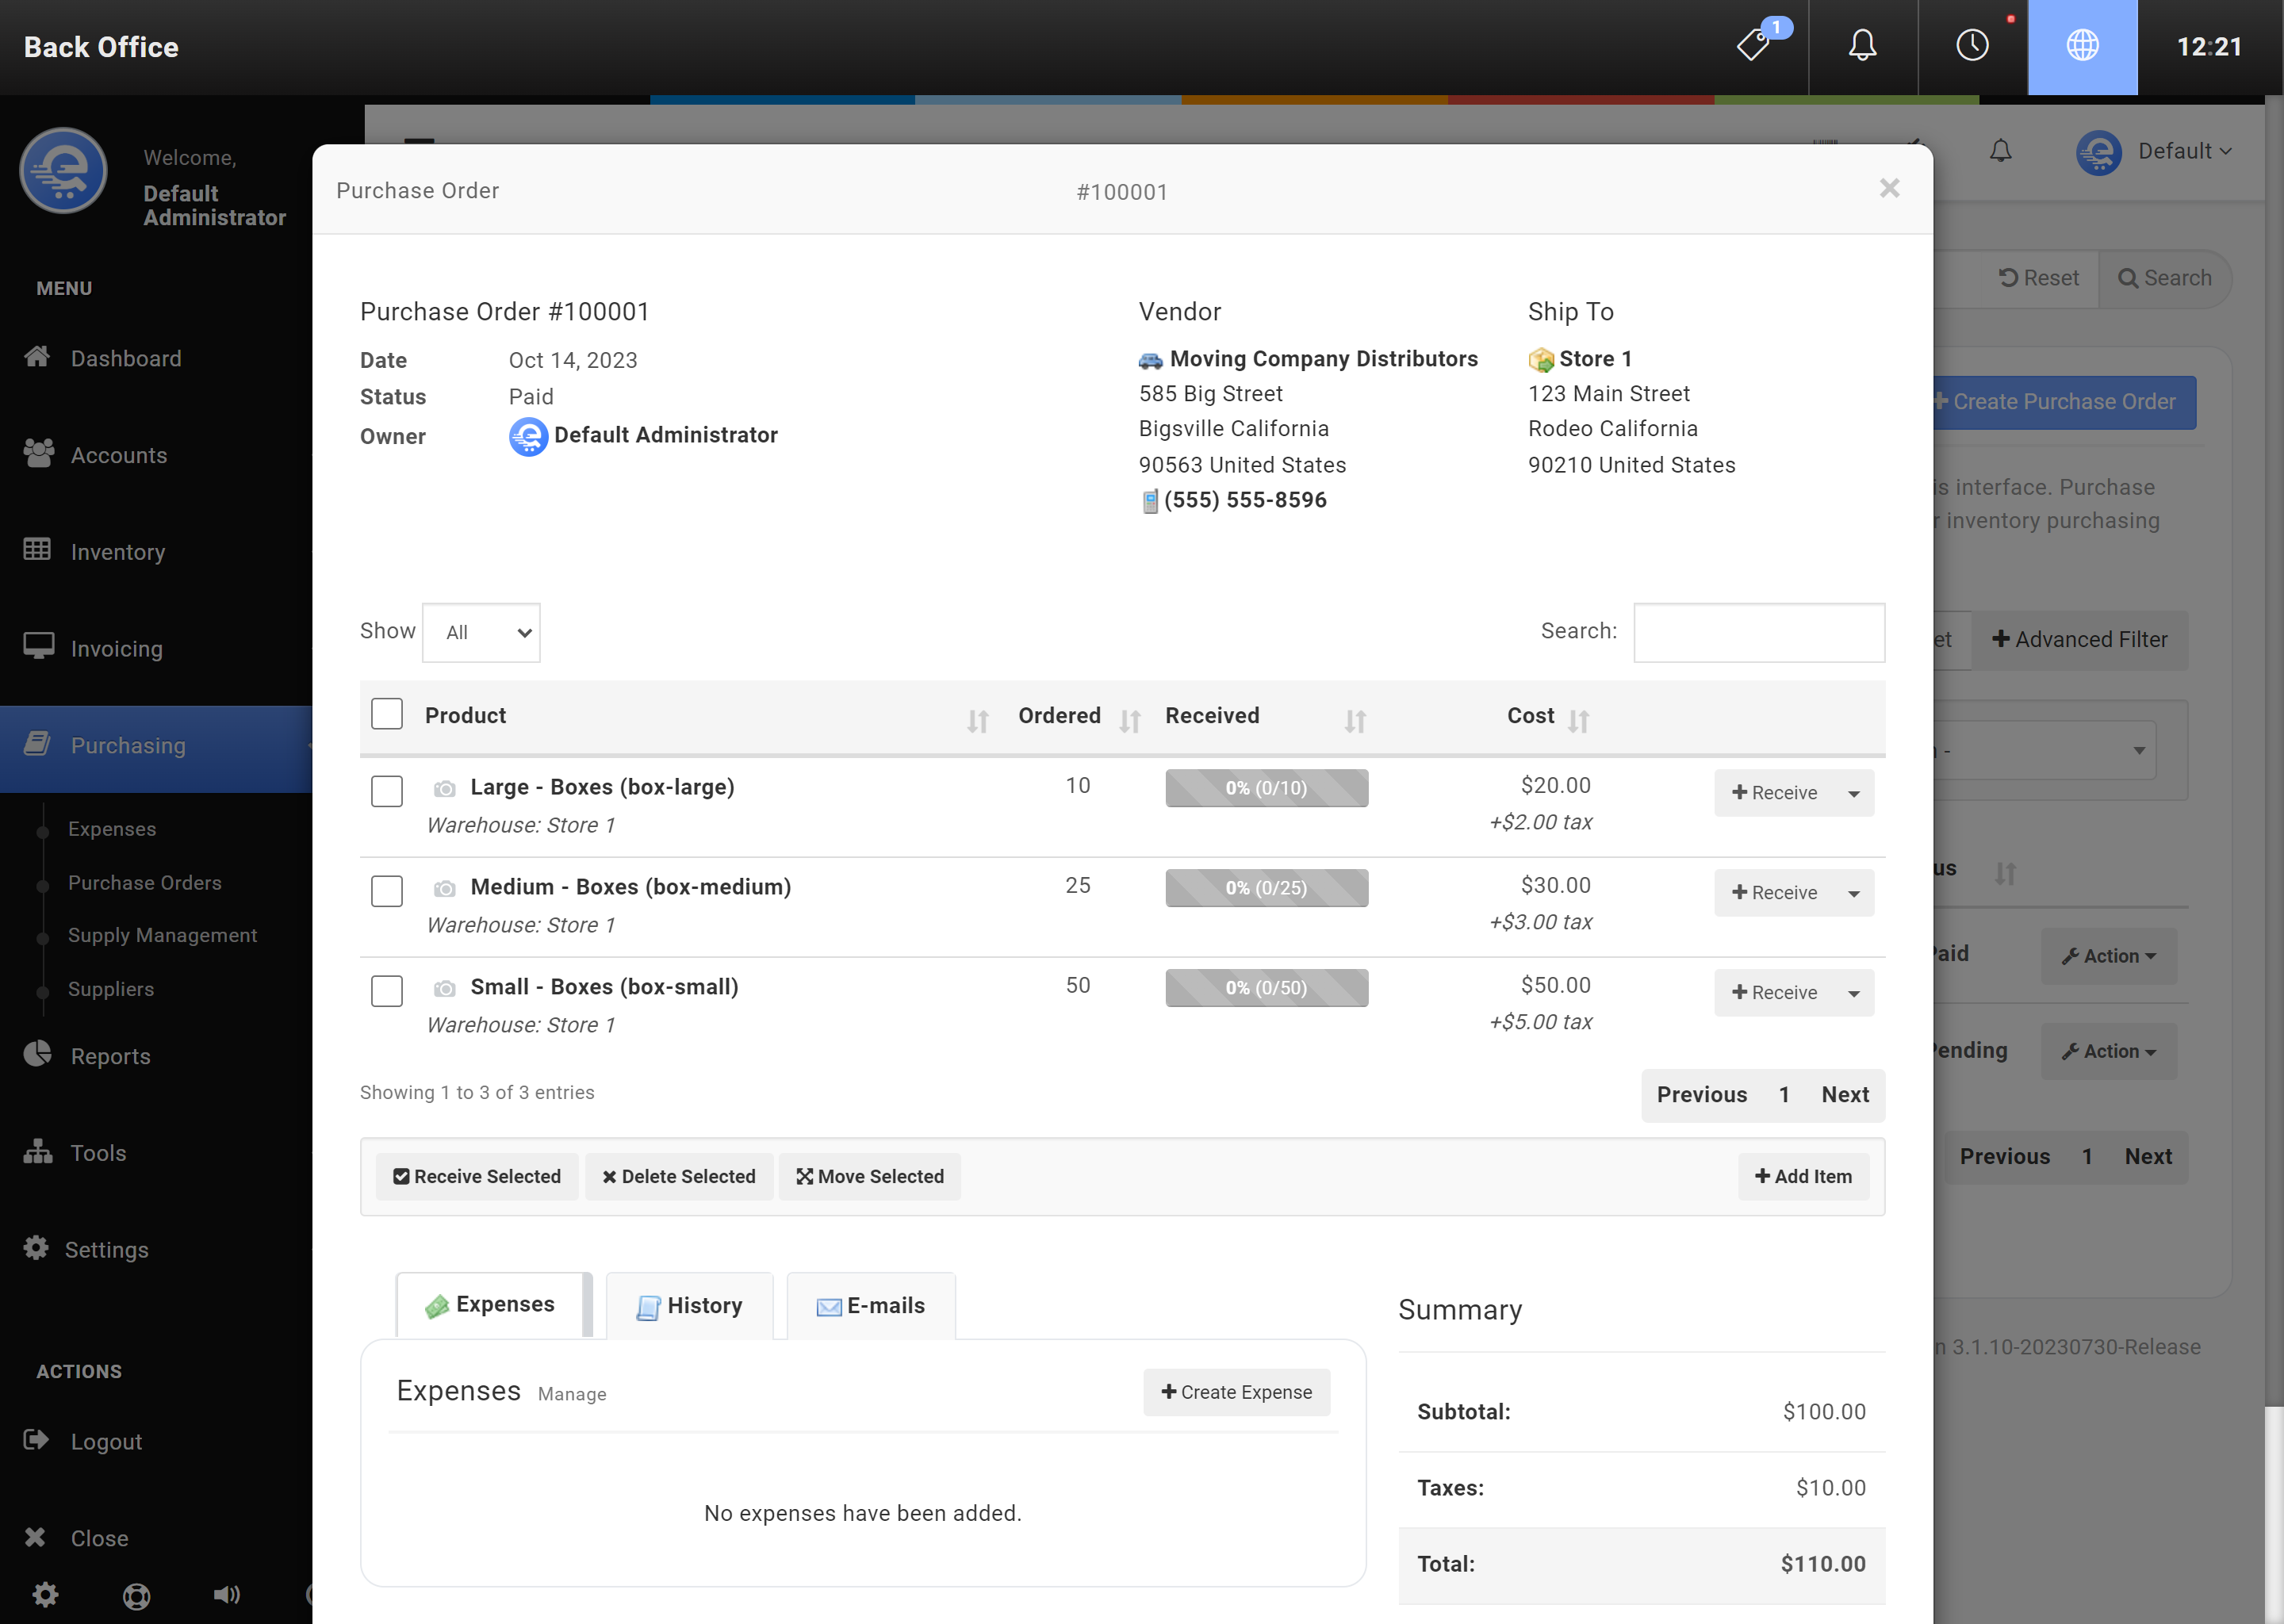
Figure E
View the Purchase Order within the Back Office.
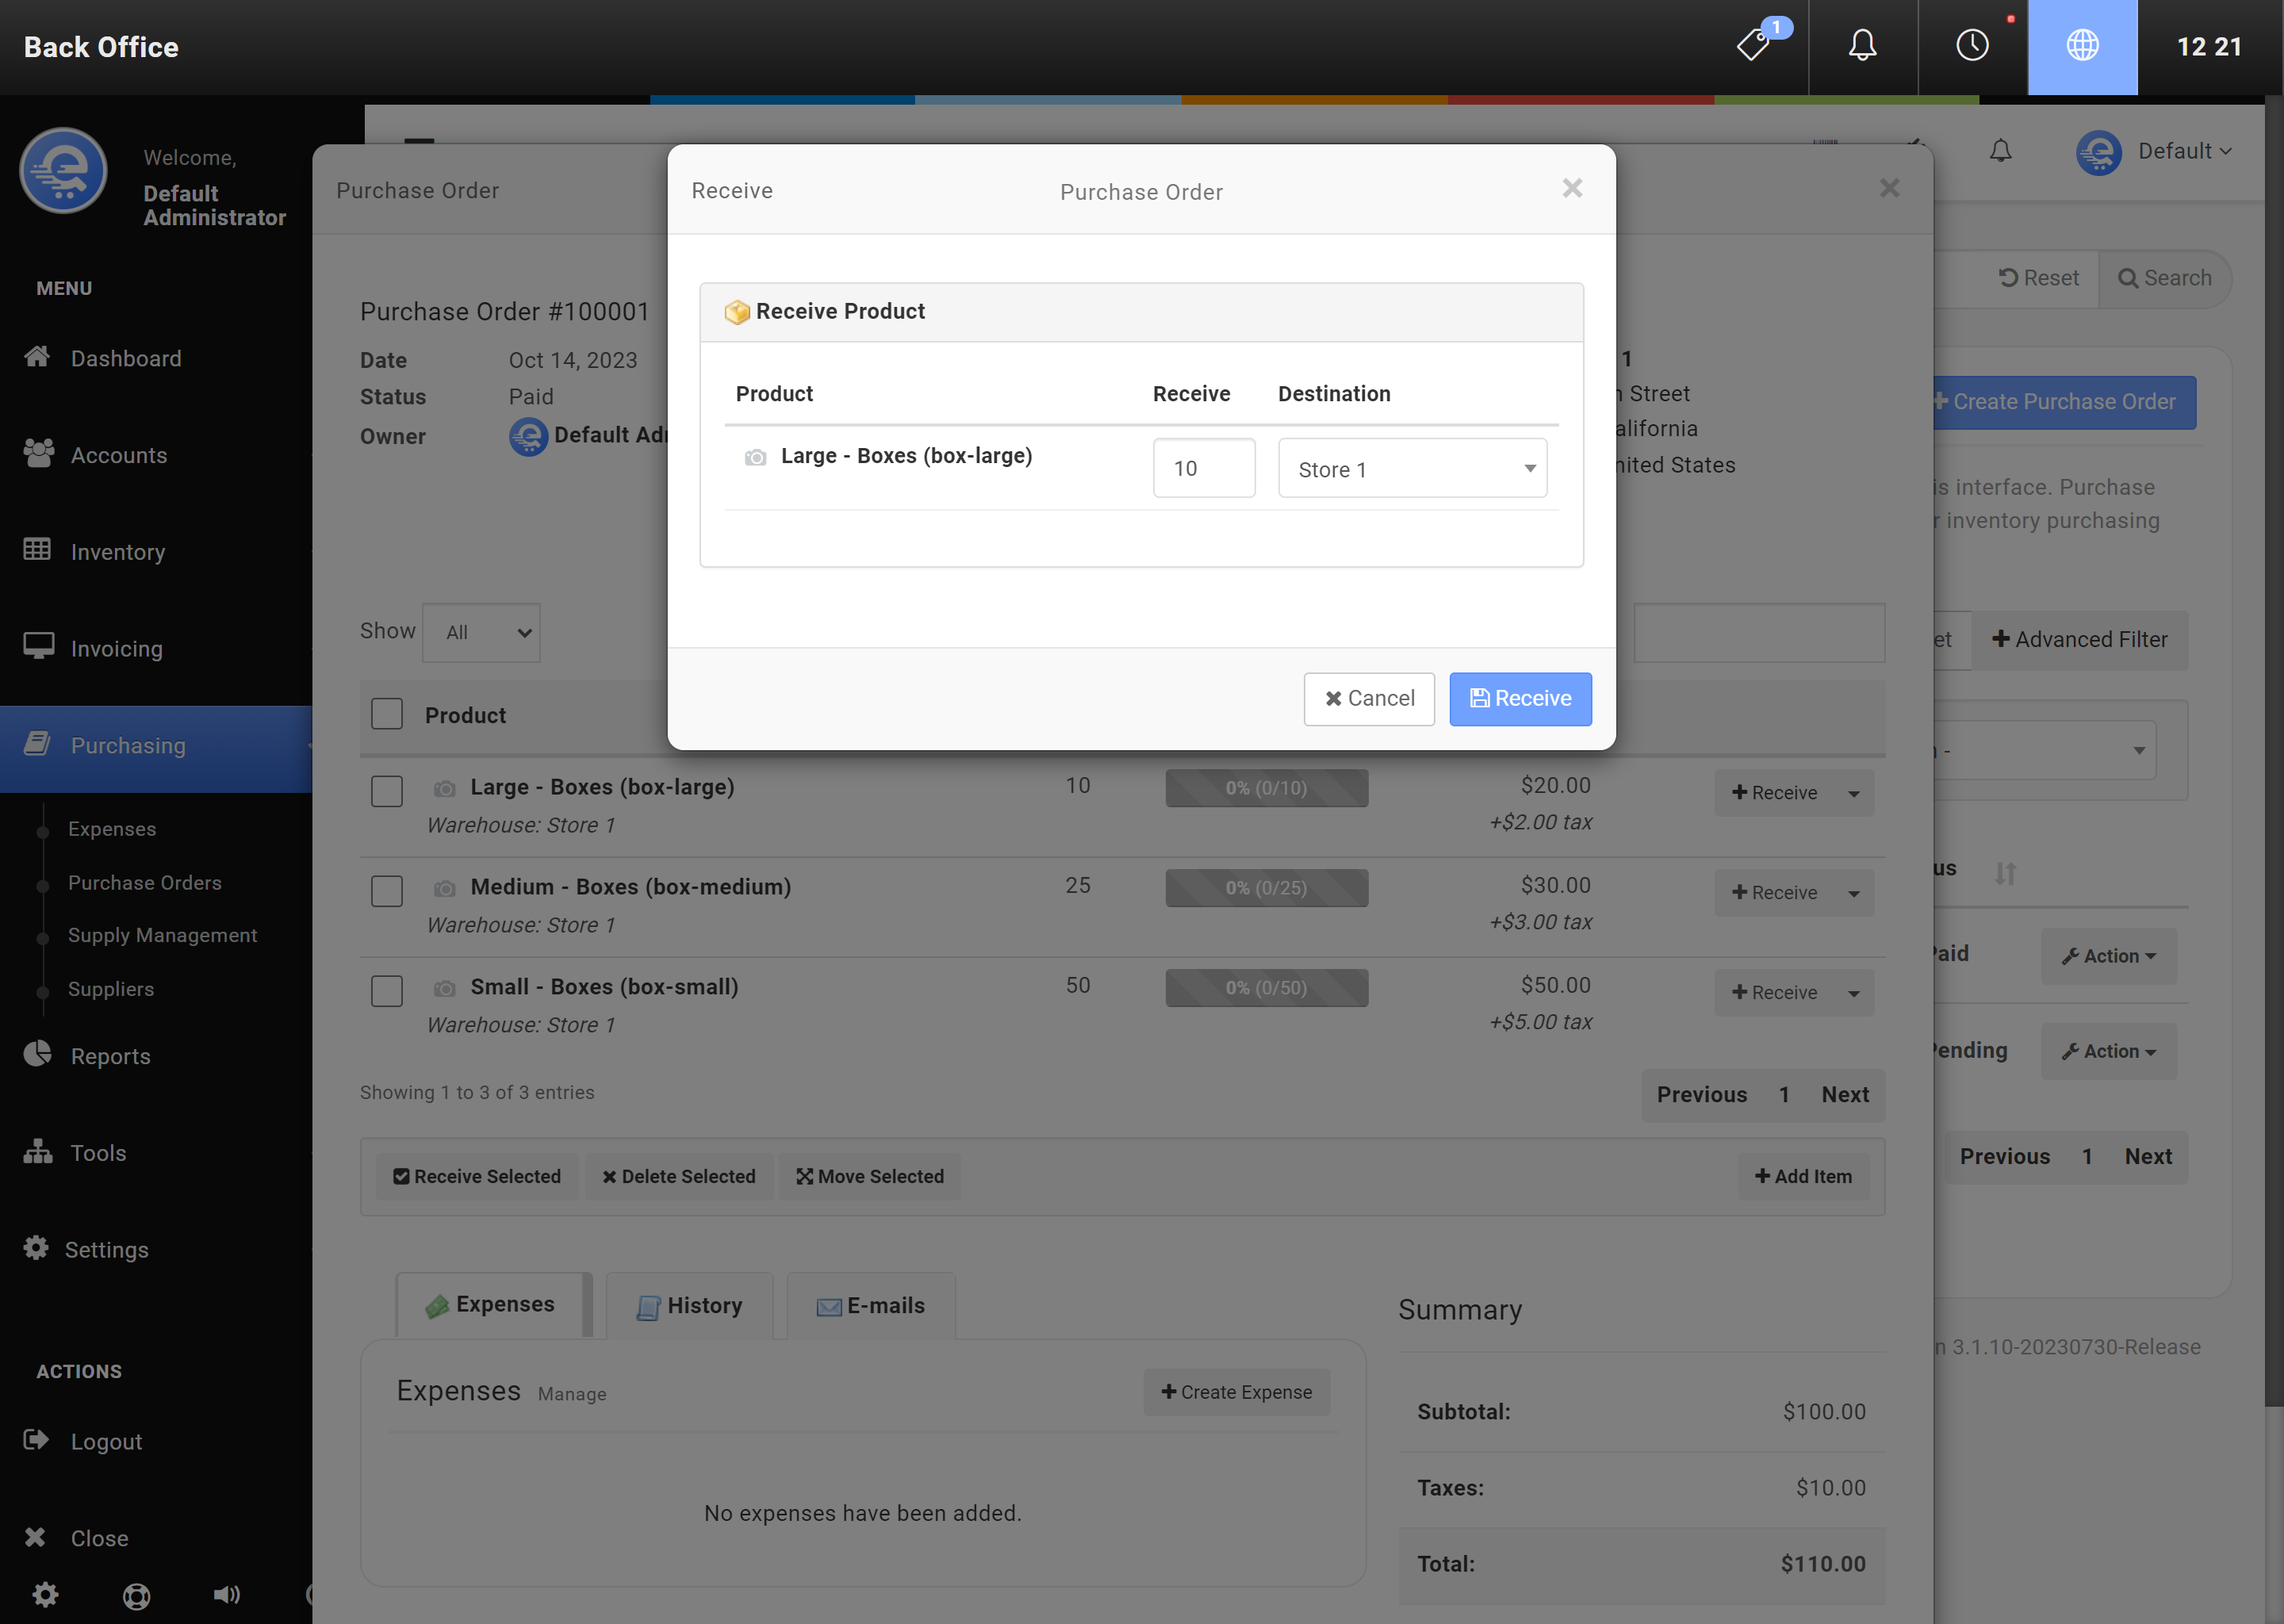
Figure F
Receive items into your Inventory and define which Warehouse to receive them into.
Suppliers
Suppliers provide your business with multiple different products to sell. A supplier can be known as many different things, for example, a Distributor. Purchase Orders reference Suppliers for contact details, and to provide reporting metrics when checking to see who you order from the most.
- Navigate to the eQuate Back Office
- On the left navigation bar, click "Purchasing", then click "Suppliers".
- On the top button menu select "New Supplier" (see Figure A).
- Add the details of the supplier and click "Save Changes" when you are complete (see Figure B).
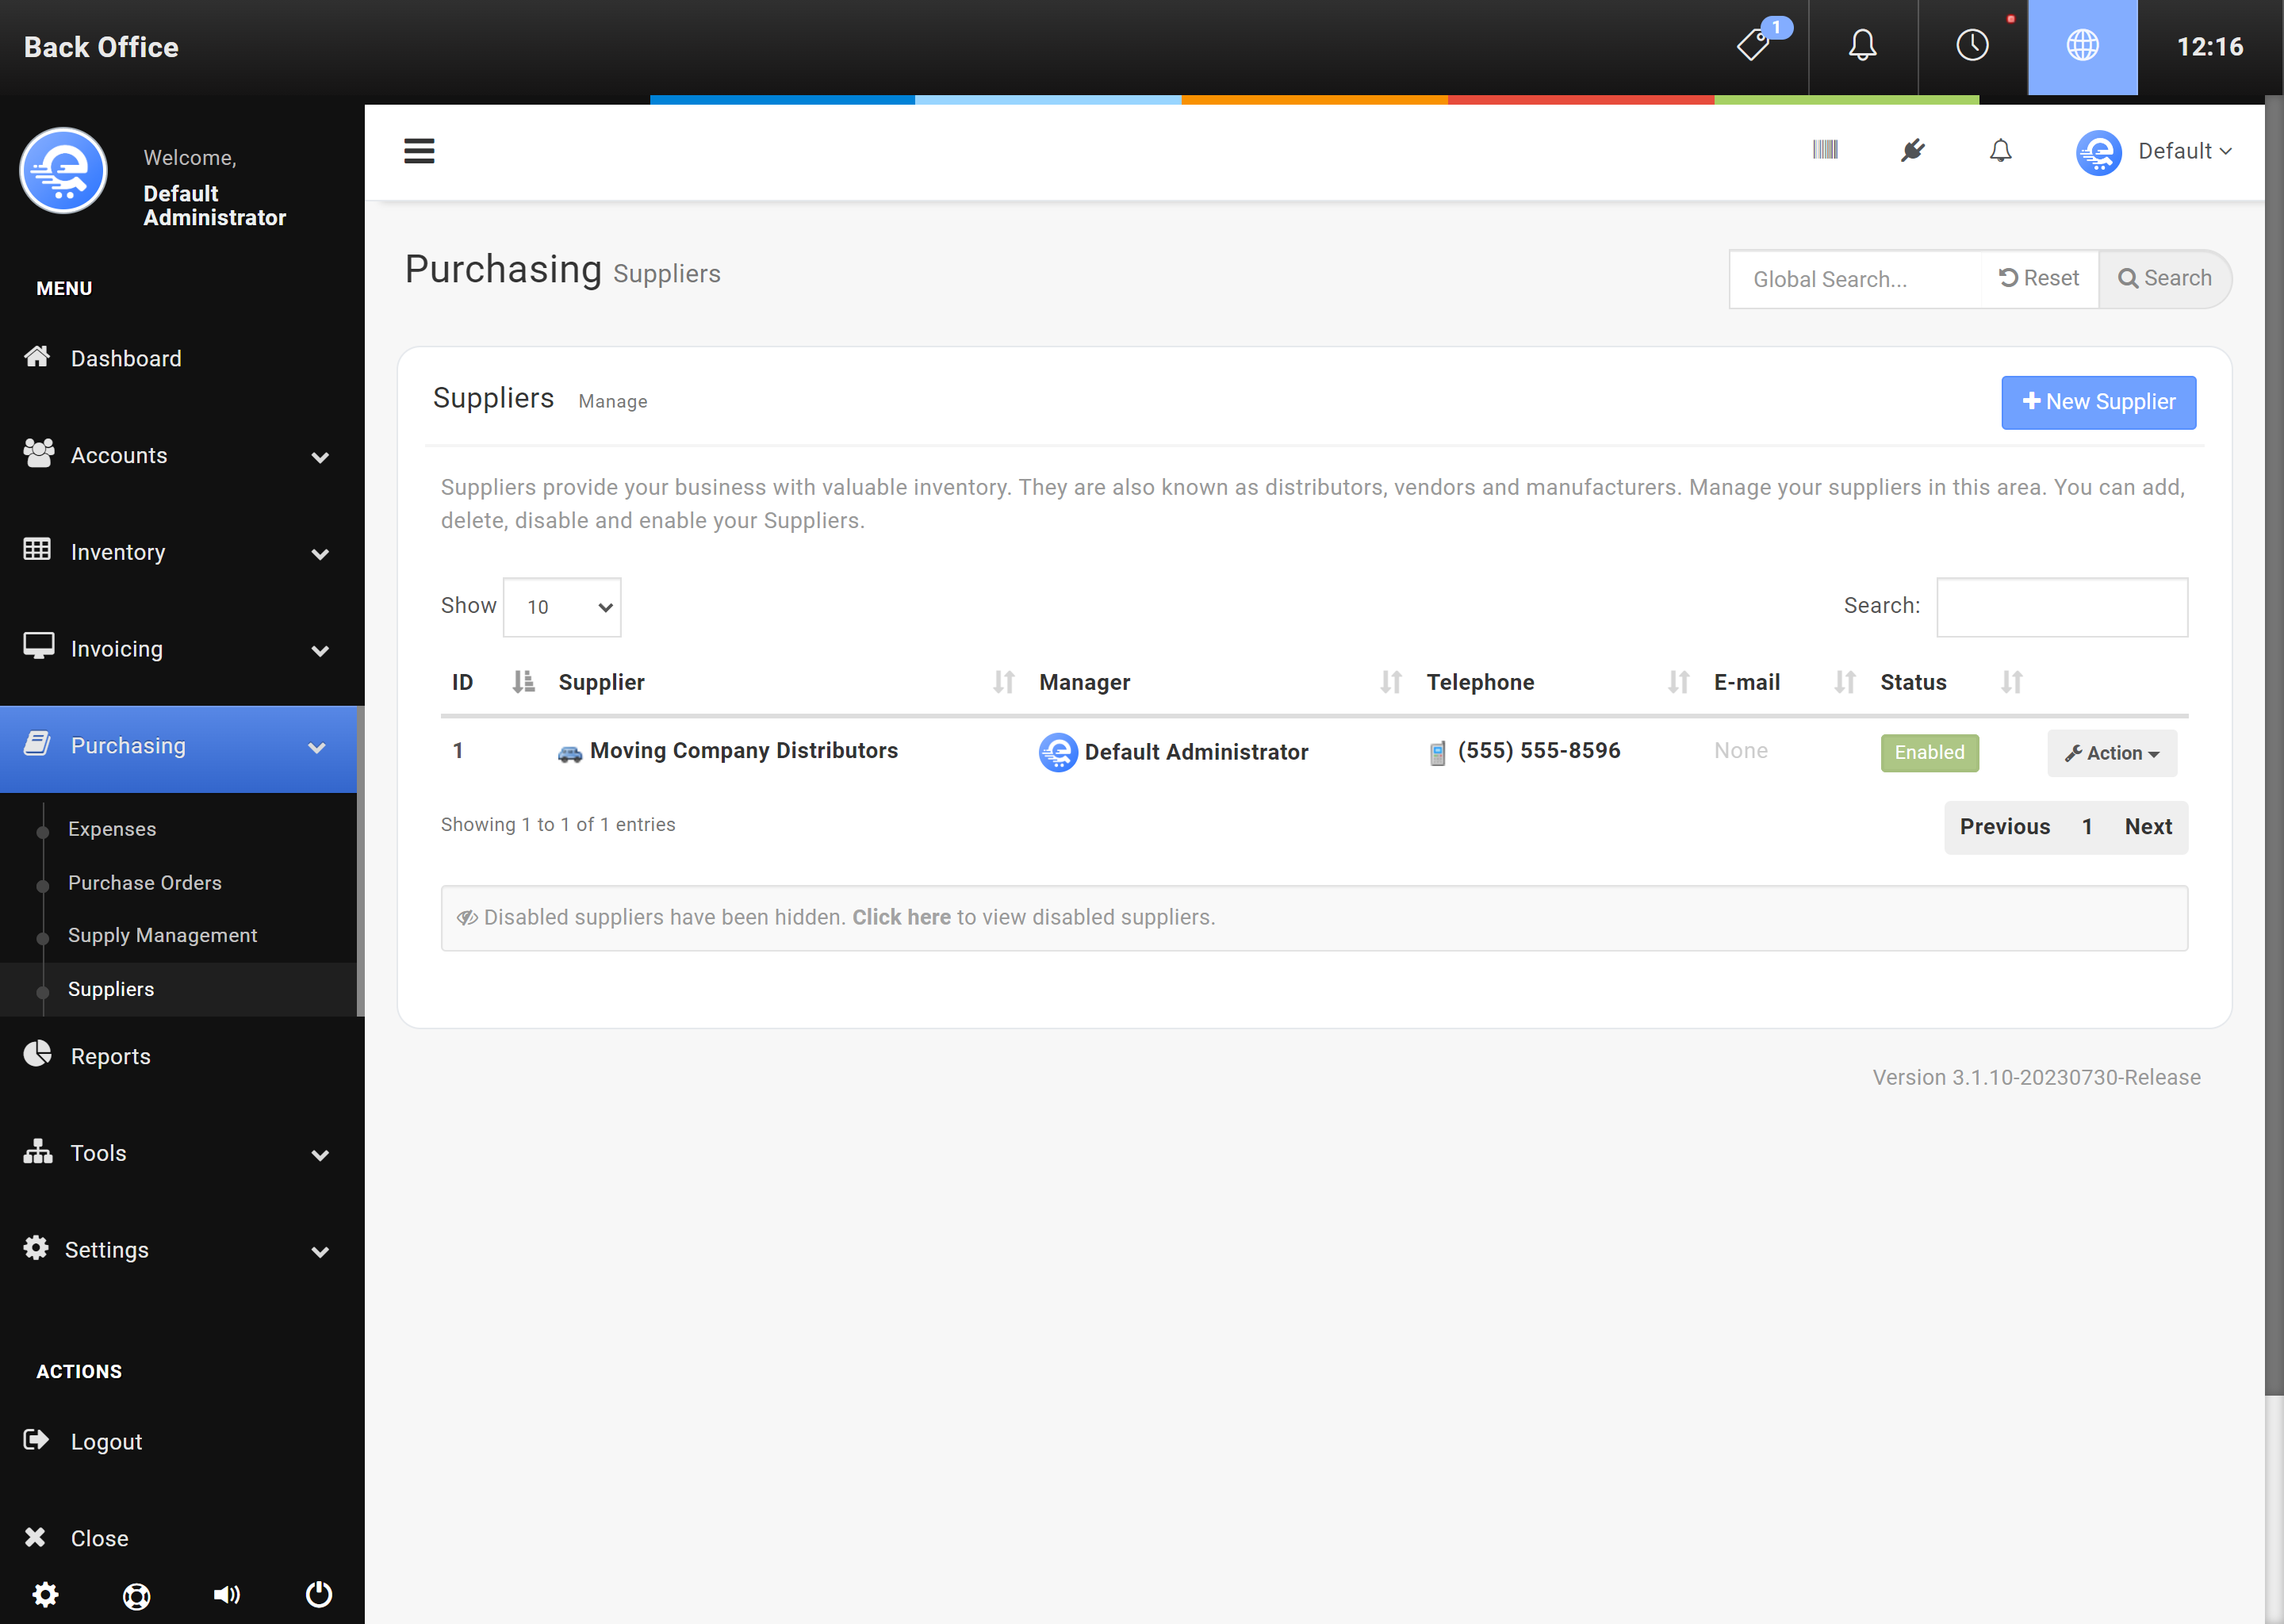
Figure A
Adding a new supplier in the Back Office area.
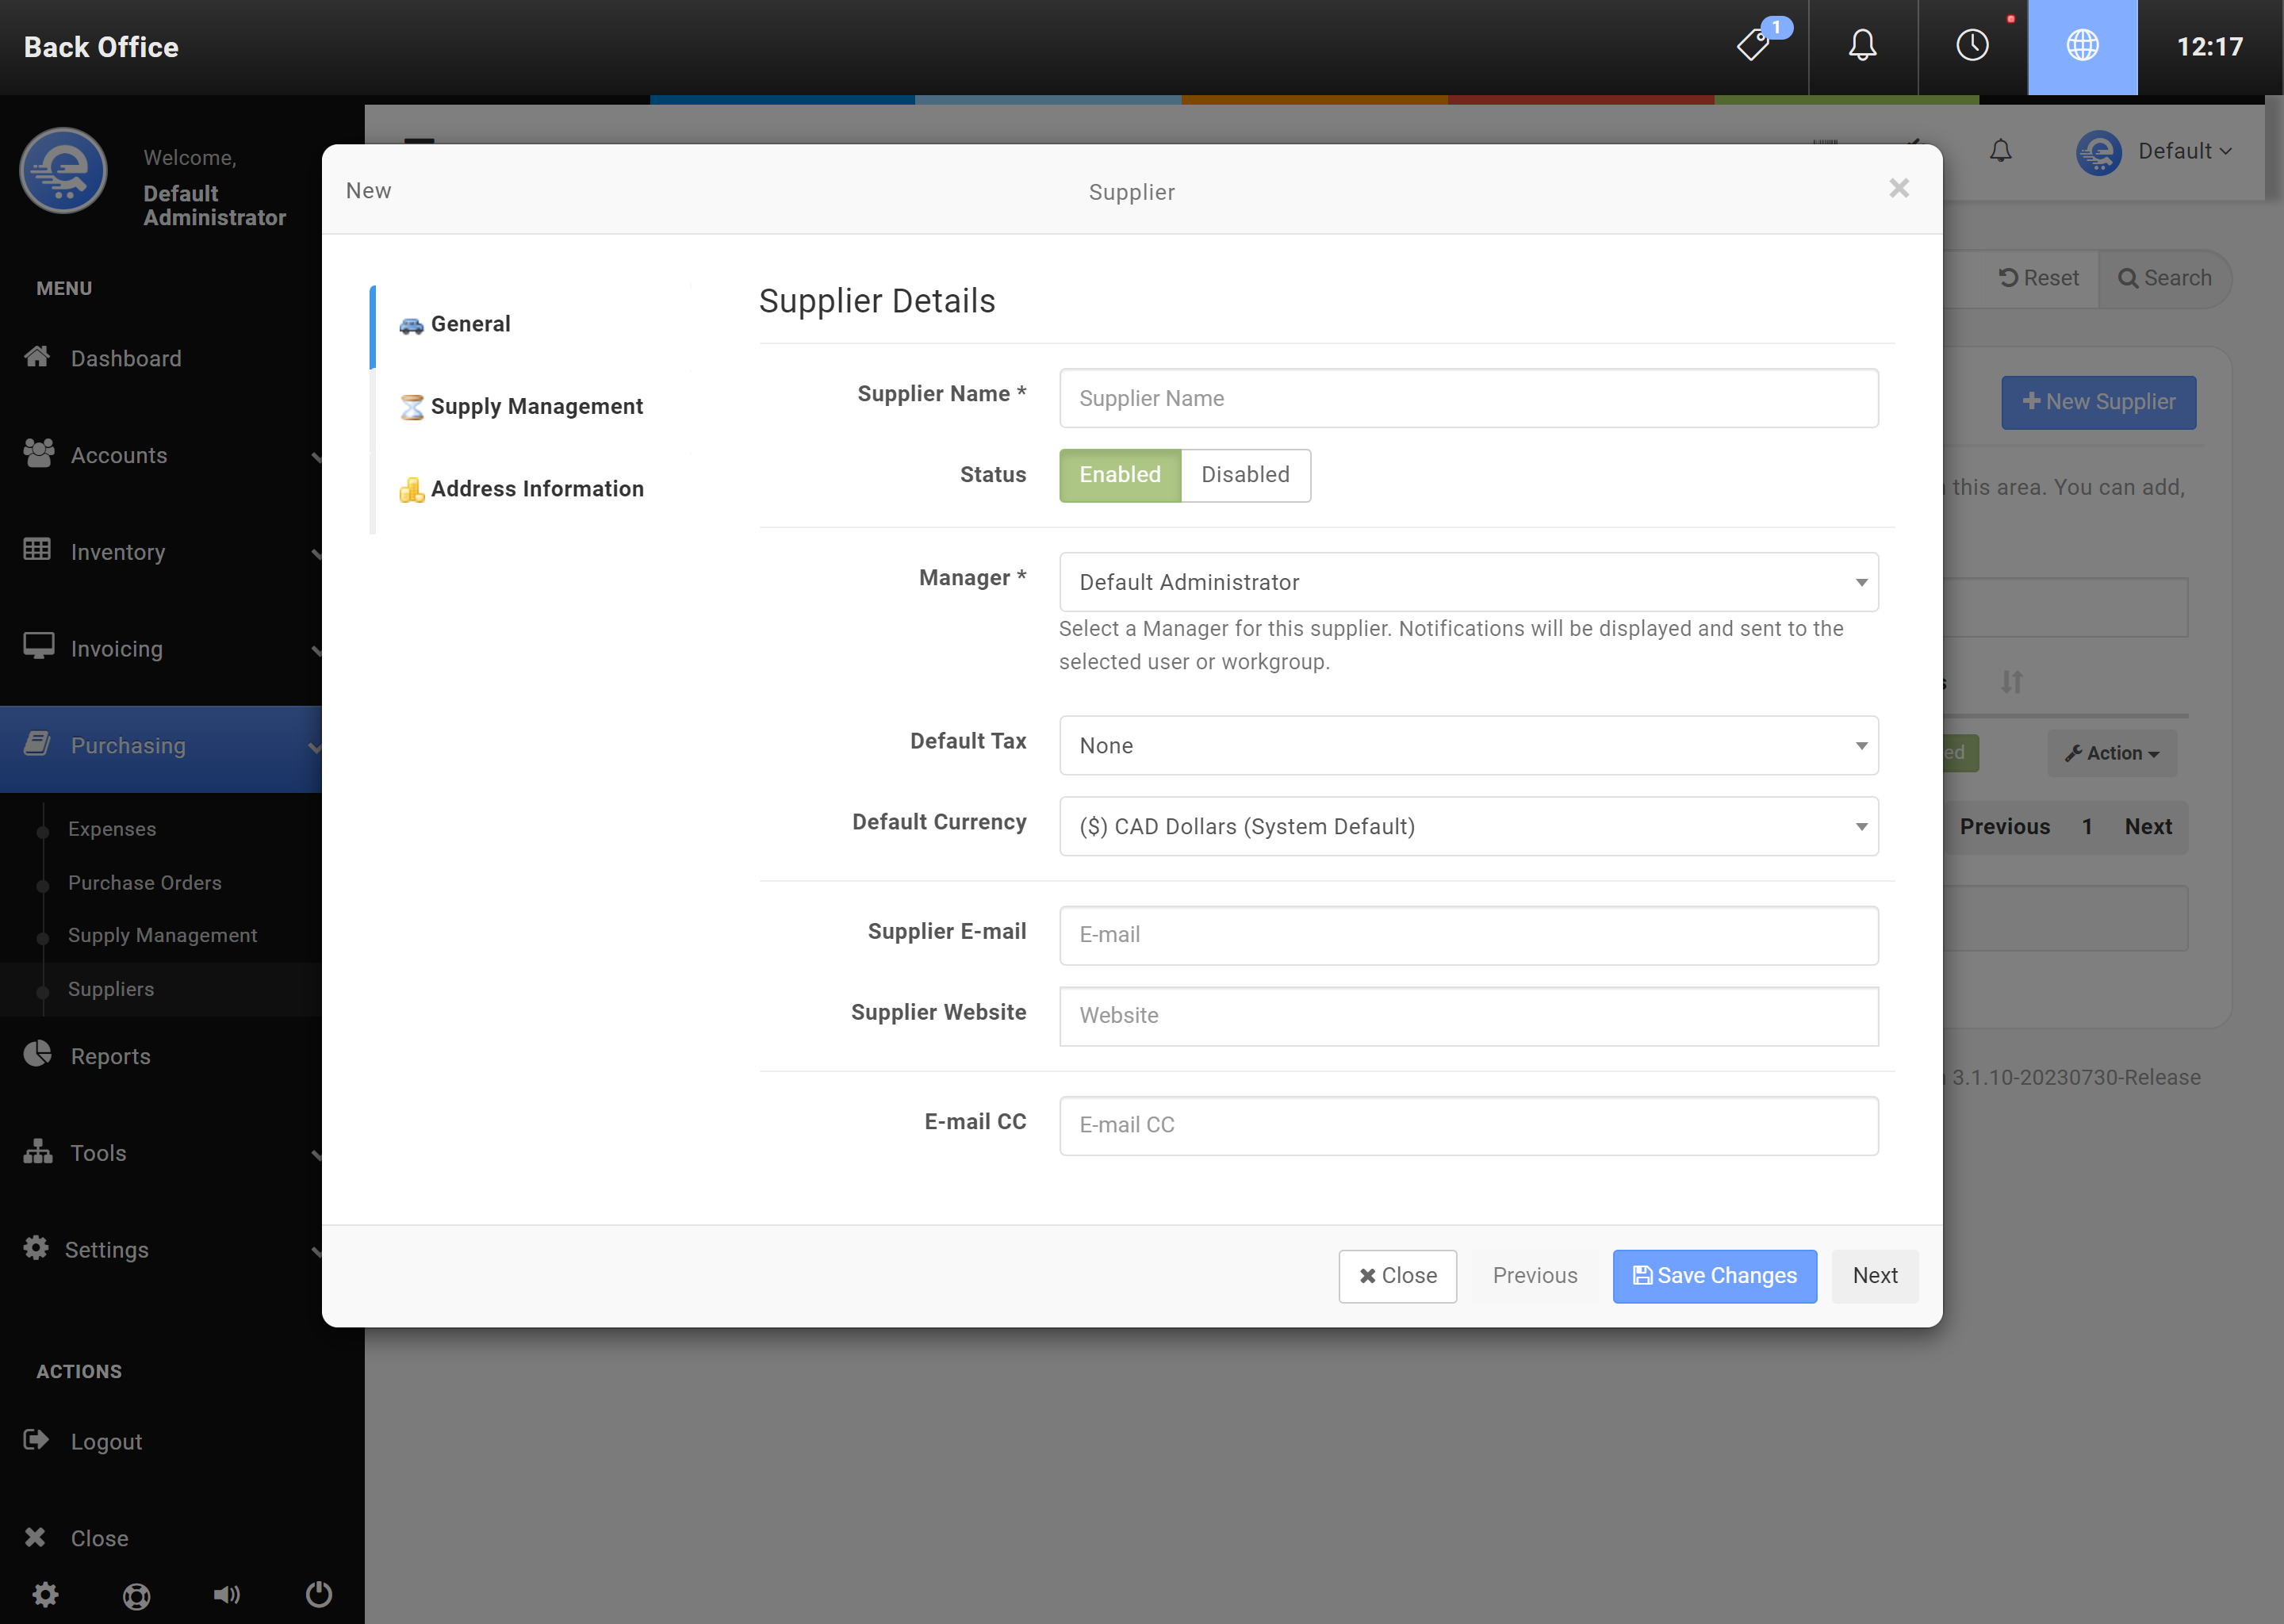
Figure B
After creating/modifying the Supplier, click "Save Changes".
Supply Management
Supply Management can automatically keep your stores stocked with inventory. You can set Supply Management to order a minimum, required, and maximum quantity by warehouse. If you have popular products that you want to keep stocked, enable Supply Management in the Settings, and start setting up Supply Management details when creating or modifying products. Supply Management will automatically create Purchase Orders as items get sold in-store or online. These Purchase Orders can then be automatically submitted to the Vendor.
Supply Management is disabled by default. You must enable Supply Management in the Settings.
- Navigate to eQuate Back Office
- On the left navigation bar, click "Inventory", then click "Products & Warehouses". You can also use the global search at the top right of the Back Office to search for the product you want to modify.
- Find the product you want to edit, and click "Action", then "Edit".
- Click on the Stock tab on the left.
- For Supply; Select "Enabled" to enable the product for Supply Management, or "Disabled" to disable.
- If Supply Management is enabled, the details of the supply will display below:
- Default Supplier: Set this to the Supplier or Manufacturer you want to create the Purchase Order with.
- Supply Type: Set to base supply counts based on warehouse inventory or global inventory.
- Pack Quantity: If the product comes in a pack (ie, pack of 5), you can set the pack quantity here.
- Min/Required/Max: For each warehouse, set the minimum (value to trigger a re-supply), the required value (how many to order to get to required value), and maximum (the absolute maximum quantity to be ordered). You will also need to Enable/Disable the warehouse on the right column.
- Click "Save Changes" when you are complete (see Figure A).
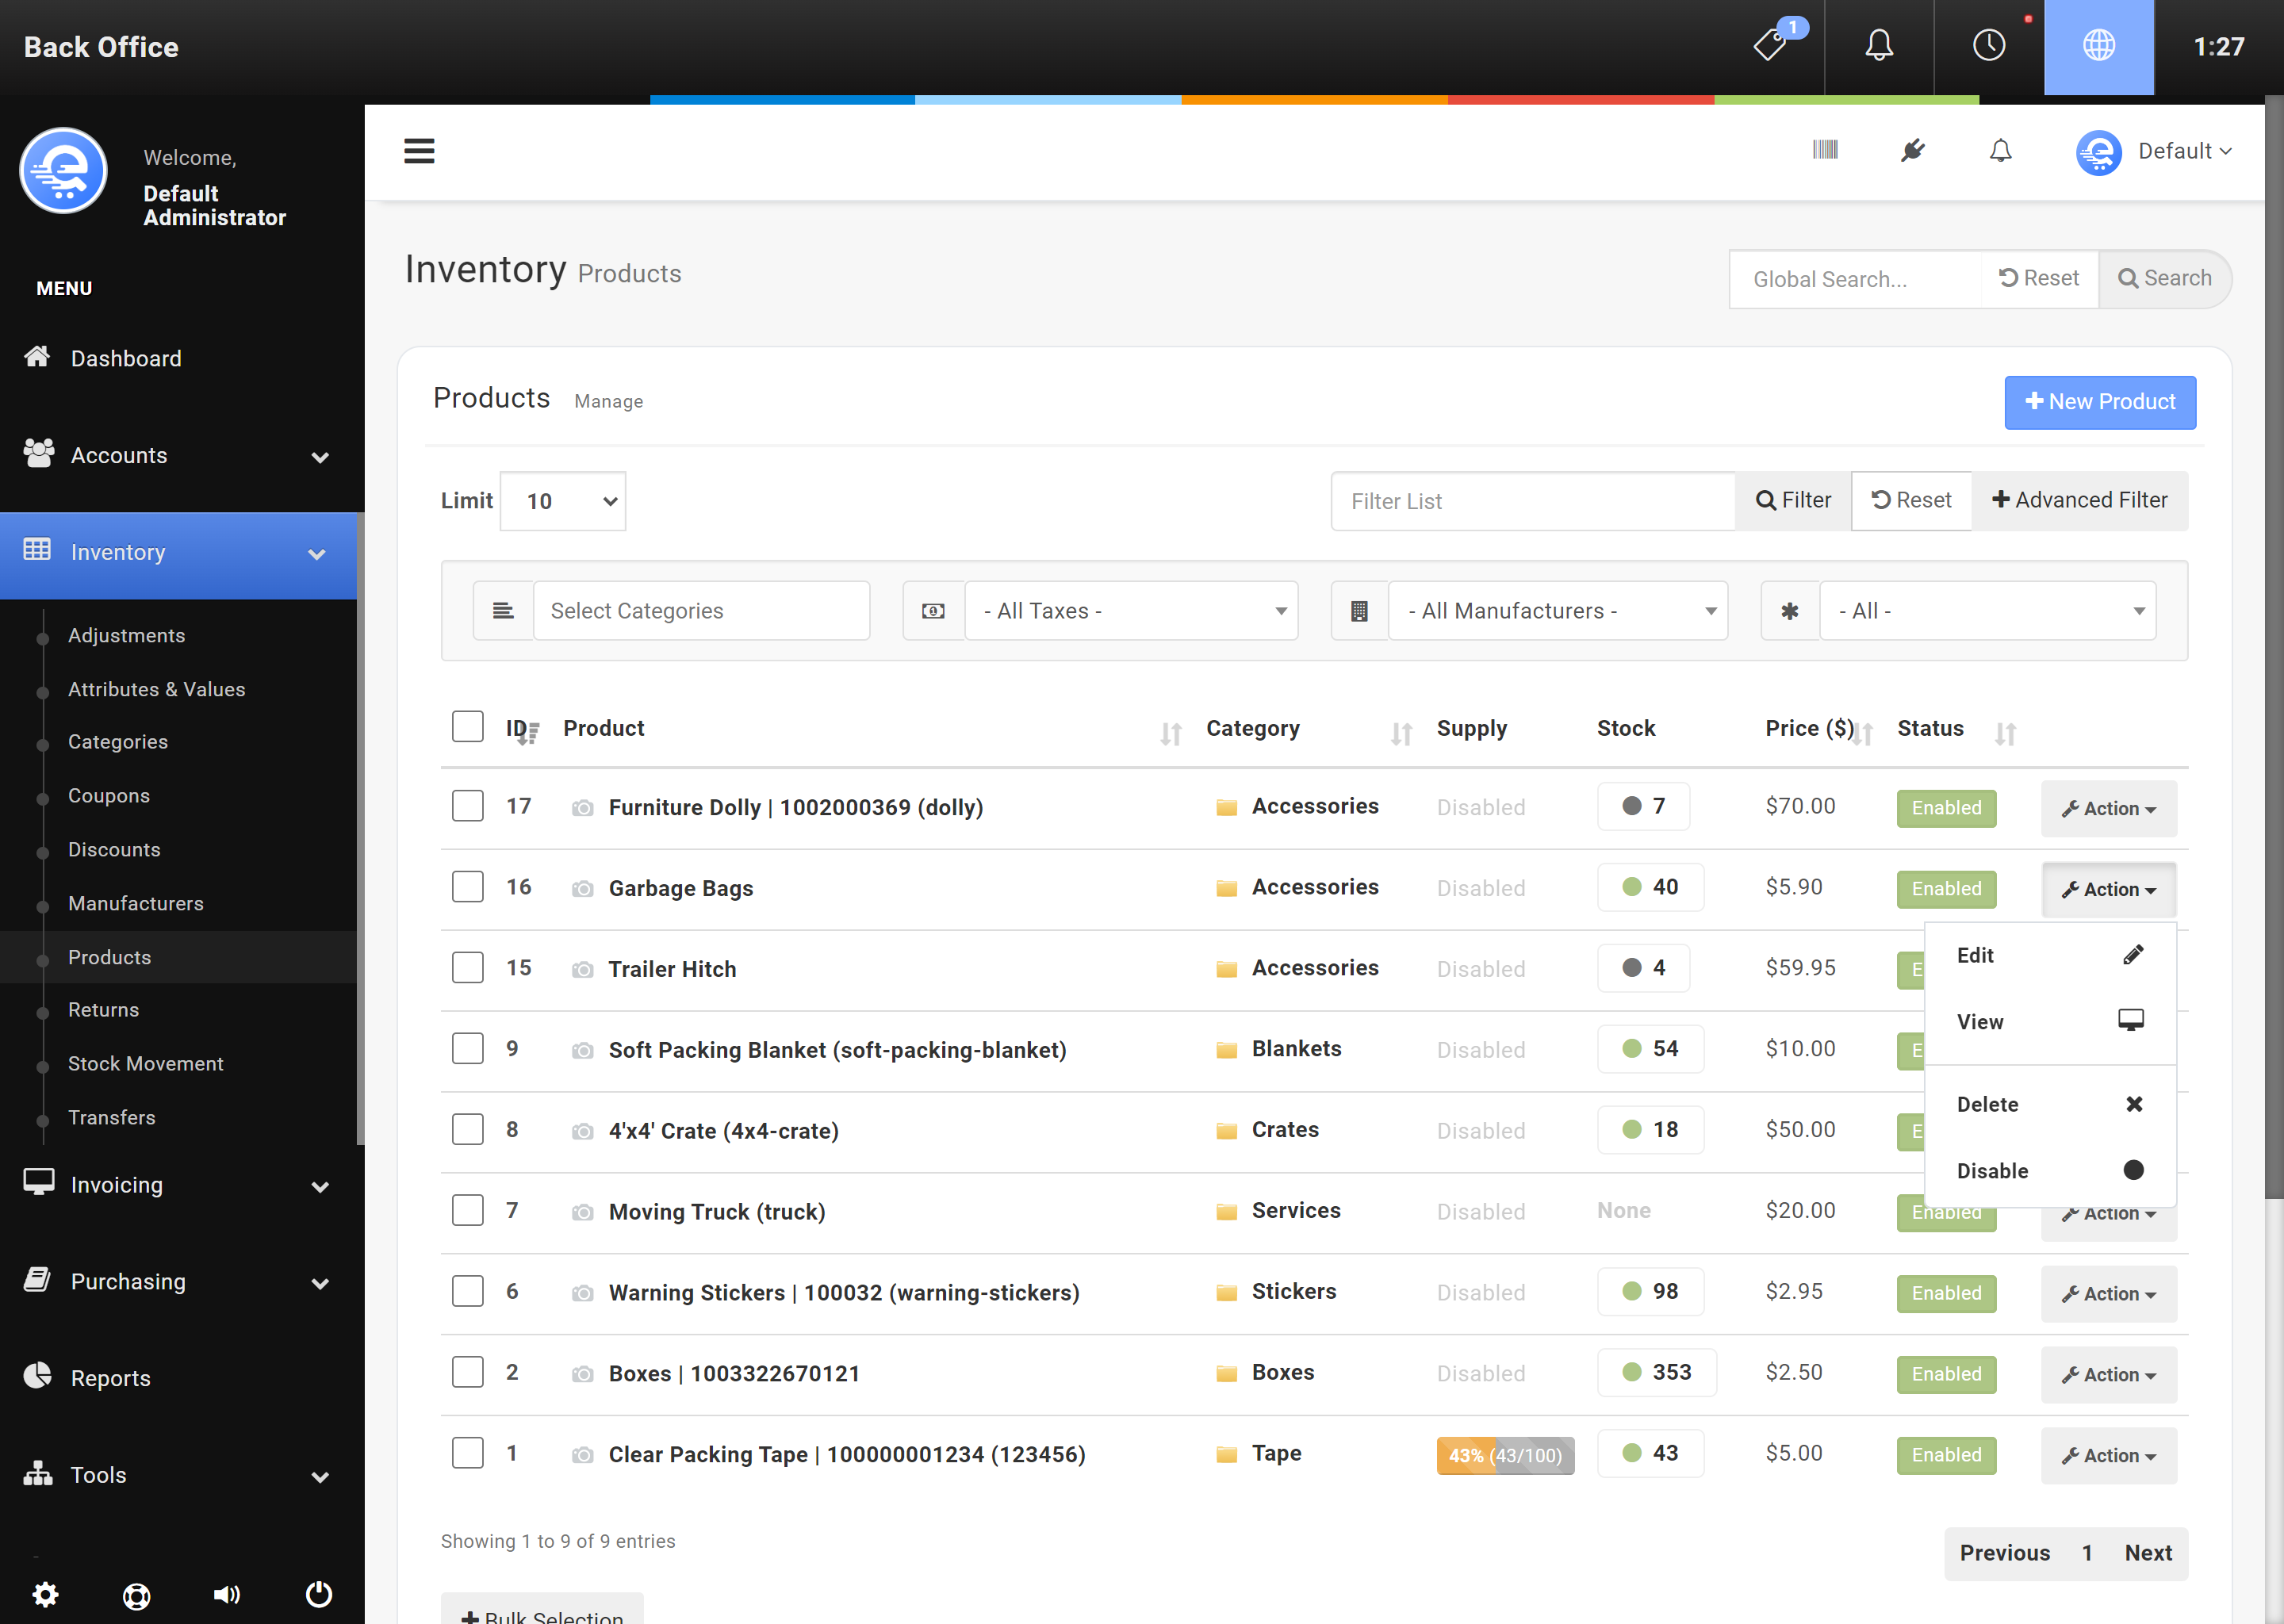
Figure A
Find the product in the Back Office area, and click on "Action", then "Edit".
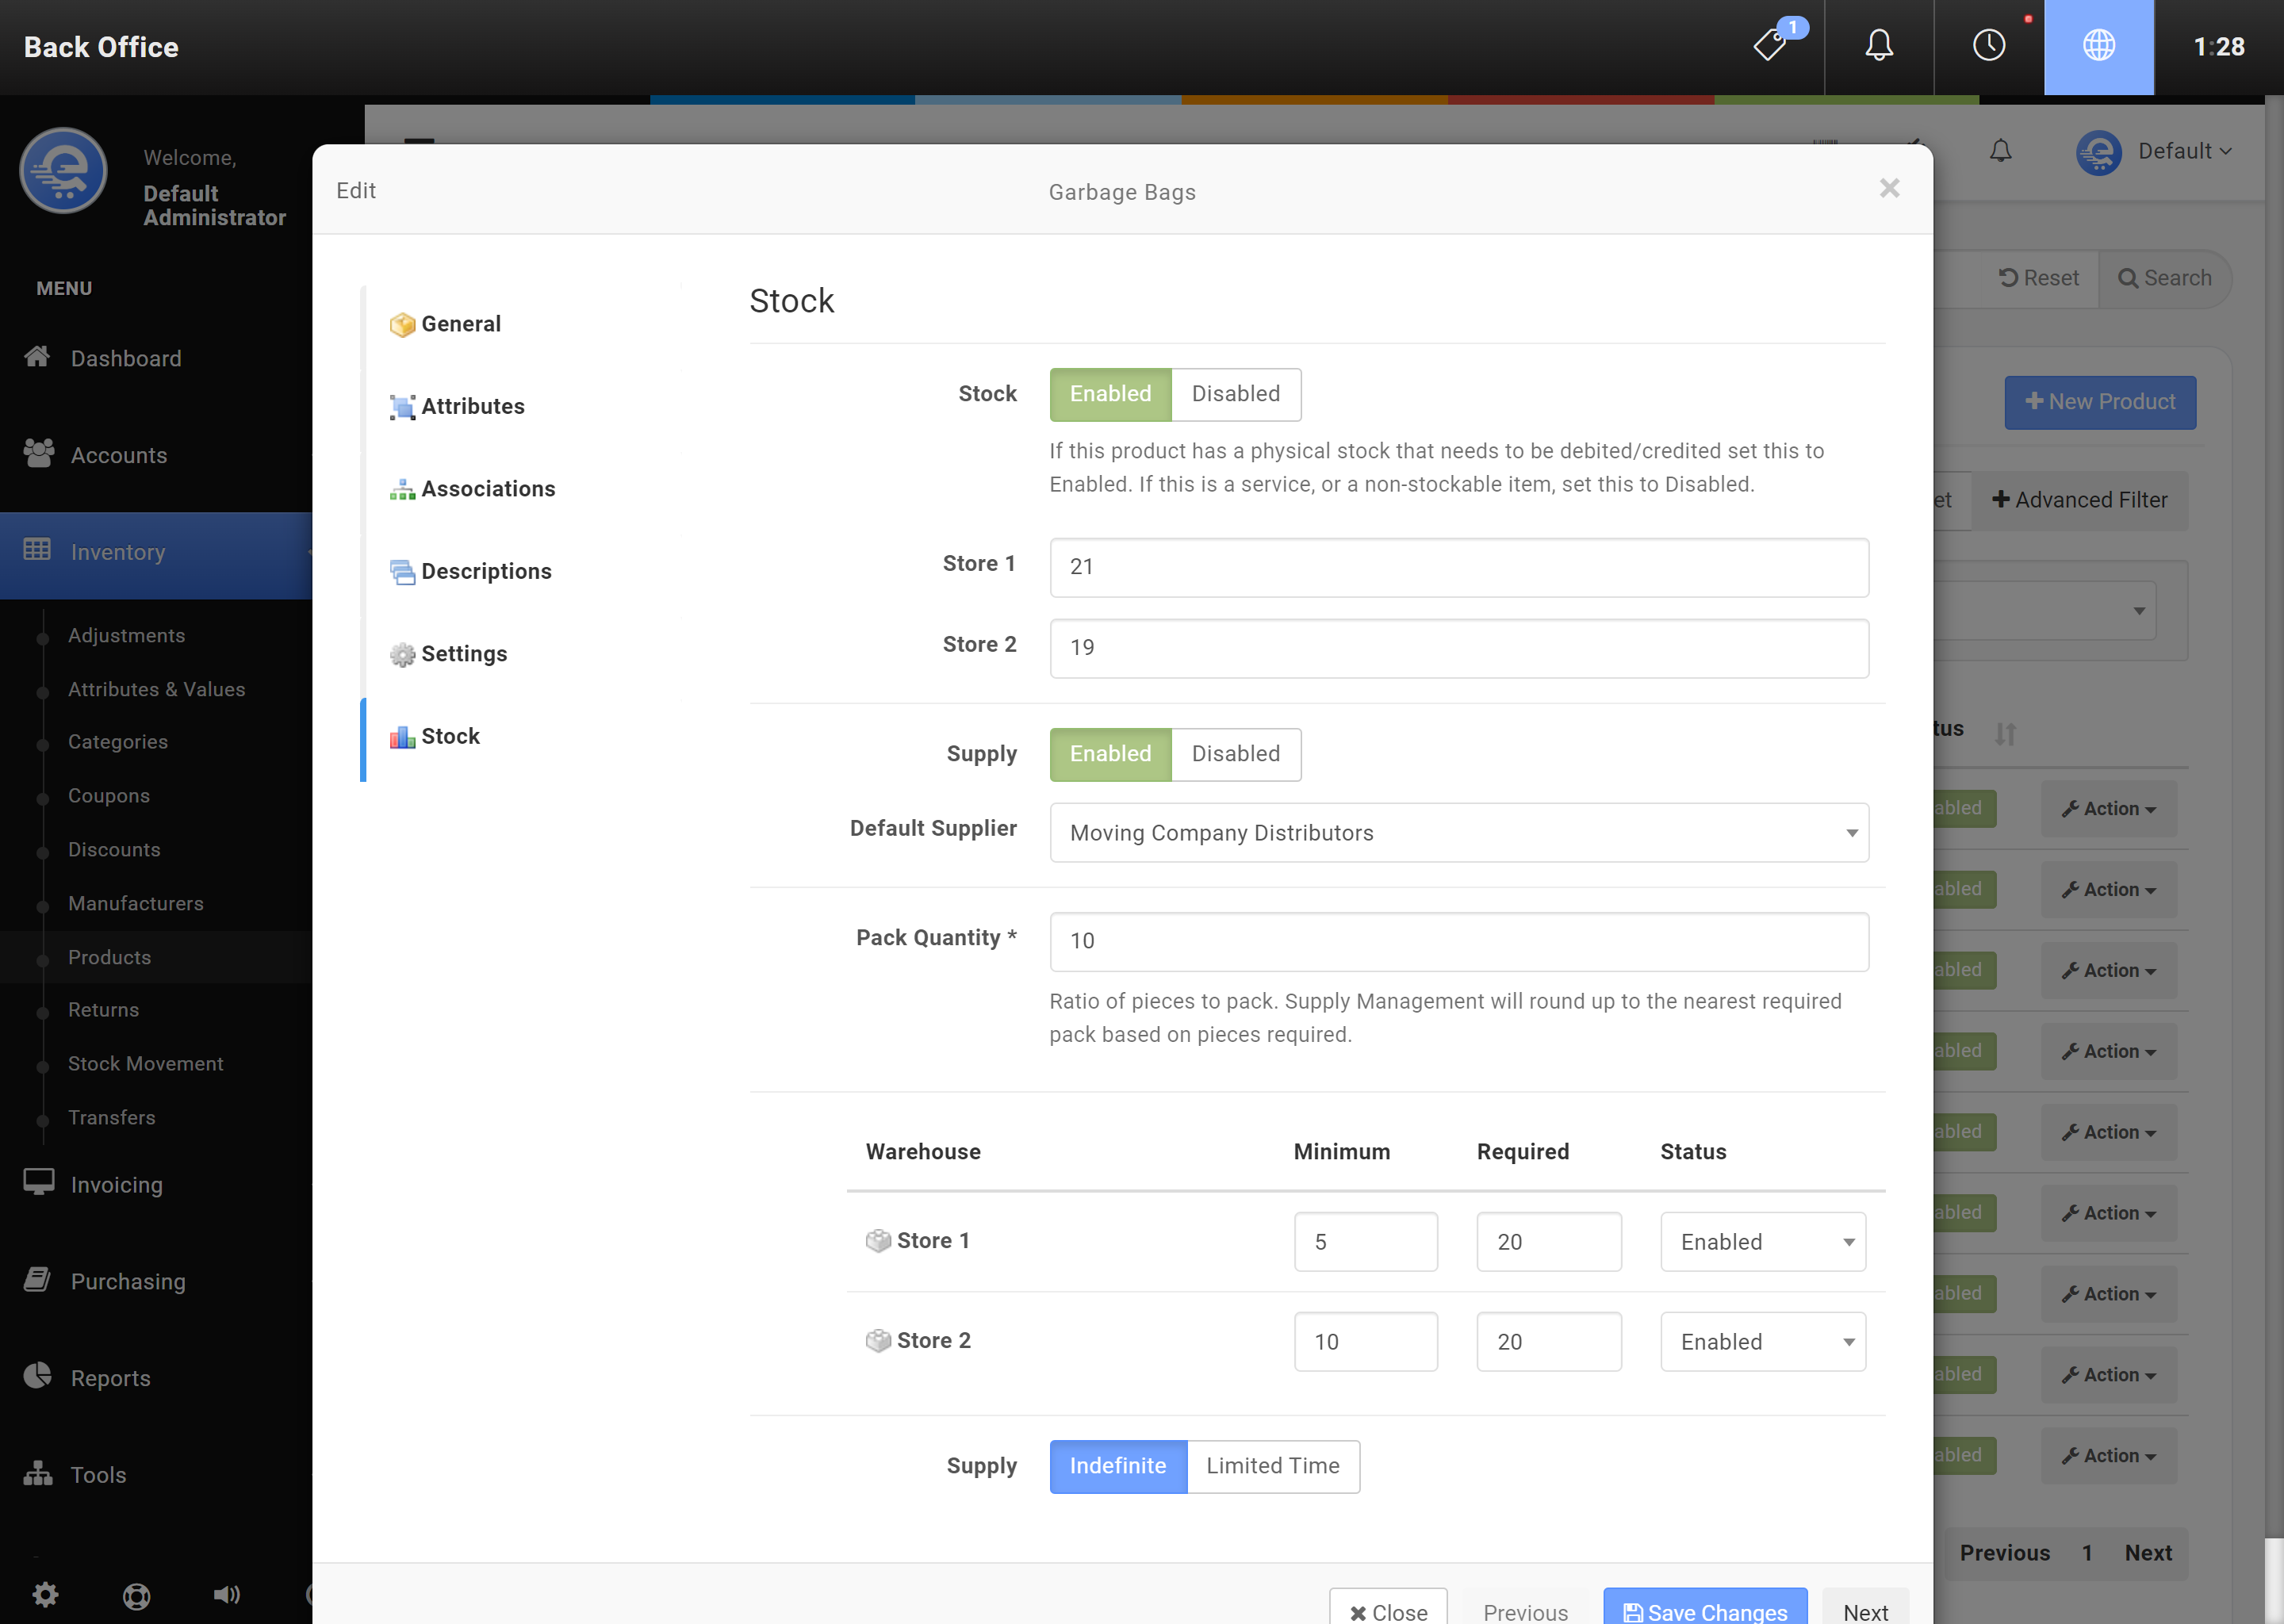
Figure B
On the left tab menu, select "Stock", then edit the details for Supply Management. Press "Save Changes" when complete.
Bulk Configure
Using bulk configure is an alternative way to quickly configure items with supply management.
- Navigate to eQuate Back Office
- On the left navigation bar, click "Purchasing", then click "Supply Management".
- On the top button menu click "Bulk Configure" (see Figure B).
- Search and select the product using the Search.
- Select "Enabled" to enable the product for Supply Management, or "Disabled" to disable.
- If Supply Management is enabled, the details of the supply will display below:
- Default Supplier: Set this to the Supplier or Manufacturer you want to create the Purchase Order with.
- Supply Type: Set to base supply counts based on warehouse inventory or global inventory.
- Pack Quantity: If the product comes in a pack (ie, pack of 5), you can set the pack quantity here.
- Min/Required/Max: For each warehouse, set the minimum (value to trigger a re-supply), the required value (how many to order to get to required value), and maximum (the absolute maximum quantity to be ordered). You will also need to Enable/Disable the warehouse on the right column.
- Click "Save Changes" when you are complete (see Figure B).
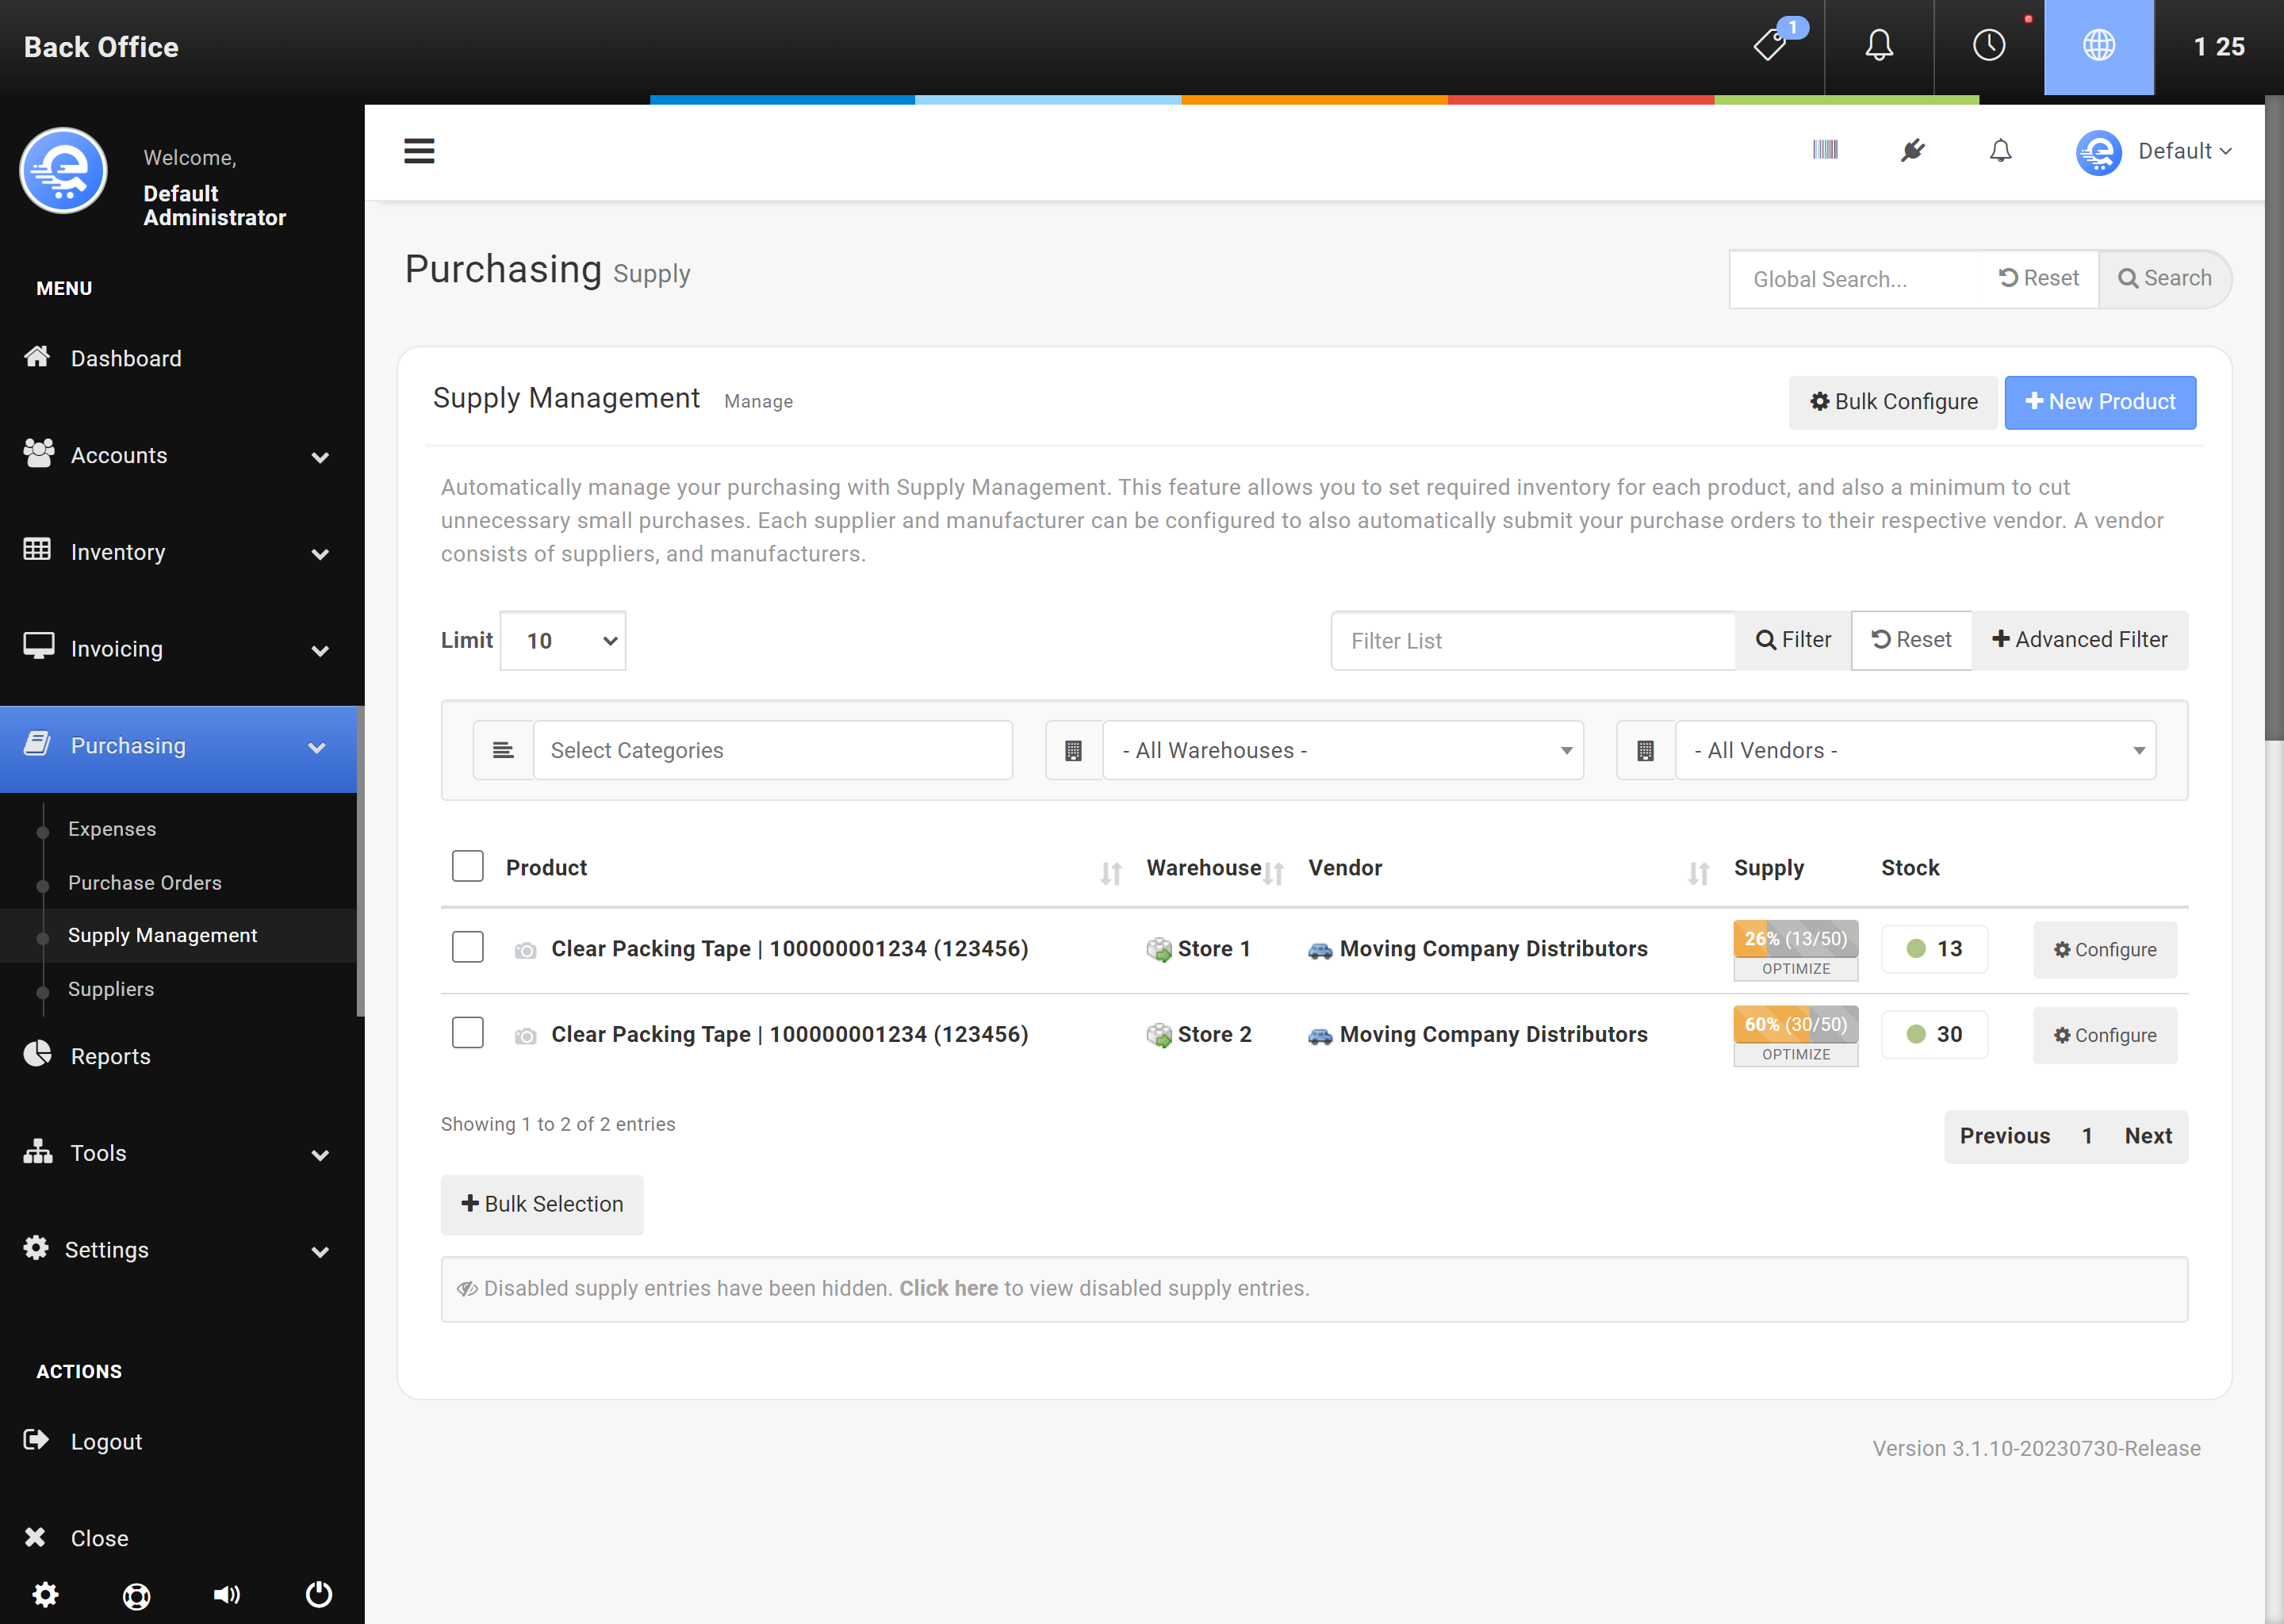
Figure C
Use the Back Office > Supply Management to Bulk Configure products.
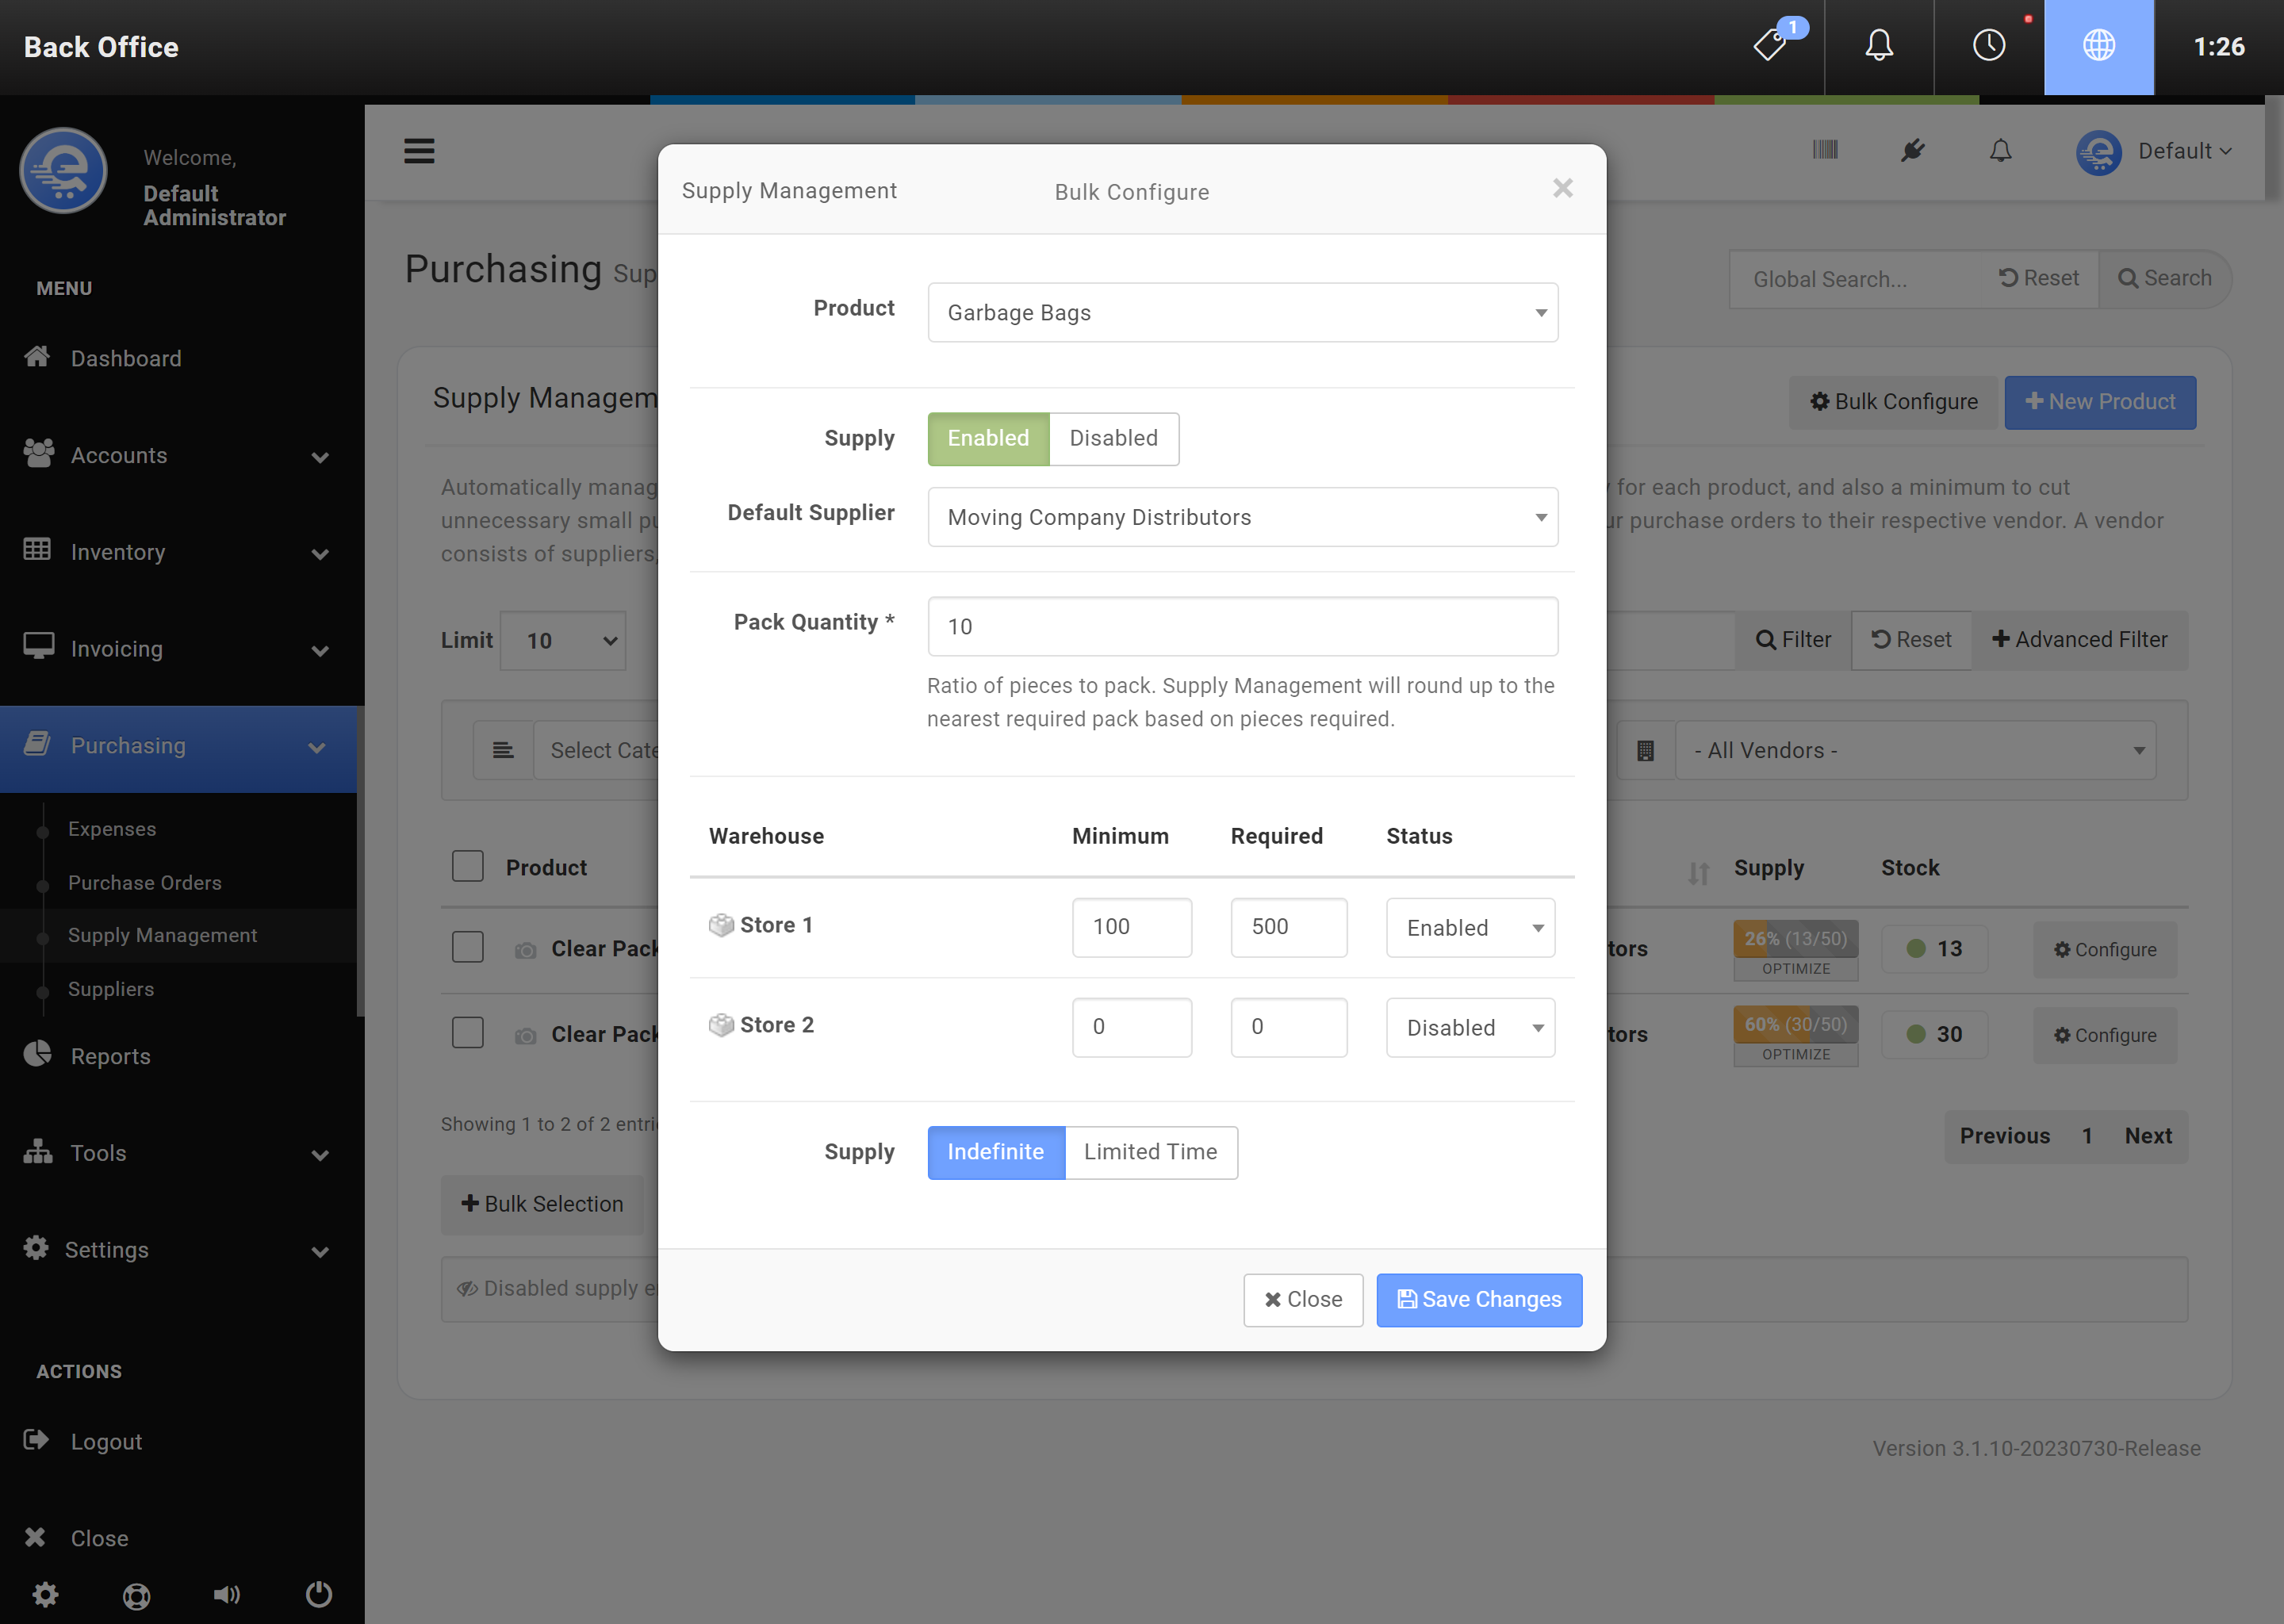
Figure D
After searching for the product, you can edit the Supply Management details, and click "Save Changes" when complete.