Invoicing
Introduction to Invoicing
Creating invoices in eQuate POS is easy and can be done on the Terminal and in the Back Office. Invoices can also be e-mailed directly to your customers. Product sold by invoices will automatically have their stock deducted from their respective warehouse inventory bucket.
- Collections
Quickly find out which invoices are beyond their terms. eQuate POS can manage Net 7, Net 10, Net 15, Net 30, Net 60, and Net 90. Invoices that are marked Due On Receipt will not be included in Collections. - Invoices
Invoices are managed through the Back Office. Invoices can be created in the Terminal and Back Office. Invoices can also be e-mailed directly to customers, or exported as a PDF, or CSV. - Online Orders
When eQuate POS is hooked up to your online store (Virtuemart, Prestashop) it will download online orders into the system. You will find your online orders seperated in this function. - Payments
Collecting payments on invoices can be done within the Terminal, or Back Office. Payments can be modified in the Back Office.
Collections
The Collections module allows you to view unpaid invoices quickly. When creating and invoice, you can also specify the terms of the invoice. When that term expires (past due), it will appear in the collections area.
- Due On Receipt
When the invoice is issued, payment is expected immediately. Pending invoices in this term type will not appear in the Collections area because it is assumed payment has been collected. - Custom
Specify a custom date for when you expect the customer to remit payment. This will show in the Collections area if it has pasted the Custom date. - Net
Net 7, 10, 15, 30, 60, 90 are supported. The due date is generated based on the invoice date. These invoices will show in the Collections area if they remain unpaid past the due date. - Other
COD (Cash on Delivery), End Of Month, Cash In Advance are all additional options you can set on invoices.
Invoices
Creating invoices in eQuate POS is easy and can be done on the Terminal and in the Back Office. Invoices can also be e-mailed directly to your customers. Product sold by invoices will automatically have their stock deducted from their respective warehouse inventory bucket.
Creating Invoices
You can create Invoices in the Back Office, and Terminal. To view the documentation around Creating An Invoice in the Terminal, view "Completing A Sale".
Each invoice contains items. An item is also known as a Product. You can add multiple items to an invoice. You can also change the warehouse source for each item, as well as the tax, price, and quantity.
- Navigate to the eQuate Back Office
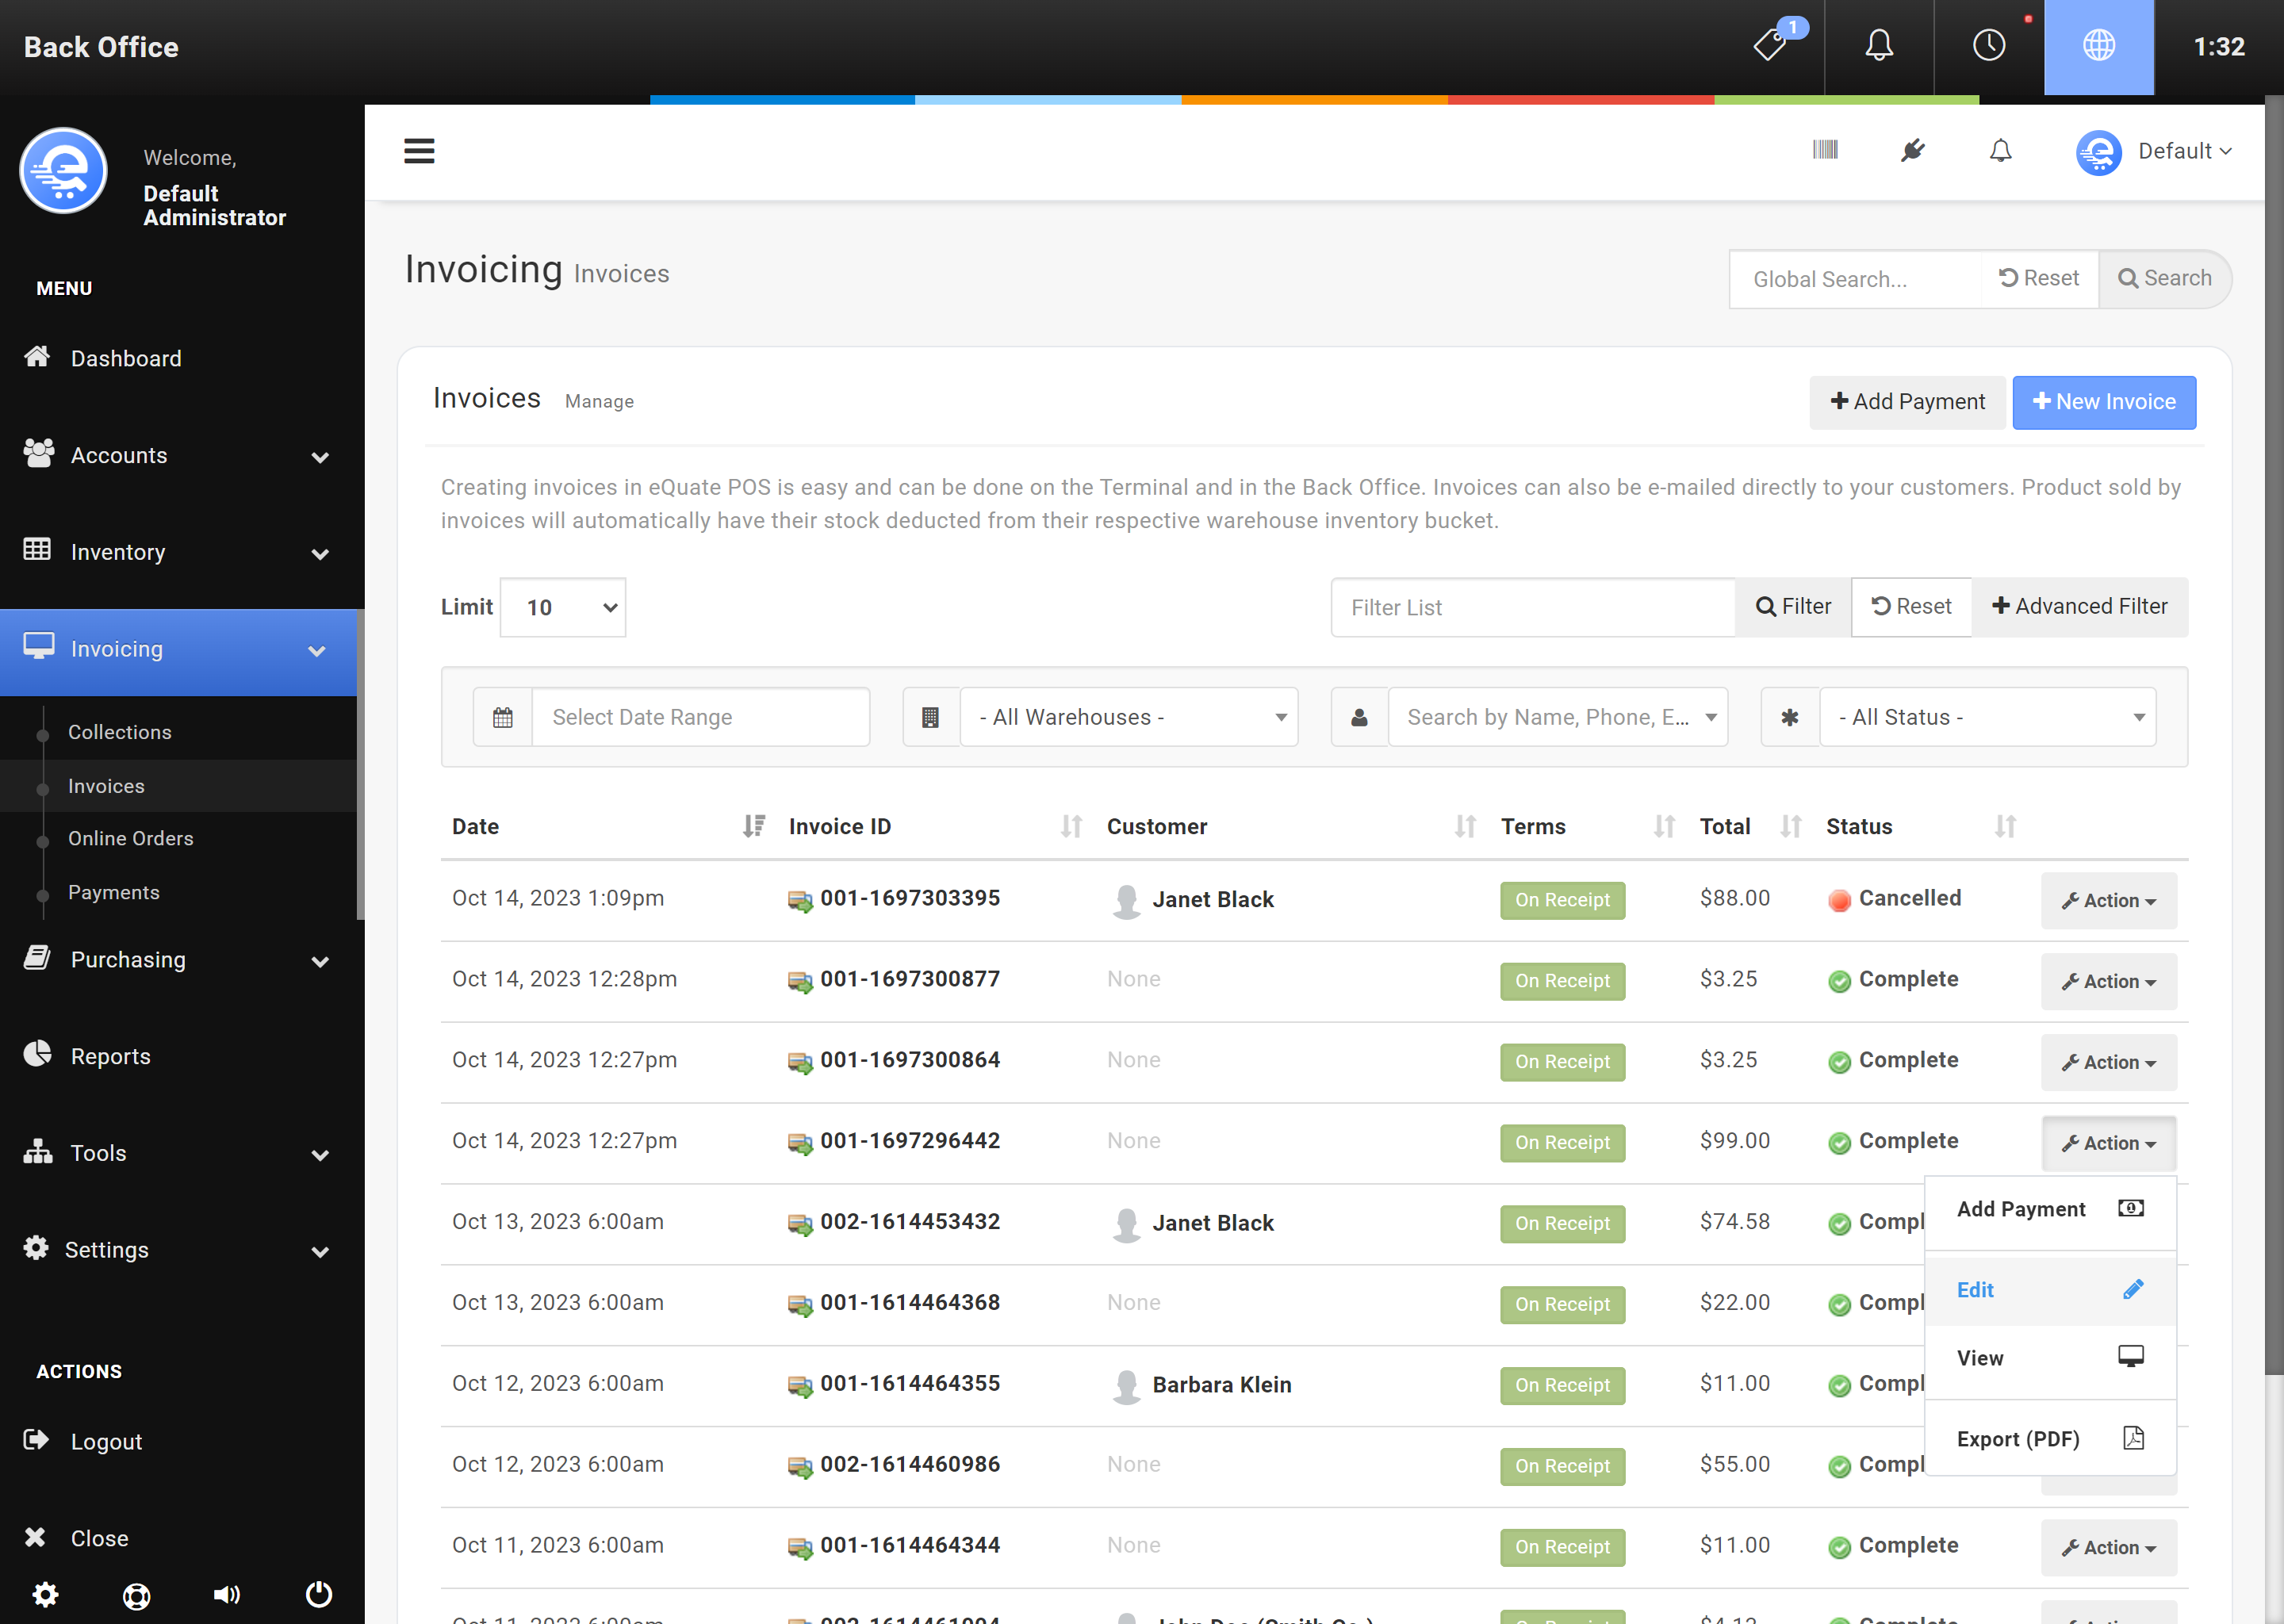
- On the left navigation bar, click "Invoicing", then click "Invoices".
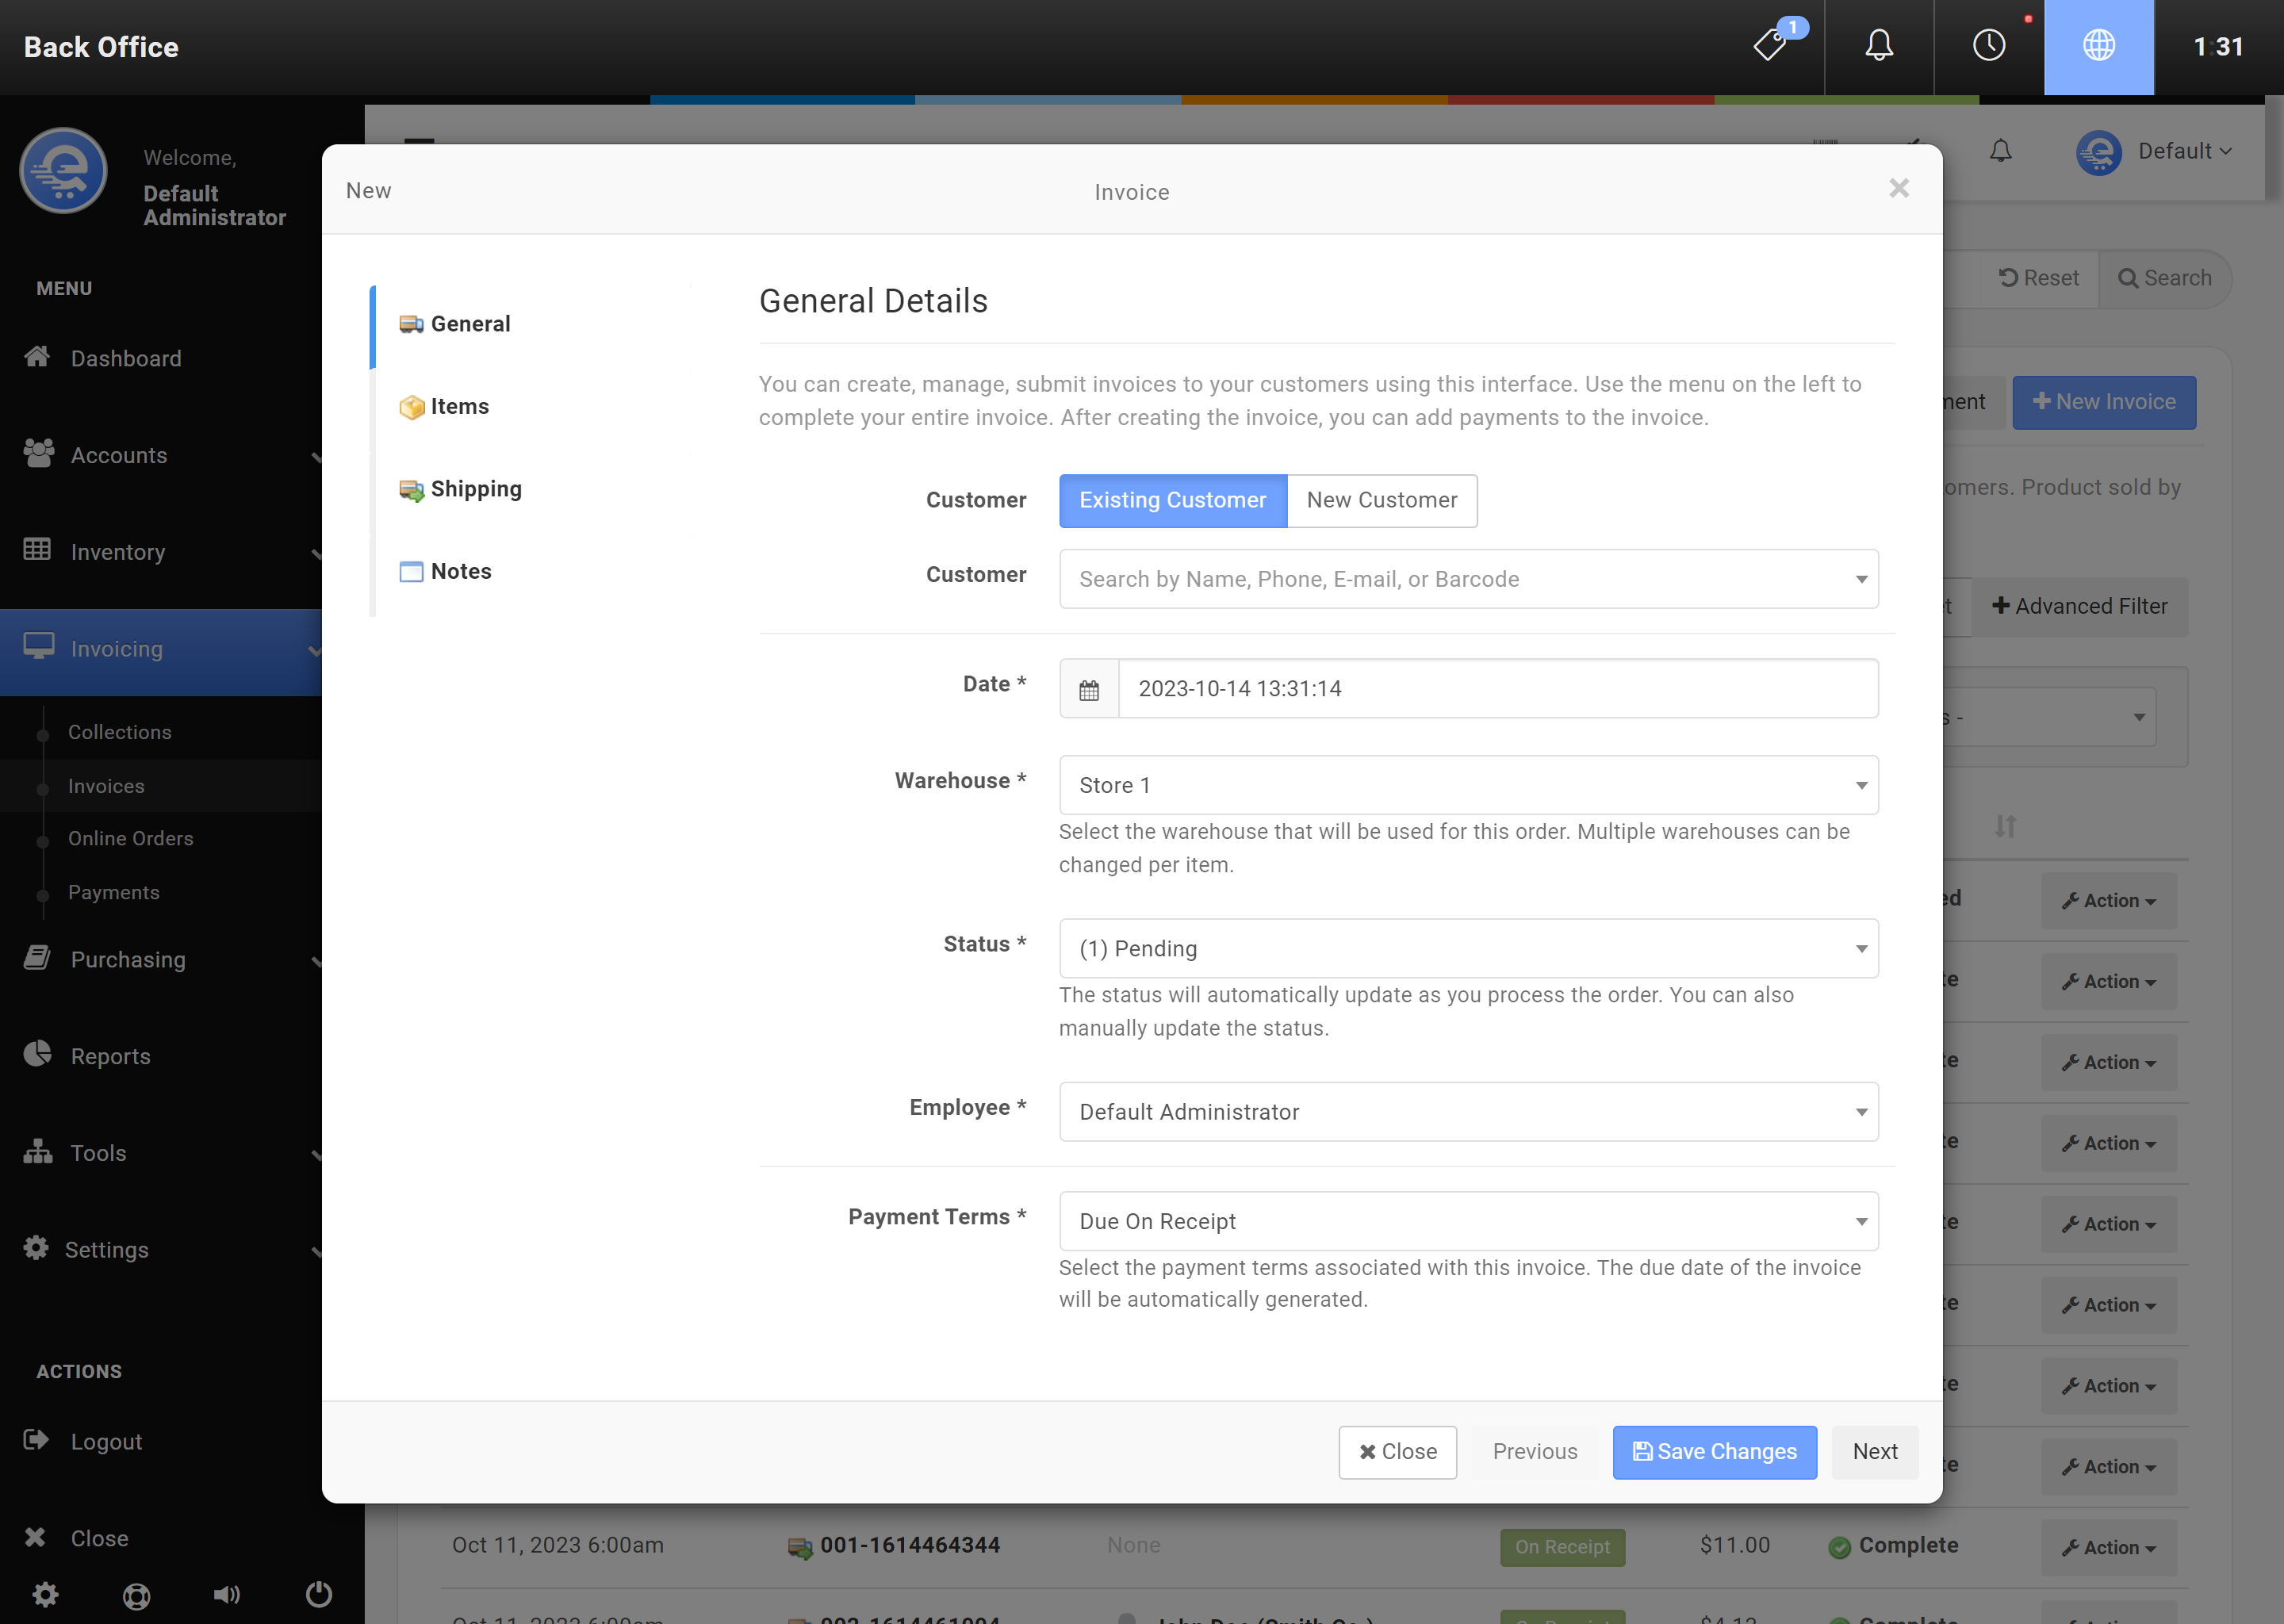
- On the top button menu select "New Invoice" (see Figure A).
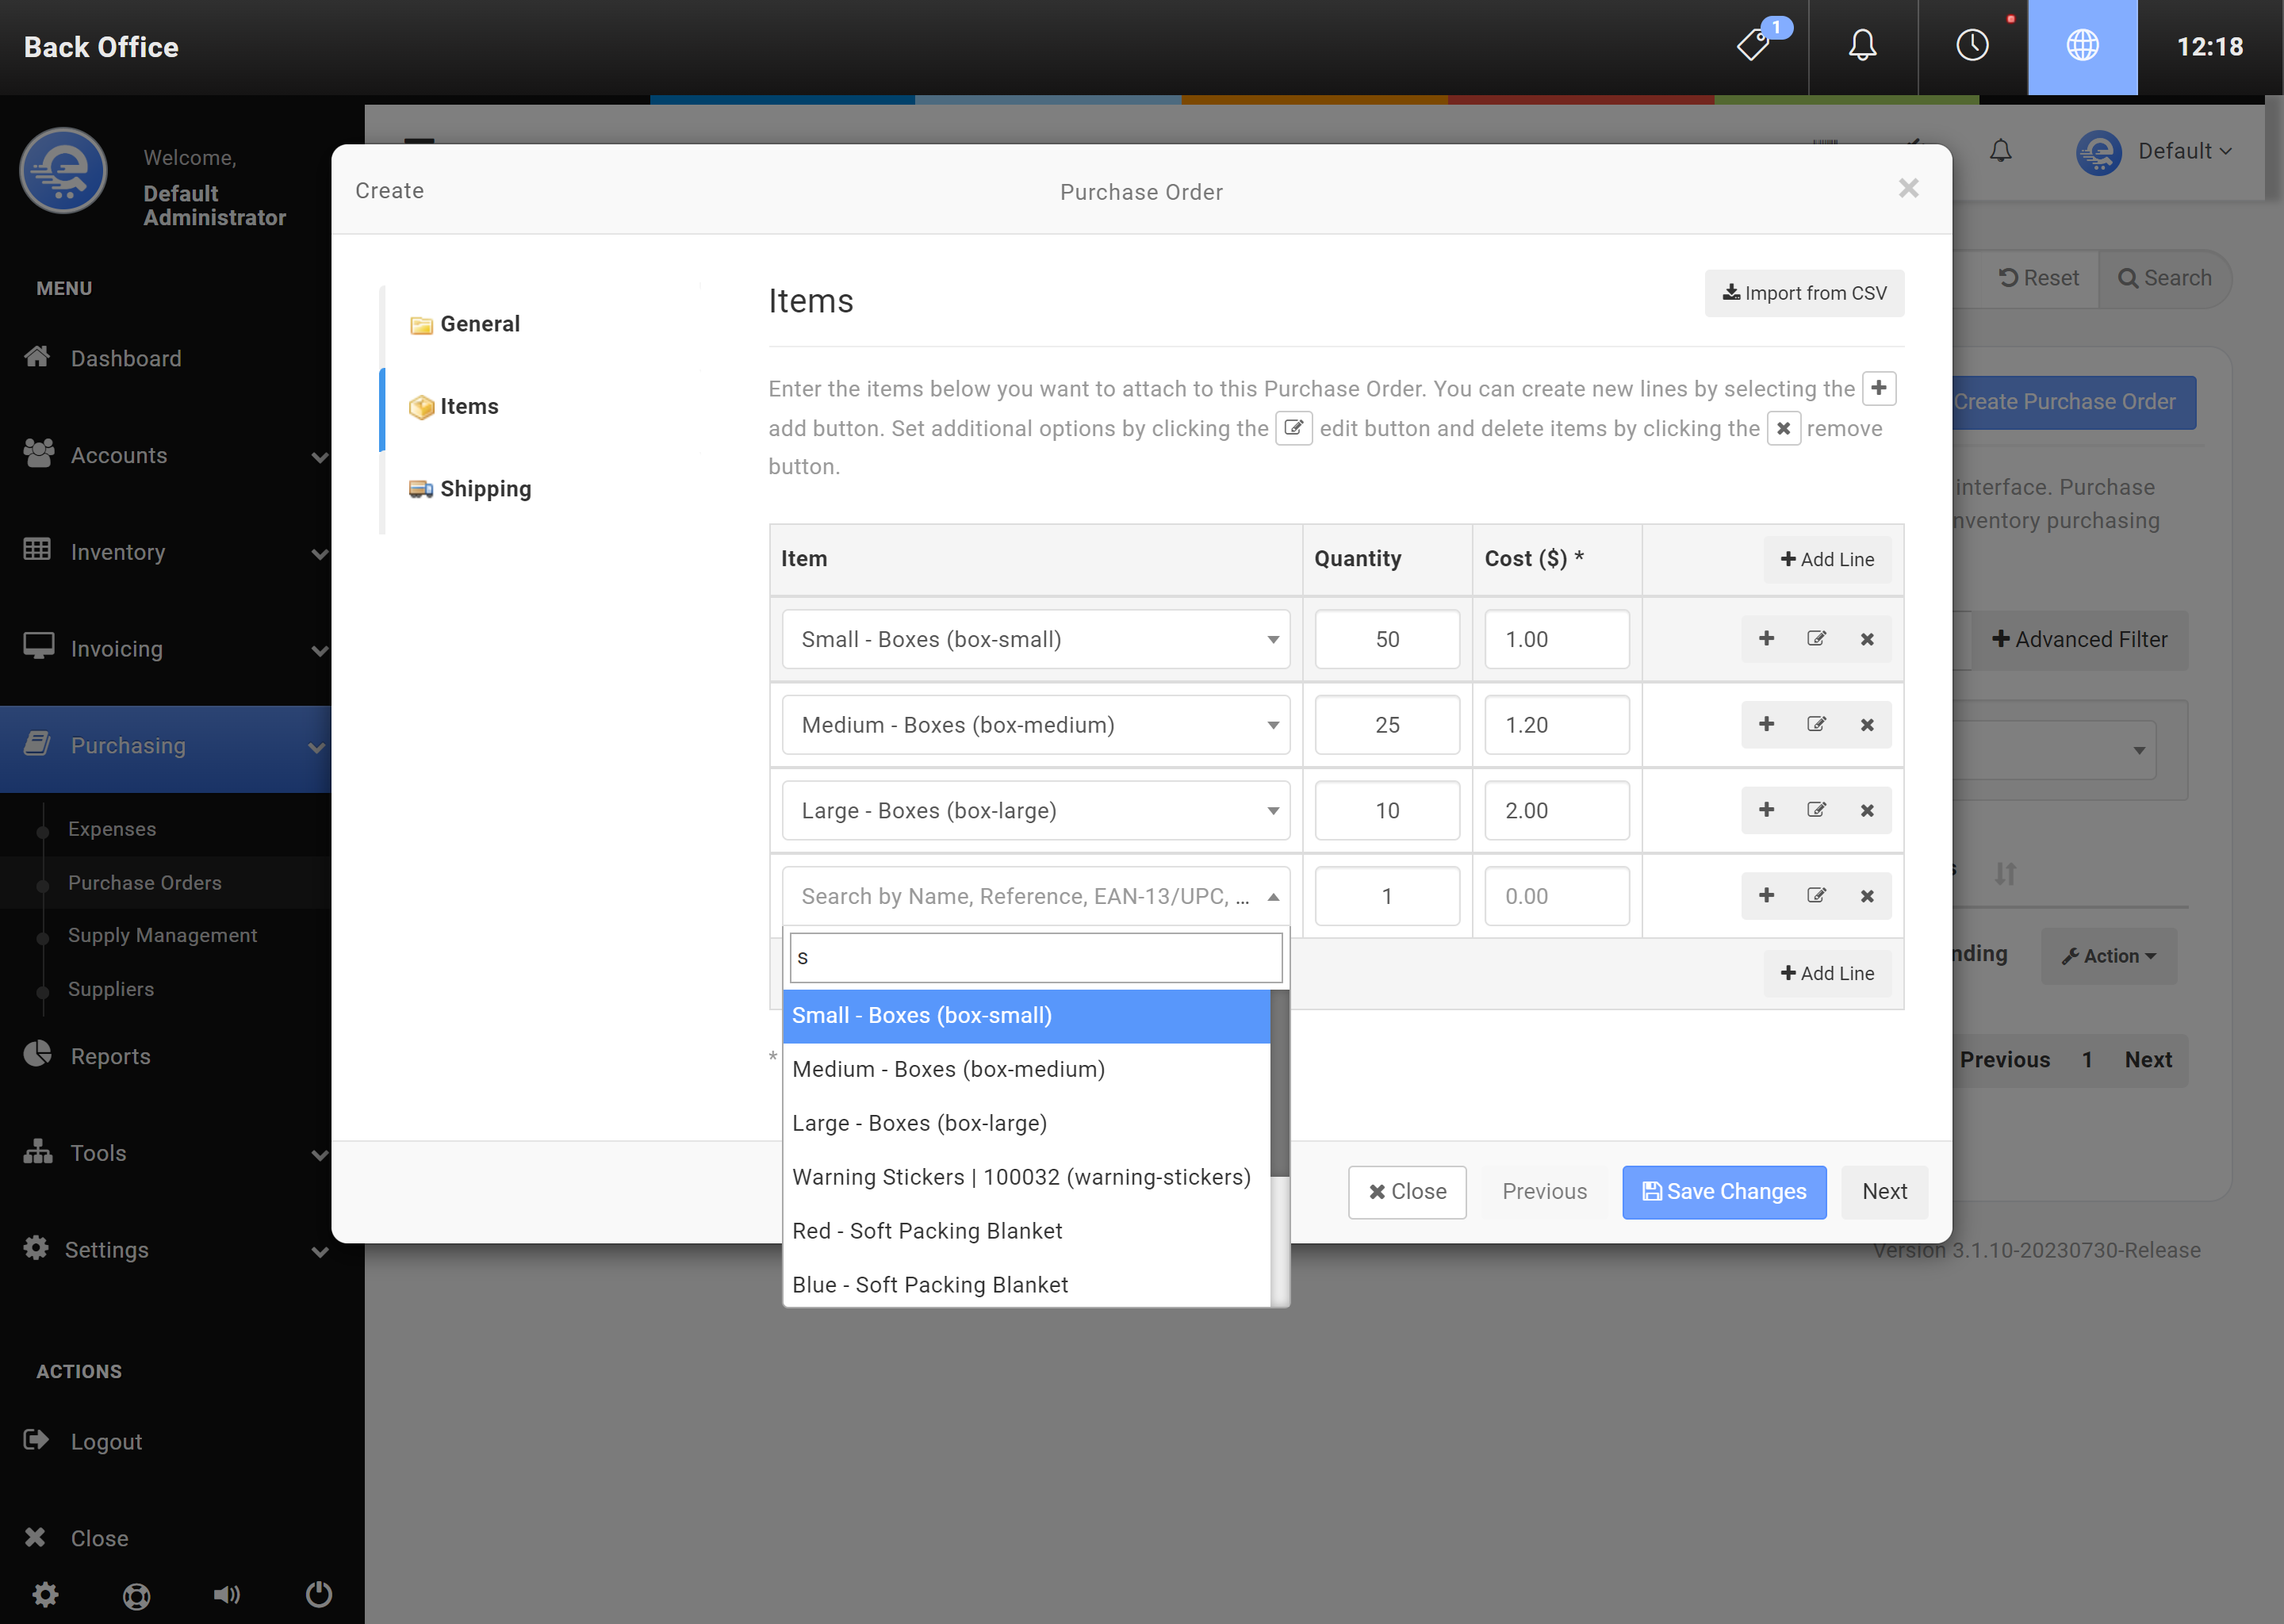
- Complete the details of the Invoice, and then use the "Items" tab on the left menu, and add the items. Click "Save Changes" when you are complete (see Figure B).
Statuses
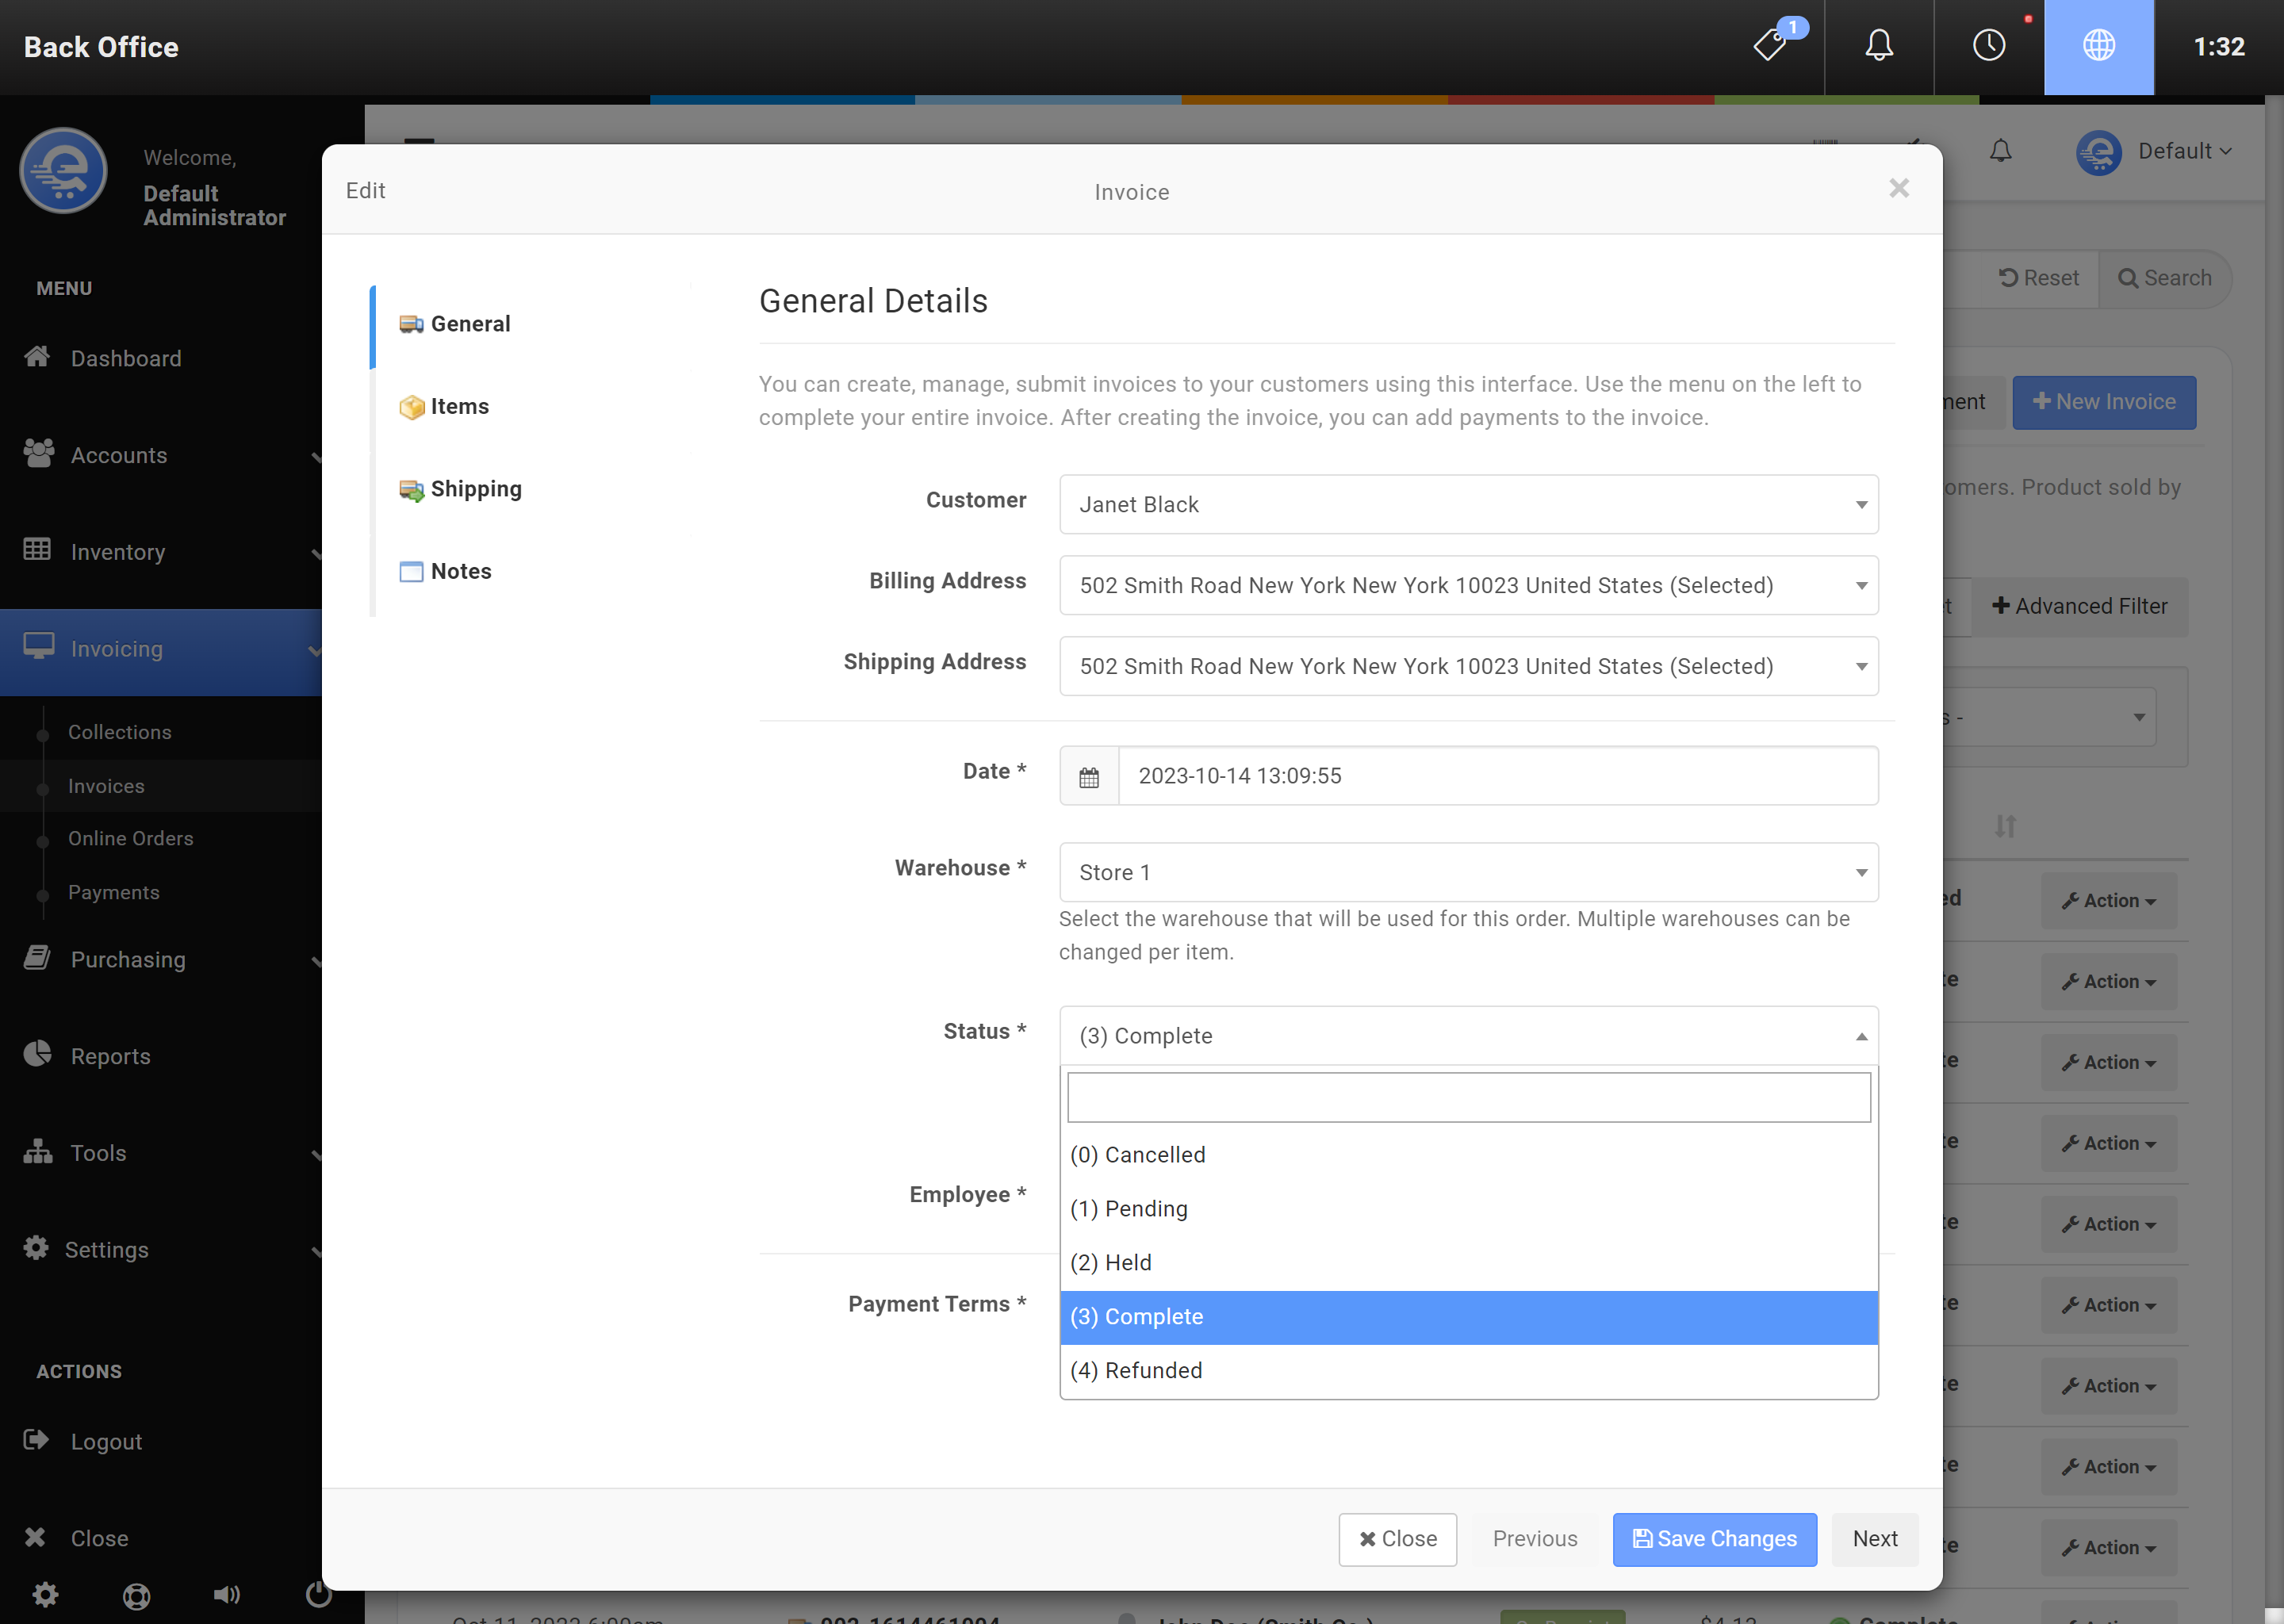
Invoices have various statuses, or stages. When creating an Invoice, the initial status will be Pending by default. In the pending status, the items have not been deducted from inventory. Once an Invoice status is changed to Held or Completed, inventory is removed from the inventory bucket. Held invoices can be edited, and unpaid. Once an Invoice is marked Completed, you will no longer be able to edit the invoice.
- Pending
The Invoice is pending edit, and items have not been removed from inventory. Pending Invoices are also not included in any reporting metrics. - Held
When an Invoice is in the Held status, inventory has been deducted from their respective inventory buckets. - Completed
Completed invoices have been deducted from inventory and can only be refunded and not edited. - Refunded
When an Invoice is in Refund status, it means the entire Invoice has been refunded. - Cancelled
Invoices in cancelled status are not included in any reporting metrics.
Changing a status can be done manually, or the system will automatically change the status for you. As you progress along creating the Invoice, the status will change. For example, when you add a payment to the Invoice that exceed the due balance, the status will automatically update to Completed. When you refund an Invoice, the status will change to Refunded.
- Navigate to the eQuate Back Office
- On the left navigation bar, click "Invoicing", then click "Invoices".
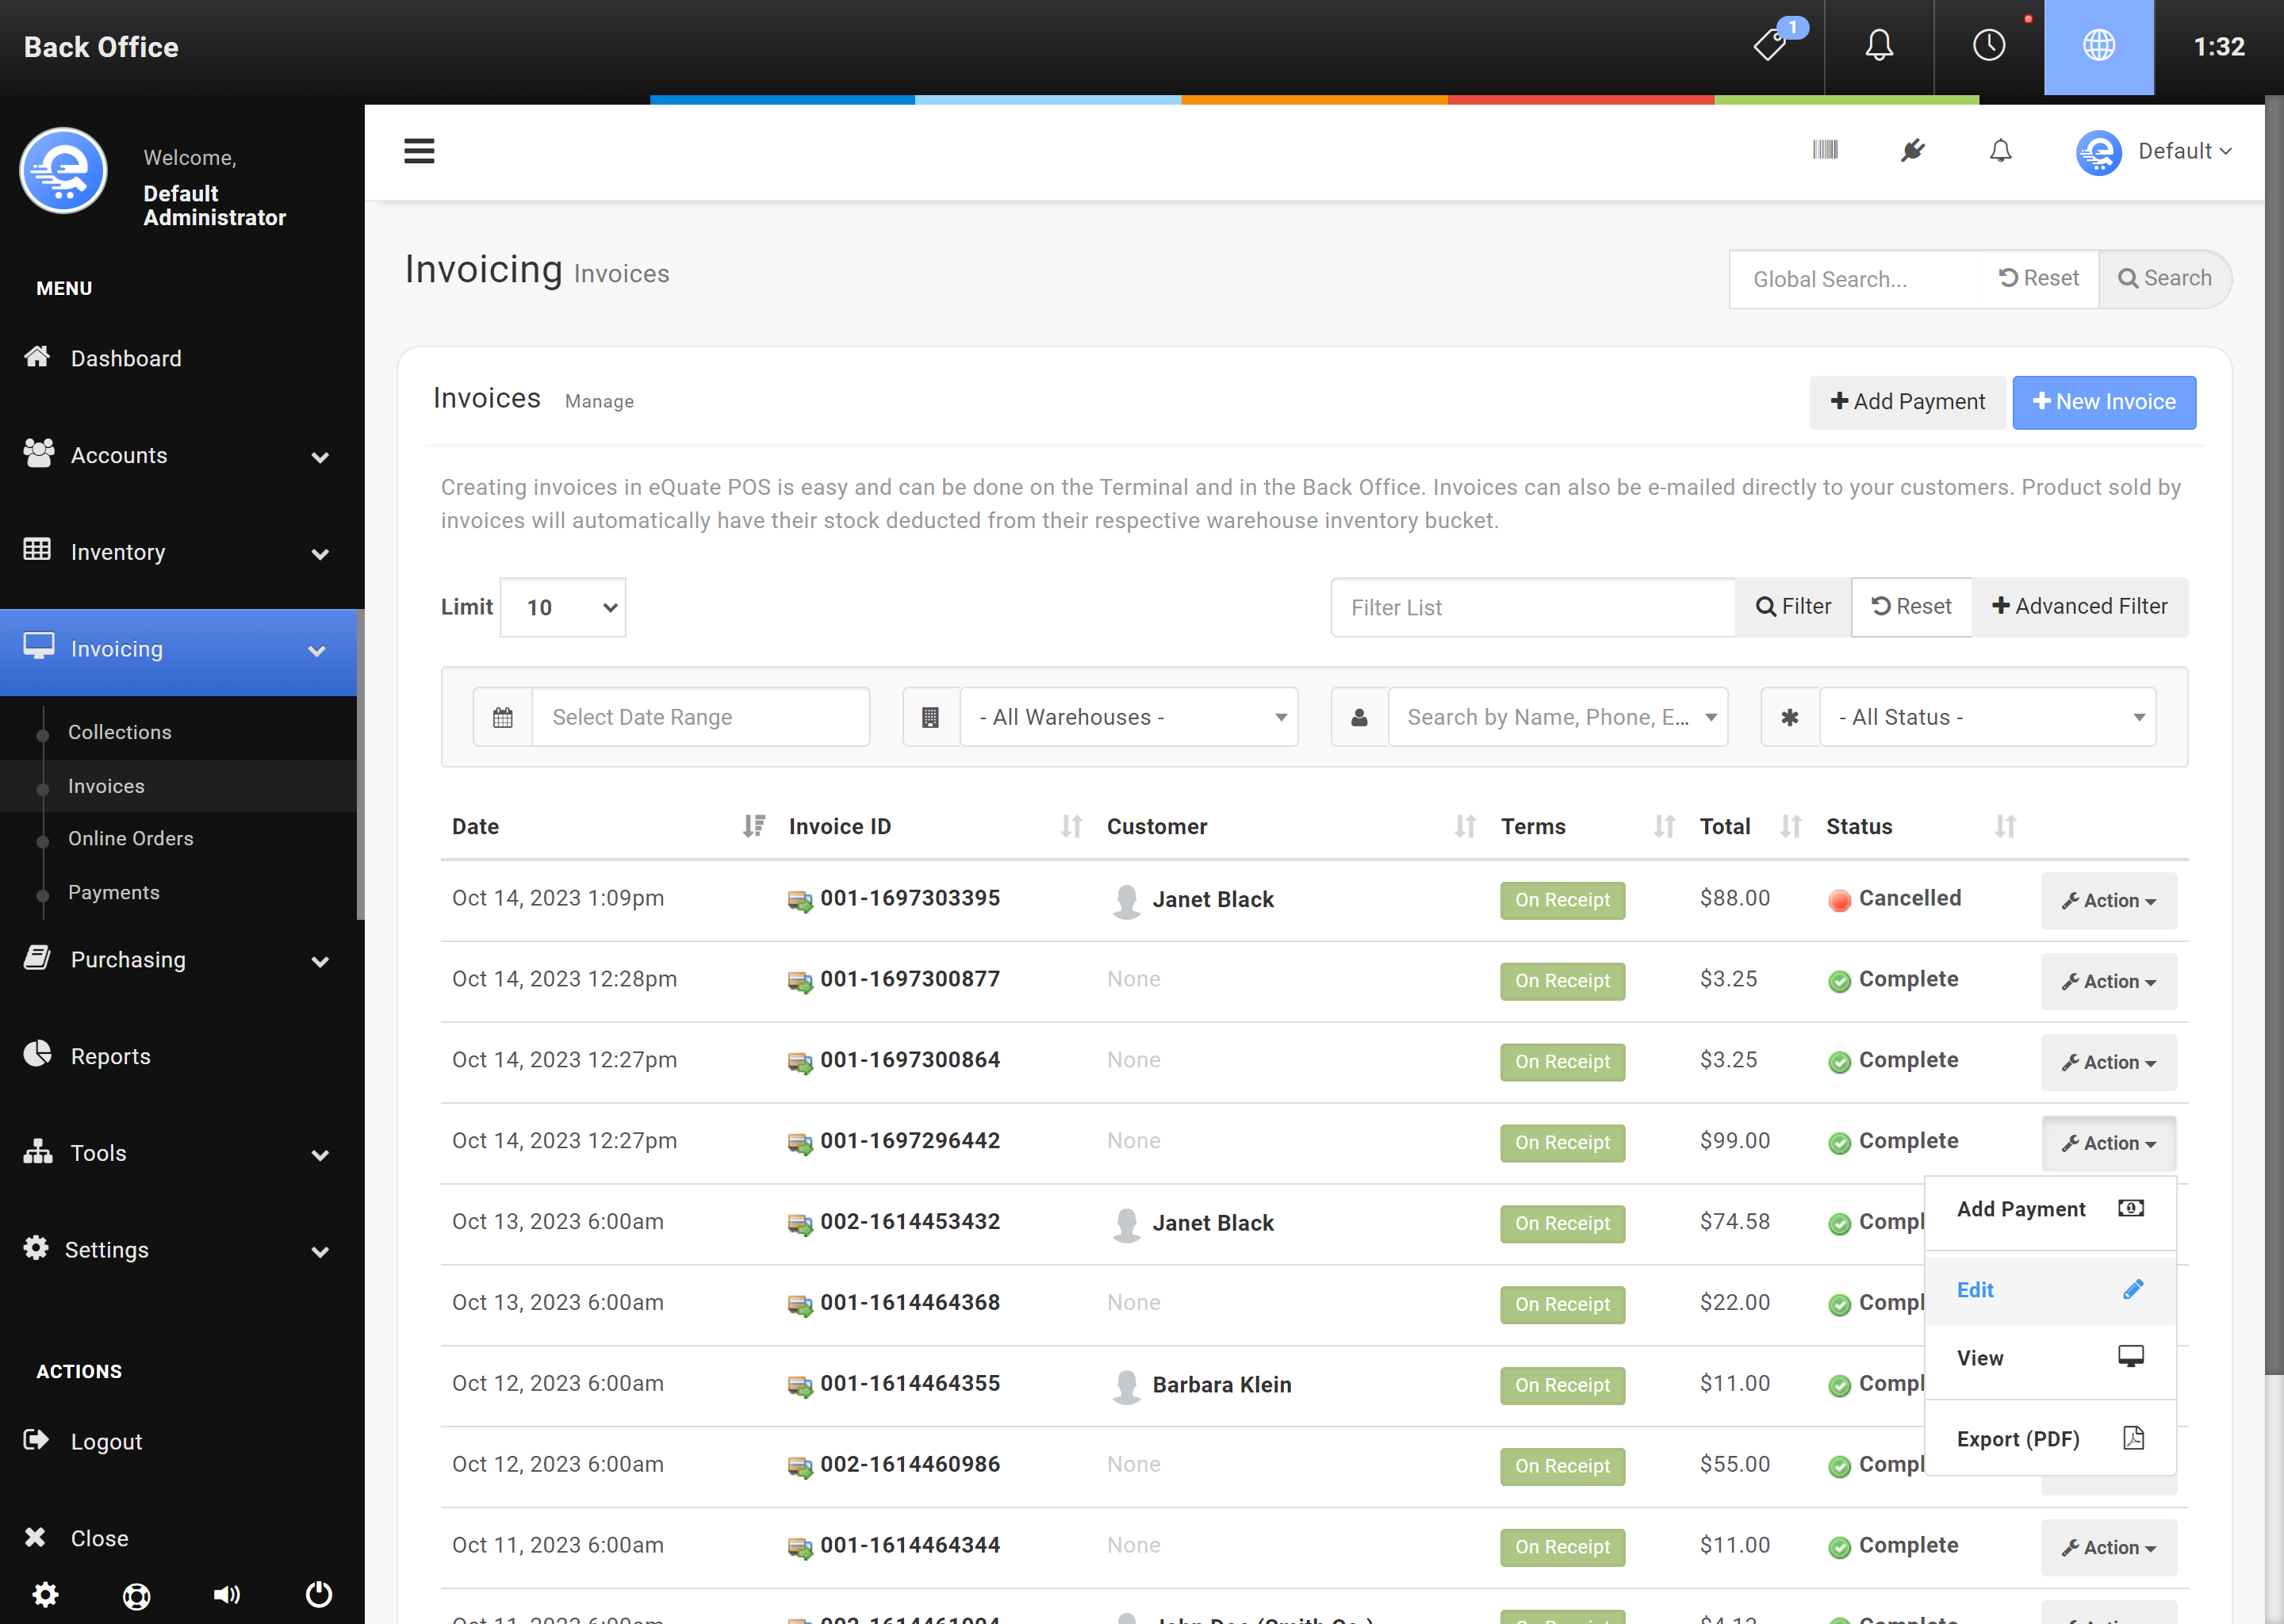
- Using the table, find the Invoice you want to receive and click "Action", then "Edit".
- Change the Status in the Invoice, then click "Save Changes" when complete.
Terms
When creating and invoice, you can also specify the terms of the invoice. When that term expires (past due), it will appear in the collections area.
- Due On Receipt
When the invoice is issued, payment is expected immediately. Pending invoices in this term type will not appear in the Collections area because it is assumed payment has been collected. - Custom
Specify a custom date for when you expect the customer to remit payment. This will show in the Collections area if it has pasted the Custom date. - Net
Net 7, 10, 15, 30, 60, 90 are supported. The due date is generated based on the invoice date. These invoices will show in the Collections area if they remain unpaid past the due date. - Other
COD (Cash on Delivery), End Of Month, Cash In Advance are all additional options you can set on invoices.
Items
Each invoice contains items. An item is also known as a Product. You can add multiple items to an invoice. You can also change the warehouse source for each item, as well as the tax, price, and quantity.
When an item is added to a Pending Invoice, the inventory is not yet deducted. Once the Invoice is paid, or enters the "Completed" status, the inventory will then be deducted. Putting an Invoice on Hold, will also reduce the inventory.
Even if products are deleted, you will still be able to view the item sold on any Invoice.
- Navigate to the eQuate Back Office
- On the left navigation bar, click "Invoicing", then click "Invoices".
- On the top button menu select "New Invoice" (see Figure A).
- Use the "Items" tab on the left menu, and add the items. Click "Save Changes" when you are complete (see Figure B).
- The Invoice must be in Pending or Held status to remove items. If you need to remove items in a Completed invoice, you should refund/return them instead.
- Navigate to the eQuate Back Office
- On the left navigation bar, click "Invoicing", then click "Invoices".
- Find the invoice in the table and click on "Action", then "Edit".
- Use the "Items" tab on the left menu, and click on the "x" to remove the items. Click "Save Changes" when you are complete (see Figure B).
Online Orders
If you've added Prestashop or Virtuemart to eQuate POS, the invoices generated from these systems will appear in this section. When combining Prestashop or Virtuemart with eQuate, you can keep your customers, orders, inventory, and stock counts synchronized for both in-store and online.
Payments
A payment can be added to Invoices. Once an Invoice has been completely paid, the Invoice will change into the Completed status. You can add unlimited payments to Invoices. You can modify Payment details, like date, amount, and method in the Back Office.
- Navigate to eQuate Back Office
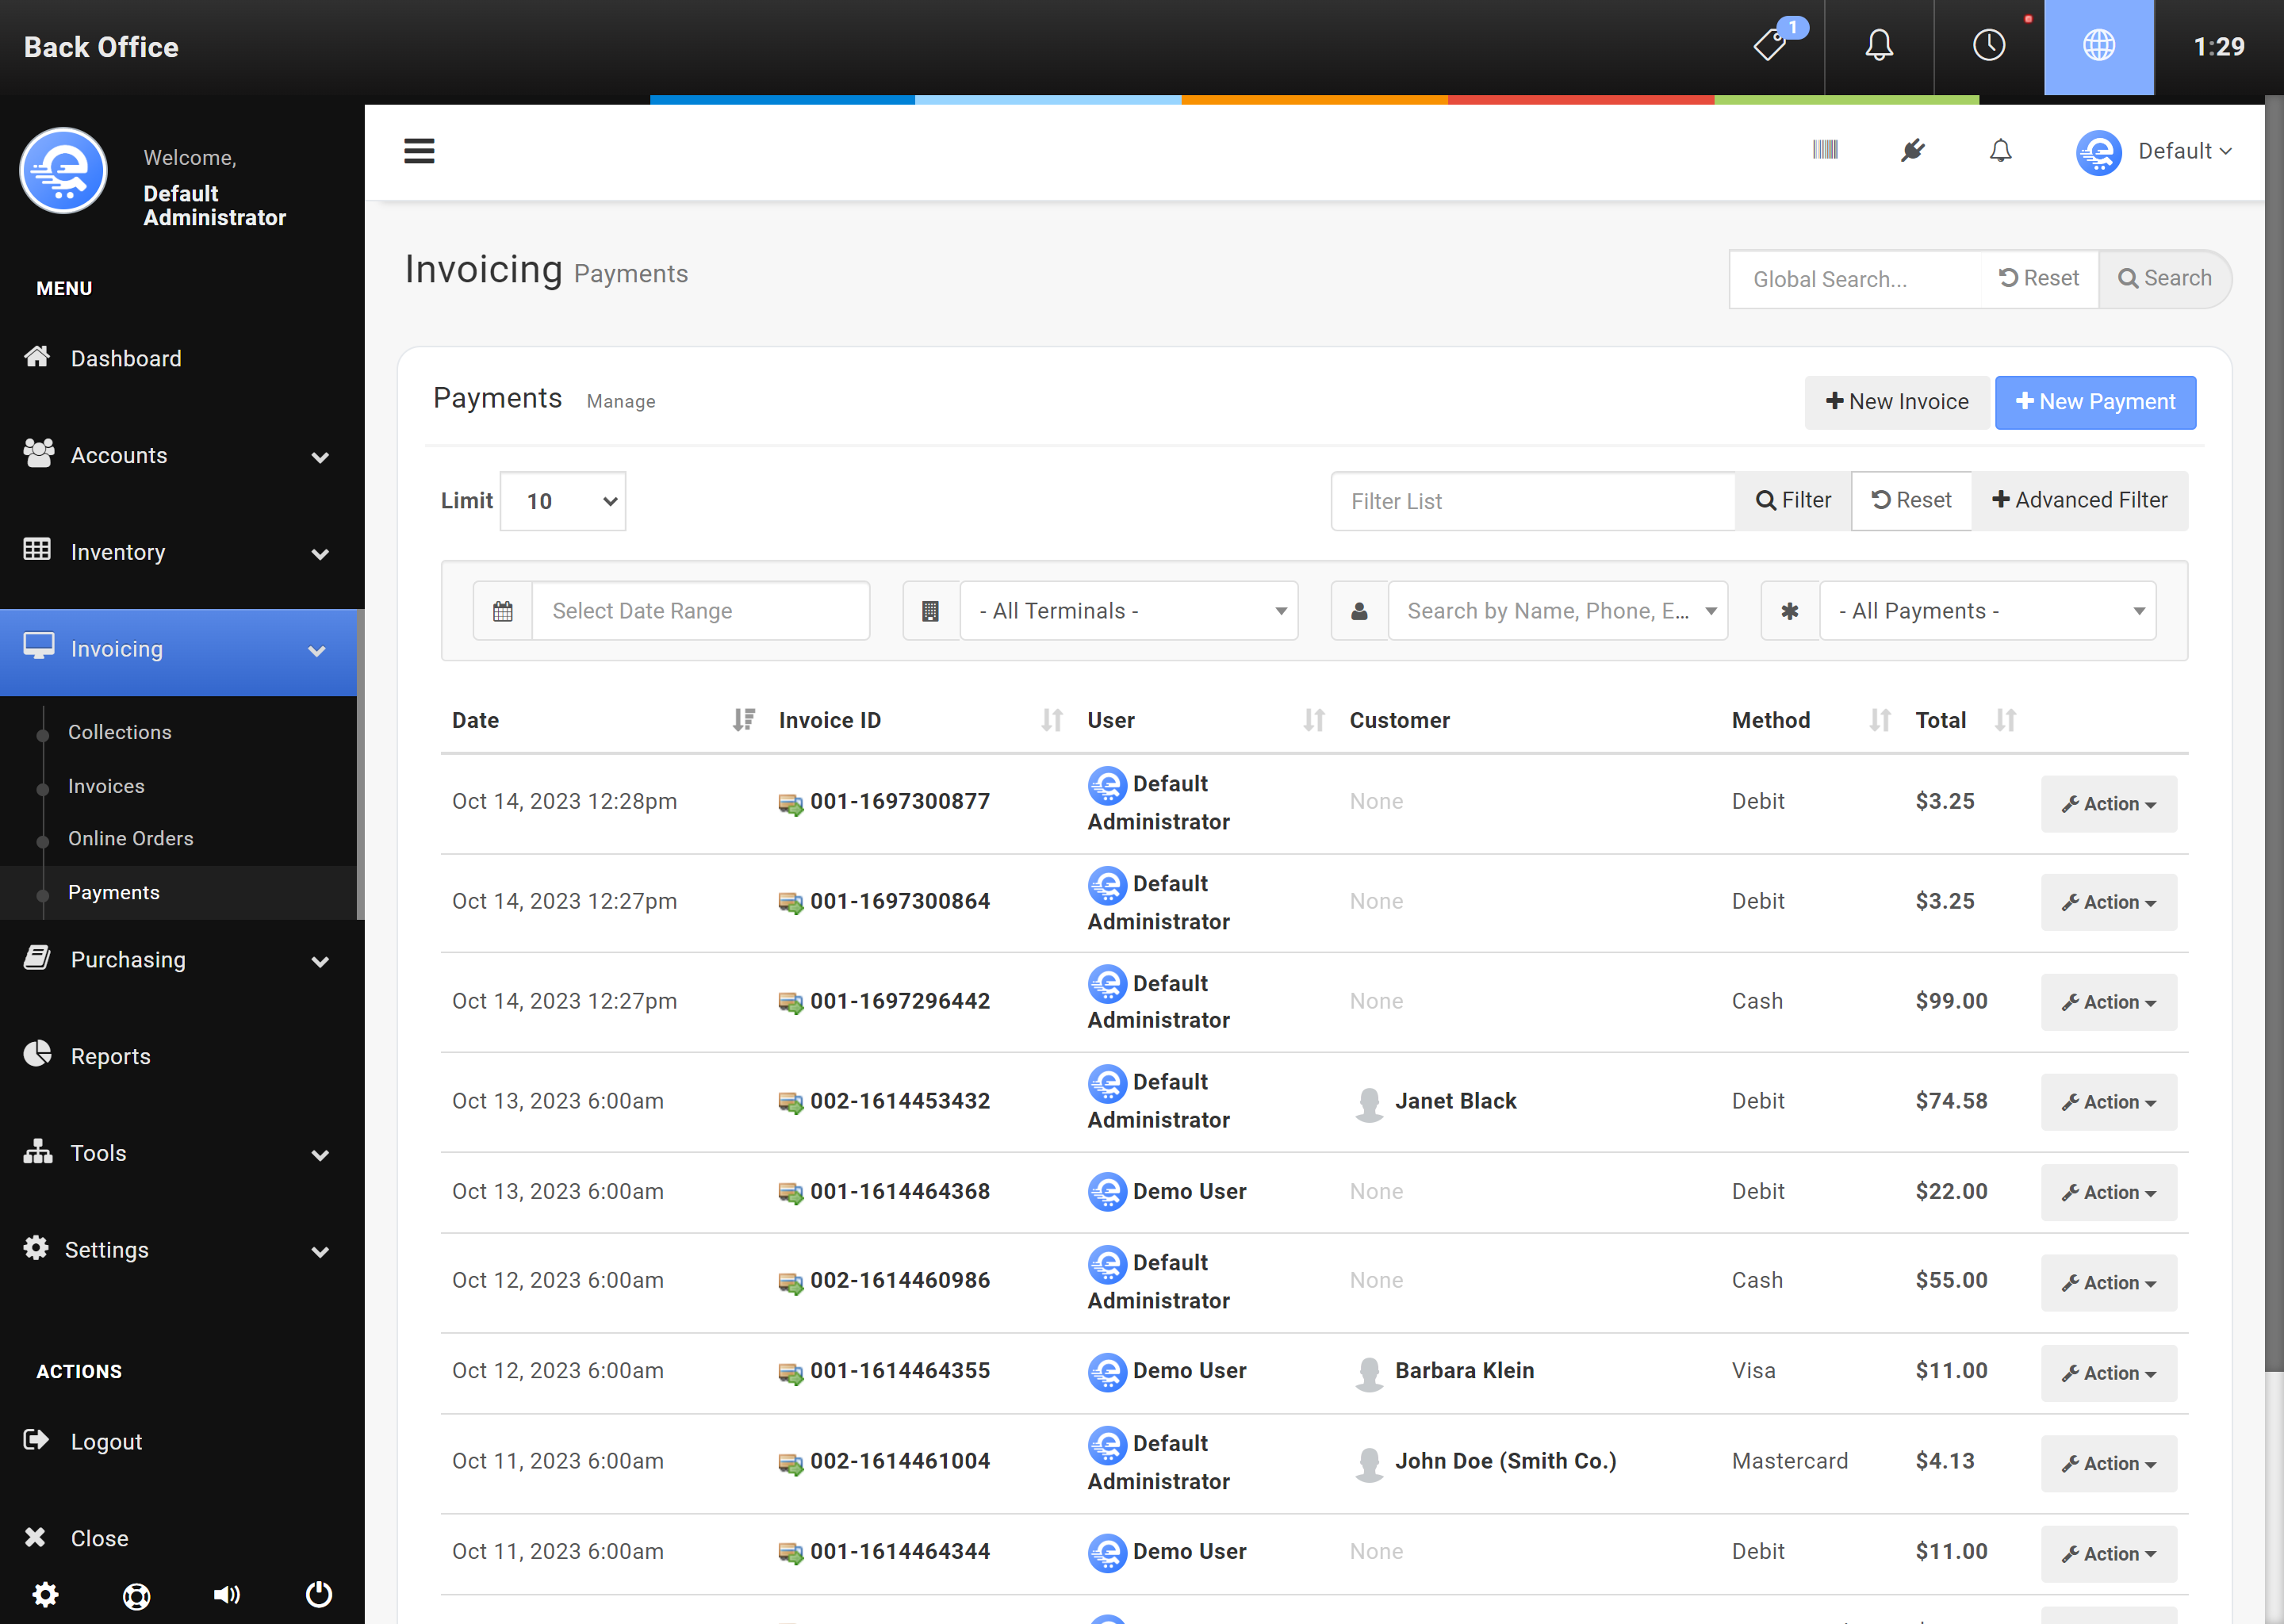
- On the left navigation bar, click "Invoicing", then click "Payments".
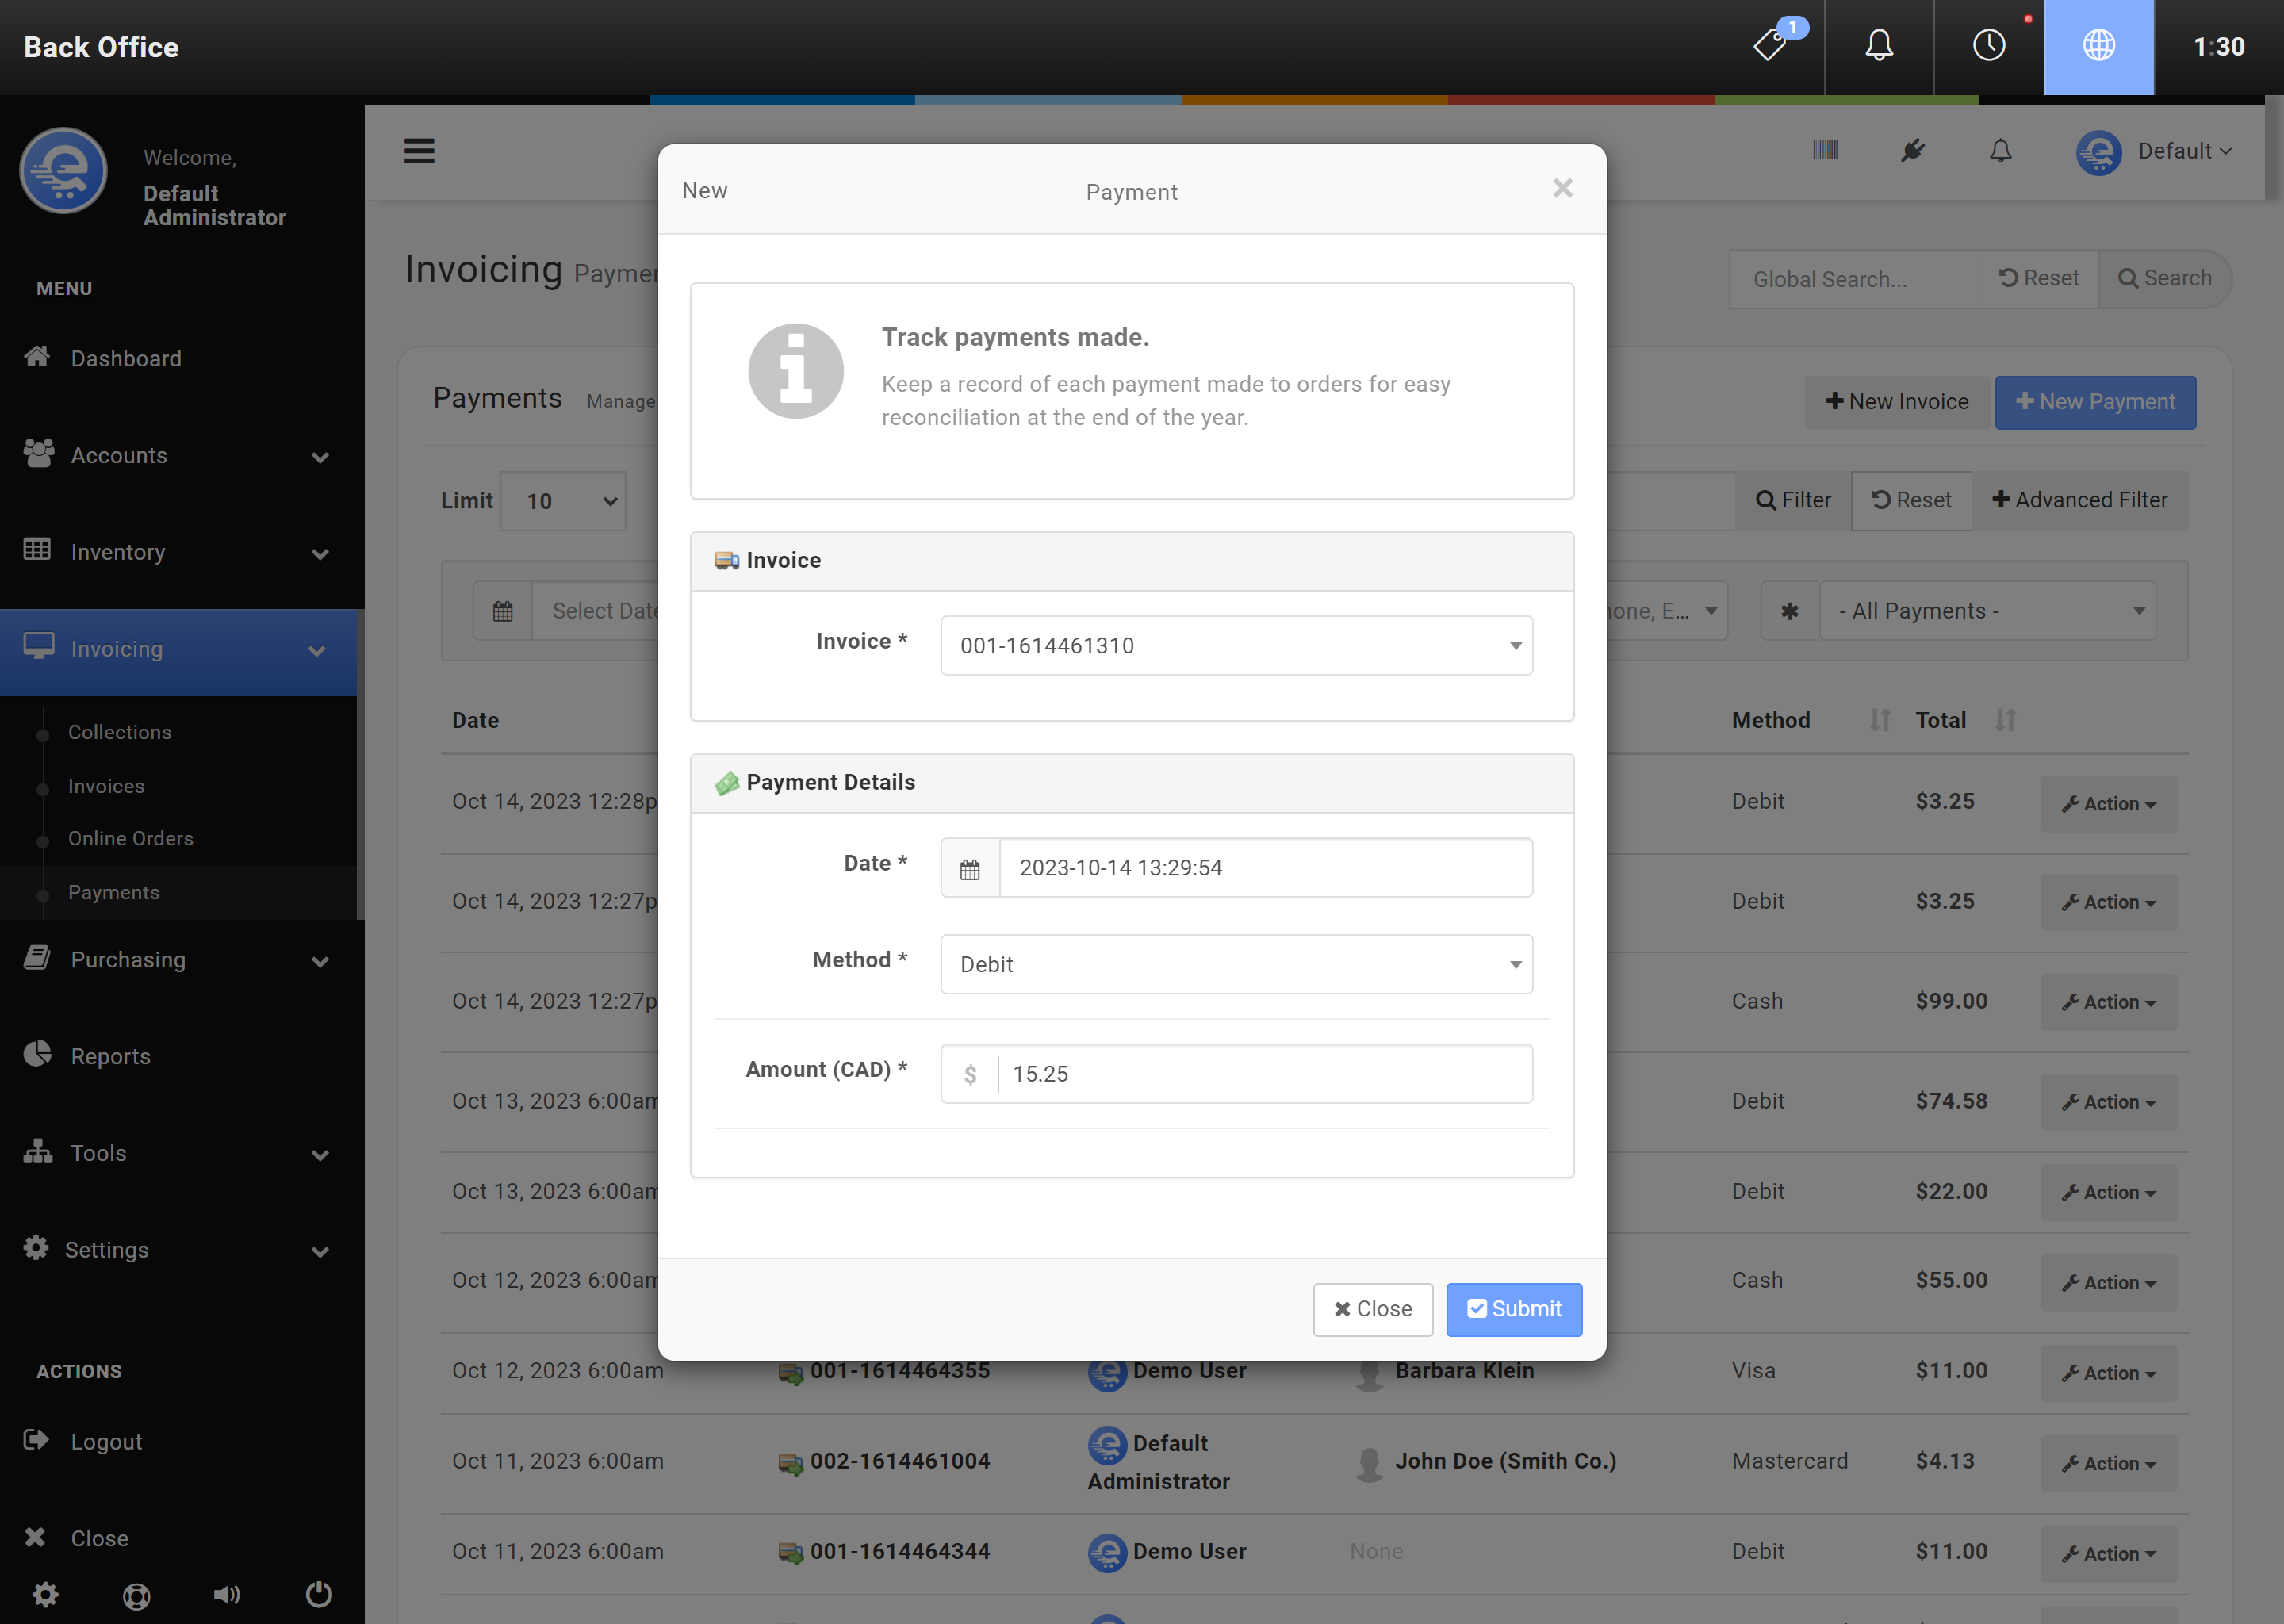
- On the top menu bar, click "New Payment".
- Enter the payment details and press "Submit" when complete.


