Adjustments
Adjustments can be made to inventory through the Back Office and the Terminal. Adjustments can be made to increase, or decrease stock. You can track the reason for adjustments by providing the Adjustment reason.
Stock adjustments take a few minutes to appear on other Terminals.
- Incorrectly sold the wrong item and need to correct the inventory
- Forgot to process a return properly
- Loss & Theft
- Unexpected inventory increases
- Damaged inventory
Individual Adjustments
Adjustments can be made to inventory through the Back Office and the Terminal. Adjustments can be made to increase, or decrease stock. You can track the reason for adjustments by providing the Adjustment reason.
- Navigate to the Back Office area
- On the left menu, click on "Inventory", then click on "Adjustments".
- Click on "New Adjustment" (see Figure A).
- Search for the product by Name, UPC, EAN13, or Reference.
- Select the Warehouse you want to adjust the inventory for.
- Fill out the adjustments details, like Type of adjustment (Increase or Decrease), the Reason, and the Quantity.
- Click "Save Changes" (see Figure B) when you are done entering the adjustment details.
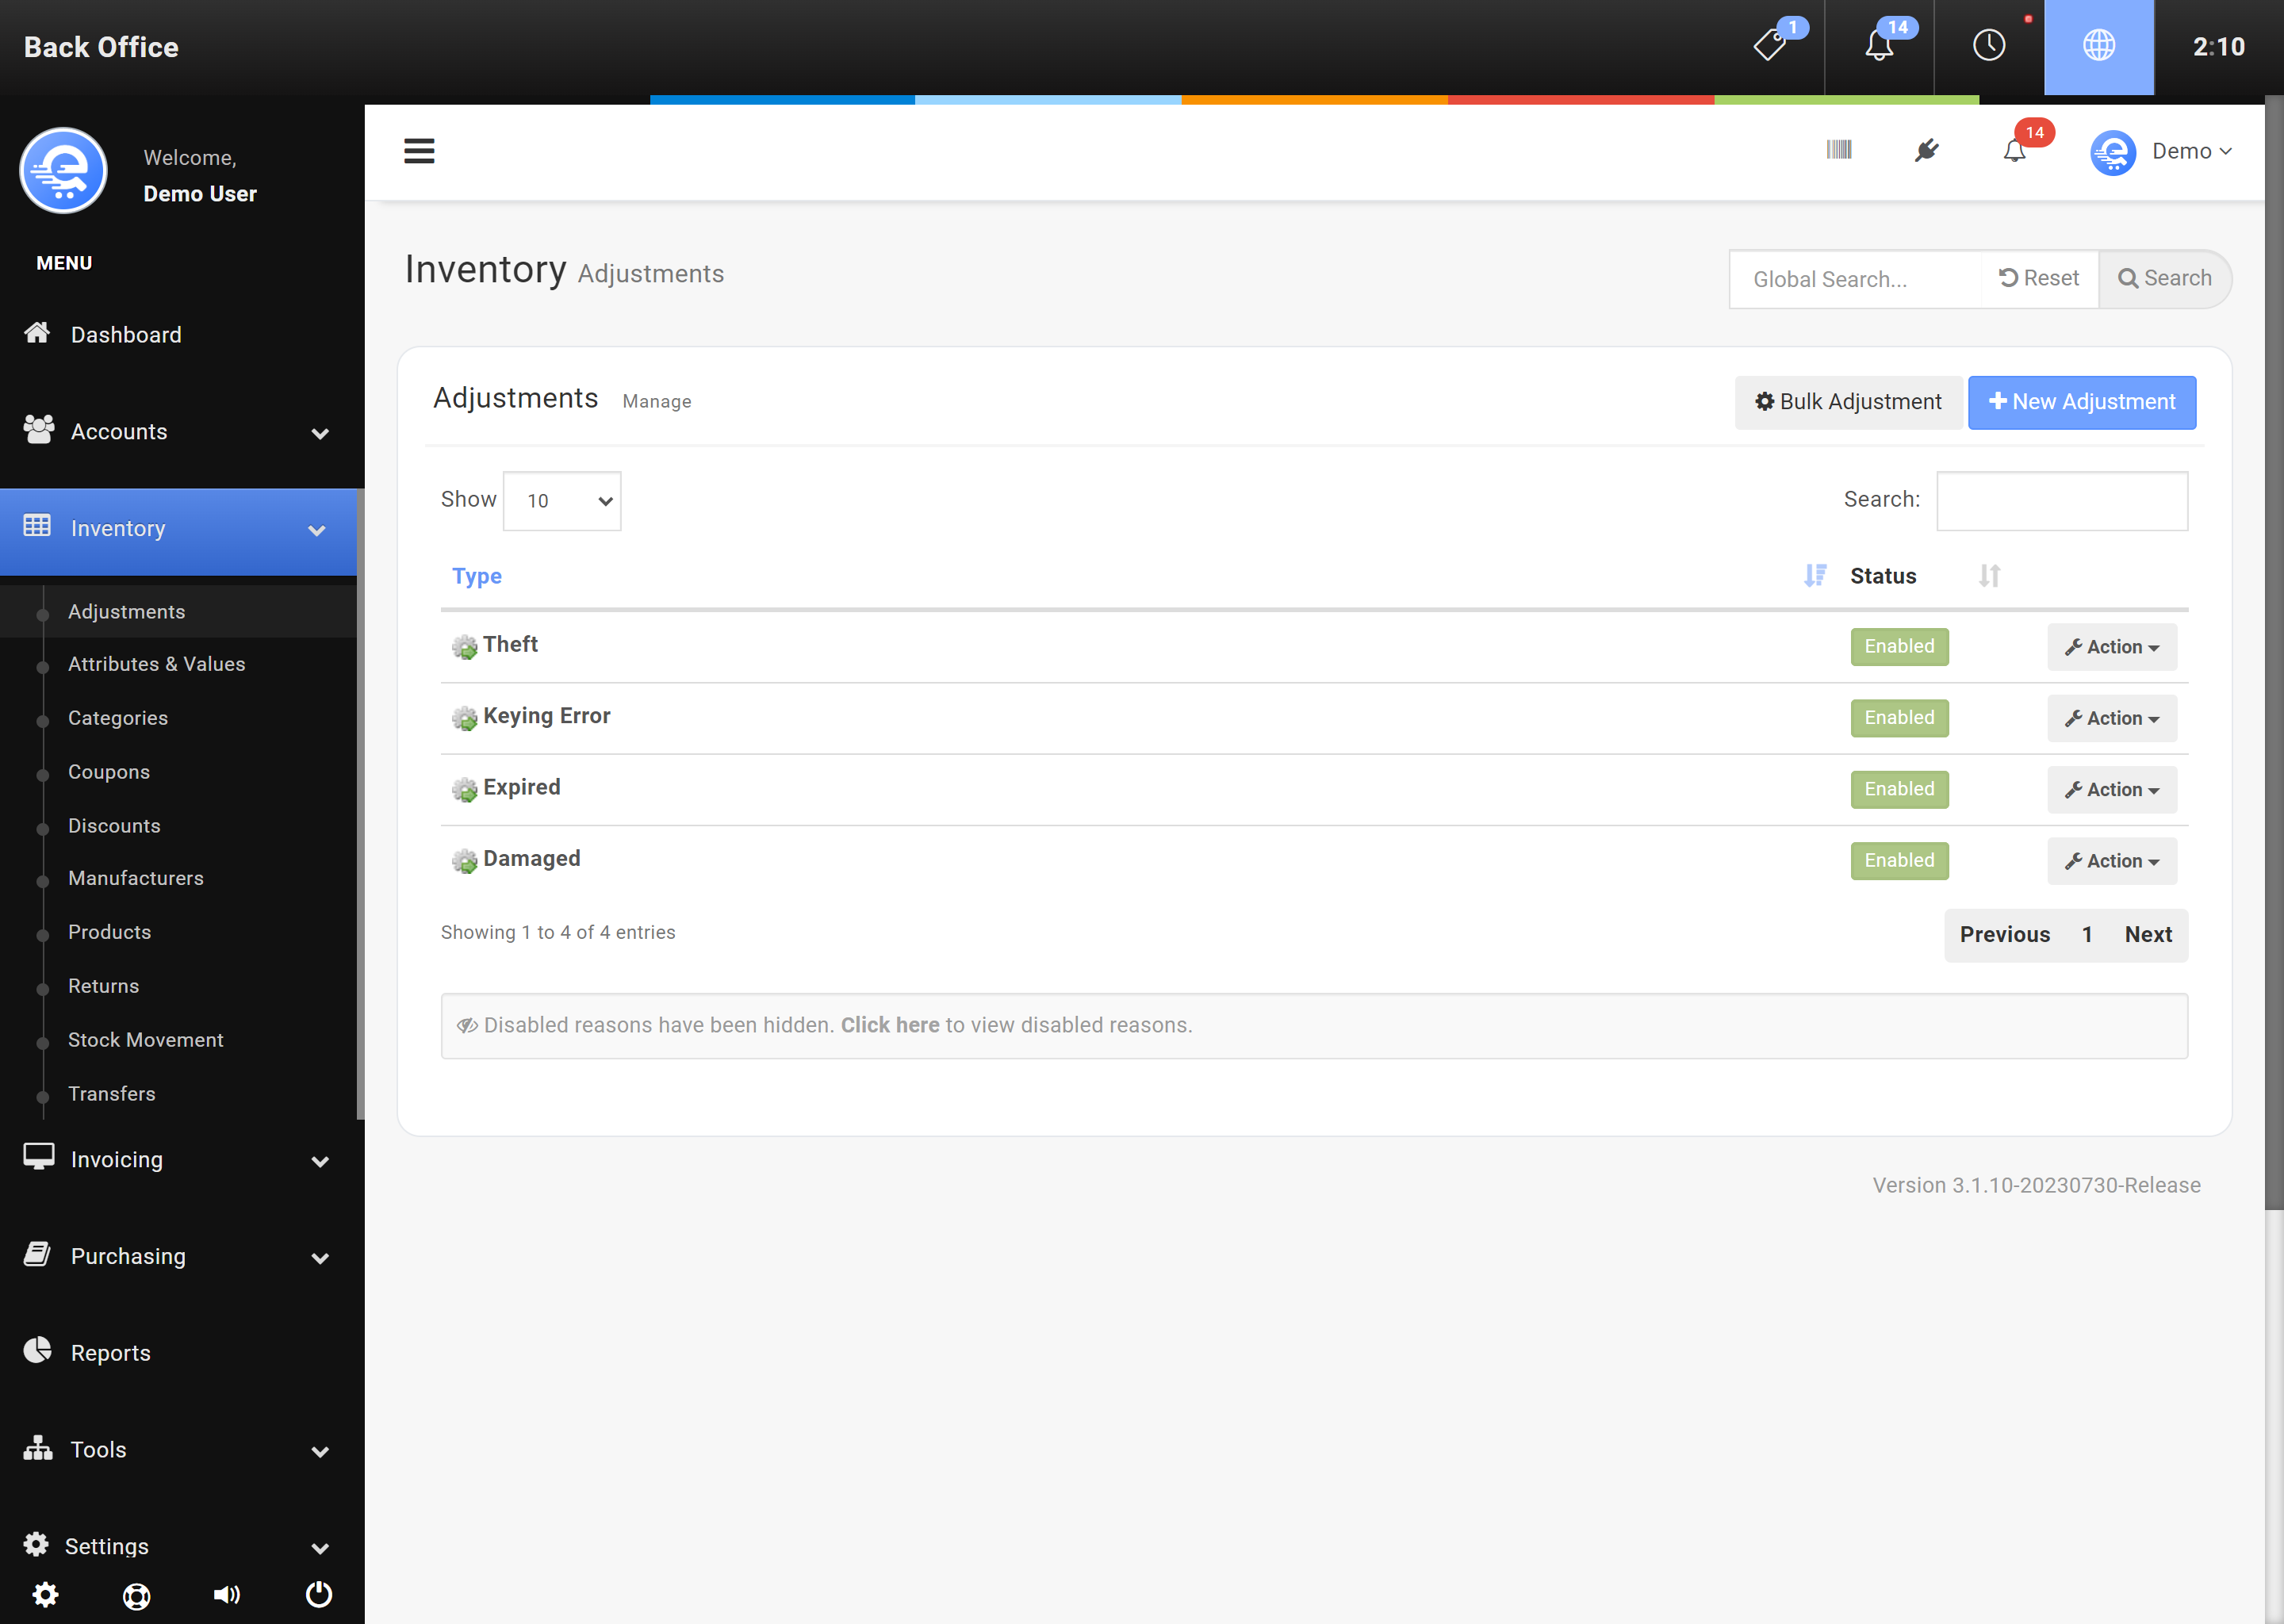
Figure A
Access the New Adjustment option by using the Back Office.
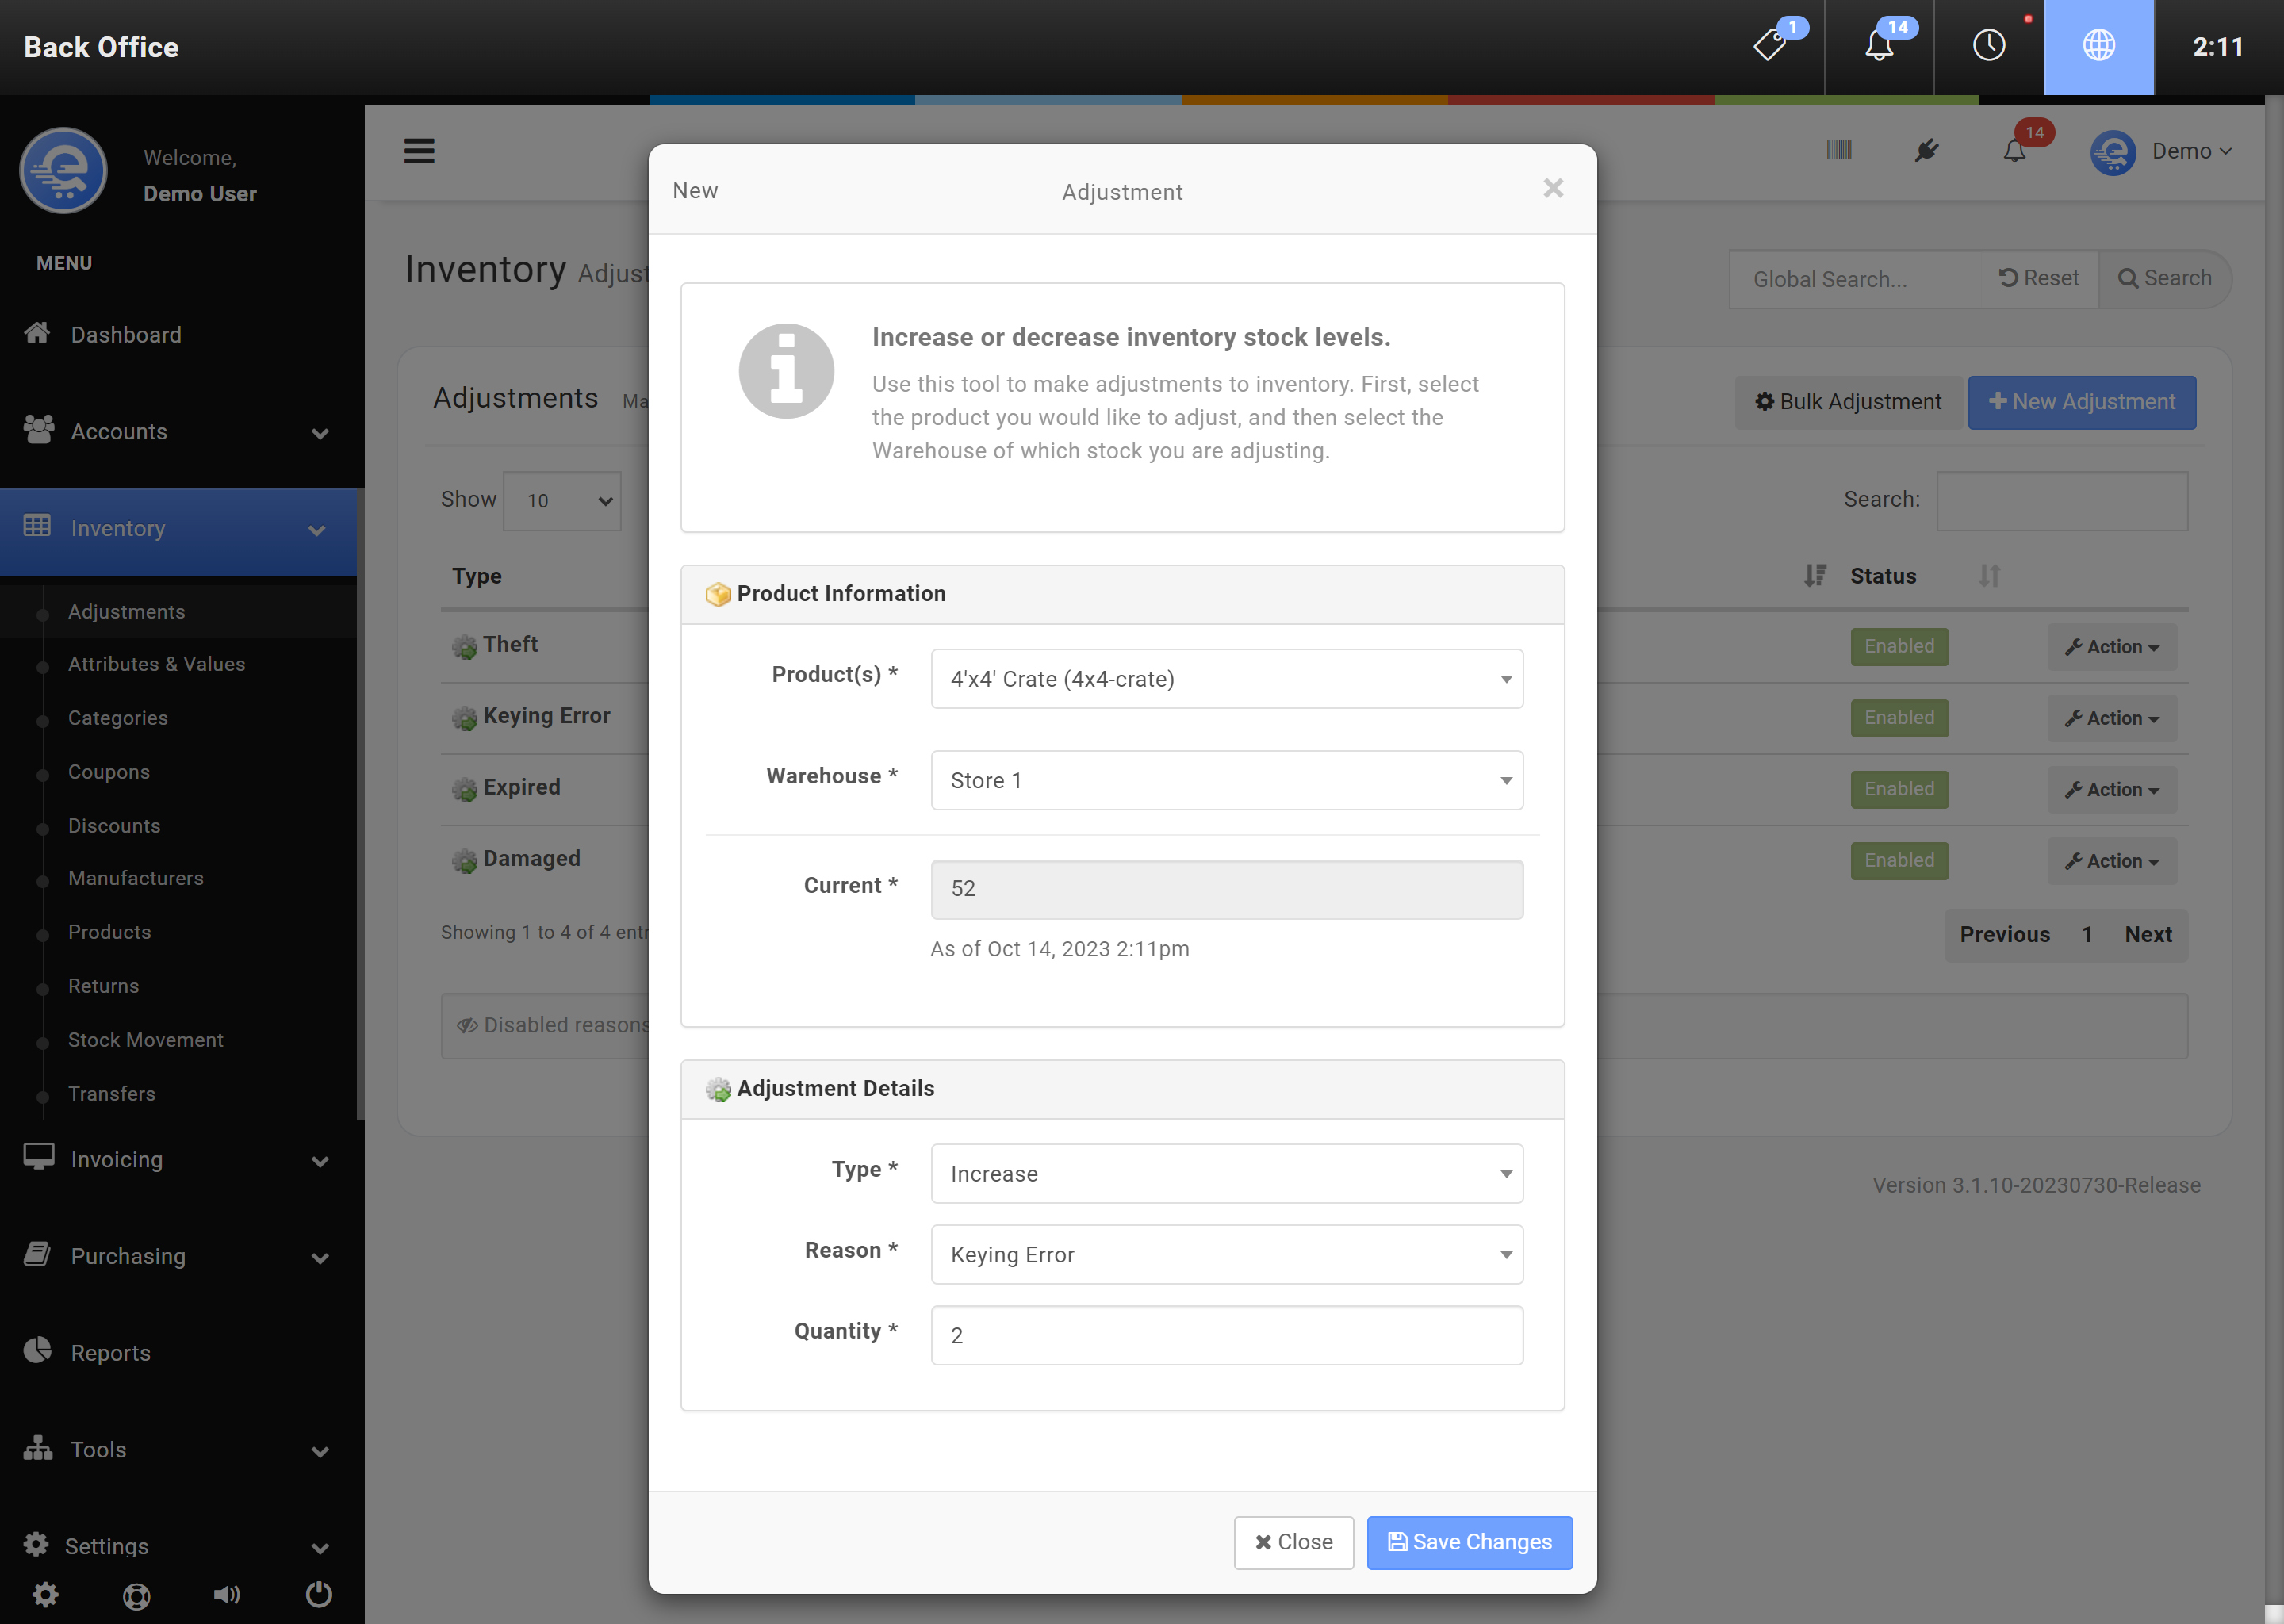
Figure B
Fill out the Adjustment details, and click "Save Changes" when complete.
Bulk Adjustments
Bulk Adjustments can be made to many different products at once. Bulk Adjustments are uploaded with a CSV file. An example file is included in the software.
- Navigate to the Back Office area
- On the left menu, click on "Inventory", then click on "Adjustments".
- Click on "Bulk Adjustment" (see Figure C).
- Download the reference file and edit it to your requirements (see Figure D).
- Upload the CSV file, and specify the CSV options (skip lines, delimiter, etc...) (see Figure E).
- After the file has processed, you will see a preview of the changes that will be made.
- Click "Save Changes" (see Figure B) when you have verified the changes. This operation is not reversible.

Figure C
Access the Bulk Adjustment tool in the Back Office.

Figure D
Use the example file to build your CSV file. When ready, click on "Upload CSV".
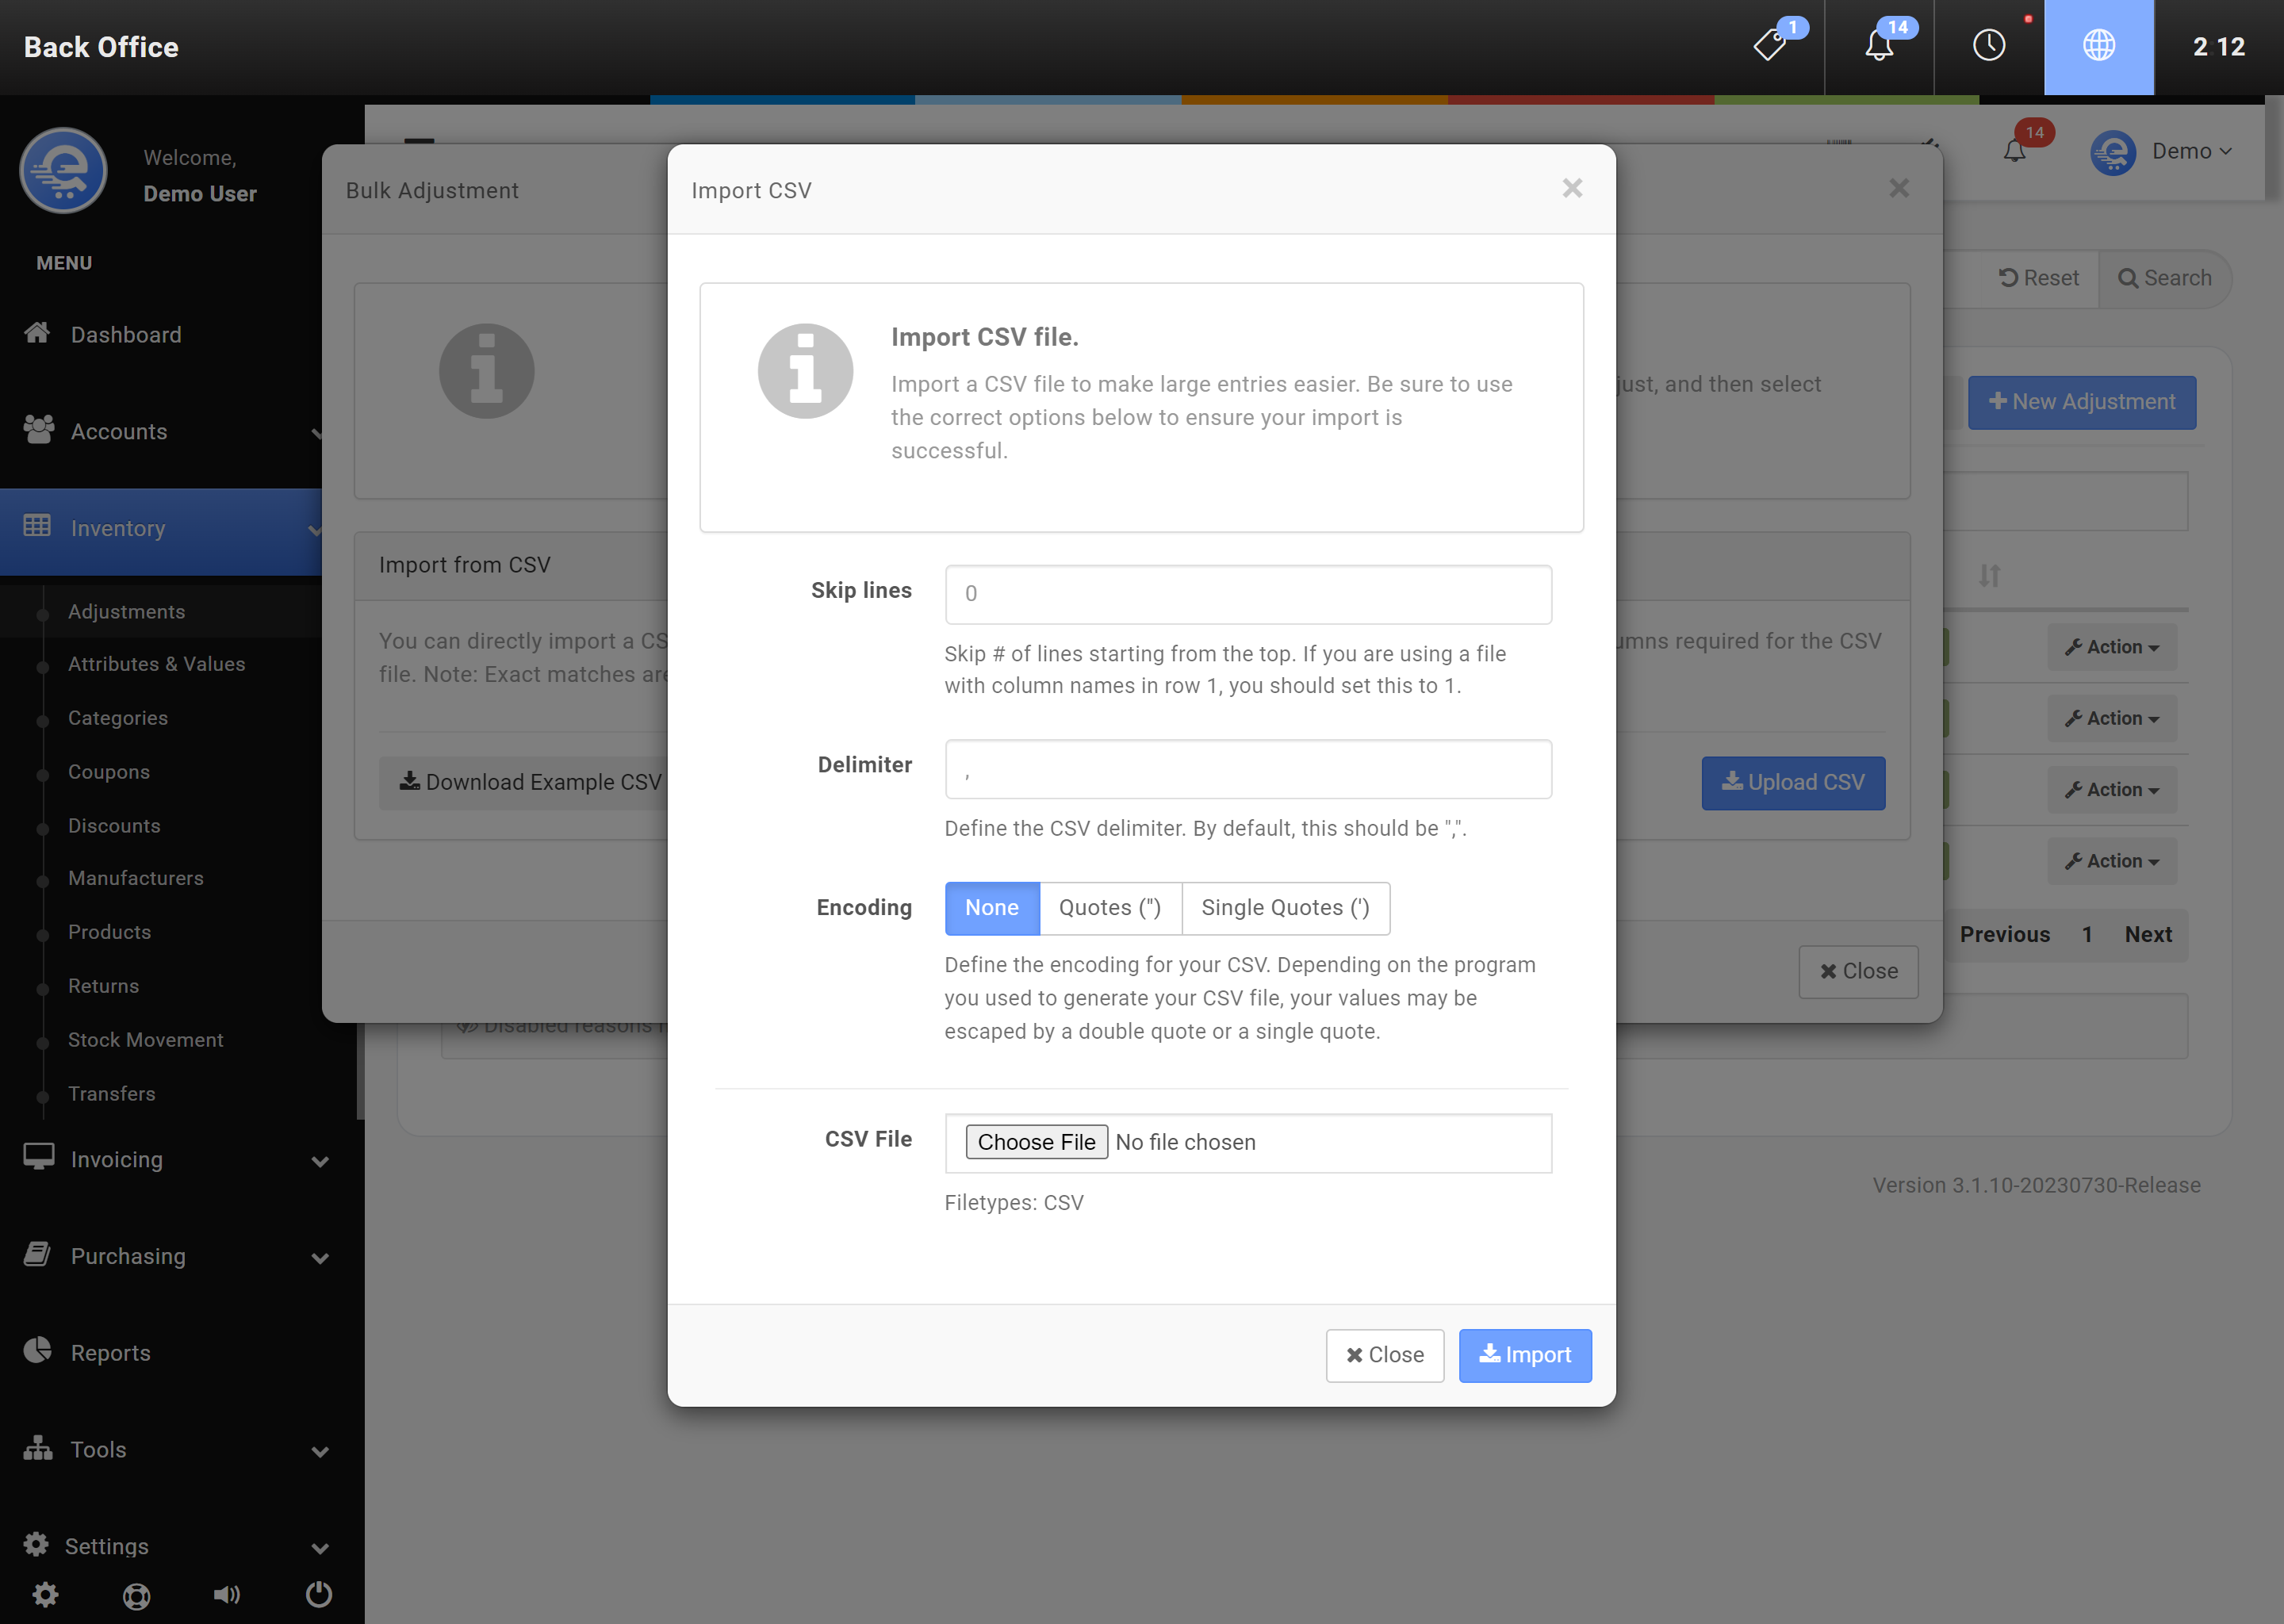
Figure E
Fill out the CSV details, and upload the file you created. Click "Import" when ready to start the import process.