Tools
Introduction to Tools
eQuate POS comes with additional tools to help you manage your business. From scheduling employees to time tracking, you can get valuable information like labour rates, and more. The Calendar function allows you to schedule customer related events, like appointments & bookings. E-mail your customers in mass with the Mailings feature. You can also import and export data in mass using the Exports & Imports feature. Track customer issues with tickets, and create workgroups for easy access for staff to complete tickets and collaborate.
- Calendars
Schedule customer related events in the Calendar. Bookings & Appointment tracking with the ability to assign an event directly to a customer profile. You can also schedule your employees by adding calendar events and assigning them to users. - Exports & Imports Advanced Users
Make changes in bulk using the export/import feature. Download CSV templates, and mass import in a matter of seconds. - Timecards
Track employee hours by using timecards. Employees can punch in when they arrive, and punch out when they leave. Allowing you to quickly run payroll. - Tickets & Workgroups
Handle customer requests like a professional with your own ticketing system. Tickets allow you to track external or internal issues that need to be addressed. You can assign these to staff, or even customers.
Calendars
Calendars allow you to track customer events in detail. For example, you can create bookings if you are a hair salon, or schedule in customer rentals if you are a bike rental shop. Calendars contain entries called "events". These events can be on a certain time or day, depending on your need. You can select a start and an end time to each event. Once you have created your first calendar, you can start adding events to your calendar.
- Use Calendars for customer related functions. For employee scheduling, you should use the Schedule feature instead.
Calendars
Calendars are a placeholder for events. You can create many different calendars.
- Navigate to eQuate Back Office
- On the left navigation bar, click "Tools", then click "Calendars".
- Click on "New Calendar" (see Figure A)
- Provide a name and description for your calendar (example: Bookings)
- Add event types for this calendar. Event types are a label for the event.
- Click "Save Changes" (see Figure B).

Figure A
Adding a New Calendar through the Back Office.
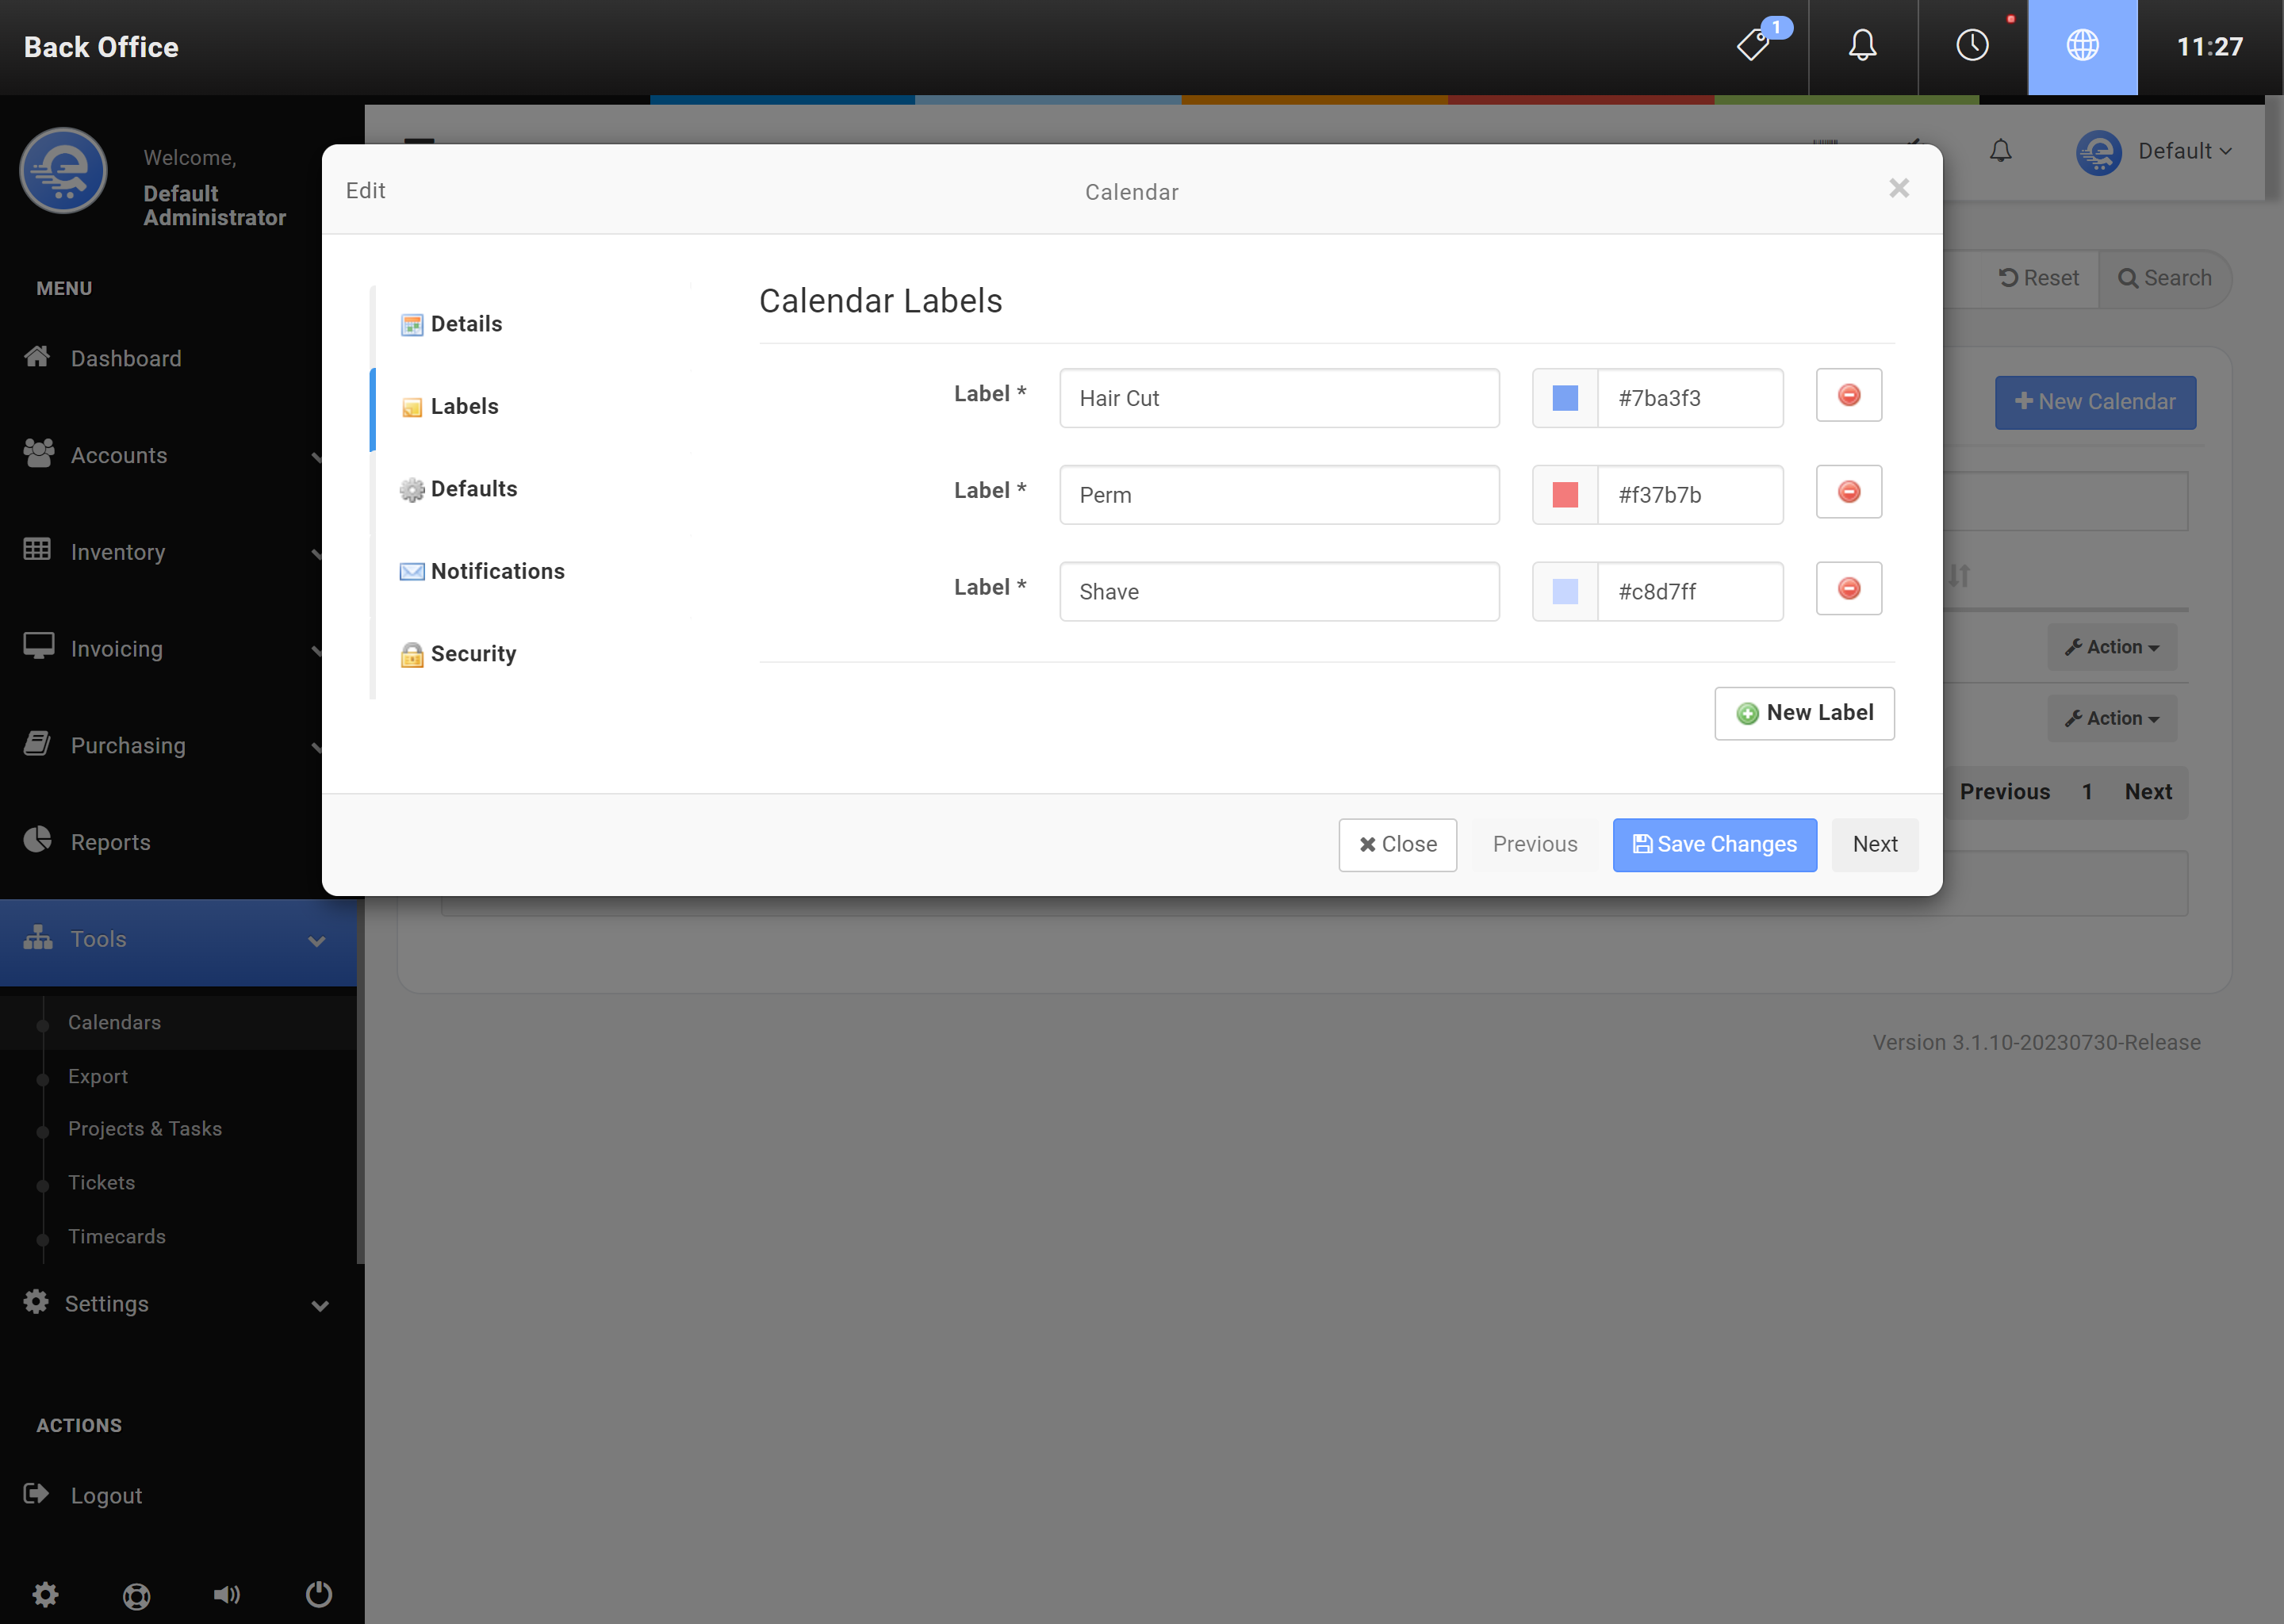
Figure B
Naming your New Calendar with a Name and a Description, pressing Save Changes when complete.
Events
Events are placed on calendars.
- Go to eQuate Back Office
- On the left navigation bar, click "Tools", then click "Calendars".
- Click on the Calendar you want to add an event to.
- Click inside any of the dates to open up a New Event window.
- Add the details of the event and click "Save Changes" when you are complete (see Figure C).
- Go to eQuate Back Office
- On the left navigation bar, click "Tools", then click "Calendars & Mailings".
- Click on the Calendar you want to remove the event from.
- Click on the event you want to remove.
- Click the "Delete" button at the bottom to remove the event (see Figure D).
- Confirm that you want to delete the event.
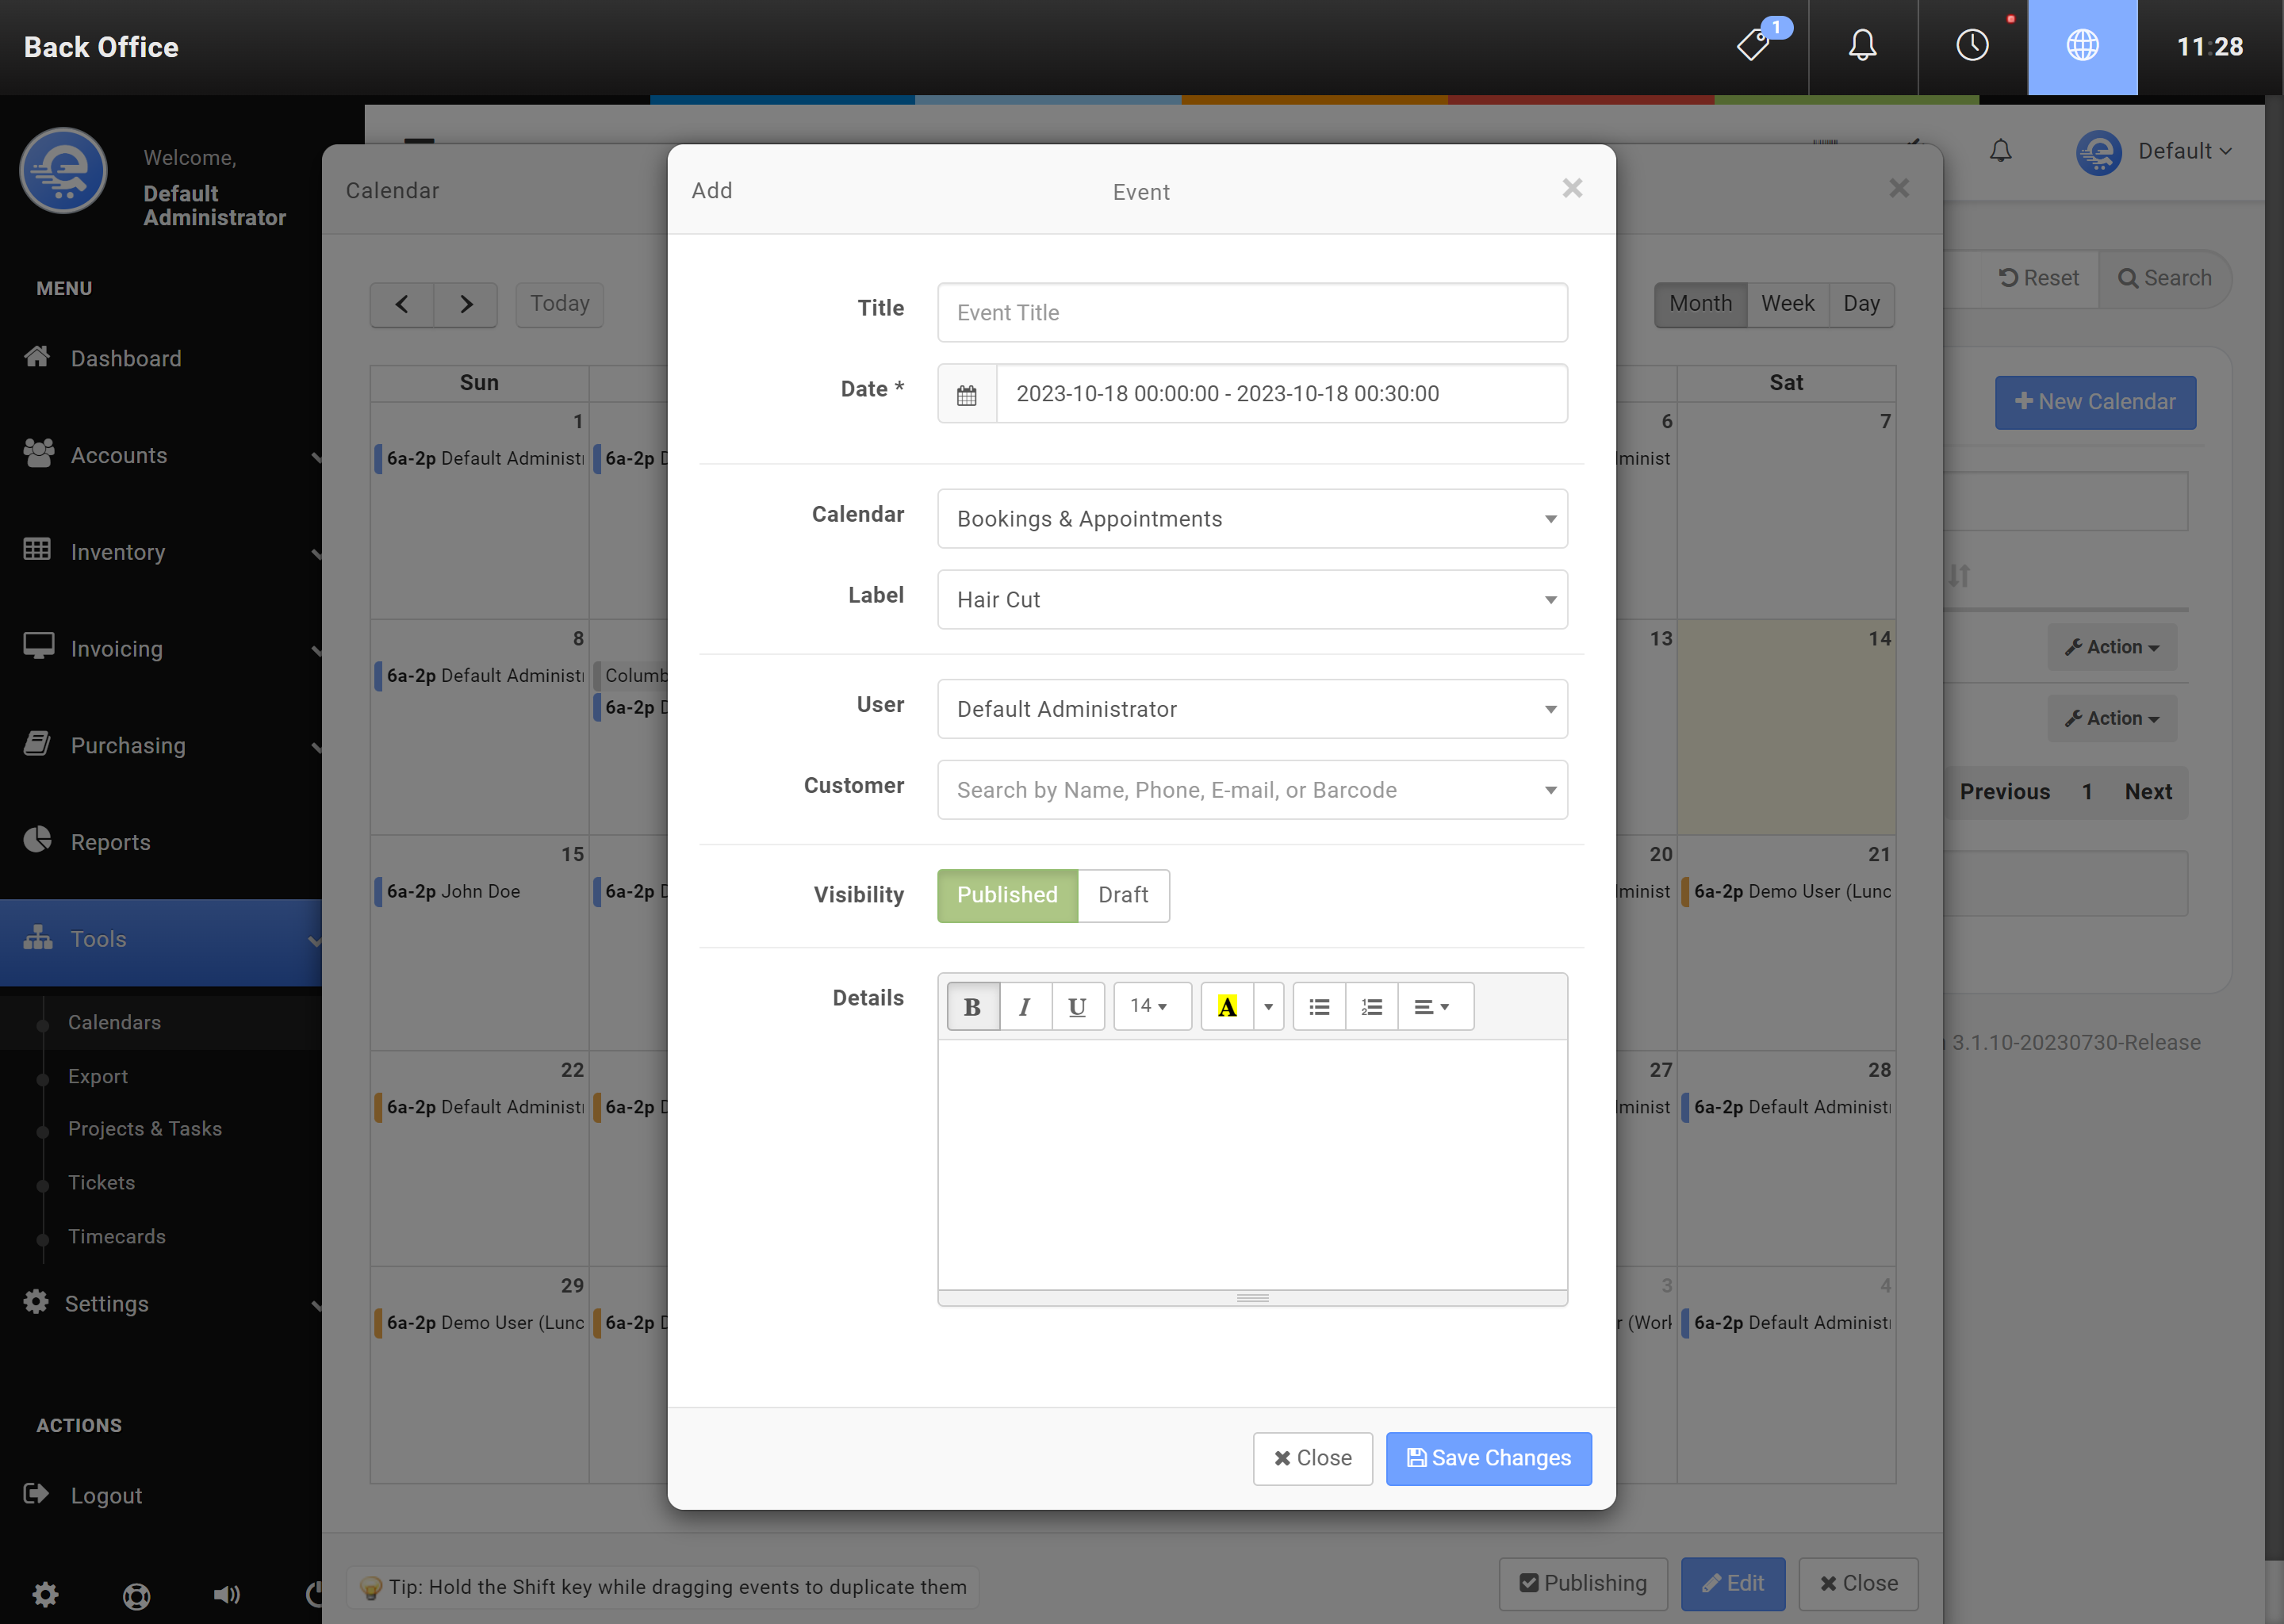
Figure C
Adding a New Event to your Calendar.
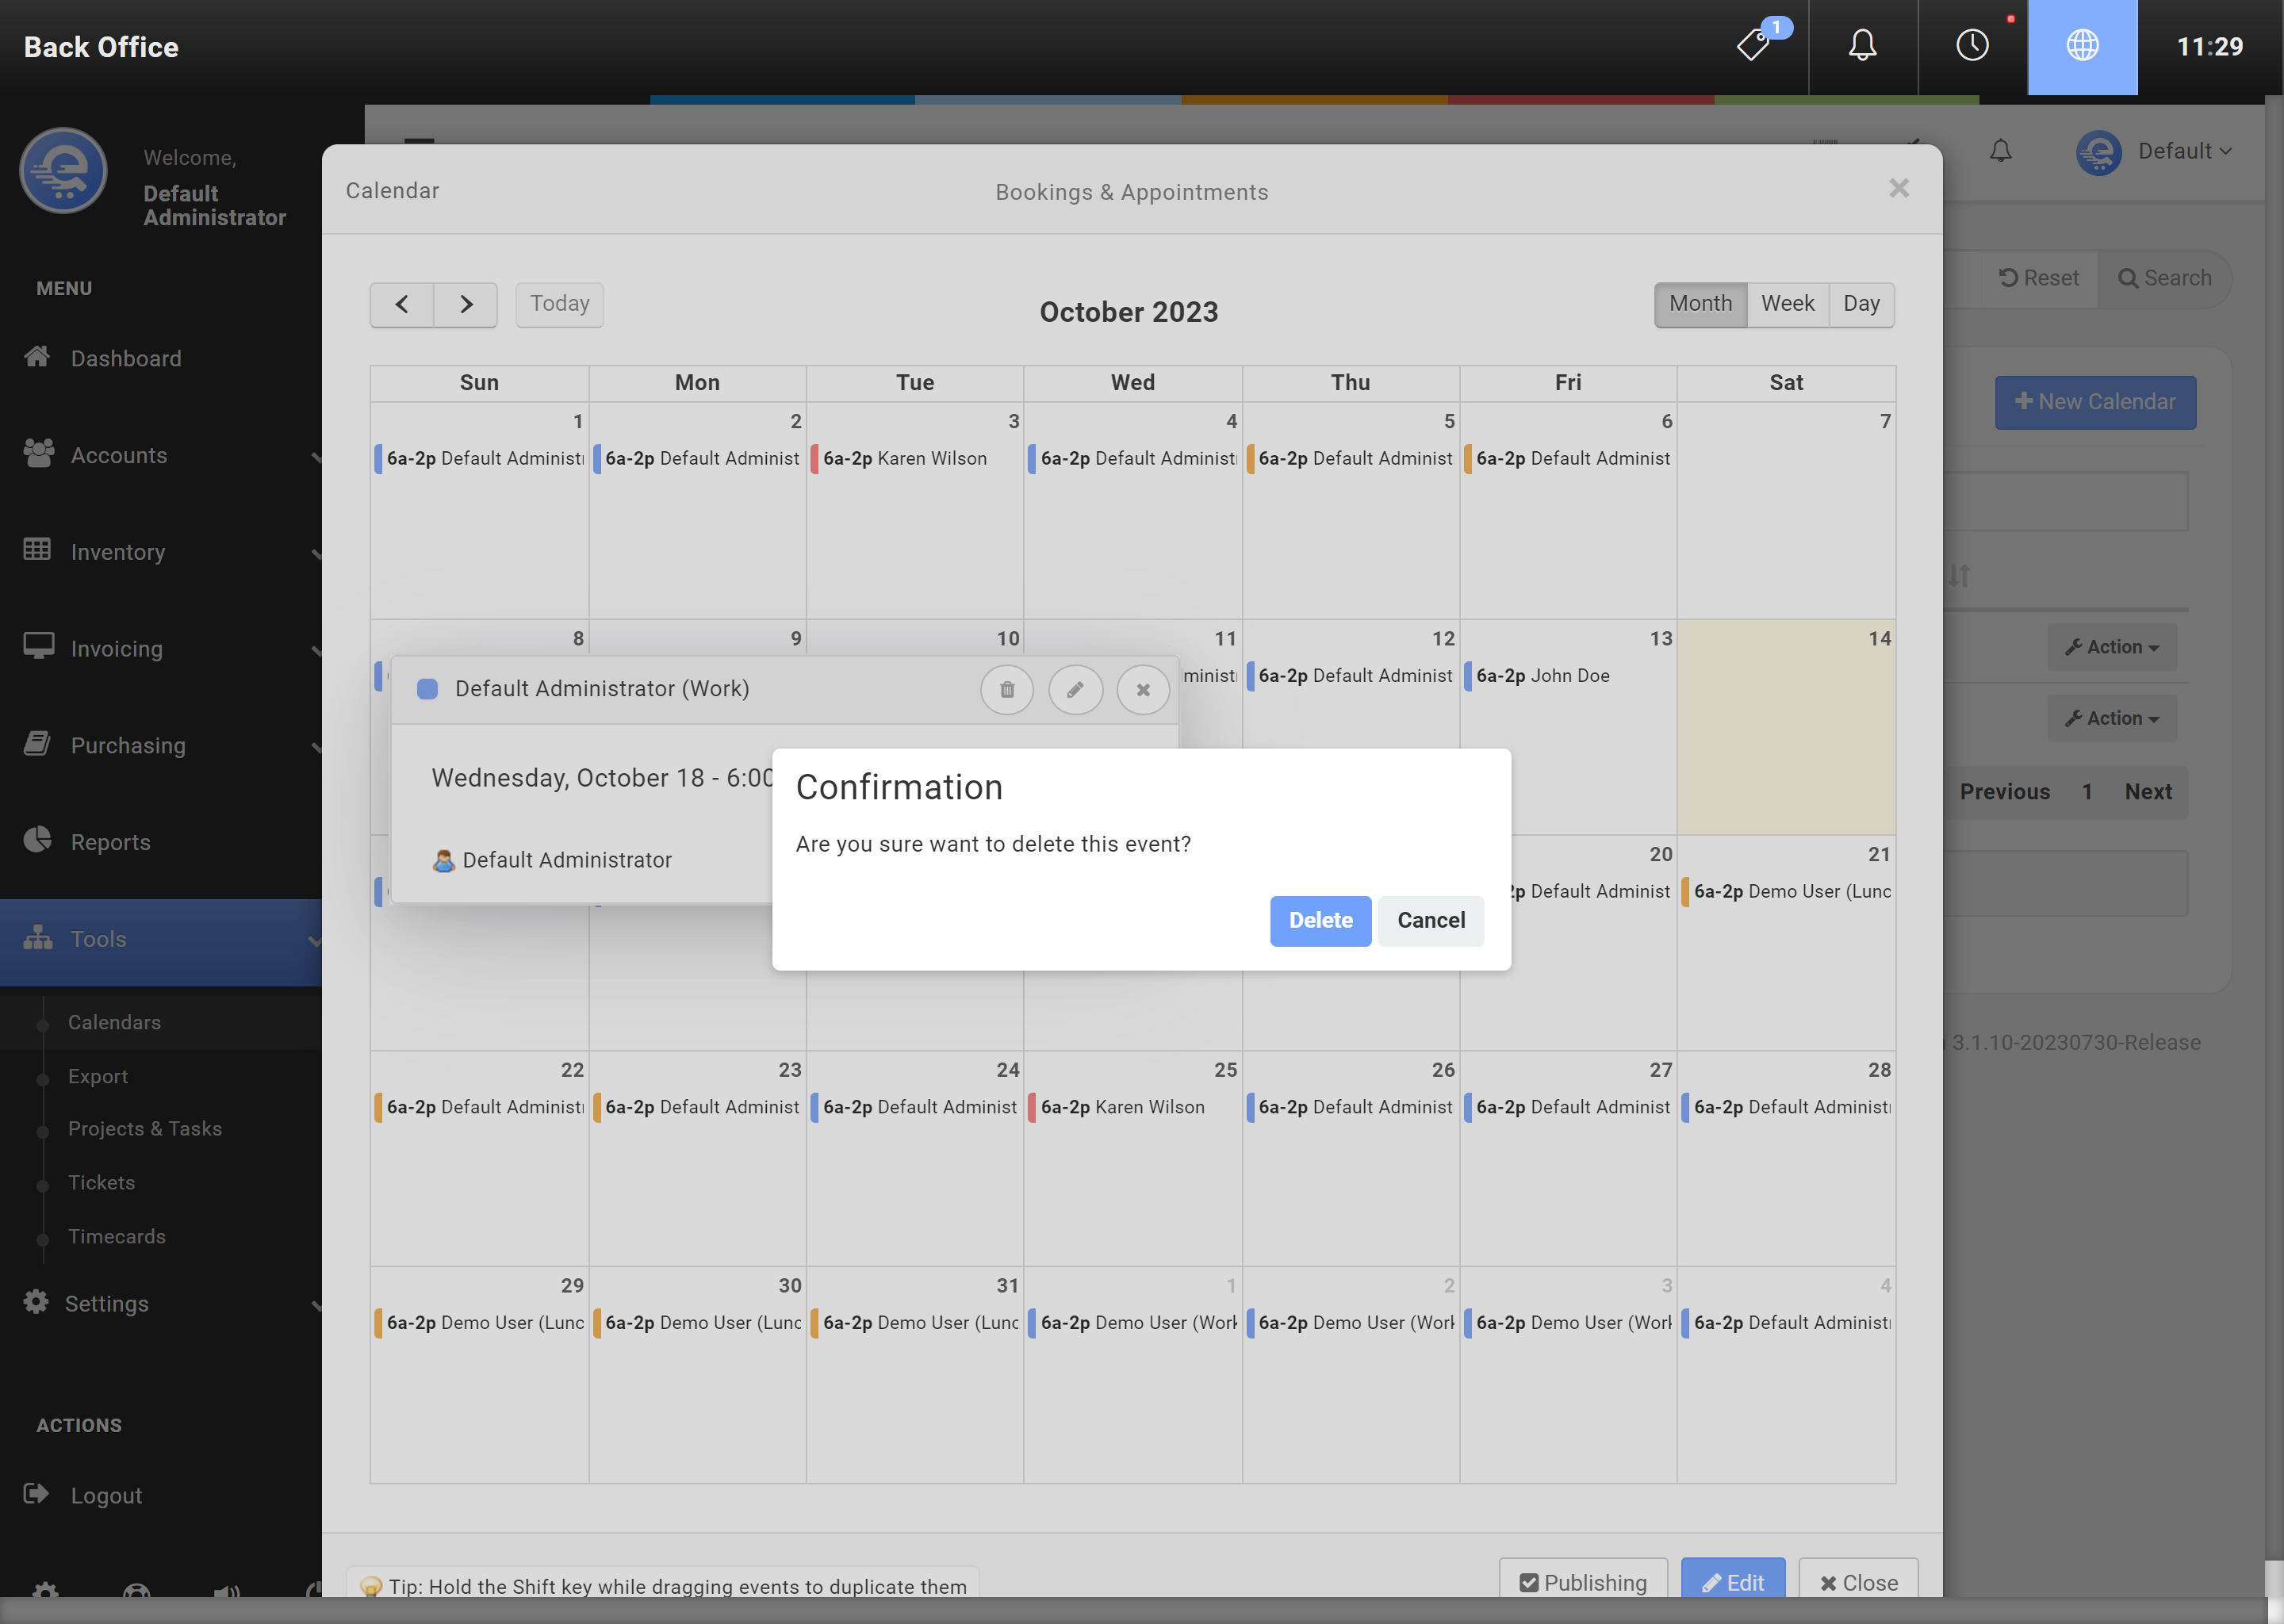
Figure D
Removing an existing event from your Calendar.
Exports & Imports
Exporting and importing information in bulk can speed up changes to your system. You can quickly adjust many variables in your system.
Exporting & Importing is for advanced users. Existing data can be accidentally overwritten very easily.
Feature available in Version 3.0.11 - Release date April 2021
Tickets & Workgroups
Tickets can be created to allow you to track and address various business issues. You can open, close and hold tickets. Tickets can also be given a severity, such as Low, or High; depending on your requirement for that specific ticket.
- Navigate to the eQuate Back Office
- On the left navigation bar, click "Tools", then click "Tickets".
- On the top button menu select "Create Ticket" (see Figure A).
- Add the details of the ticket and click "Save Changes" when you are complete (see Figure B).
- Navigate to the eQuate Back Office
- On the left navigation bar, click "Tools", then click "Tickets".
- Select "Action" and "Edit" on the row of the ticket you want to edit.
- Click "Save Changes" (see Figure B) when you are done modifying the ticket.
Statuses
Tickets can be changed to various statuses. Statuses allow you to manage your workflow.
- Open
Open tickets are the default status when creating a new ticket. An open ticket indicates the ticket is not complete. - Held
A held status indicated the ticket has been acknowledged, but not yet resolved. - Closed
A closed ticket is the final status a ticket enters. It indicates that the ticket is complete and no further action is required.
- Navigate to the eQuate Back Office
- On the left navigation bar, click "Tools", then click "Tickets".
- Select "Action" and "Edit" on the row of the ticket you want to close.
- Click on the classification sub-menu, and change the Status of the ticket to Closed.
- Click "Save Changes" (see Figure B).
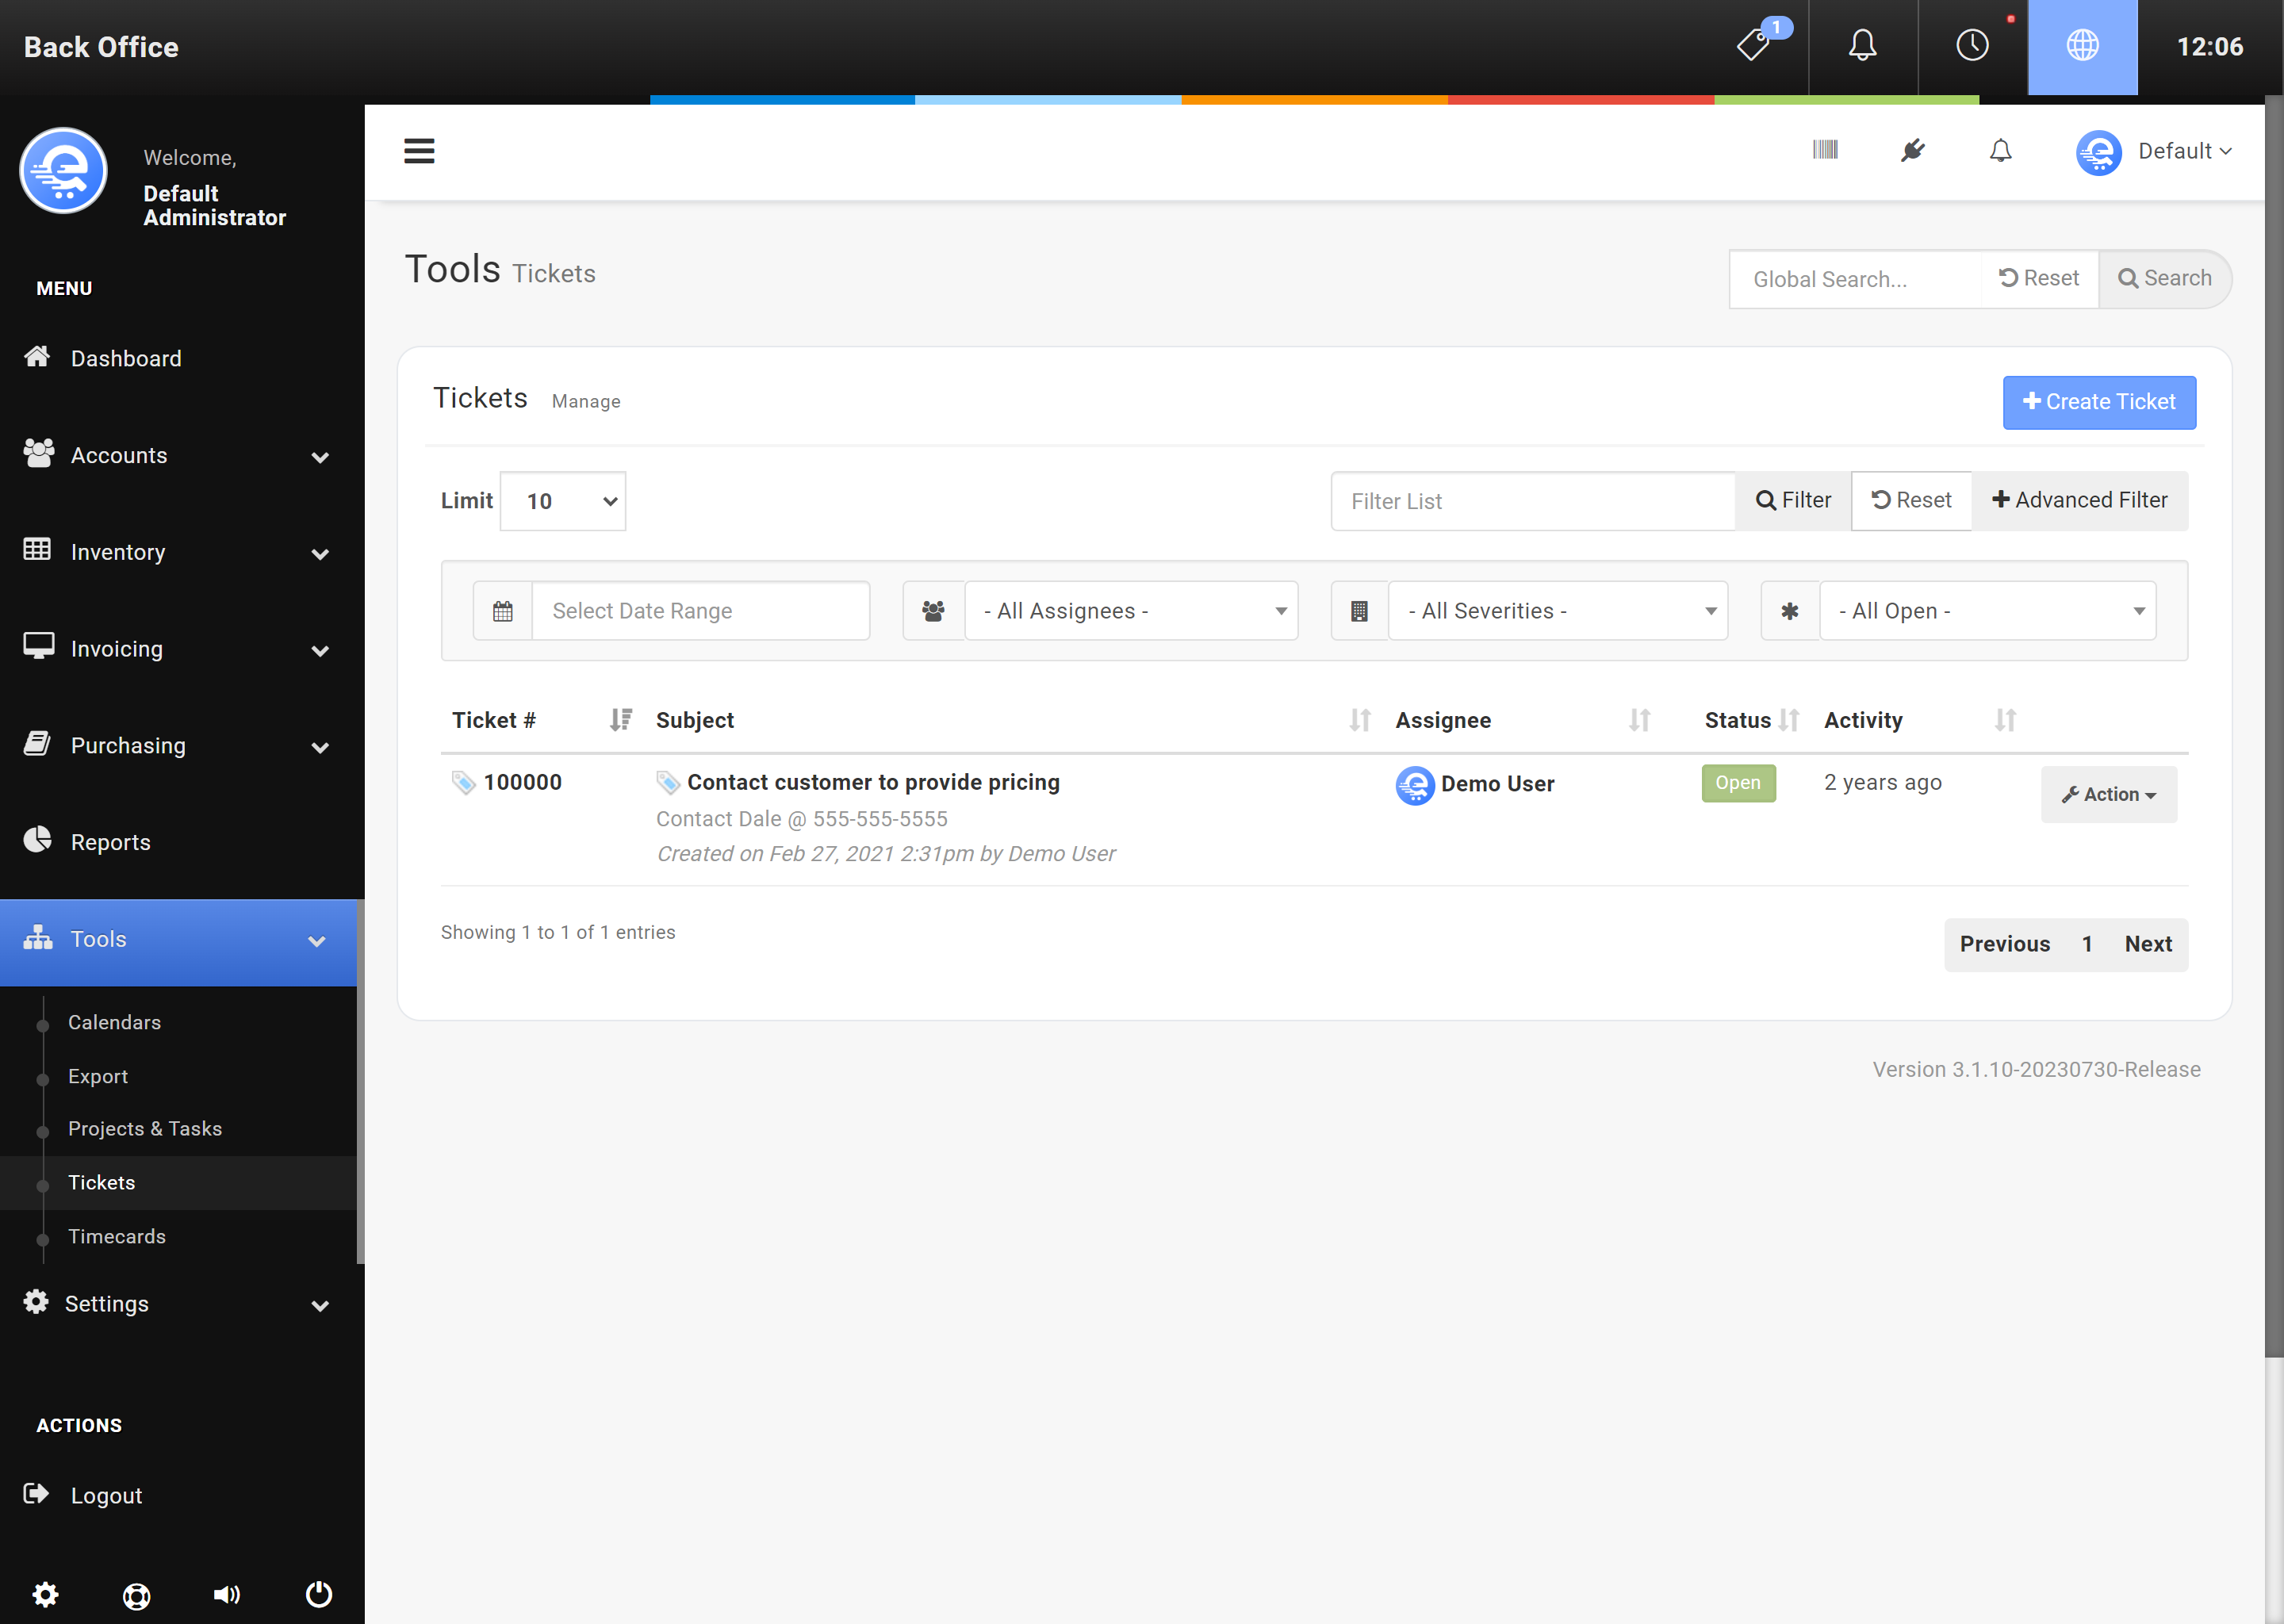
Figure A
Adding a new ticket in the Back Office area.
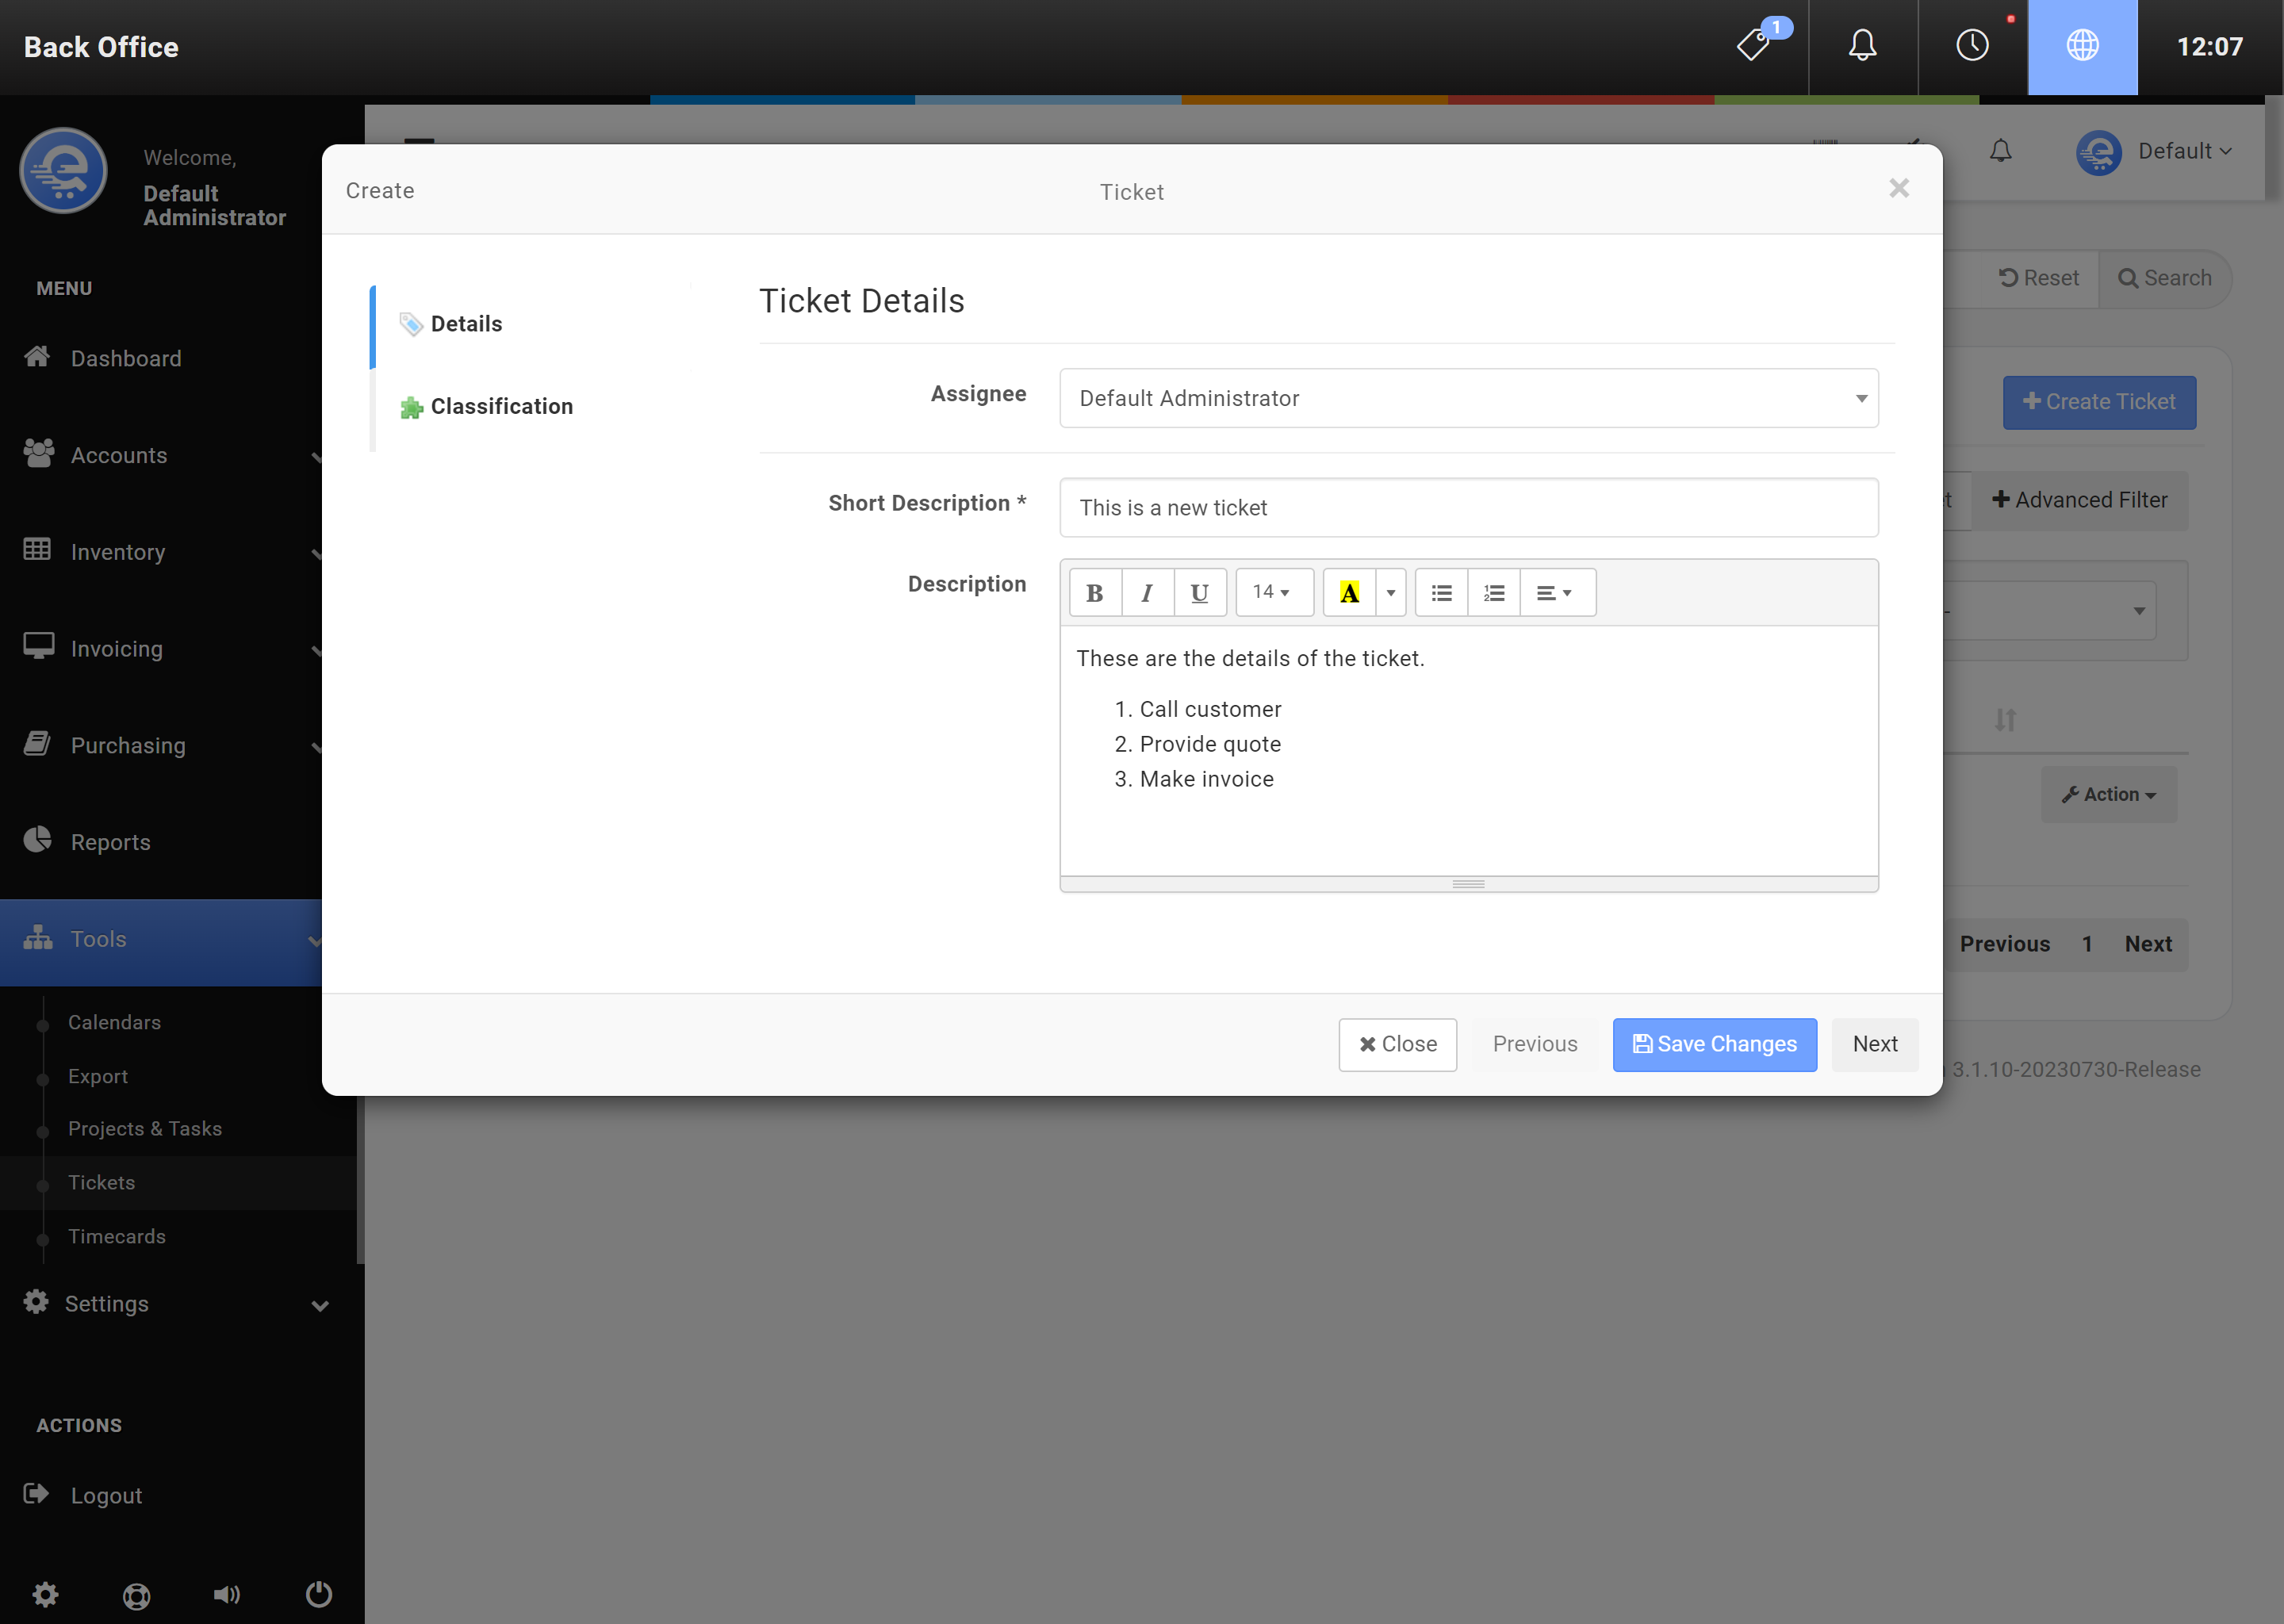
Figure B
After modifying the ticket, click "Save Changes".
Workgroups
Workgroups can provide you a way of working as a team. You can assign tickets to workgroups, and all of the users in the workgroup can work on the assigned ticket. Workgroups can also be a good way of collaborating with various tasks, such as Projects & Tasks. You can assign various users to workgroups.
- Navigate to the eQuate Back Office
- On the left navigation bar, click "Settings", select "System", then click "Workgroups".
- On the top button menu select "Create Workgroup" (see Figure C).
- Enter the information about the workgroup, and the employees you want to add to it.
- Click "Save Changes" (see Figure D).
- Navigate to the eQuate Back Office
- On the left navigation bar, click "Settings", select "System", then click "Workgroups".
- Find the Warehouse you would like to edit.
- Select "Action" and "Edit" on the row of the workgroup you want to edit.
- Click "Save Changes" (see Figure D).
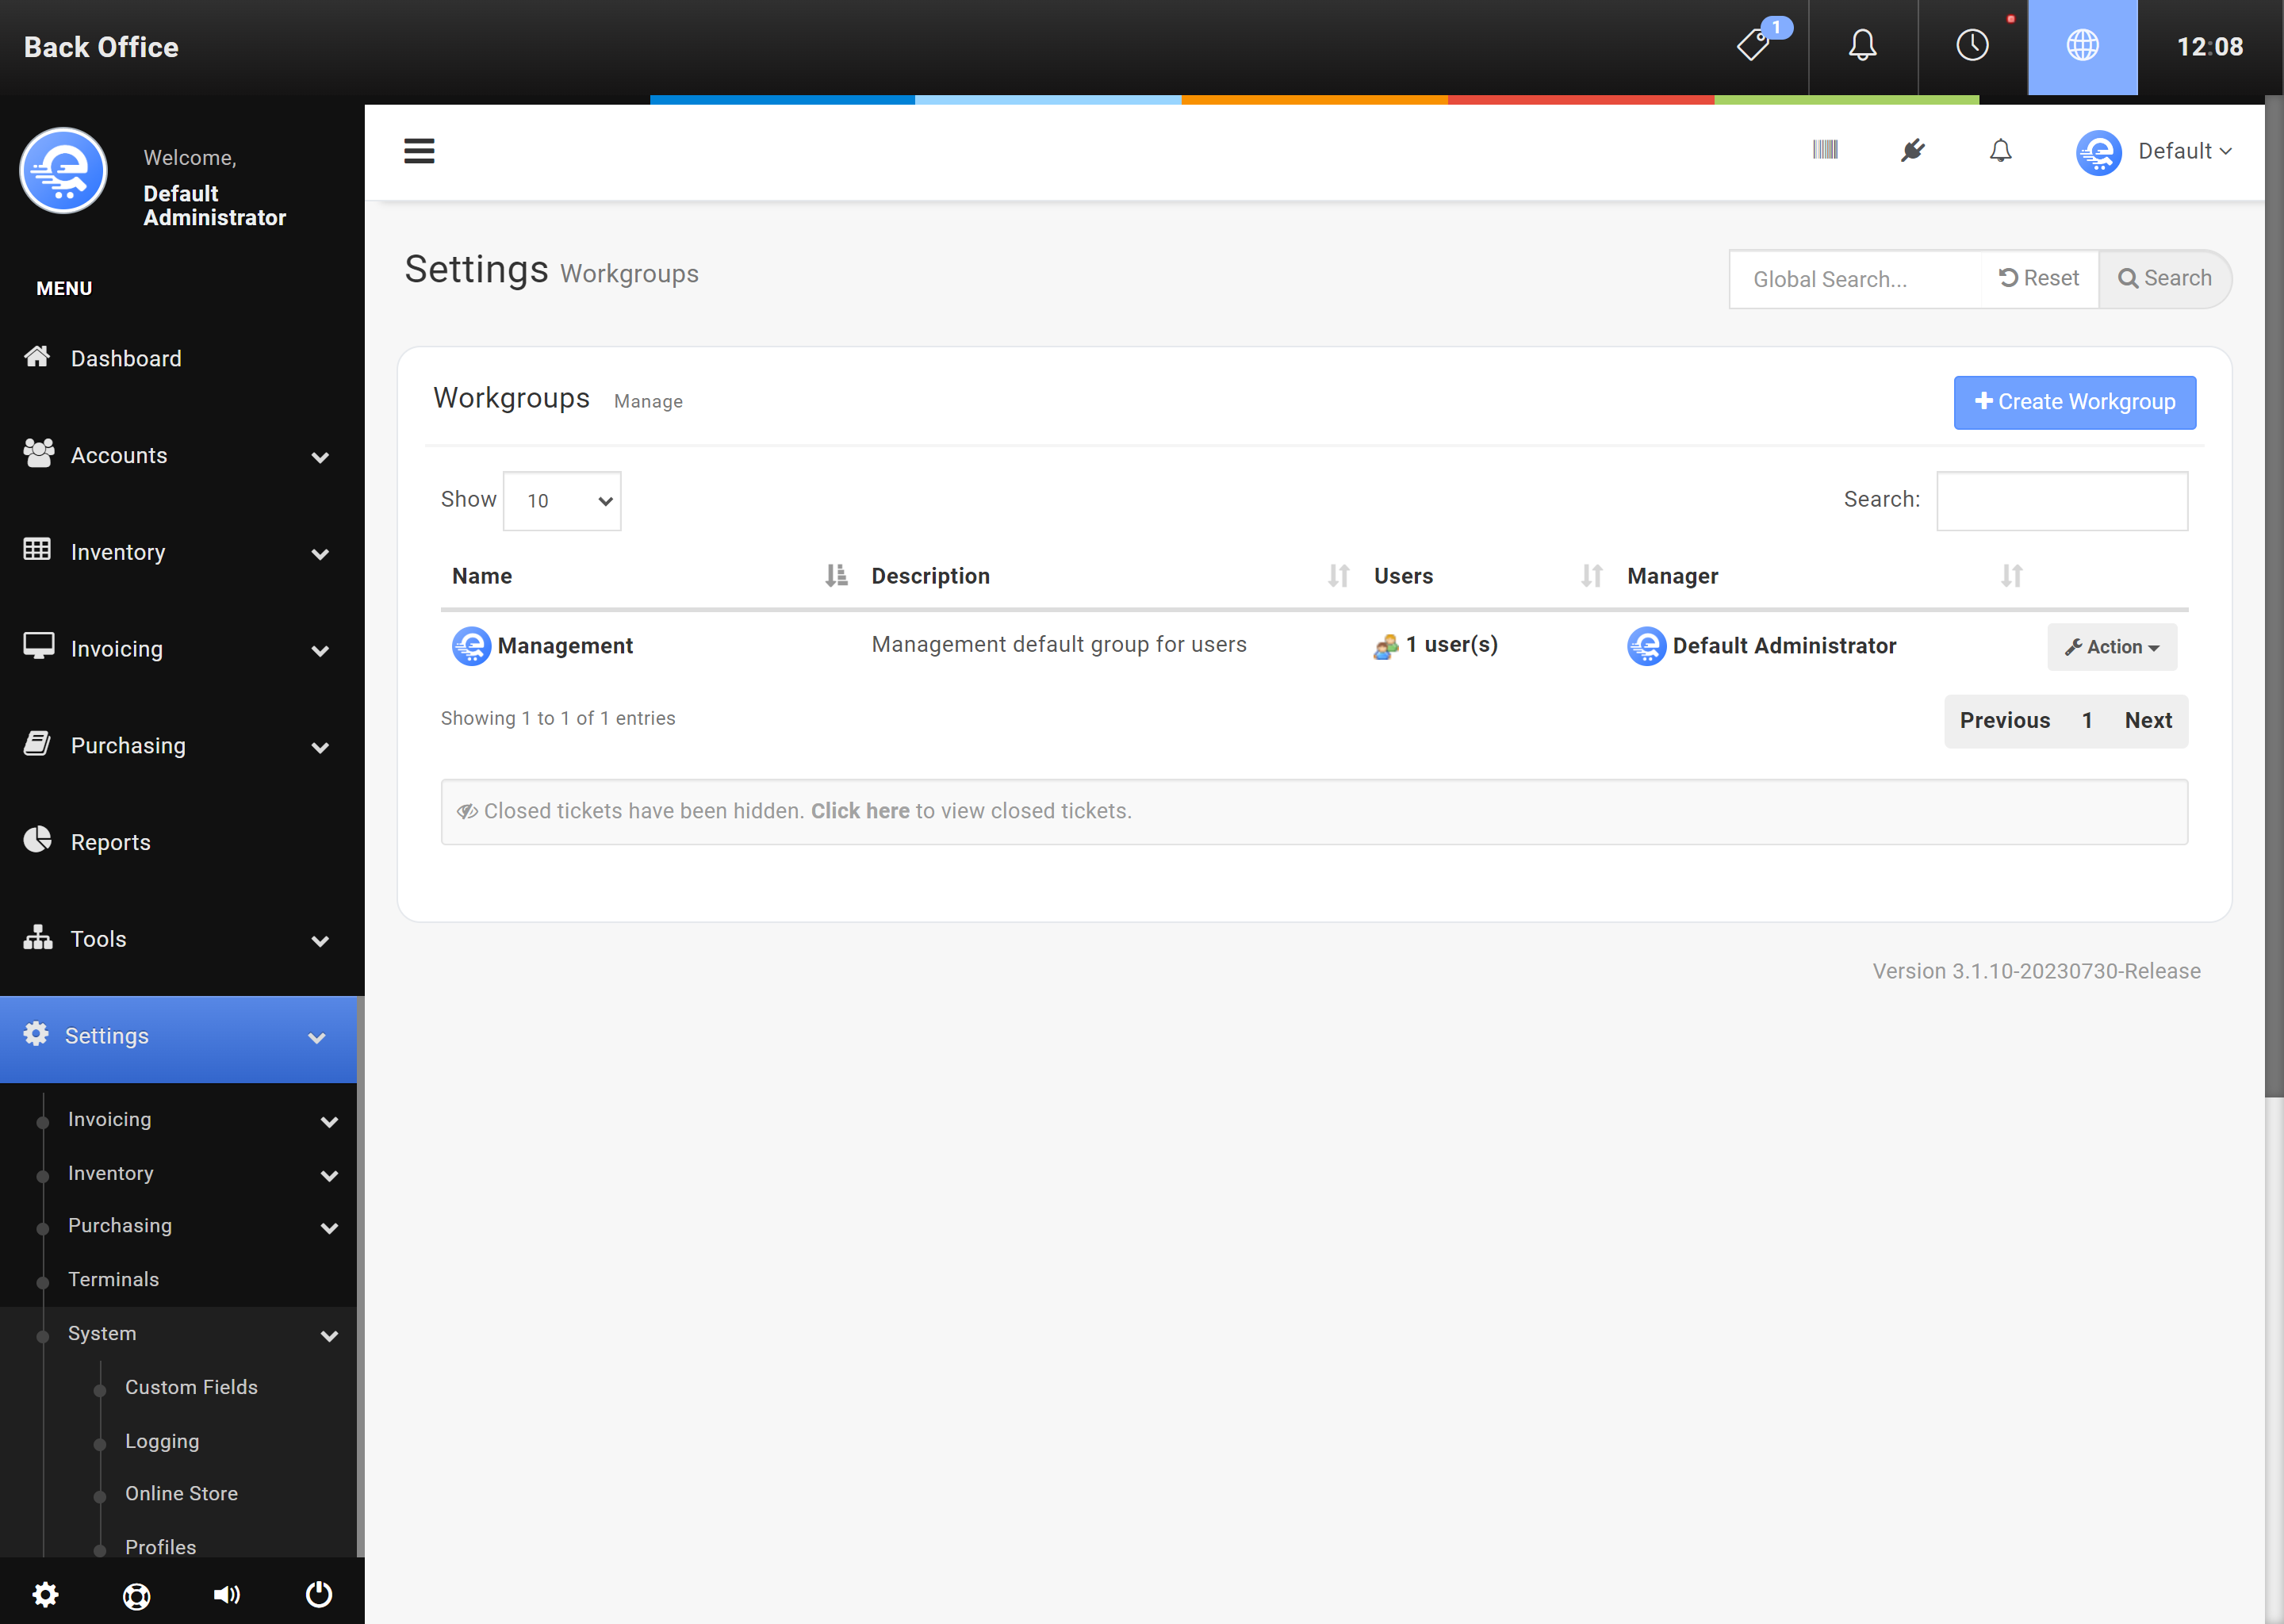
Figure C
Create a new workgroup in the Workgroup section of the Back Office.

Figure D
Click "Save Changes" when done adding or modifying the workgroup.
Timecards
Tracking employee punches is a great way to improve labour efficiency. Employees can punch in and out for the day, providing you with an accurate total calculation of hours worked. Payroll can be easily completed but running a Timecard report in the Reporting section. You can adjust, remove, add punches using the Timecard section in the Back Office area.
Users can also self-track their Timecard punches in the Terminal, and in the Back Office area.
Terminal logins must be enabled for the timecard feature. If terminal logins are disabled, users will not be able to use timecards.
- Navigate to the eQuate Back Office
- On the left navigation bar, click "Tools", then click "Timecards".
- On the top button menu select "Create Entry" (see Figure A).
- Add the details of the entry and click "Save Changes" when you are complete (see Figure B).
- Navigate to the eQuate Back Office
- On the left navigation bar, click "Tools", then click "Timecards".
- Select "Action" and "Edit" on the row of the employee you want to edit.
- Either drag and drop existing entries, or click on a time period to add a new entry.
- Click "Save Changes" (see Figure C).
- Employees can also view their own timecards within the Terminal.

Figure A
Create a new timecard entry for an employee by using the Back Office.
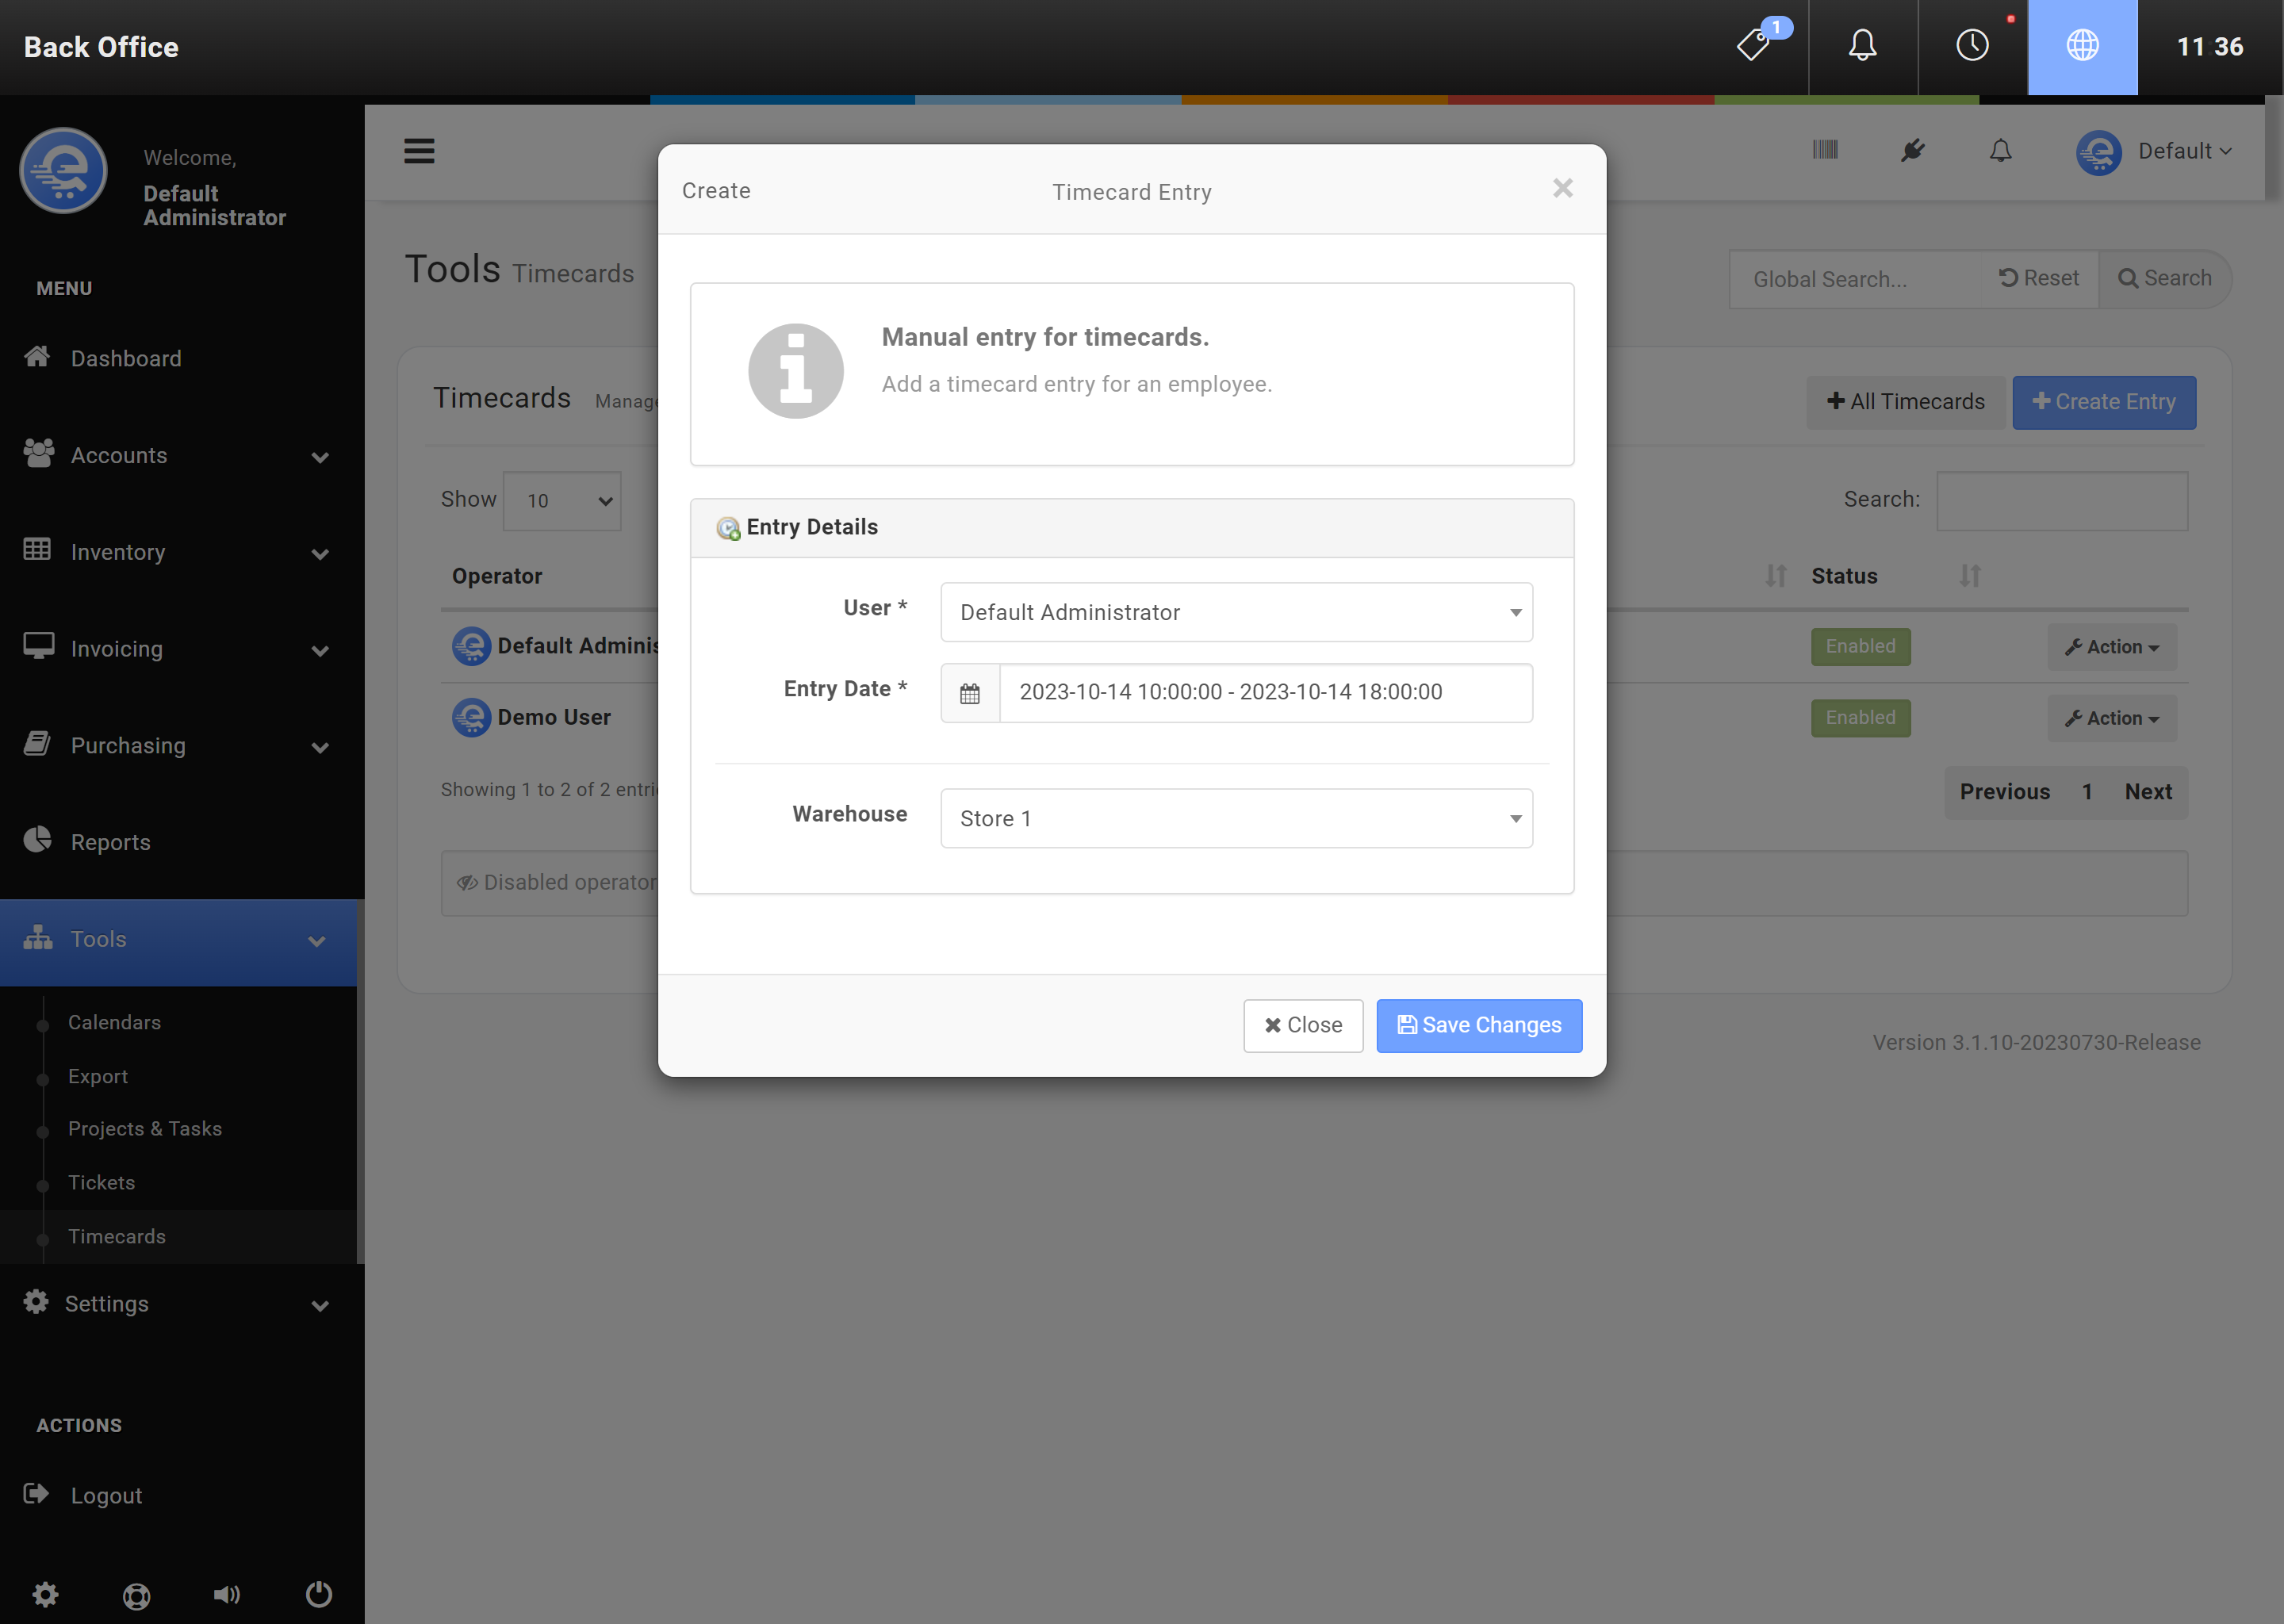
Figure B
When completing the timecard entry, click "Save Changes".
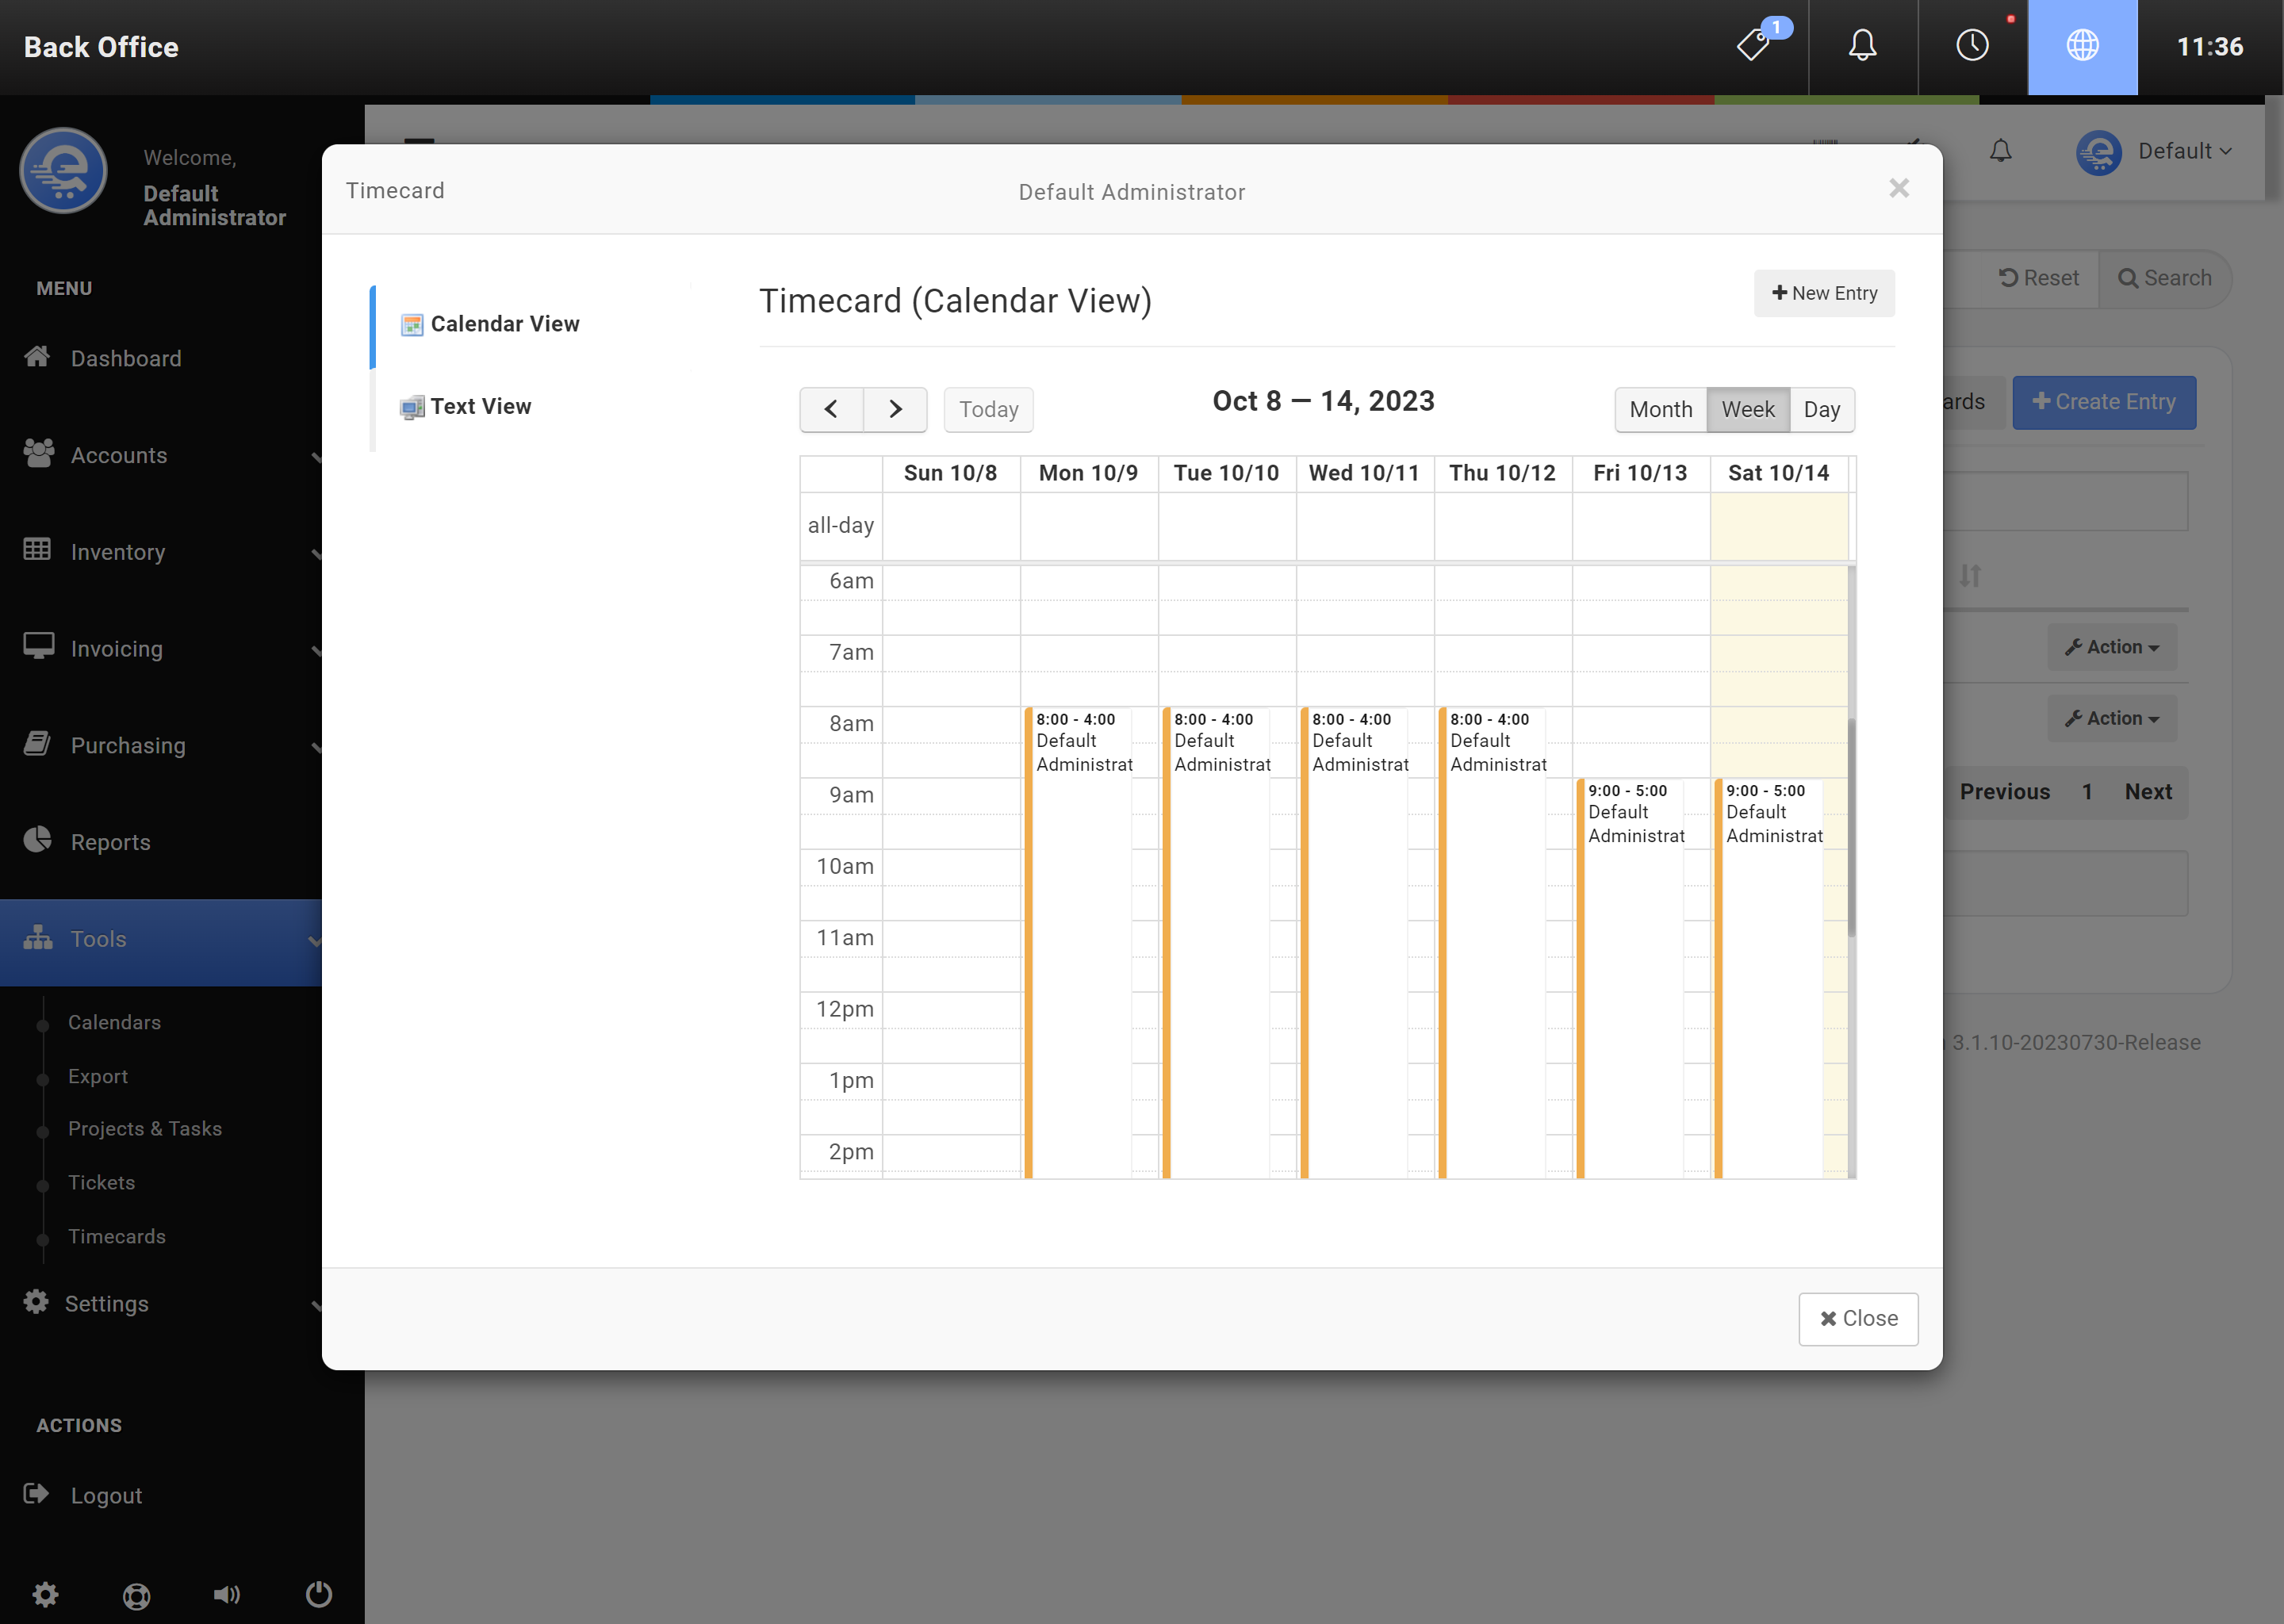
Figure C
Drag and drop existing entries, or click on a time period to add a new timecard entry.
- Logins must be enabled in the settings.
- After logging into the Terminal, click the Clock icon at the top of the menu bar (see Figure D).
- Click on the bottom menu "Punch In" or "Punch Out" depending on the current status of your timecard.
- After a complete, a success pop-up will take place and your timecard will show as In or Out.
- It can take a few minutes for a timecard punch to appear on other terminals.

Figure D
General terminal login screen.

Figure E
To Punch In or Out, click on the Clock and then "Punch In" or "Punch Out" on the bottom button of the menu.