Connecting to WooCommerce
WooCommerce is an open source based shopping cart available for free as an plugin for WordPress. WordPress allows you to customize your website with a large choice of available templates in their marketplace. WooCommerce also has many addon's that are compatible with eQuate POS.
Always make a back-up copy of your WooCommerce database before adding it to eQuate POS.
eQuate POS can connect to your WooCommerce database and synchronize orders, products, and customers with your in-store operation. Some functions that eQuate offers may not be available in WooCommerce. See below for the full list of supported features:
| eQuate Feature | WooCommerce 5.x |
|---|---|
| Attributes | Yes |
| Customers | Yes |
| Discounts | Yes |
| Gift Cards | No |
| Images | Yes |
| Inventory | Yes |
| Loyalty | No |
| Multi Store | No |
| Orders | Yes |
| Stock Adjustments | Yes |
Before connecting eQuate POS to WooCommerce, you may need to make adjustments to your WooCommerce installation.
Database:
- Always make a backup of your WooCommerce database before adding it to eQuate POS.
Limitations:
- Only one warehouse is supported for online sales. Multiple stores can be added with seperate inventory buckets however.
- Only supports the default currency set in WooCommerce.
Creating an API key in WooCommerce
Before you connect eQuate POS with WooCommerce, you will need to create an API key in WooCommerce's settings.
- Login to your WordPress administrator site. WooCommerce must already be installed to continue.
- On the left menu, select "WooCommerce", then select "Settings".
- Select "Advanced" on the top menu.
- Click "REST API" link on the top page menu (see Figure A below).
- Click "Create an API Key".
- Give the API Key a description, and select a user with sufficient Administrative privledges. Permissions must be set to Read/Write.
- Click "Generate API Key".
- On the next page, your Consumer Key and Consumer Secret will be displayed. Save these details for later when you add WooCommerce to eQuate POS.
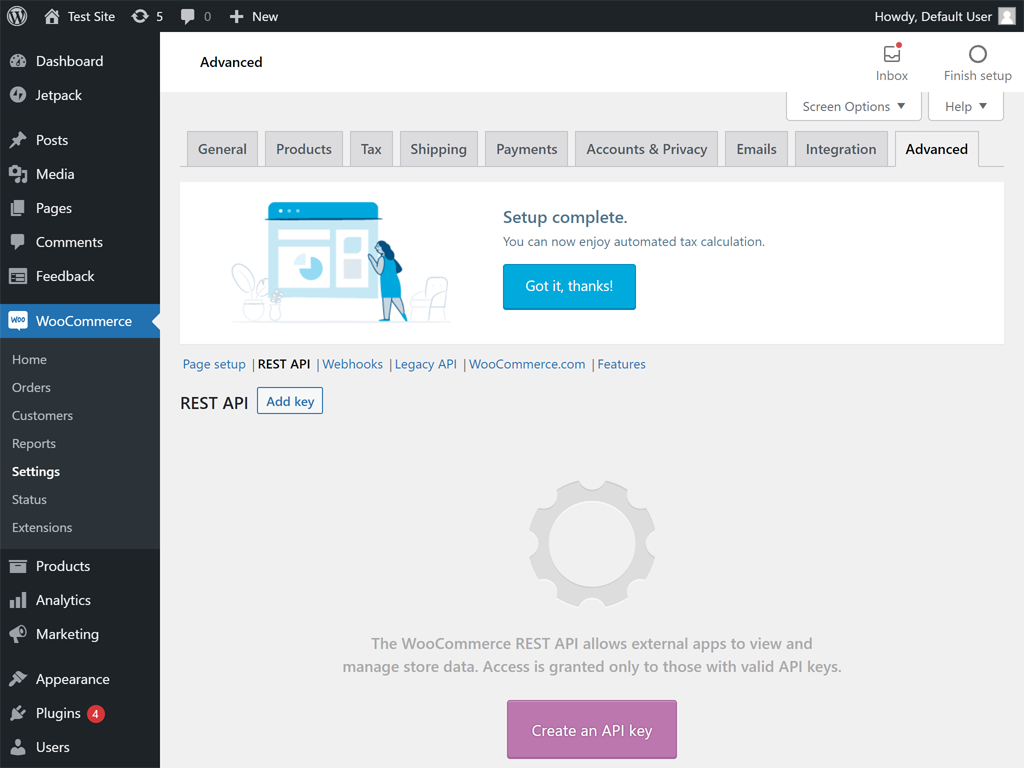
Figure A
Within WordPress, generate your API key by going to WooCommerce > Settings > Advanced > REST API.
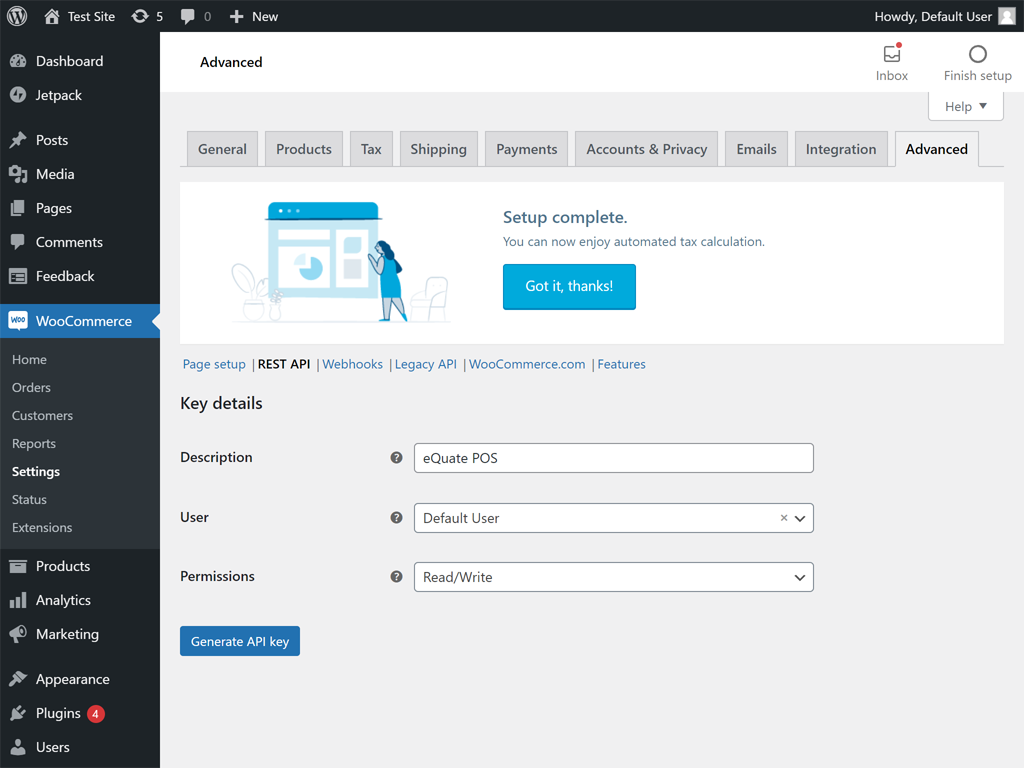
Figure B
Provide the API key a Description and select an Adminstrative user and set the permissions to "Read/Write" and press "Generate API key".

Figure C
Take note of the Consumer Key and Consumer Secret which you will need while adding WooCommerce to eQuate POS.
Installing the eQuate POS WordPress plugin
After you have generated your WooCommerce API key, you must install the eQuate POS plugin. The plugin allows eQuate POS to communicate to your WooCommerce site.
- Download the eQuate POS WordPress plugin here.
- Login to your WordPress administrator site. WooCommerce must already be installed to continue.
- On the left menu, select "Plugins", then select "Add New".
- Select "Upload Plugin" on the top menu.
- Attach the eQuate POS WordPress plugin zip file you downloaded (see Figure D below).
- You will see that the plugin is now installed, but not activated. Click "Activate Plugin" to enable the plugin (see Figure E below).
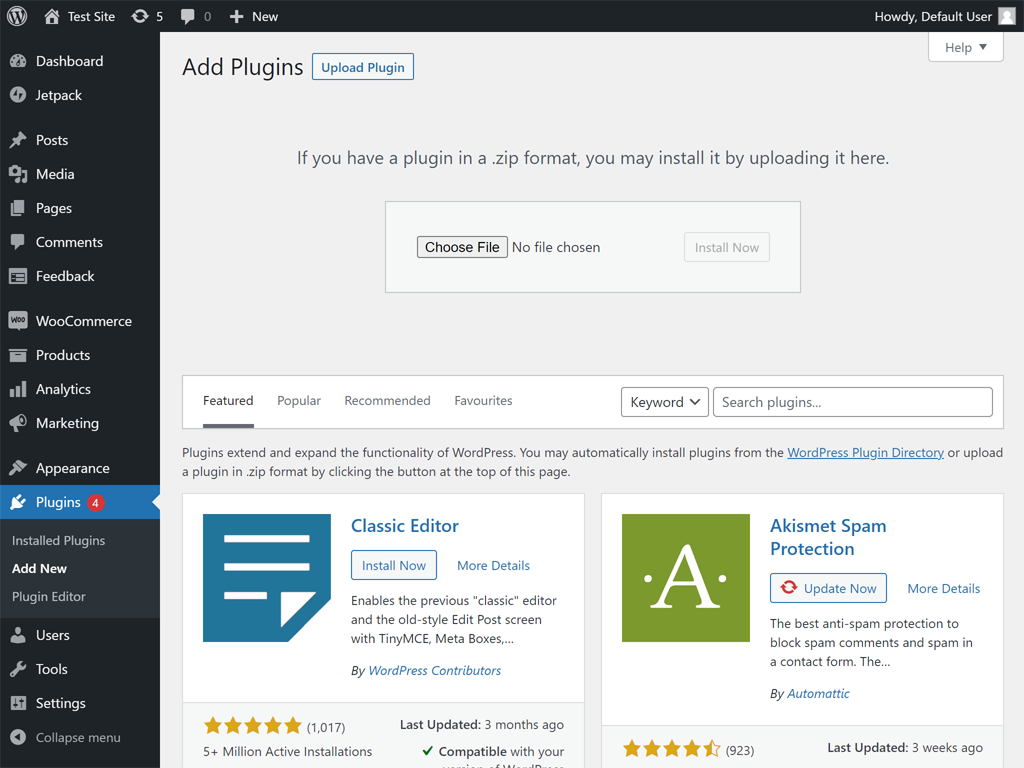
Figure D
From your WordPress backend, click "Plugins", then "Add New". Click Upload Plugin and attach the eQuate POS WooCommerce plugin zip file you downloaded.

Figure E
After the plugin has been installed, locate it on the list of plugins and click "Activate".
Adding WooCommerce to eQuate POS
Once you have backed up your WooCommerce database, created an API key, and installed the eQuate POS WordPress plugin, you can proceed to the final step of adding the connection between WooCommerce and eQuate POS from the Back Office.
- Login to the eQuate POS Back Office.
- On the left menu, select "Settings", under "System", select "Online Stores".
- Click "Add Online Store" button (see Figure F below).
- Enter the WooCommerce API details and press "Save Changes" (see Figure G below).
- Configure the default settings for WooCommerce and "Save Changes" (see Figure H below).
- Allow some time for the data to synchronize. Depending on the size of your WooCommerce database, this could take anywhere from 1 to 60 minutes.
- Refresh the page to check the status of the synchronization.
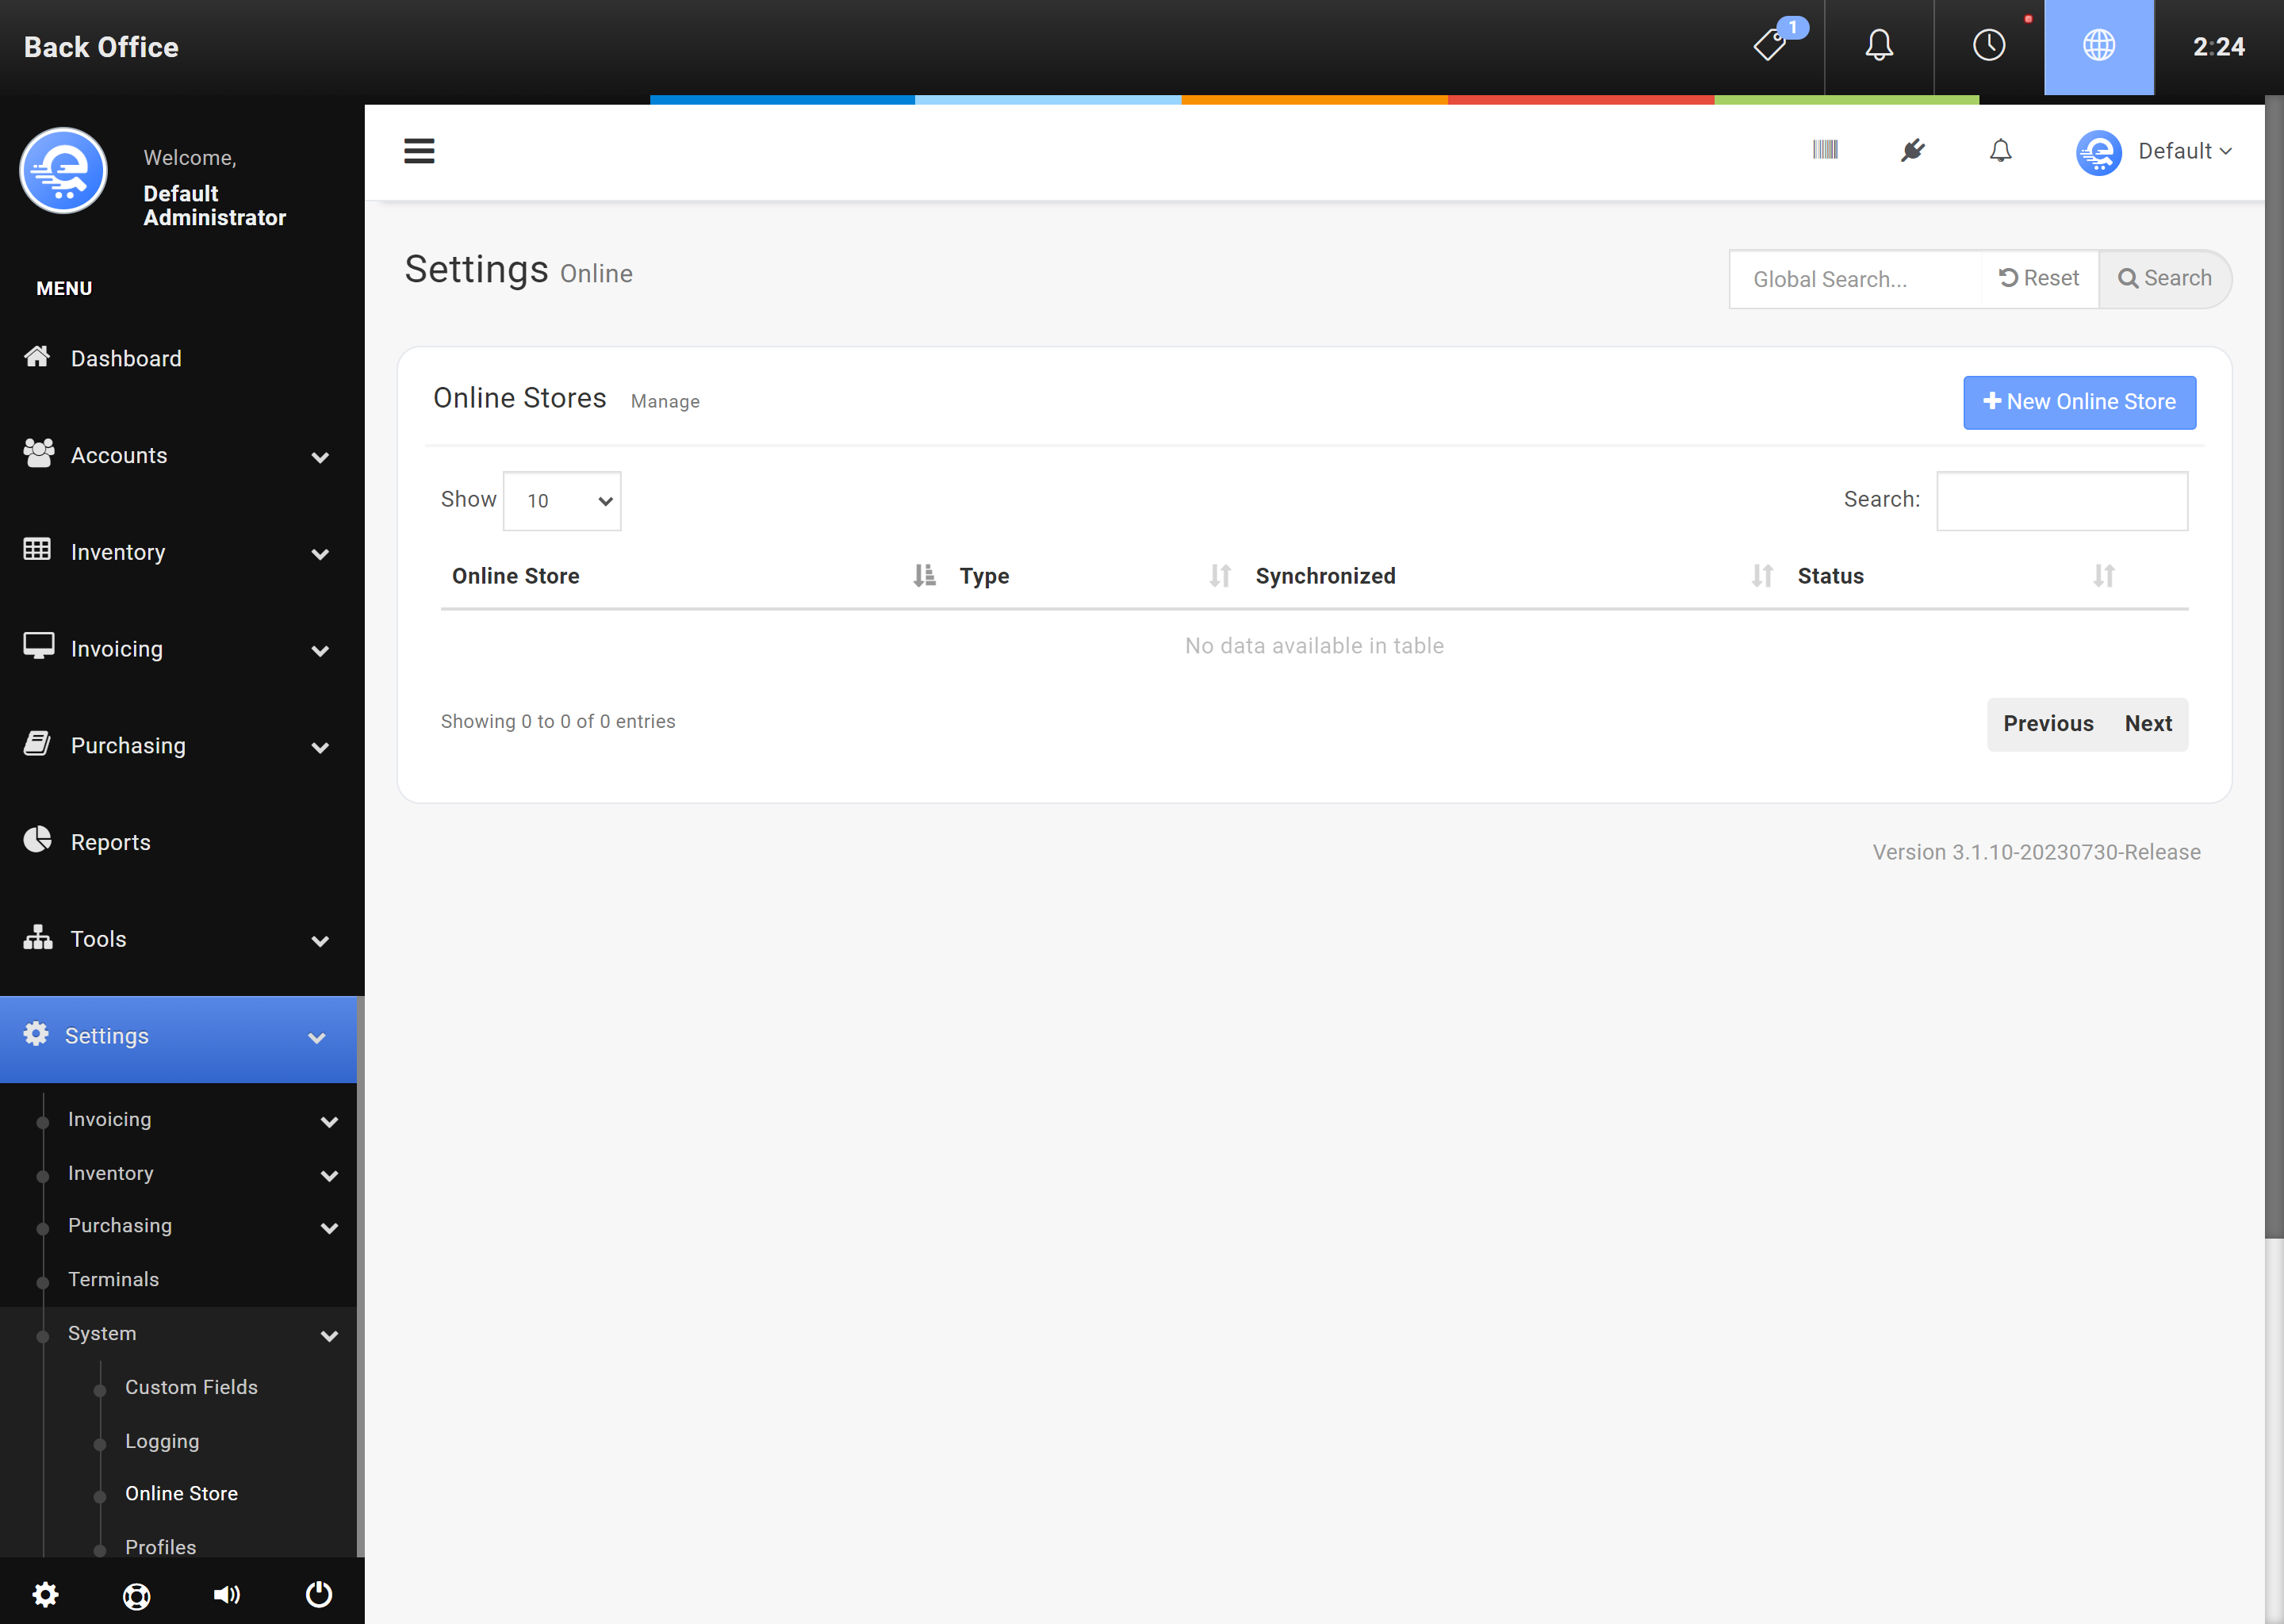
Figure F
Add your online store in the Back Office area. Select "New Online Store".
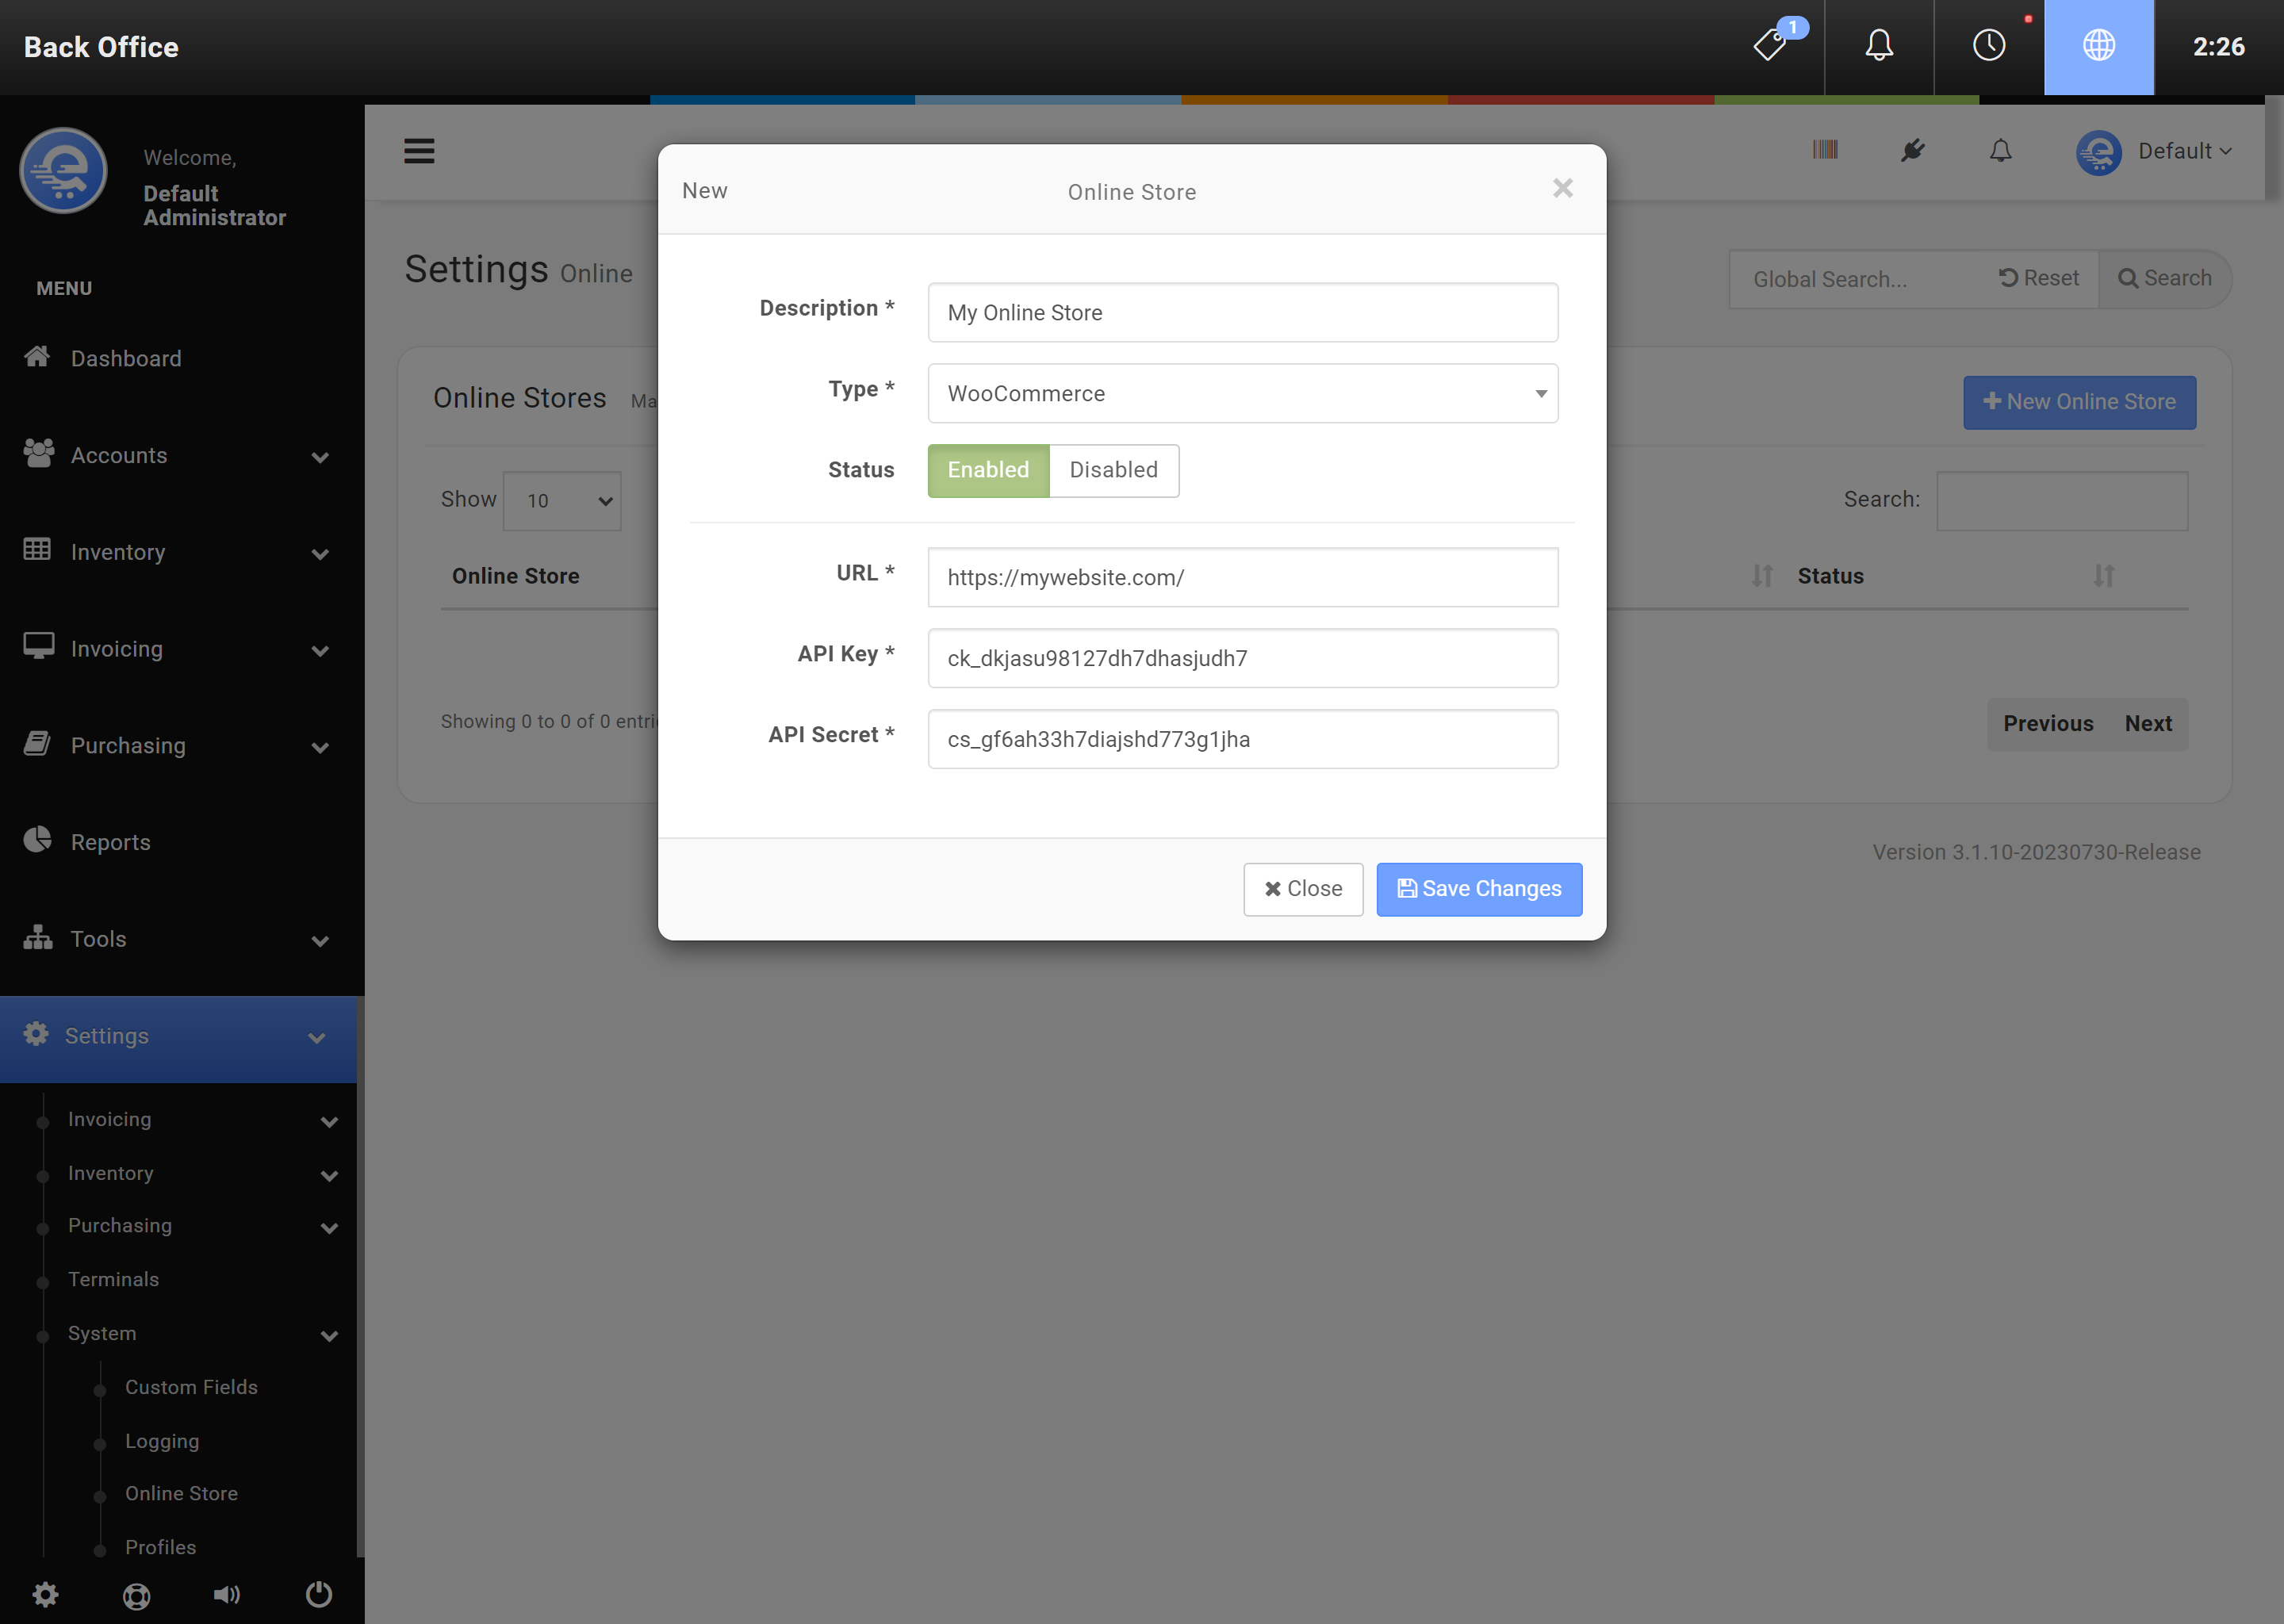
Figure G
Enter your WooCommerce API details and press "Save Changes".
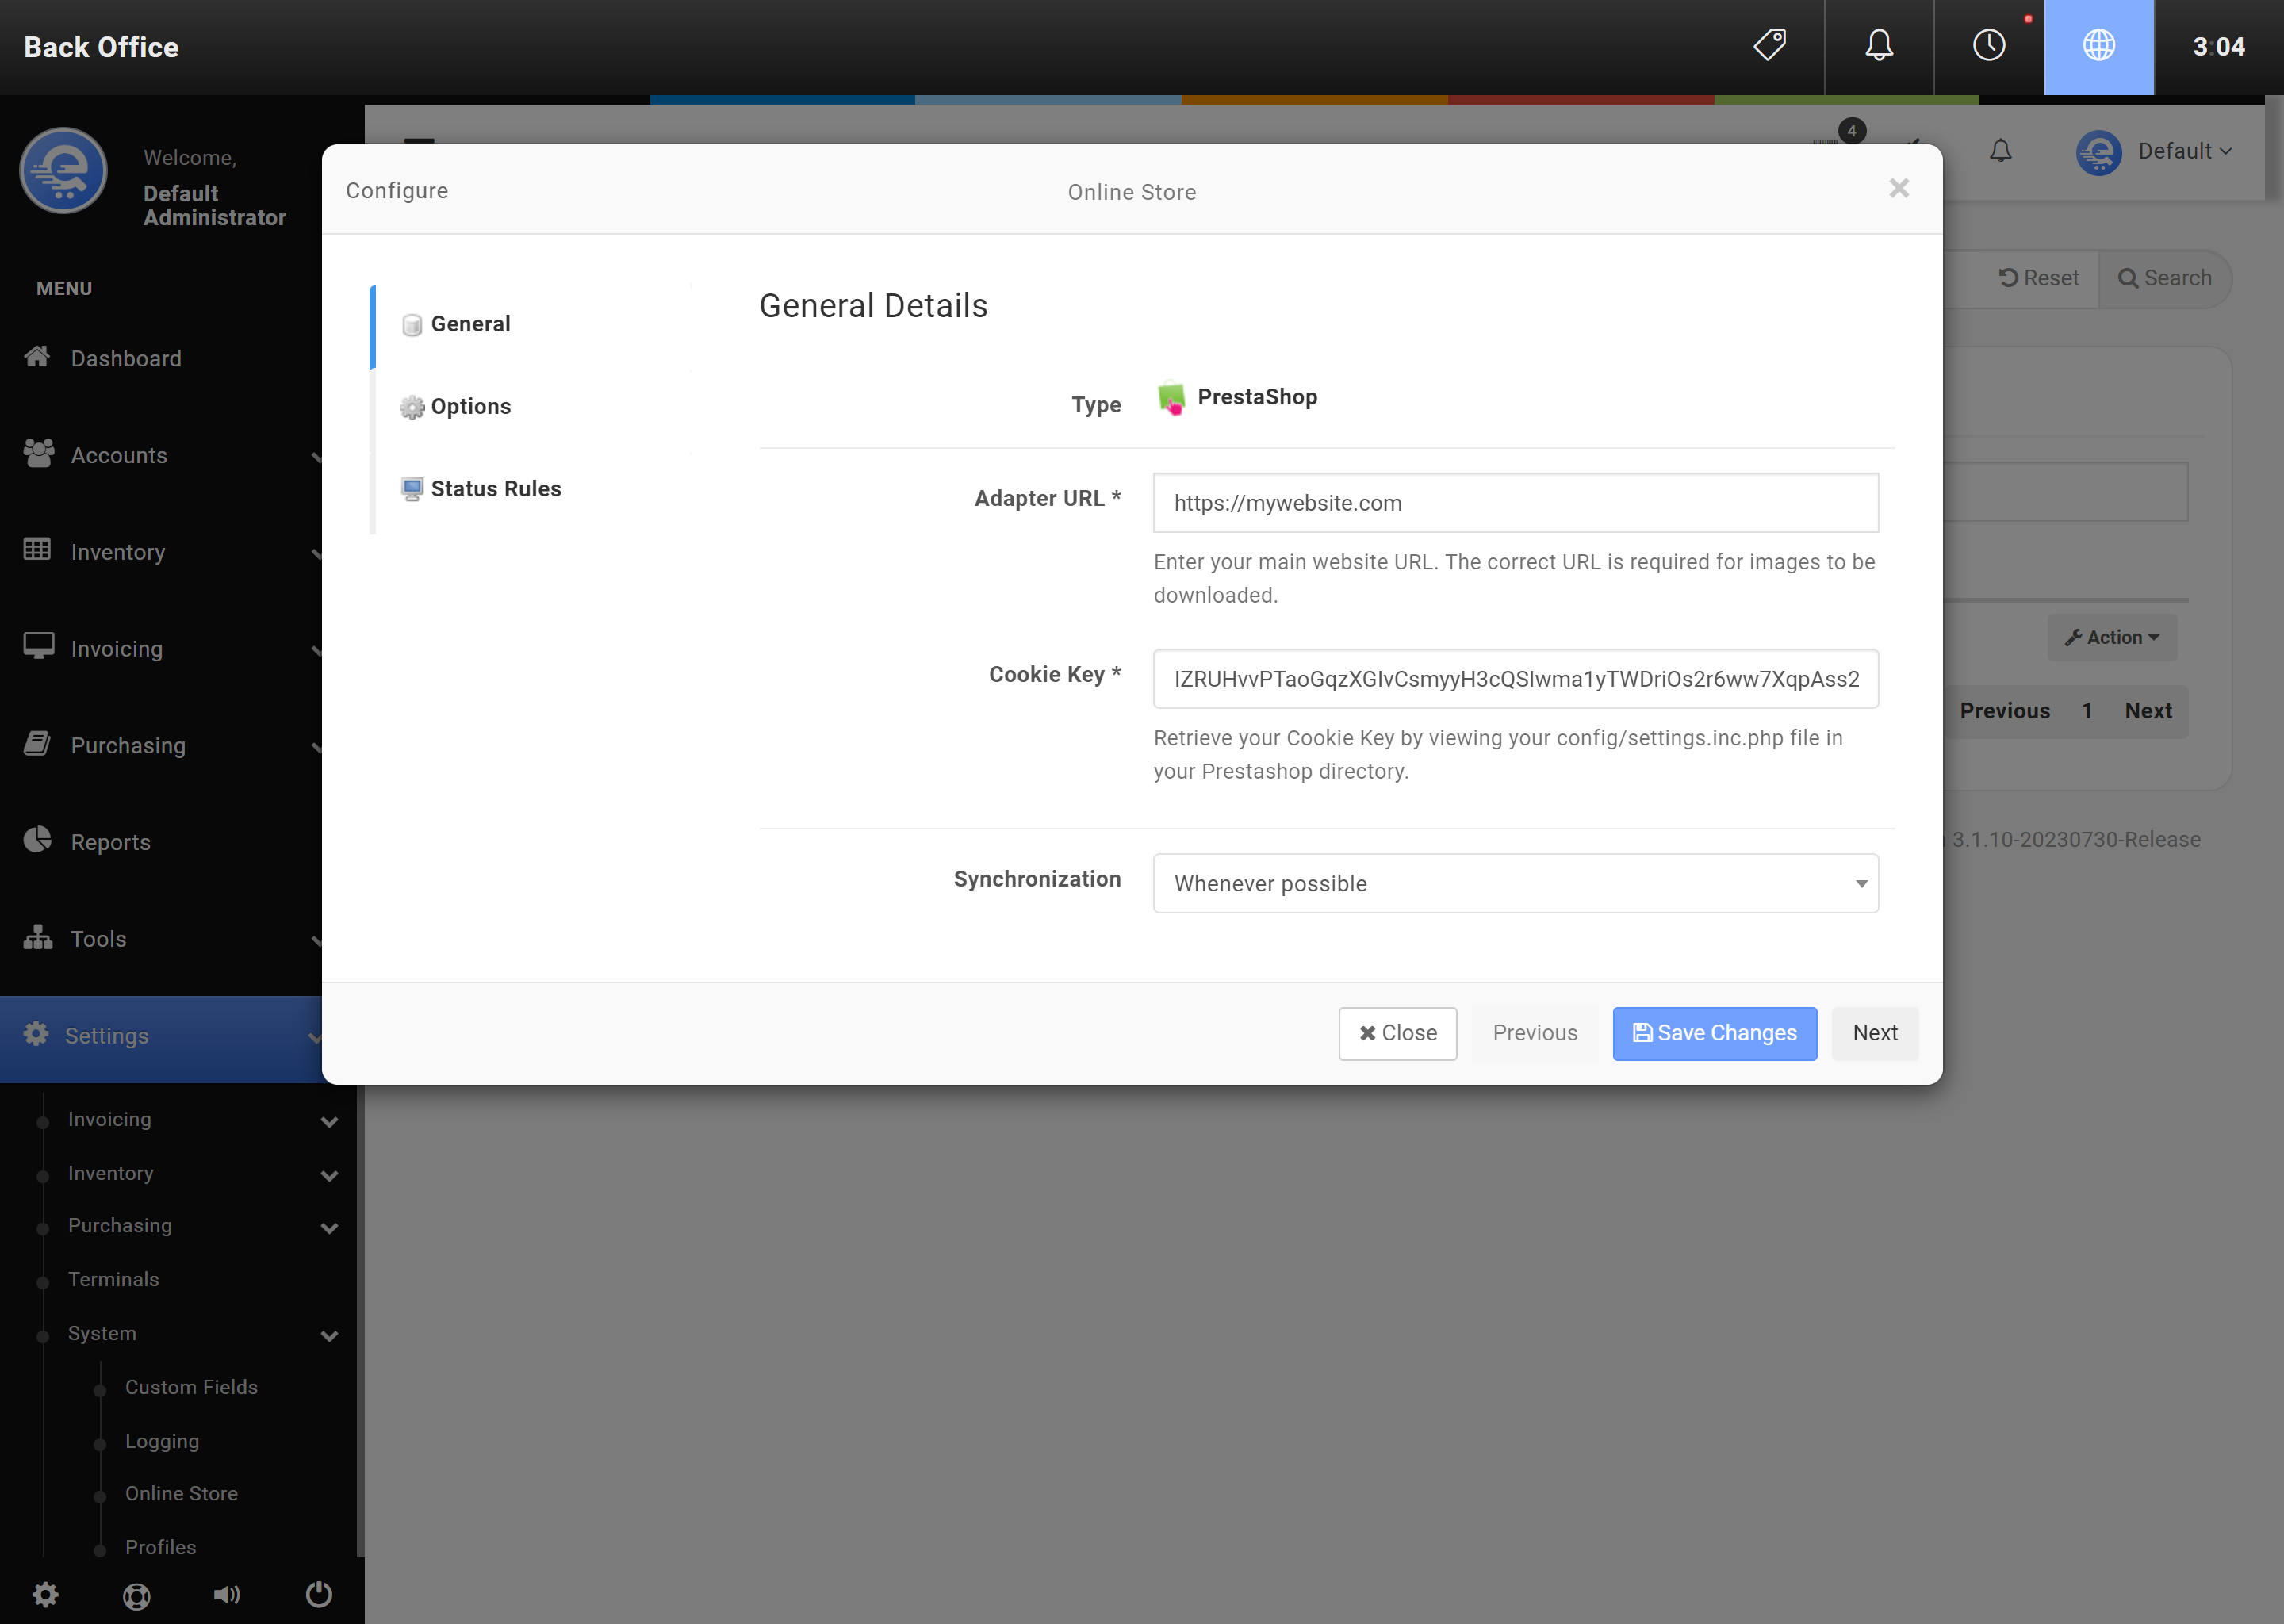
Figure H
Configure the connection between WooCommerce & eQuate POS.
- Login to the Back Office.
- On the left menu, select "Settings", under "System", select "Online Stores".
- Select your online store and under the Actions column, select "Action", then "Edit" (see Figure I below).
- You must ensure the database you are editing is the same database that was previously synchronized (see Figure J below).
- Click "Save Changes" when complete.
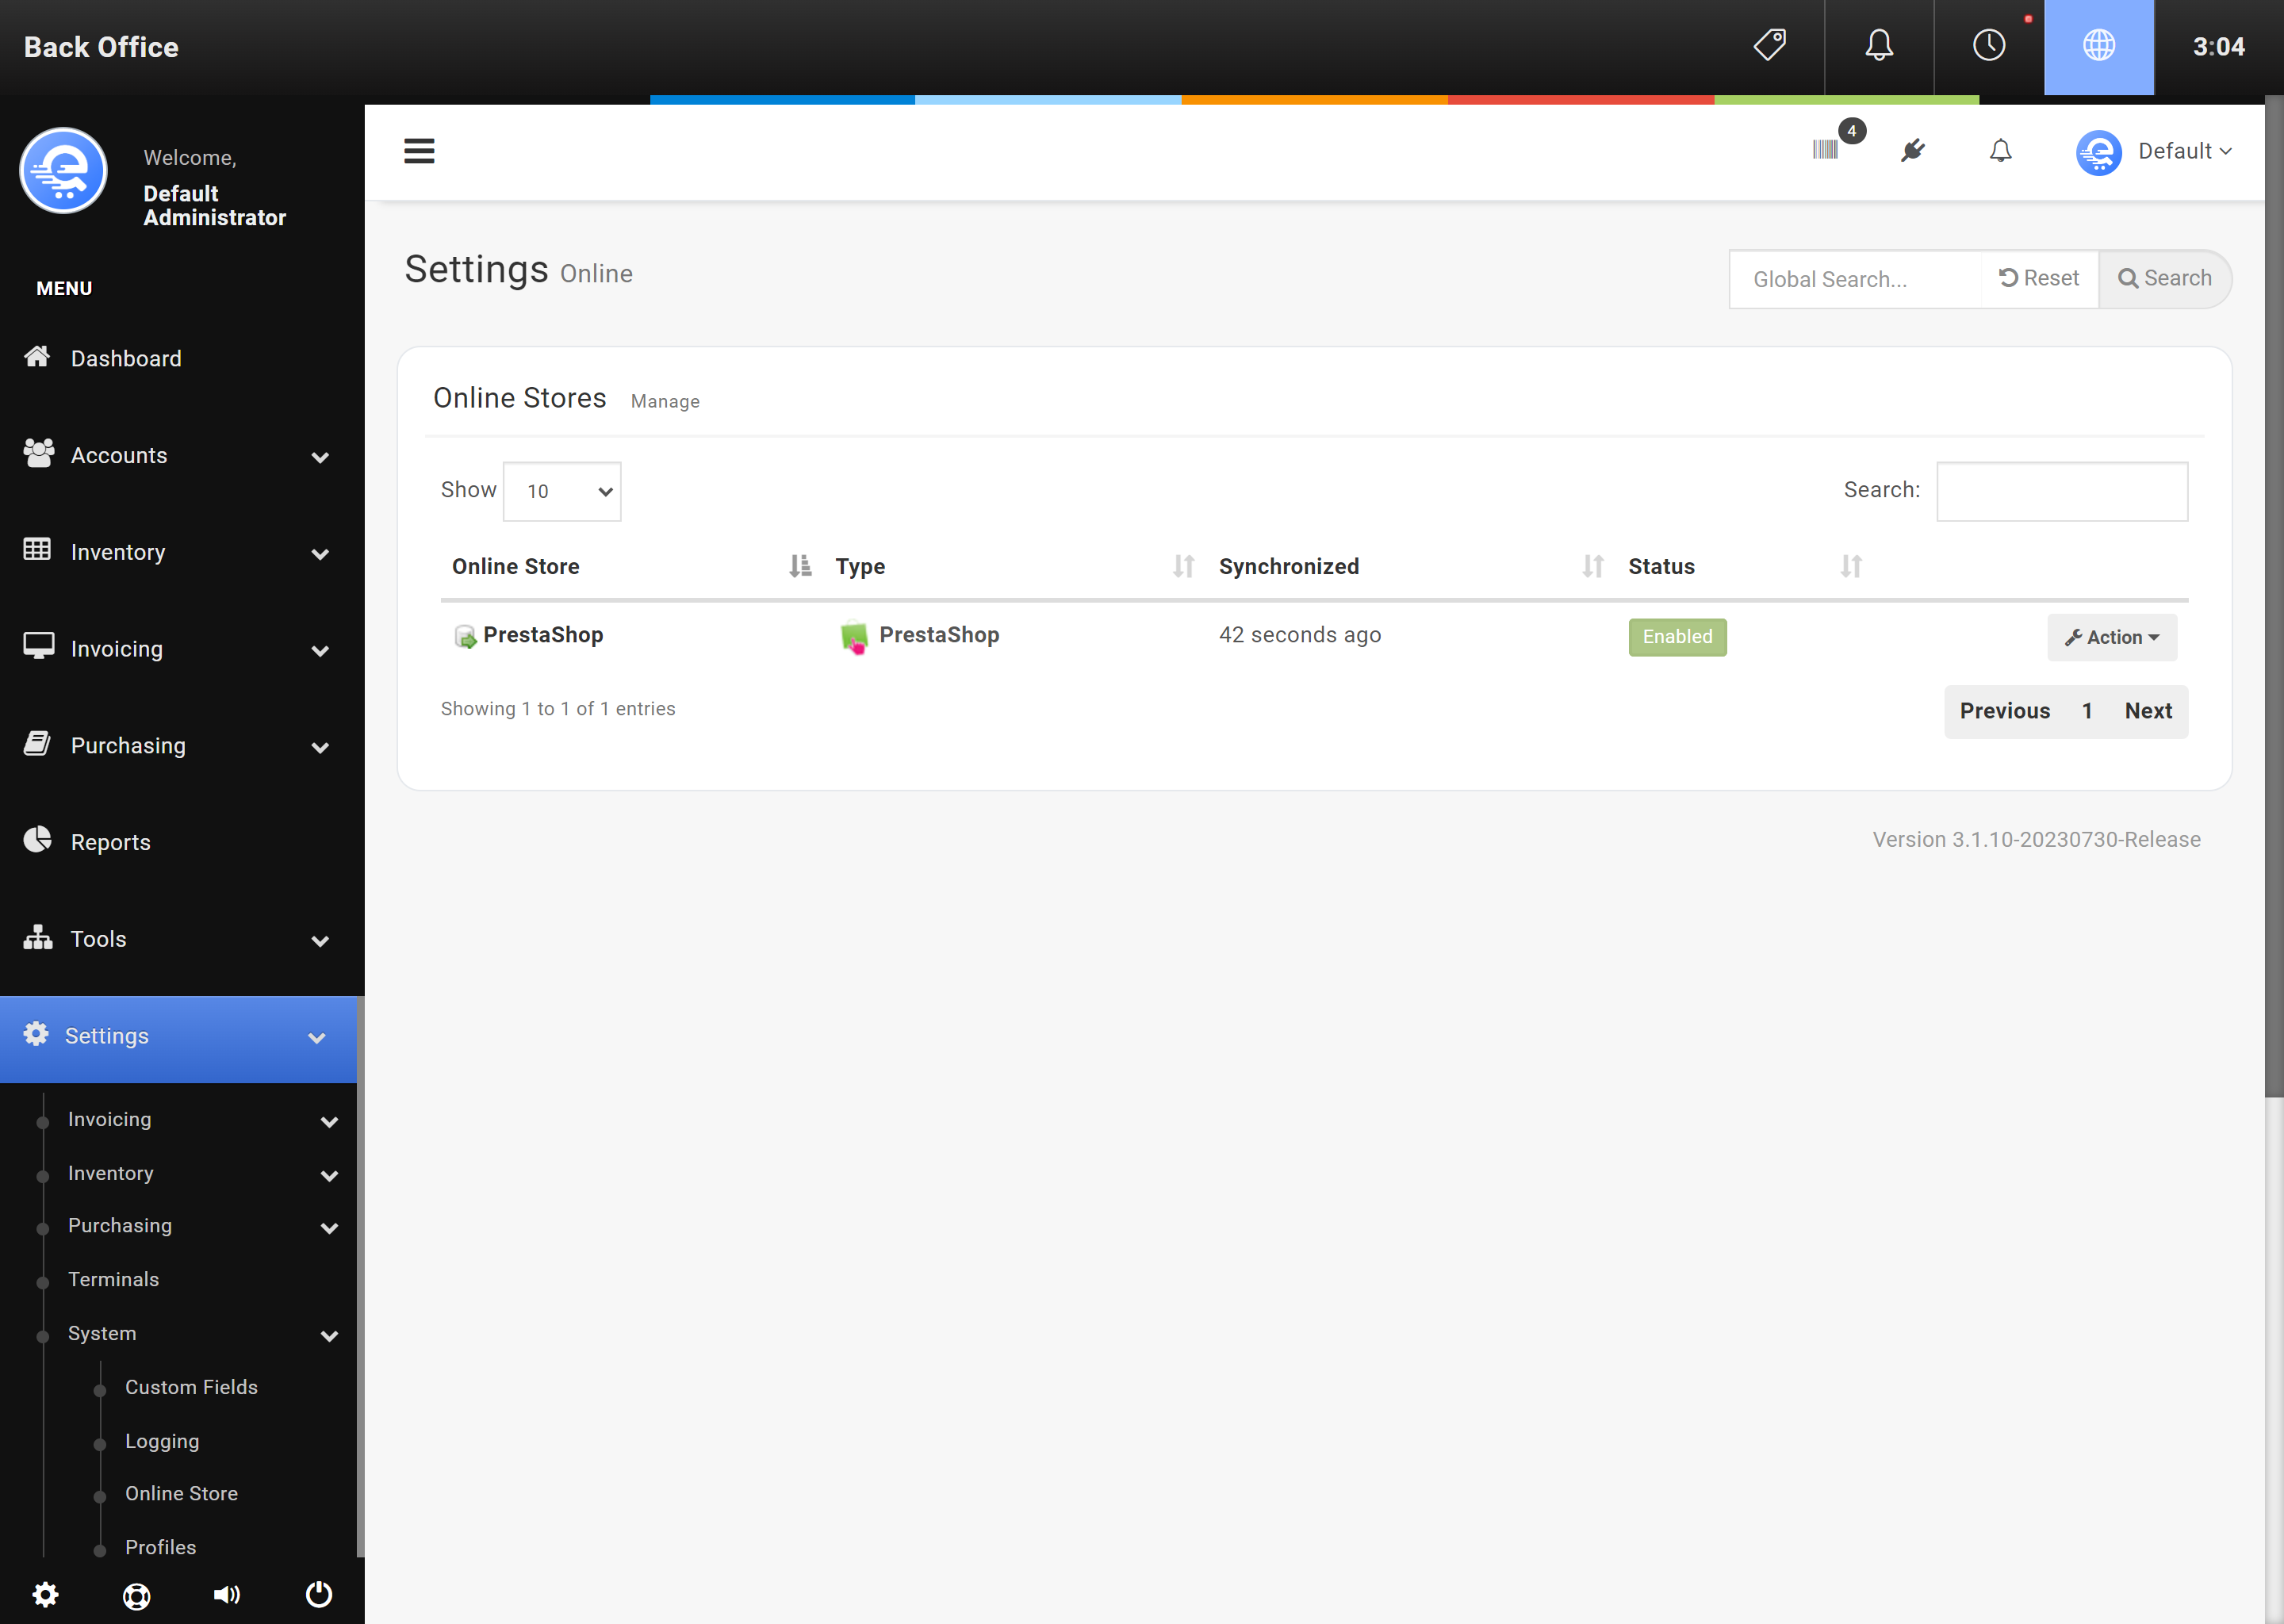
Figure I
After saving your online store to eQuate POS, you will see "Pending" until the system has synchronized.

Figure J
To disable the synchronization, select "Edit" under Actions and set the status to Disabled and press "Save Changes".