Refunding An Item
If your store offers an in-store warranty, or refunds; you can process them using the Terminal. Refunds can only be completed on invoices that have been completed. Refunds do not automatically get added back to your inventory. When a refund is completed, it is added to a queue in the Back Office (Inventory > Refunds). This queue is where you can decide of the product can be resold (put back into inventory), or discarded.
Refunding An Item
You can refund individual items on an invoice. You can also select and refund multiple items on an order.
- Find and open the Invoice/Order you want to return an item on.
- Select the items on the order you want to refund. You can select multiple items by clicking on each one until they highlight blue.
- Click the red "Refund" button in the Item menu.
- Complete the refund screen by specifying how many to refund, and the reason for the refund. Press "Save Changes" when complete.
- A new sale will be generated with a negative amount owing. You can either add a negative Payment (return the money to the customer), or add new items to replace the value (exchange). If the value is $0 owing, you will need to add a $0 Cash payment.
- The returns are complete. To return the inventory into your stock bucket, you will need to use the Back Office (Inventory > Refunds).
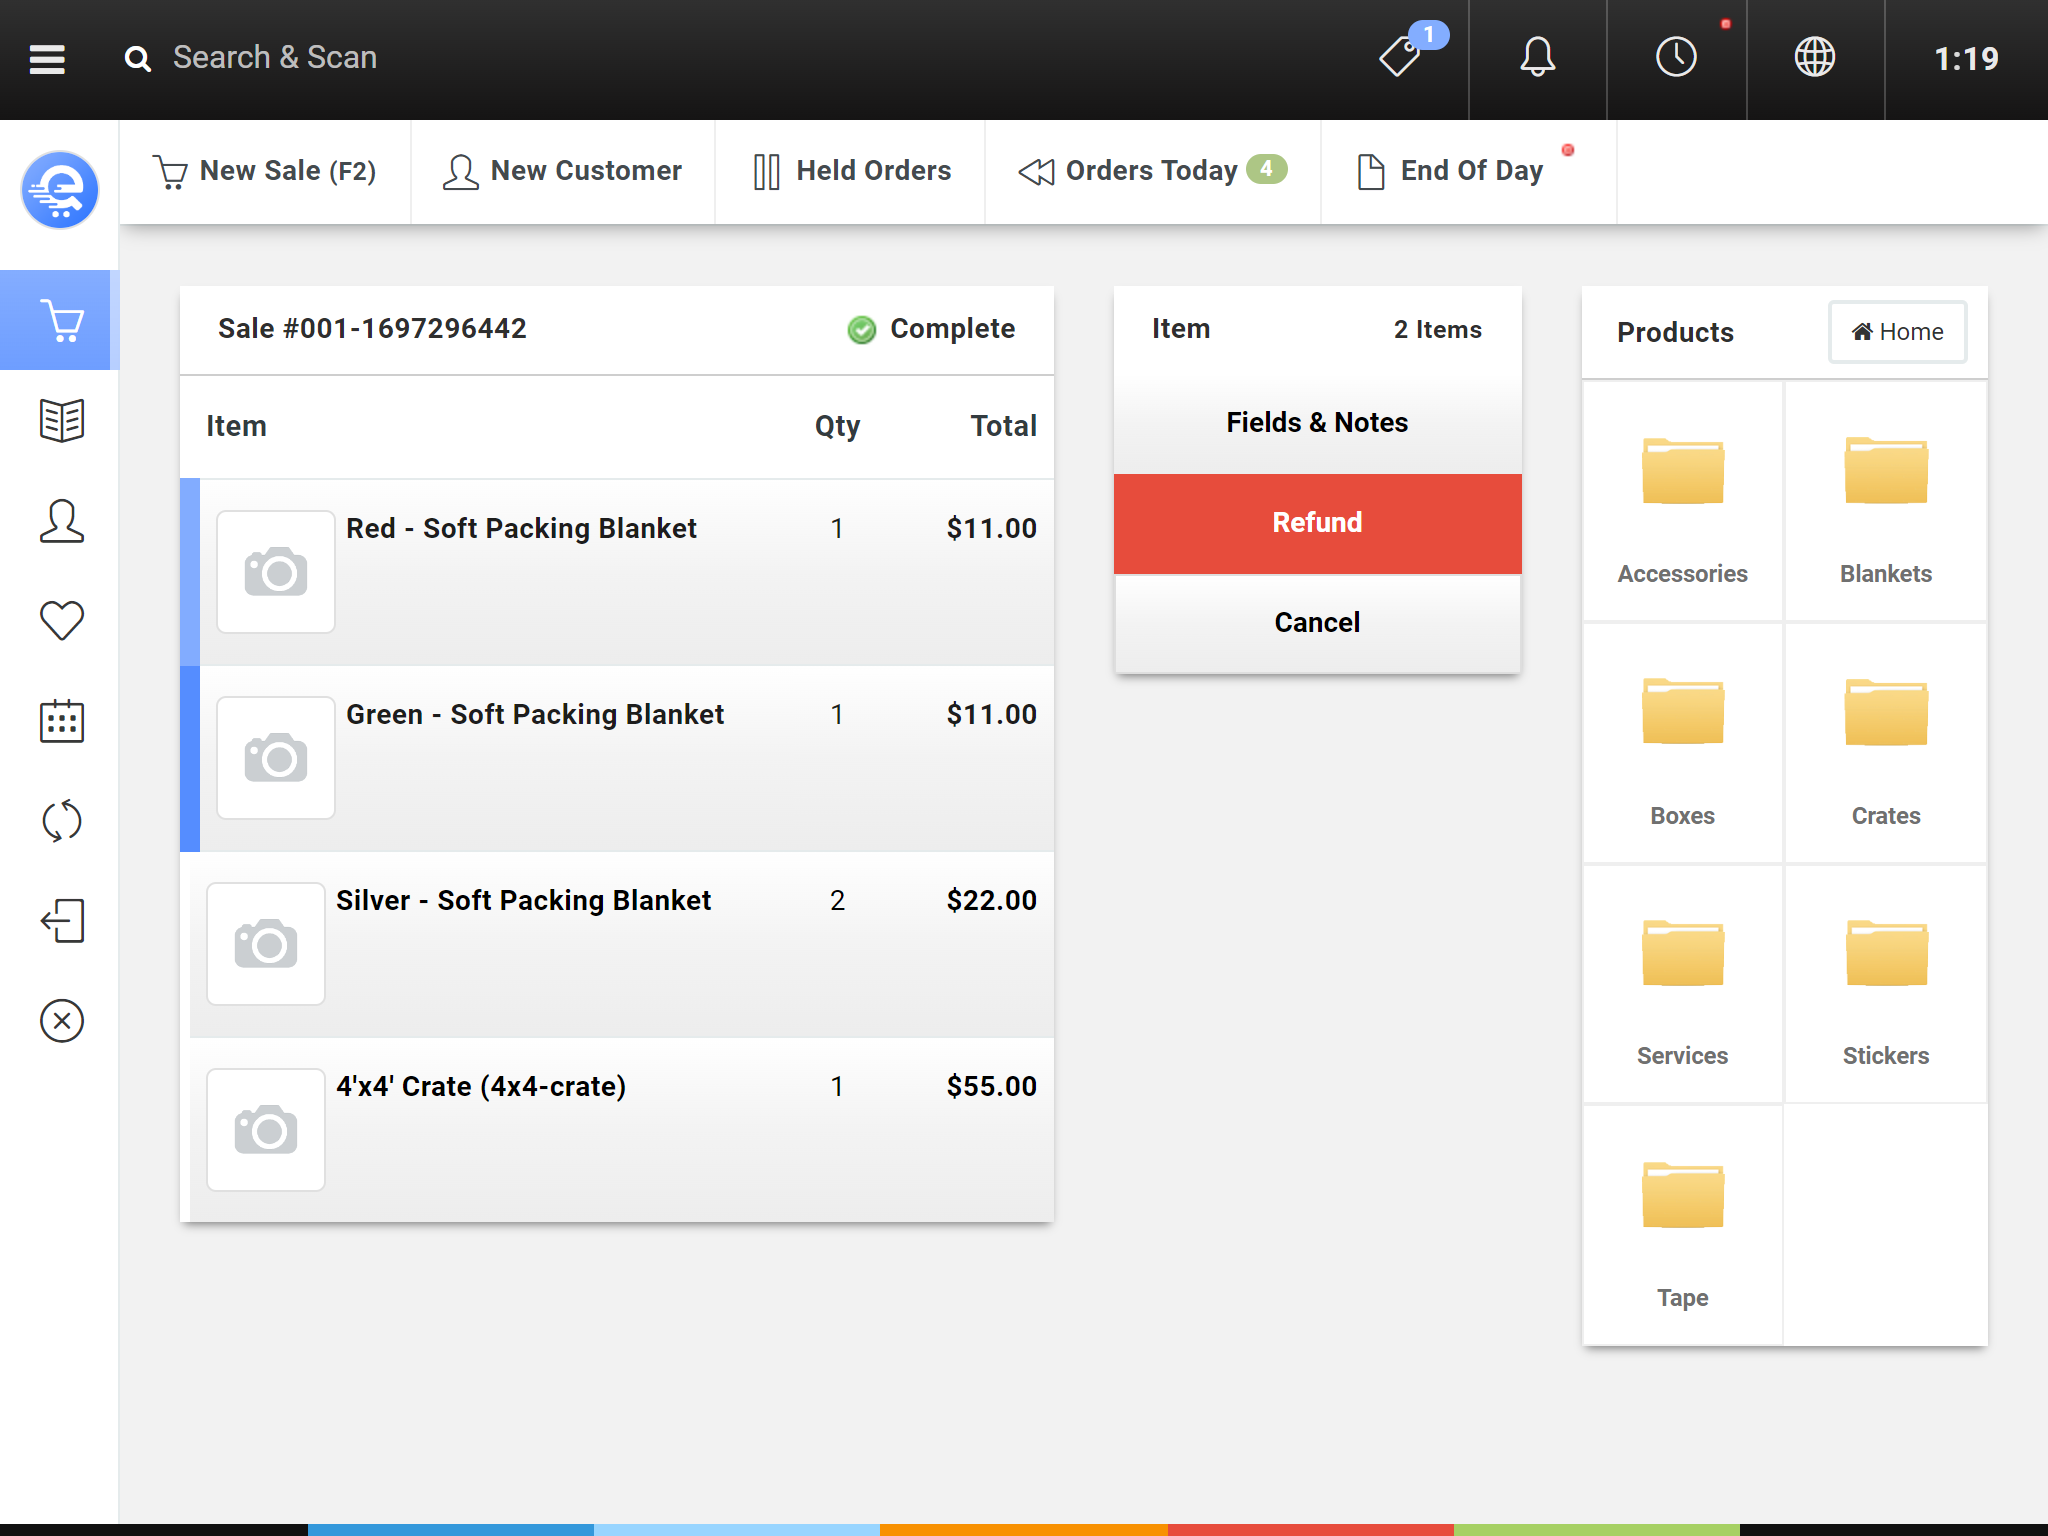
Figure A
Select the items you want to return. They will highlight blue. Then select the red "Refund" button in the item menu.
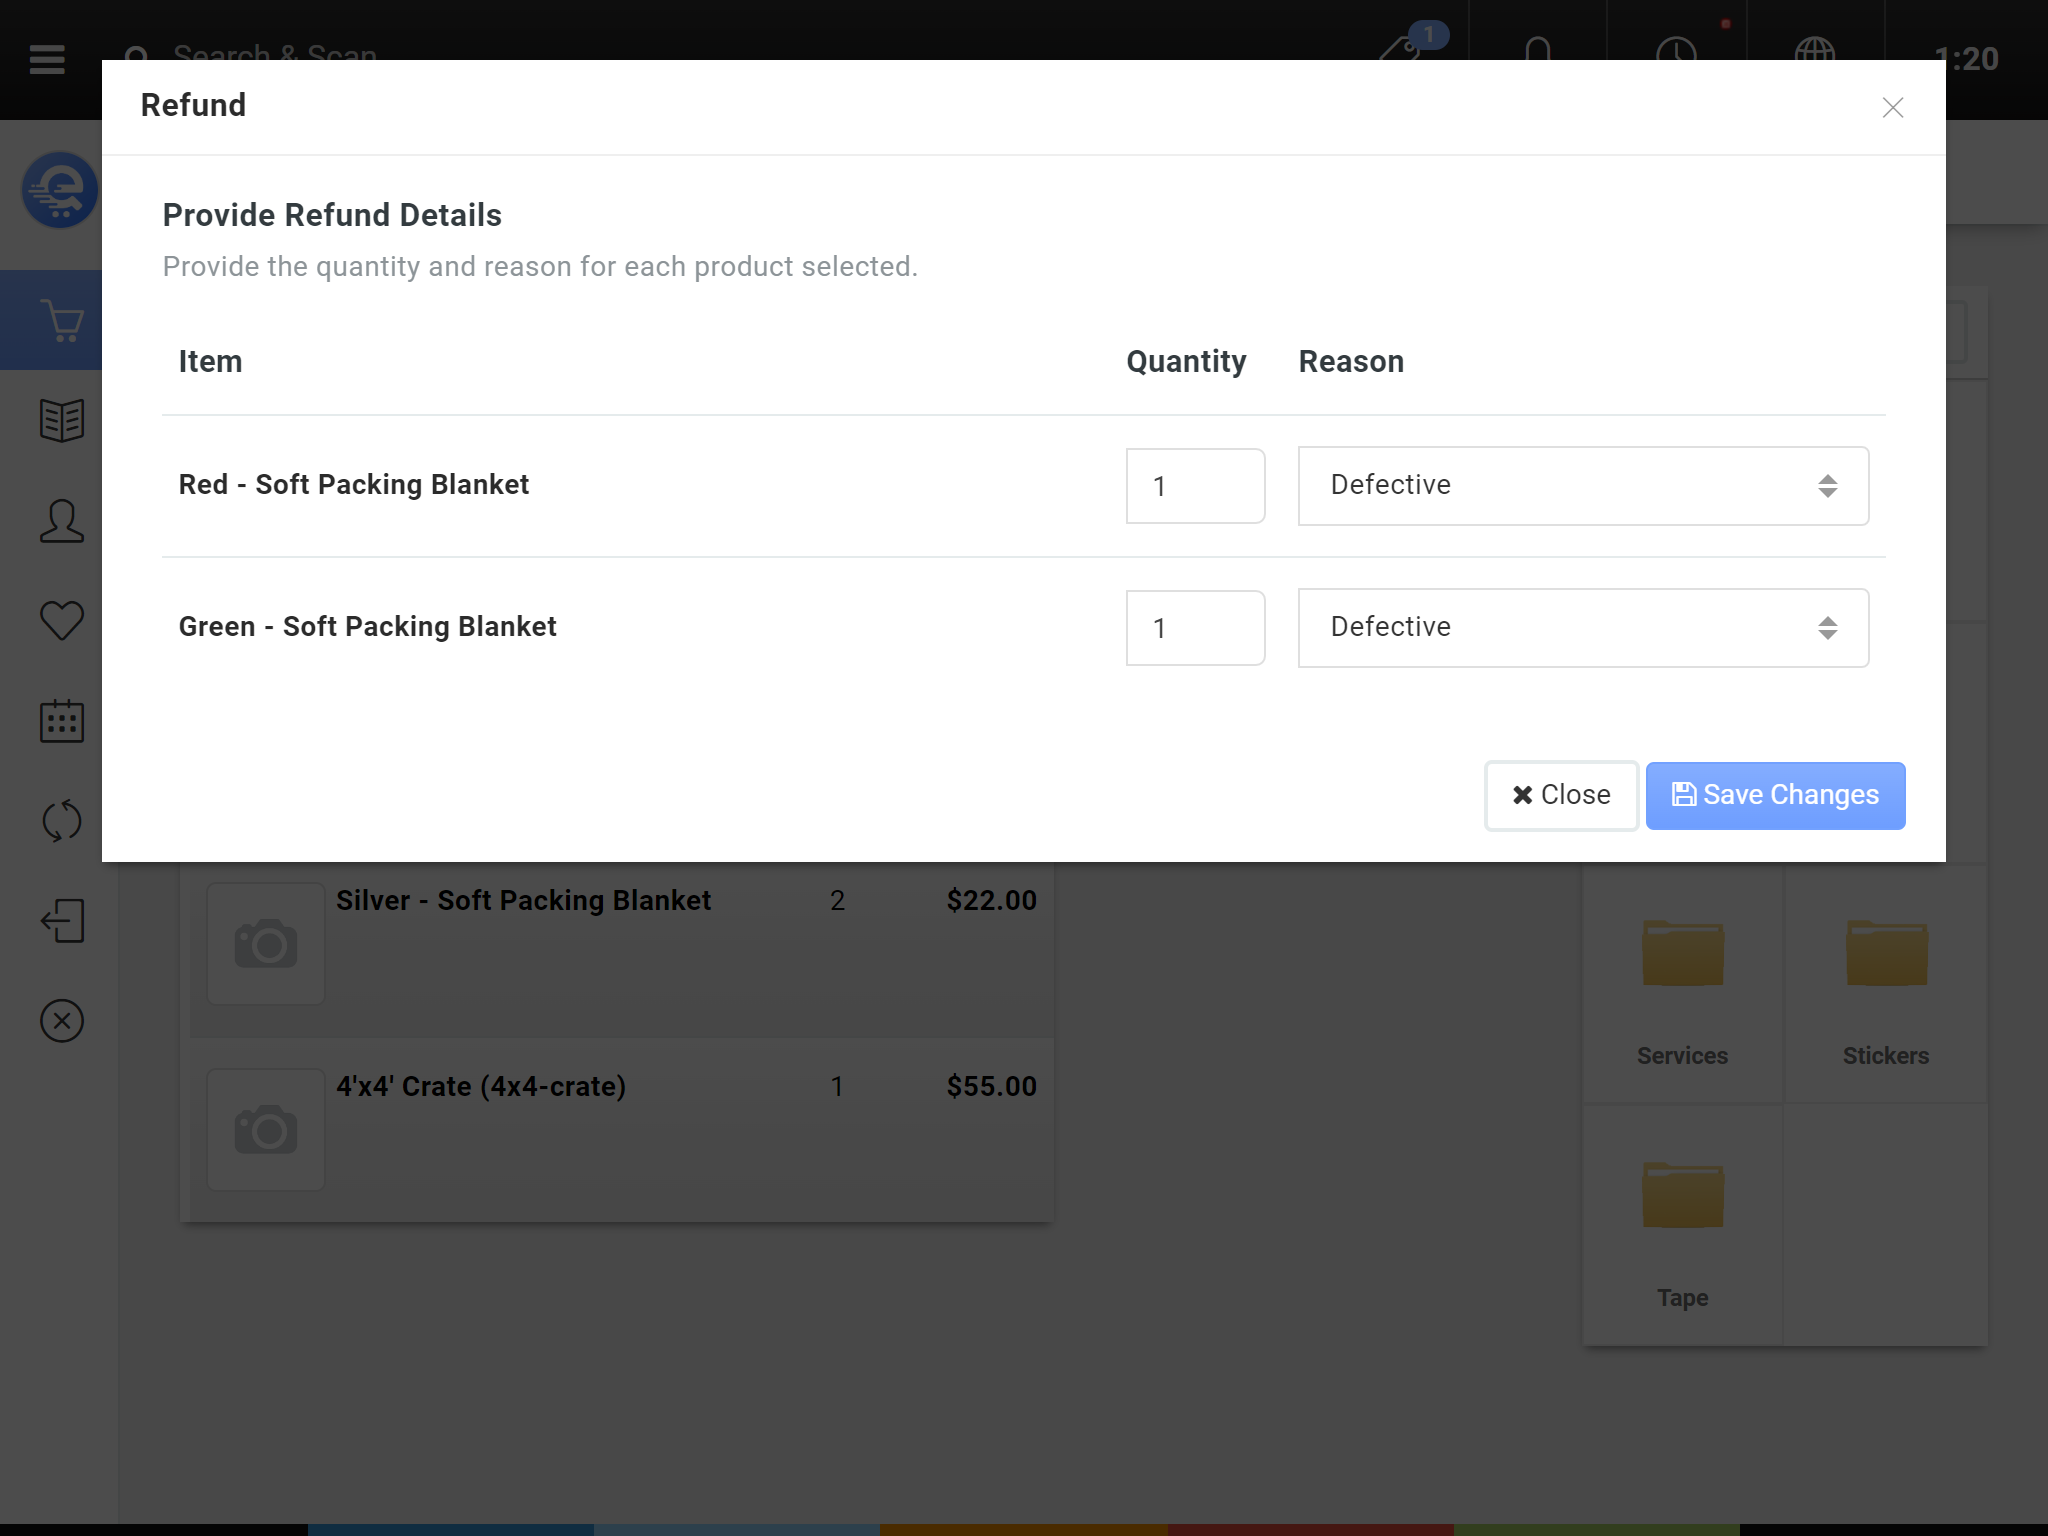
Figure B
Complete the refund details, the quantity refunded, and the refund reason then press "Save Changes".
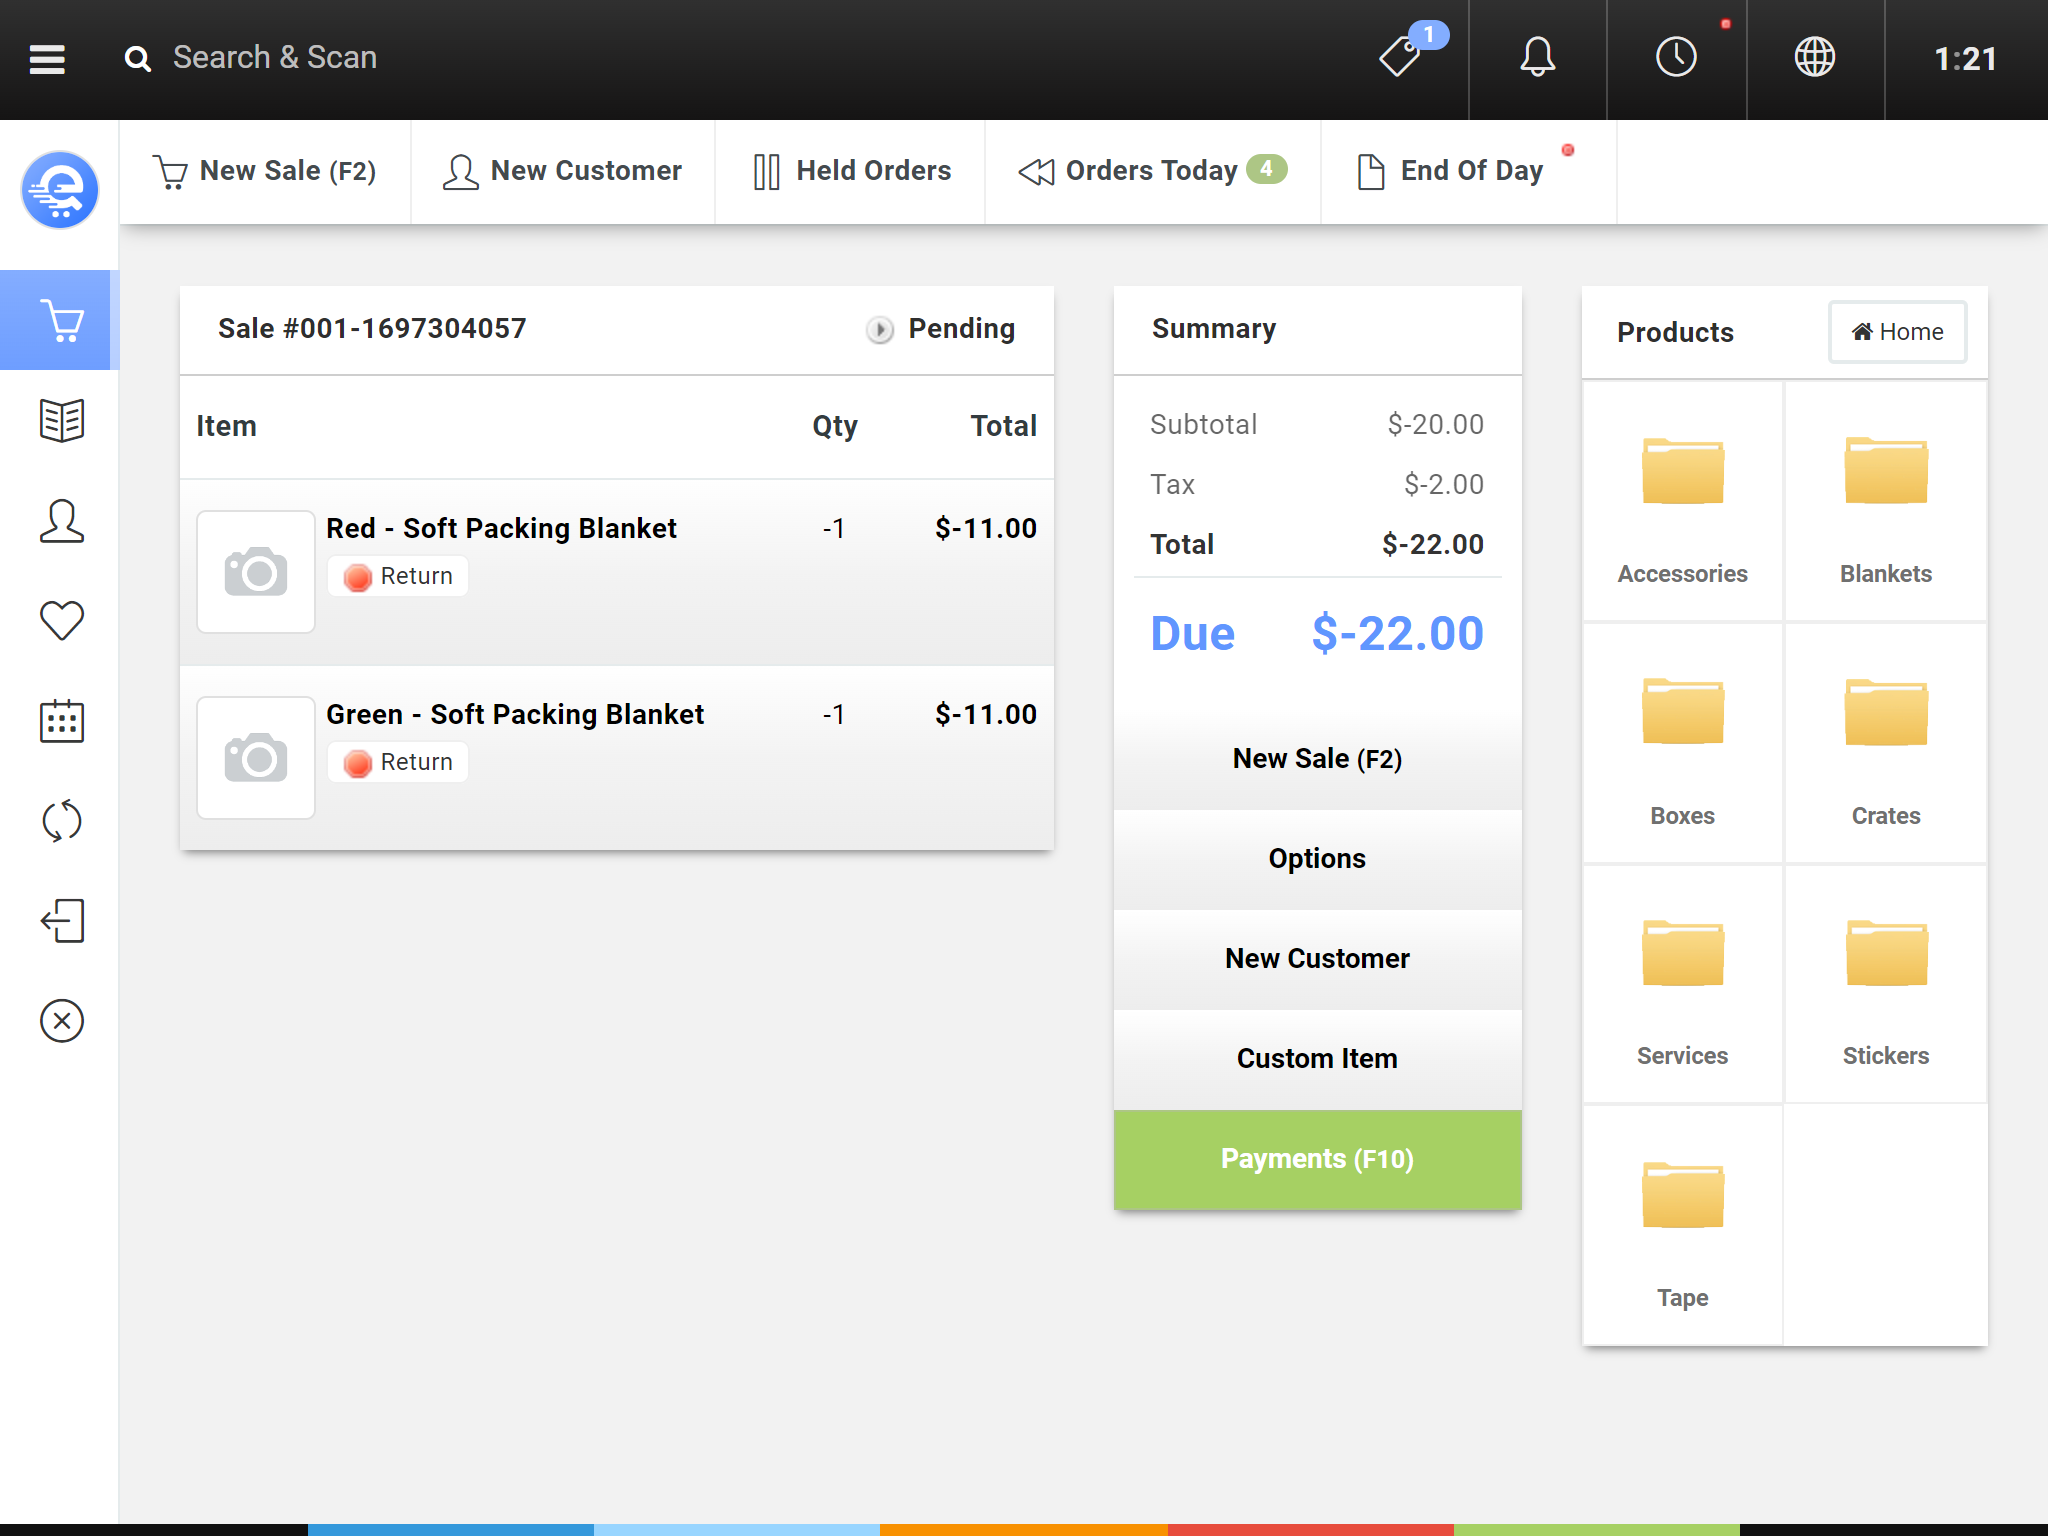
Figure C
A new sale will be generated and you can either add a replacement item to the order, or just add a Payment to the order by clicking the "Payments" button.