Configuring Login Screen
Operators can login using an I.D. number, and a PIN (if applicable). Enabling this feature will allow you to use Payroll functions, Chat functions, and Sales Tracking.
Enabling Operator Login Screen Globally
- Login to the Back Office.
- On the left menu, click "Settings", under "System", click "Settings".
- Select "Terminals" in the left sub-menu.
- Find "Require Login" and change to either Enabled or Disabled (see Figure A below).
- Press "Save Changes" to finalize changes made.
- The terminal must synchronize before the changes are discovered (see Figure B below).

Figure A
Cash Out screen showing "Customer Entitlement" option which will display the customers total loyalty points.

Figure B
Adjust Loyalty points on the Customer Profile screen by going to More > Loyalty.
Enabling Operator Login Screen On A Specific Terminal
- Login to the Back Office.
- On the left menu, click "Settings", then click "Terminals".
- On the "Action" drop-down menu, select "Edit" (see Figure C below).
- On the left sub-menu, click "Settings".
- Find "Require Login" and change to either Enabled or Disabled, or use Global Settings (default) (see Figure D below).
- Press "Save Changes" to finalize changes made.
- The terminal must synchronize before the changes are discovered (see Figure E below).
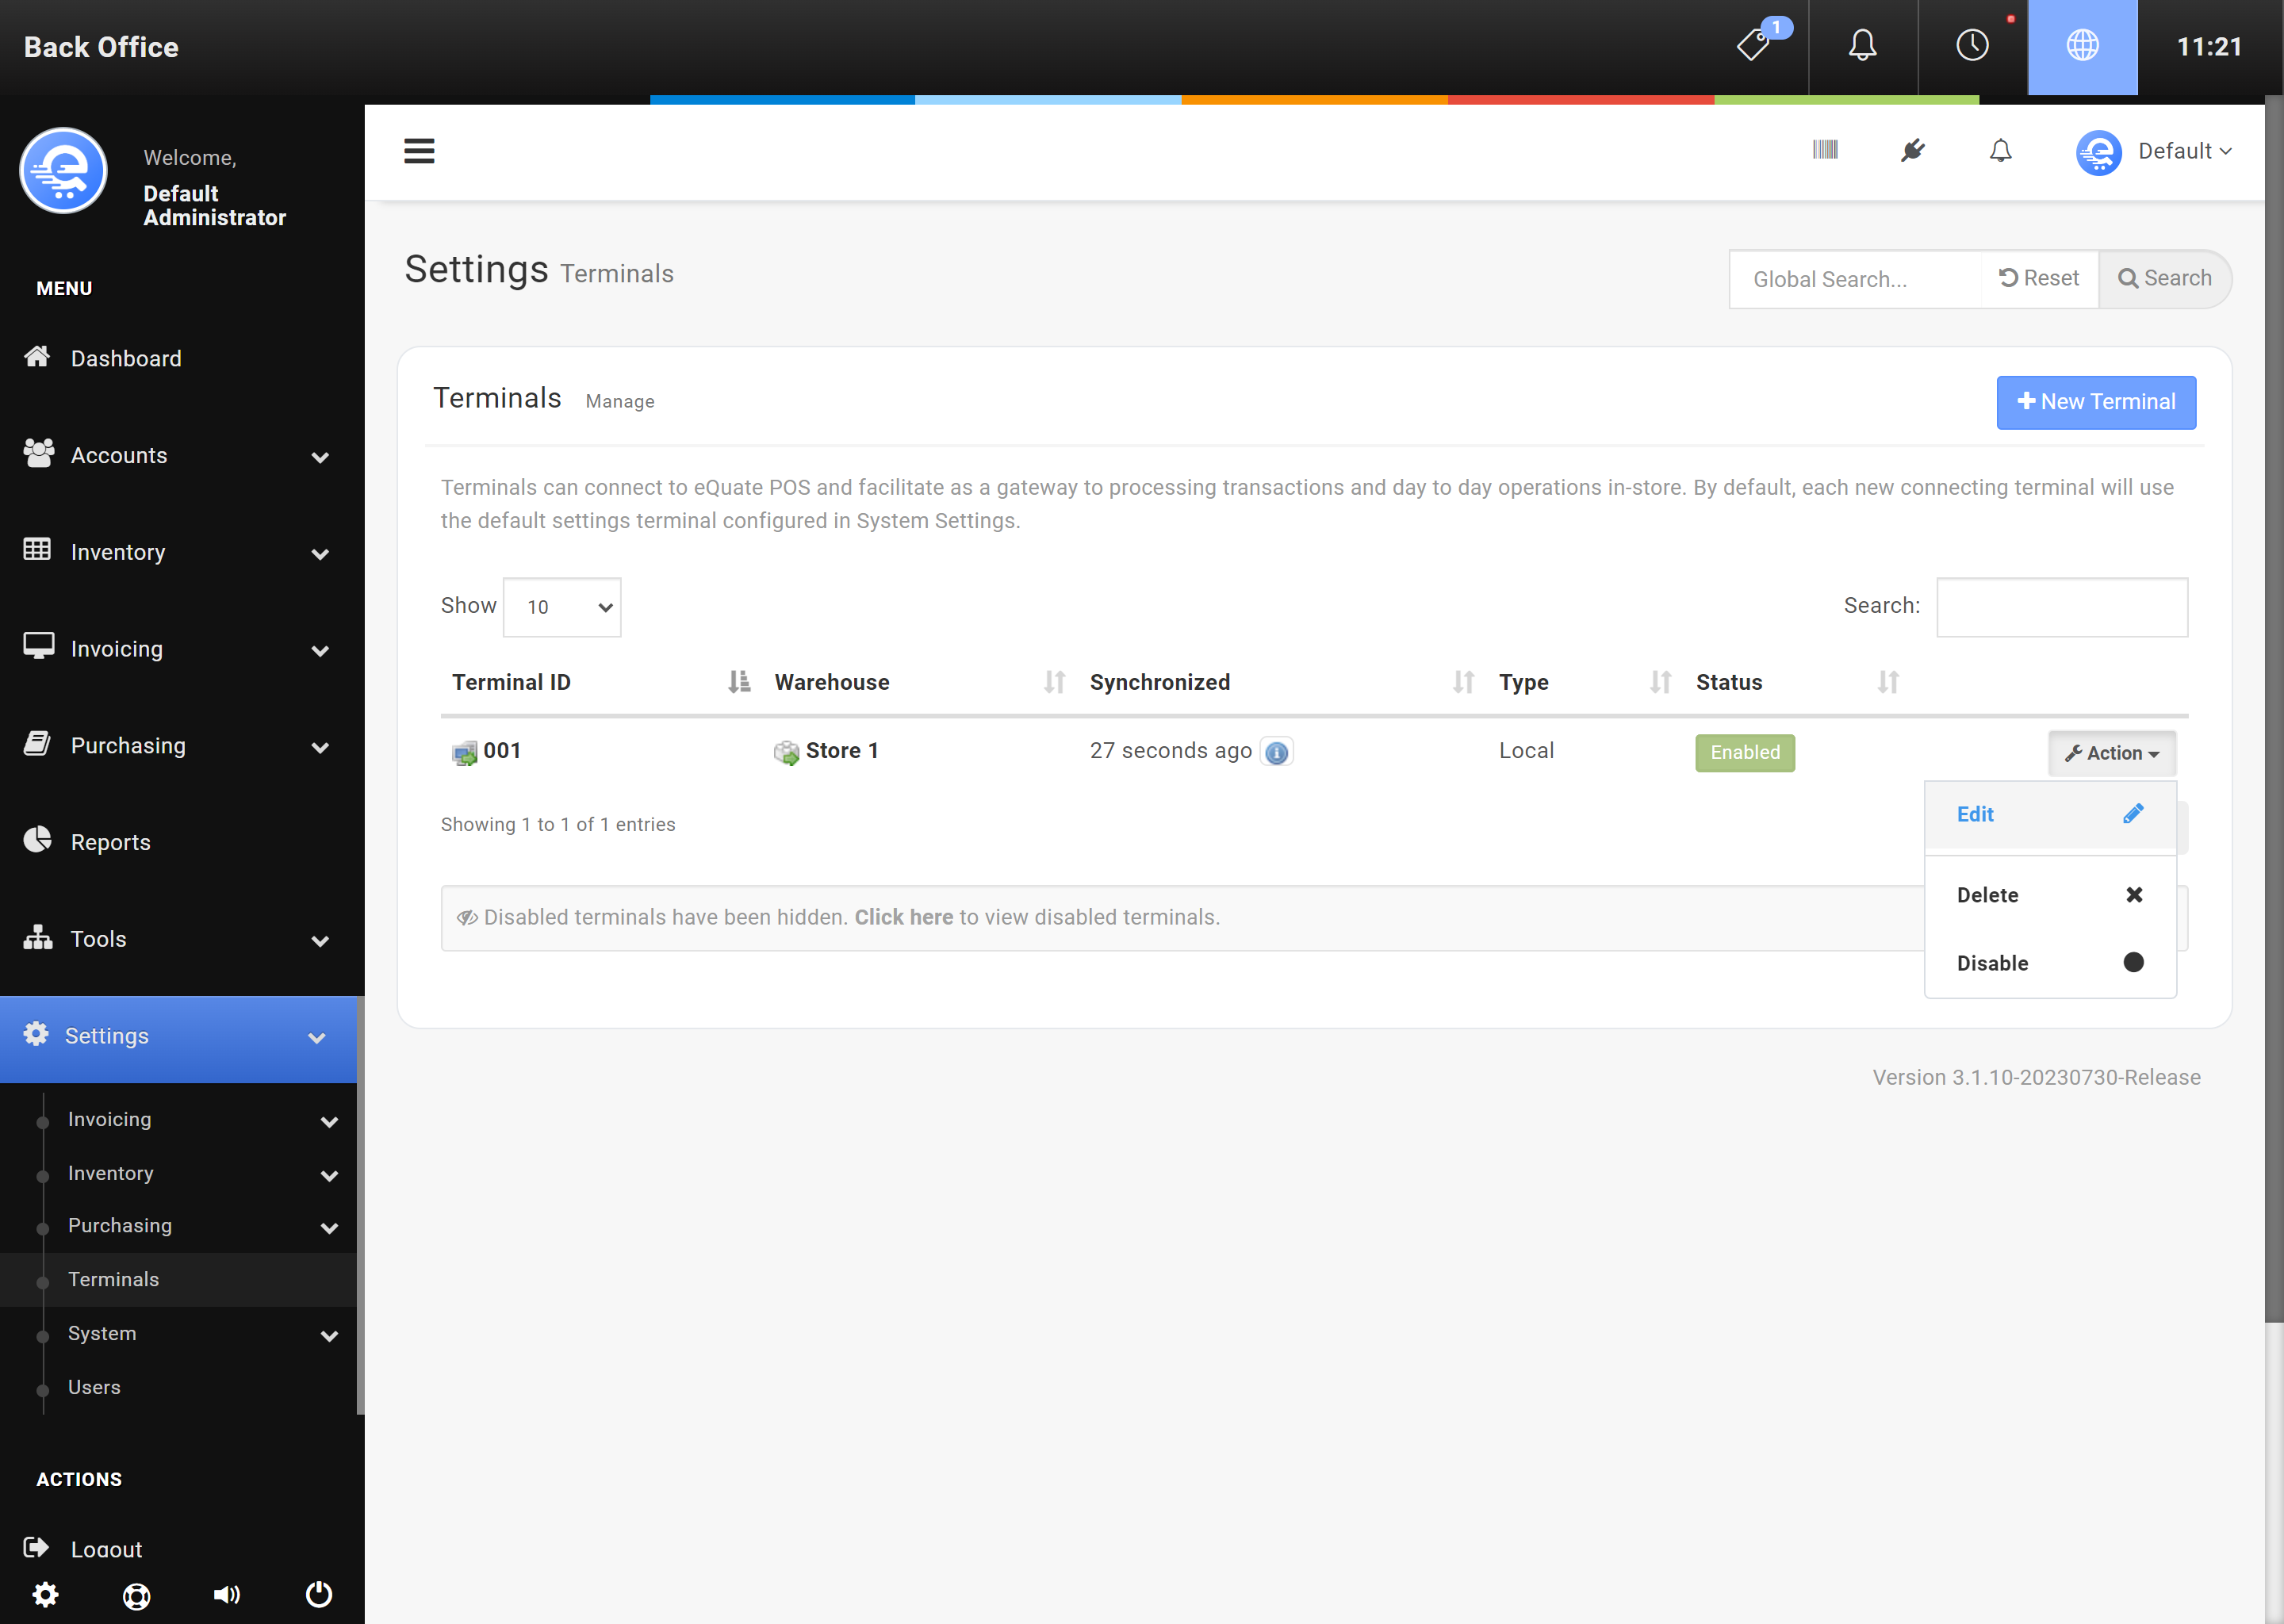
Figure C
Adjust Loyalty points on the Customer Profile screen by going to More > Loyalty.

Figure D
Adjust Loyalty points on the Customer Profile screen by going to More > Loyalty.
Figure E
Login screen with system time and information buttons.