Configuring Taxes
eQuate POS provides tax management in the Back Office. Tax groups hold mulitple tax rates. Tax rates can be applied to certain locations and hold various rates. For example, in Canada, some provinces require two different tax rates to be applied to items. An example of this would be GST (5%) and PST (7%) in Ontario, Canada. For this setup, one single Tax Group would be setup, and then two individual tax rates would be added and assigned to the tax group.
Adding A Tax Group
Tax groups hold various tax rates. Only one tax group can be used when applying tax to a product or item.
- Login to the Back Office.
- On the left menu, select "Settings" under Settings, then select "Invoicing", then "Taxes".
- Click "Add Tax Group" button (see Figure A below).
- Provide a name for the tax group and then click "Save Changes" (see Figure C).
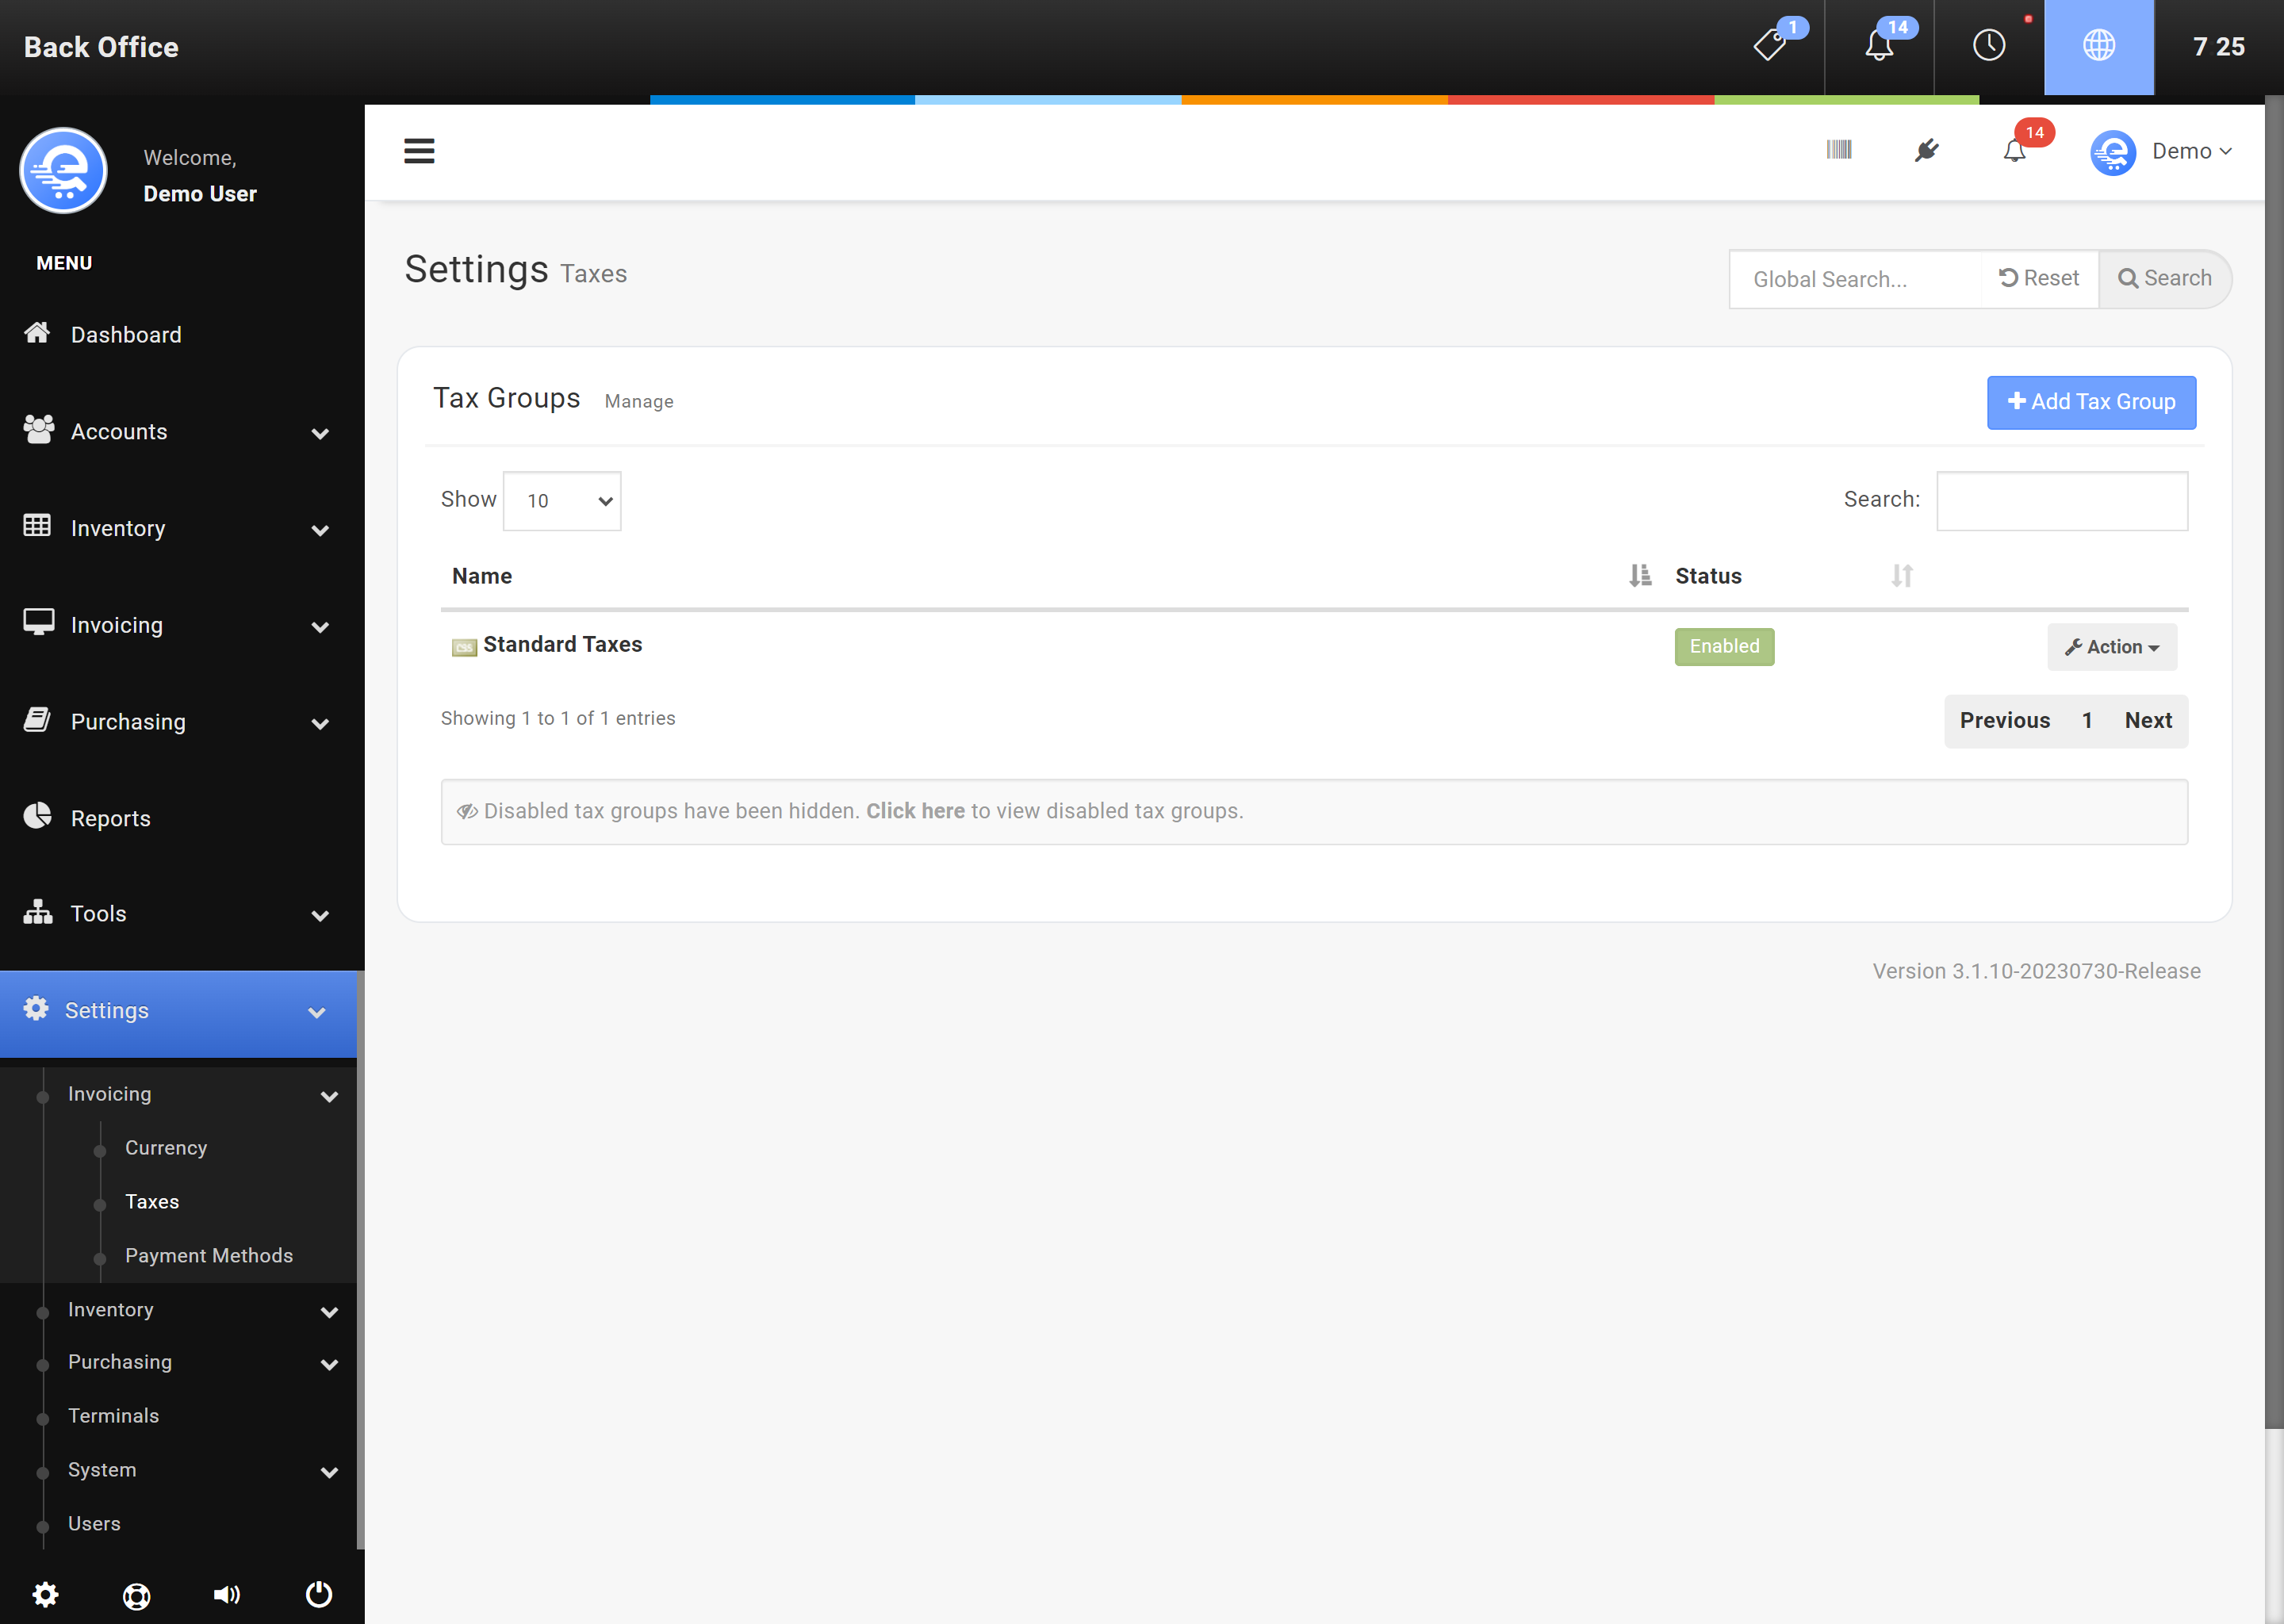
Figure A
Add your online store in the Back Office area. Select "New Online Store".
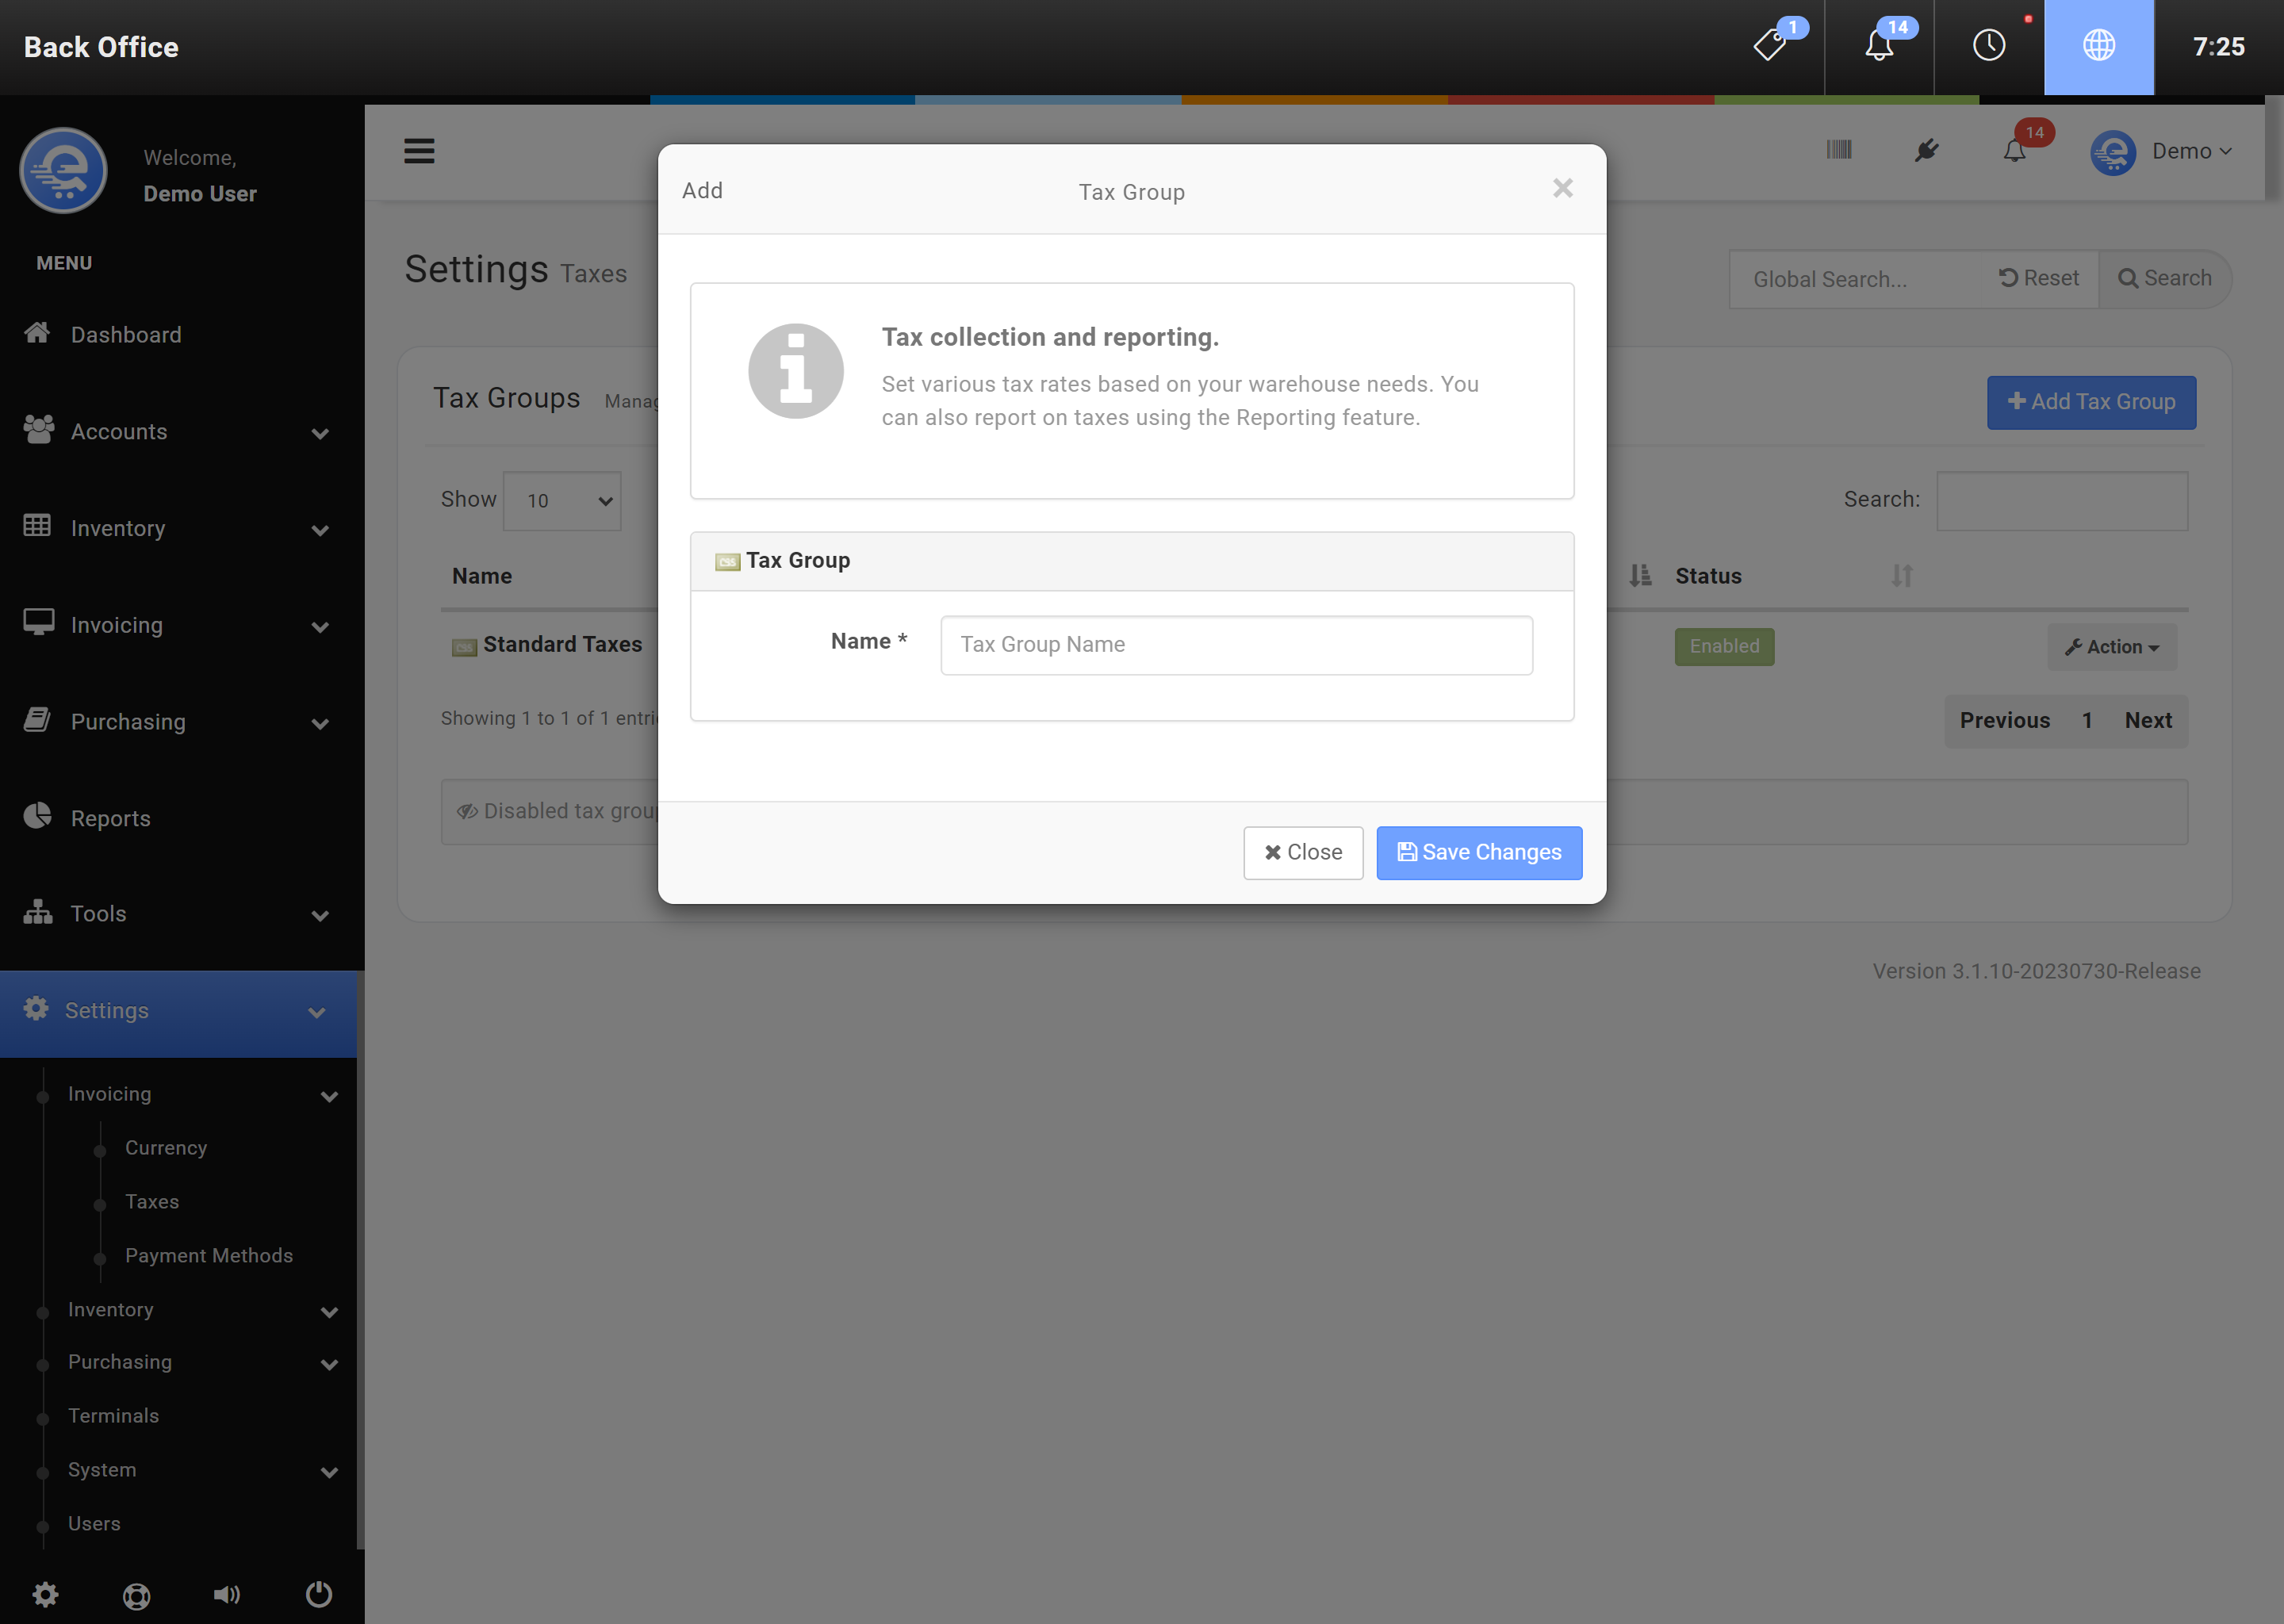
Figure B
Enter your VirtueMart SQL details and press "Save Changes".
Adding Tax Rates
Tax rates can be added within the Tax Group. You can add an unlimited amount of tax rates under tax groups.
- Login to the Back Office.
- On the left menu, select "Settings" under Settings, then select "Invoicing", then "Taxes".
- Find the Tax Group you would like to add or modify a Tax rate then select "Action", then "Edit" (see Figure D).
- Click "Add Tax" and then provide the tax rate details (see Figure E).
- Click "Save Changes" when complete.
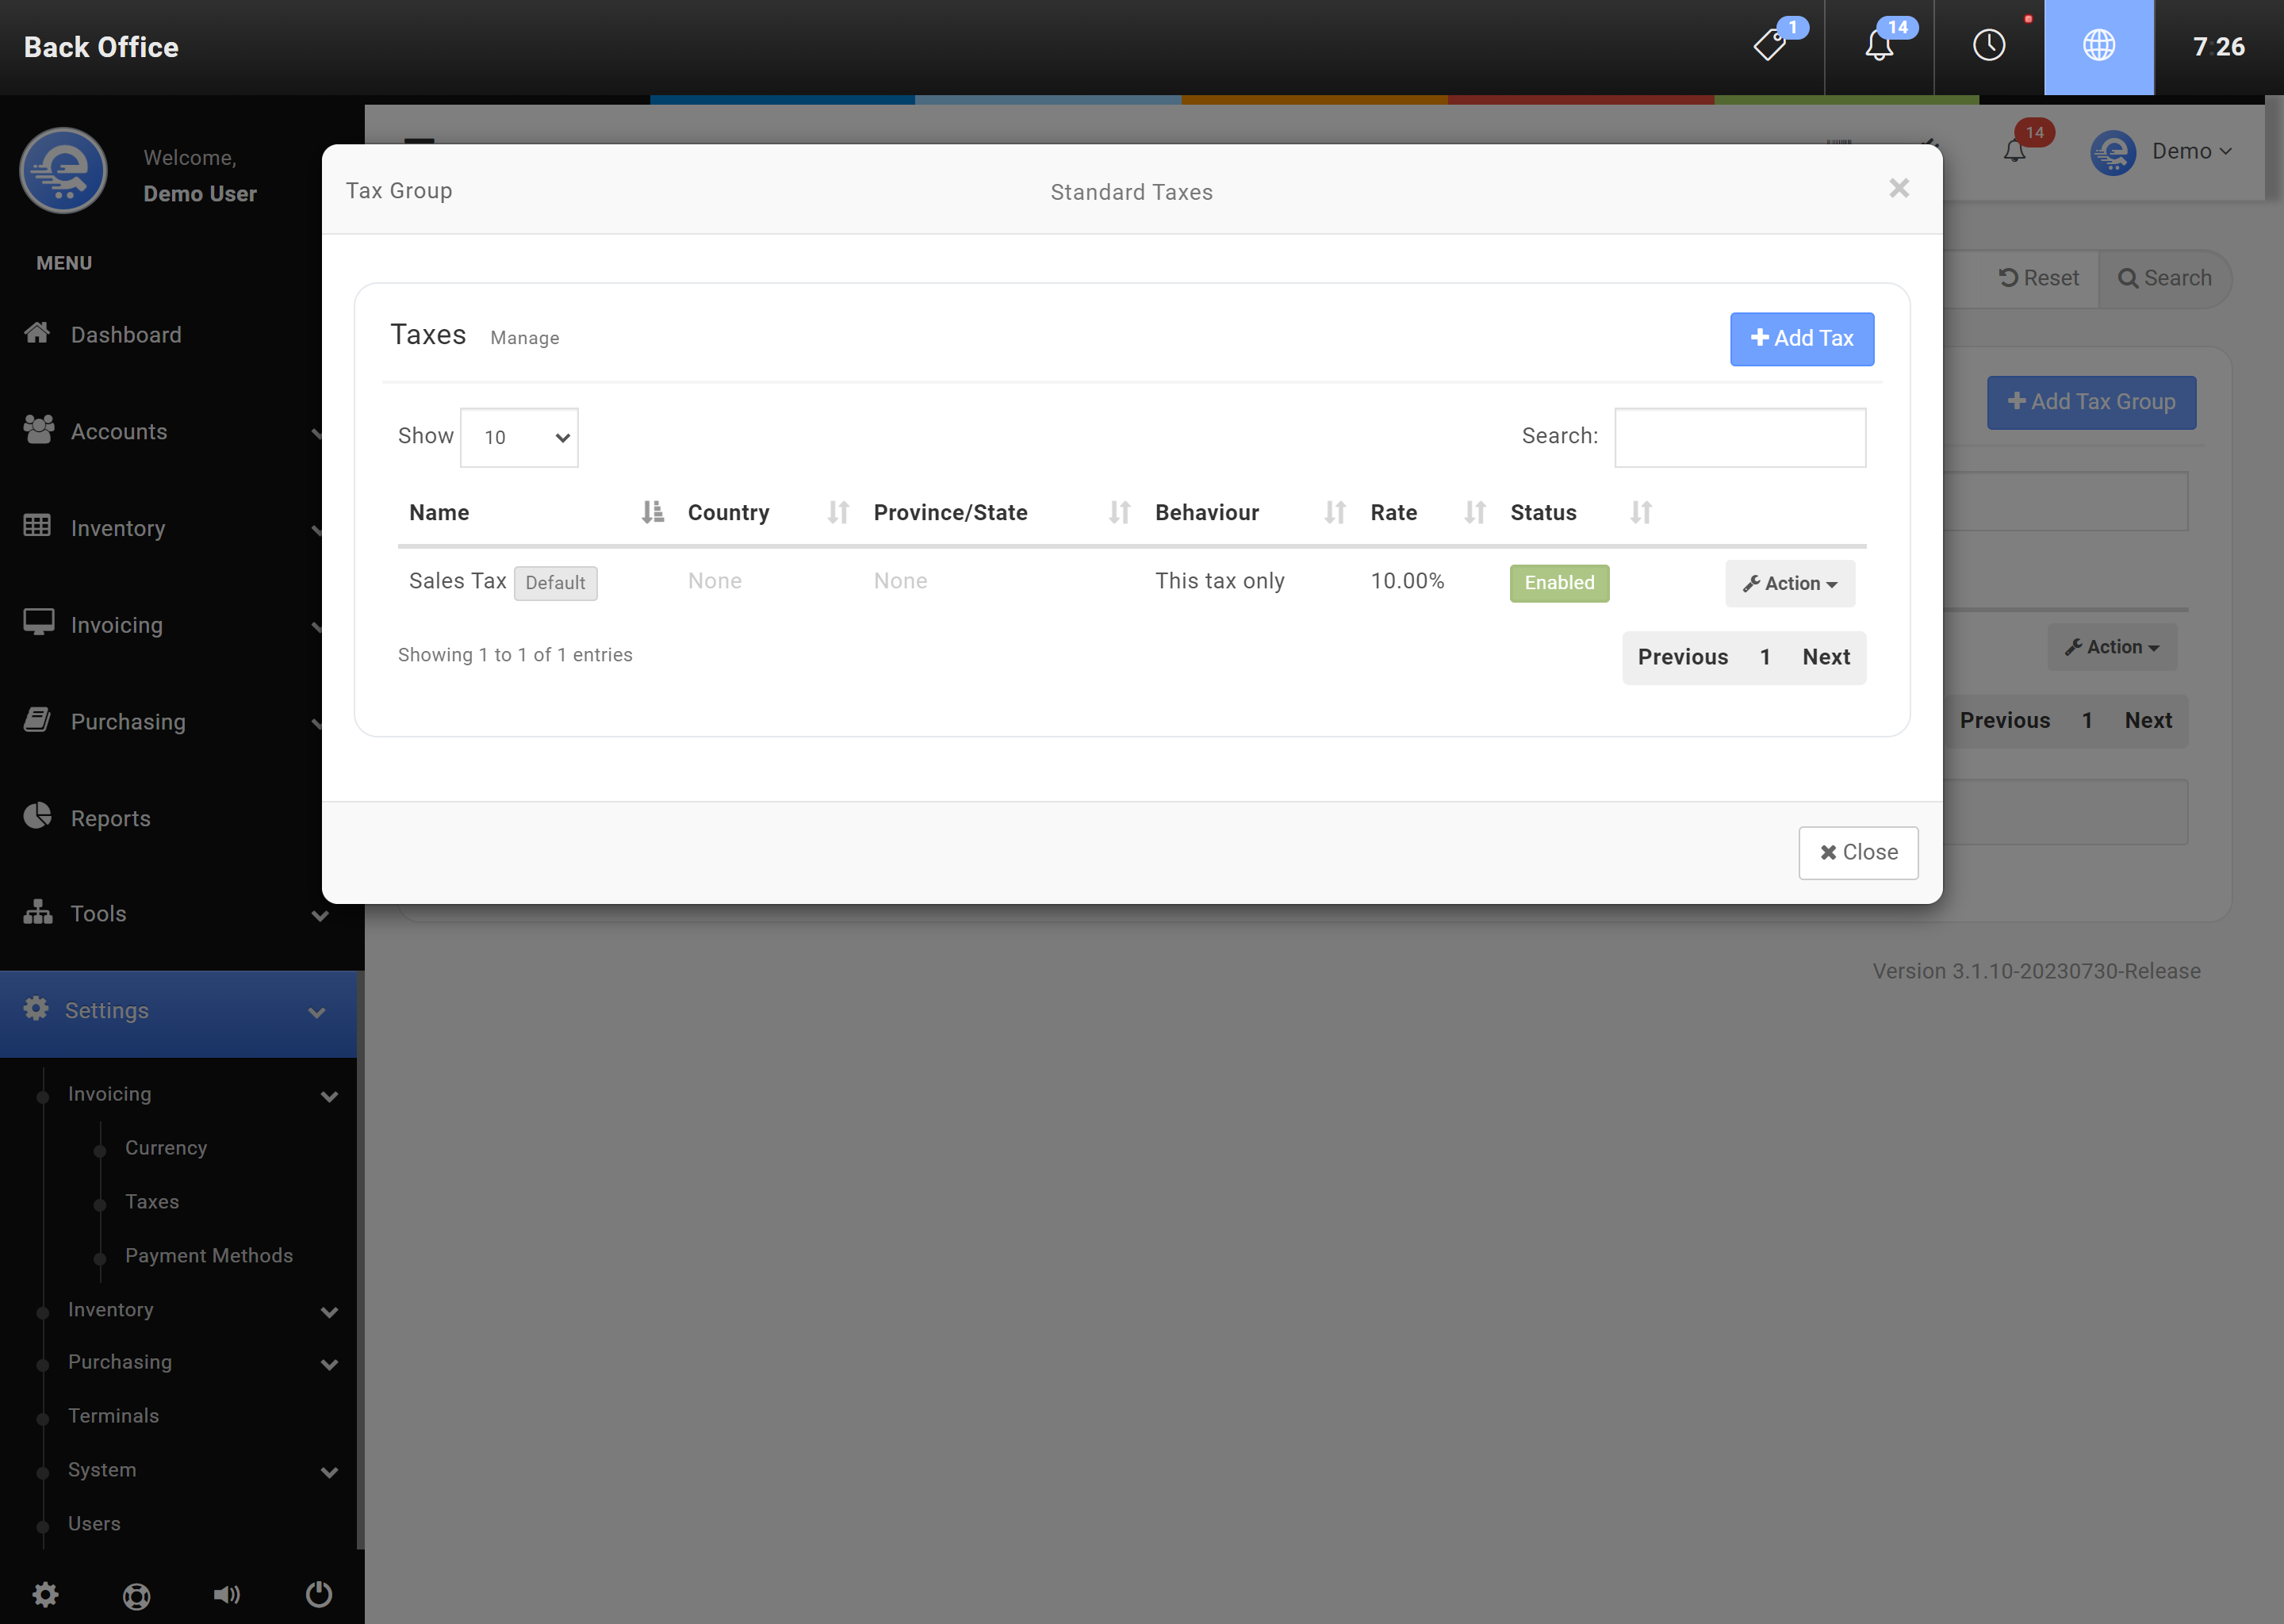
Figure C
After saving your online store to eQuate POS, you will see "Pending" until the system has synchronized.
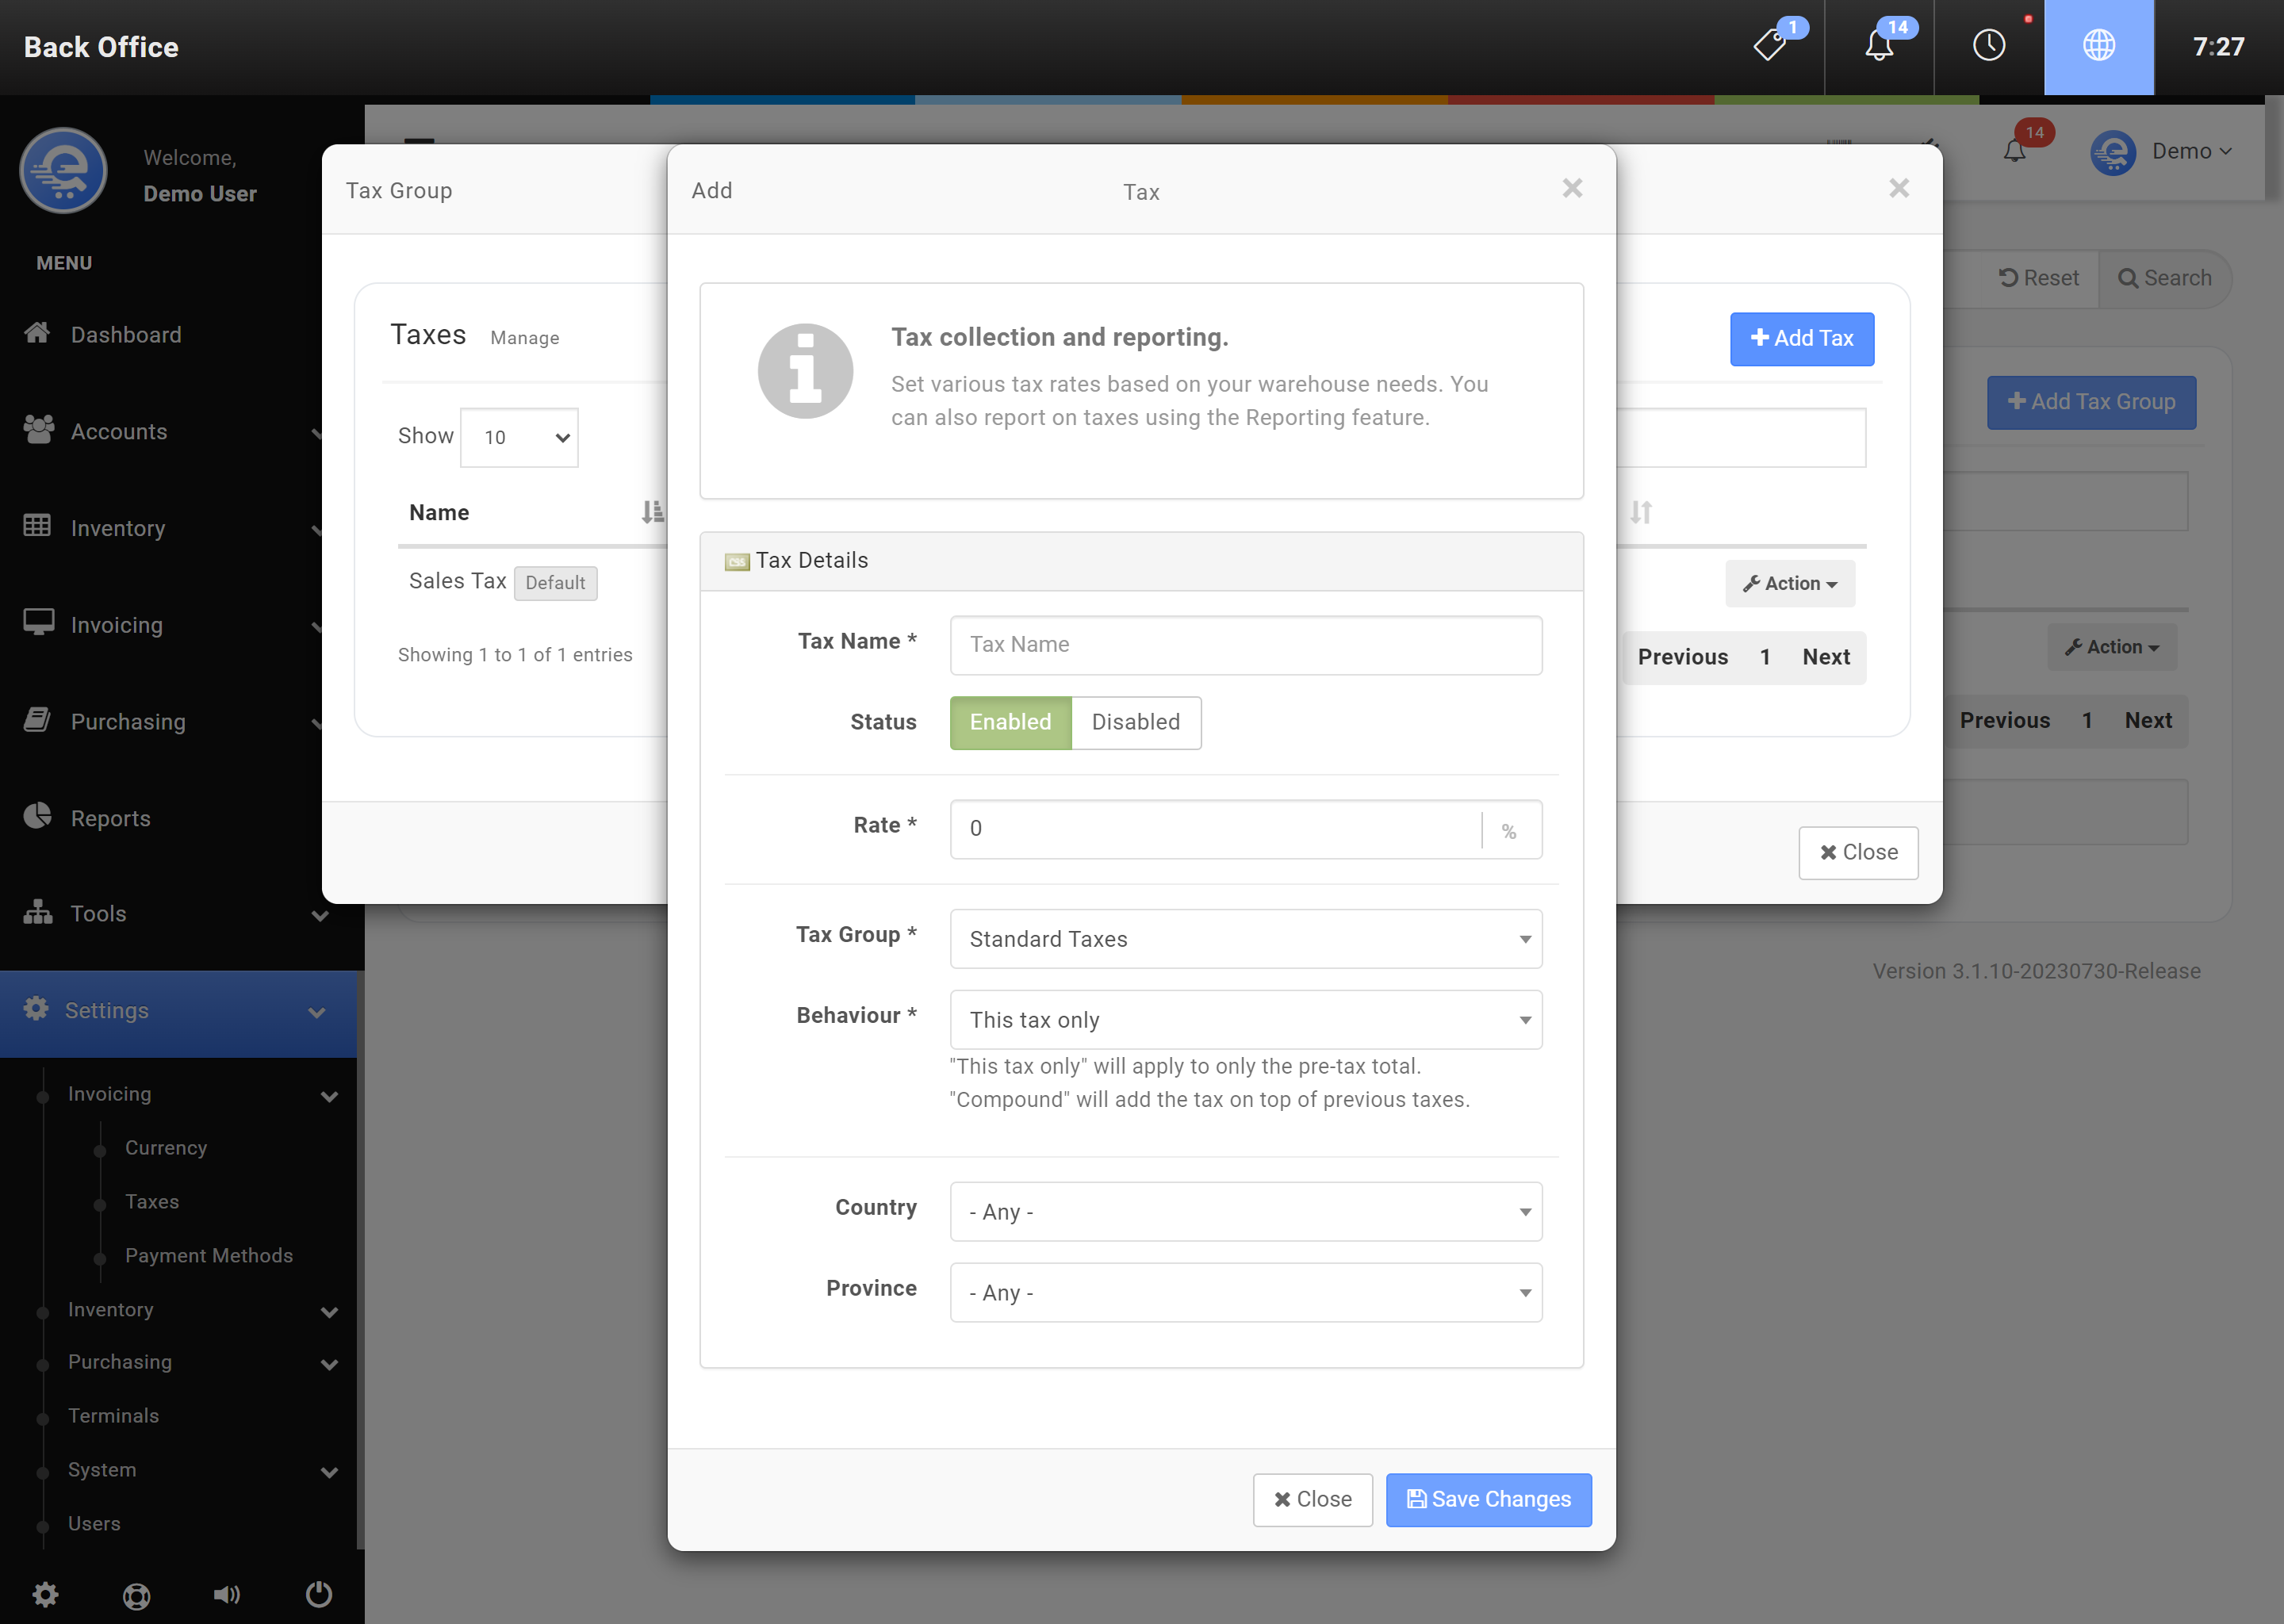
Figure D
To disable the synchronization, select "Edit" under Actions and set the status to Disabled and press "Save Changes".
Setting Default Tax Group
During the creation of each product, you can set the default tax group for that product. However, sometimes you may need to add custom items to an order. Setting the default tax group will ensure the proper tax group is applied to these custom items. Setting the default tax group also allows you to create products quicker by not having to select your preferred tax group everytime.
- Login to the Back Office.
- On the left menu, select "Settings" under Settings, then select "Invoicing", then "Taxes".
- Find the Tax Group you would like to add or modify a Tax rate then select "Action", then "Edit" (see Figure D).
- Click "Add Tax" and then provide the tax rate details (see Figure E).
- Click "Save Changes" when complete.
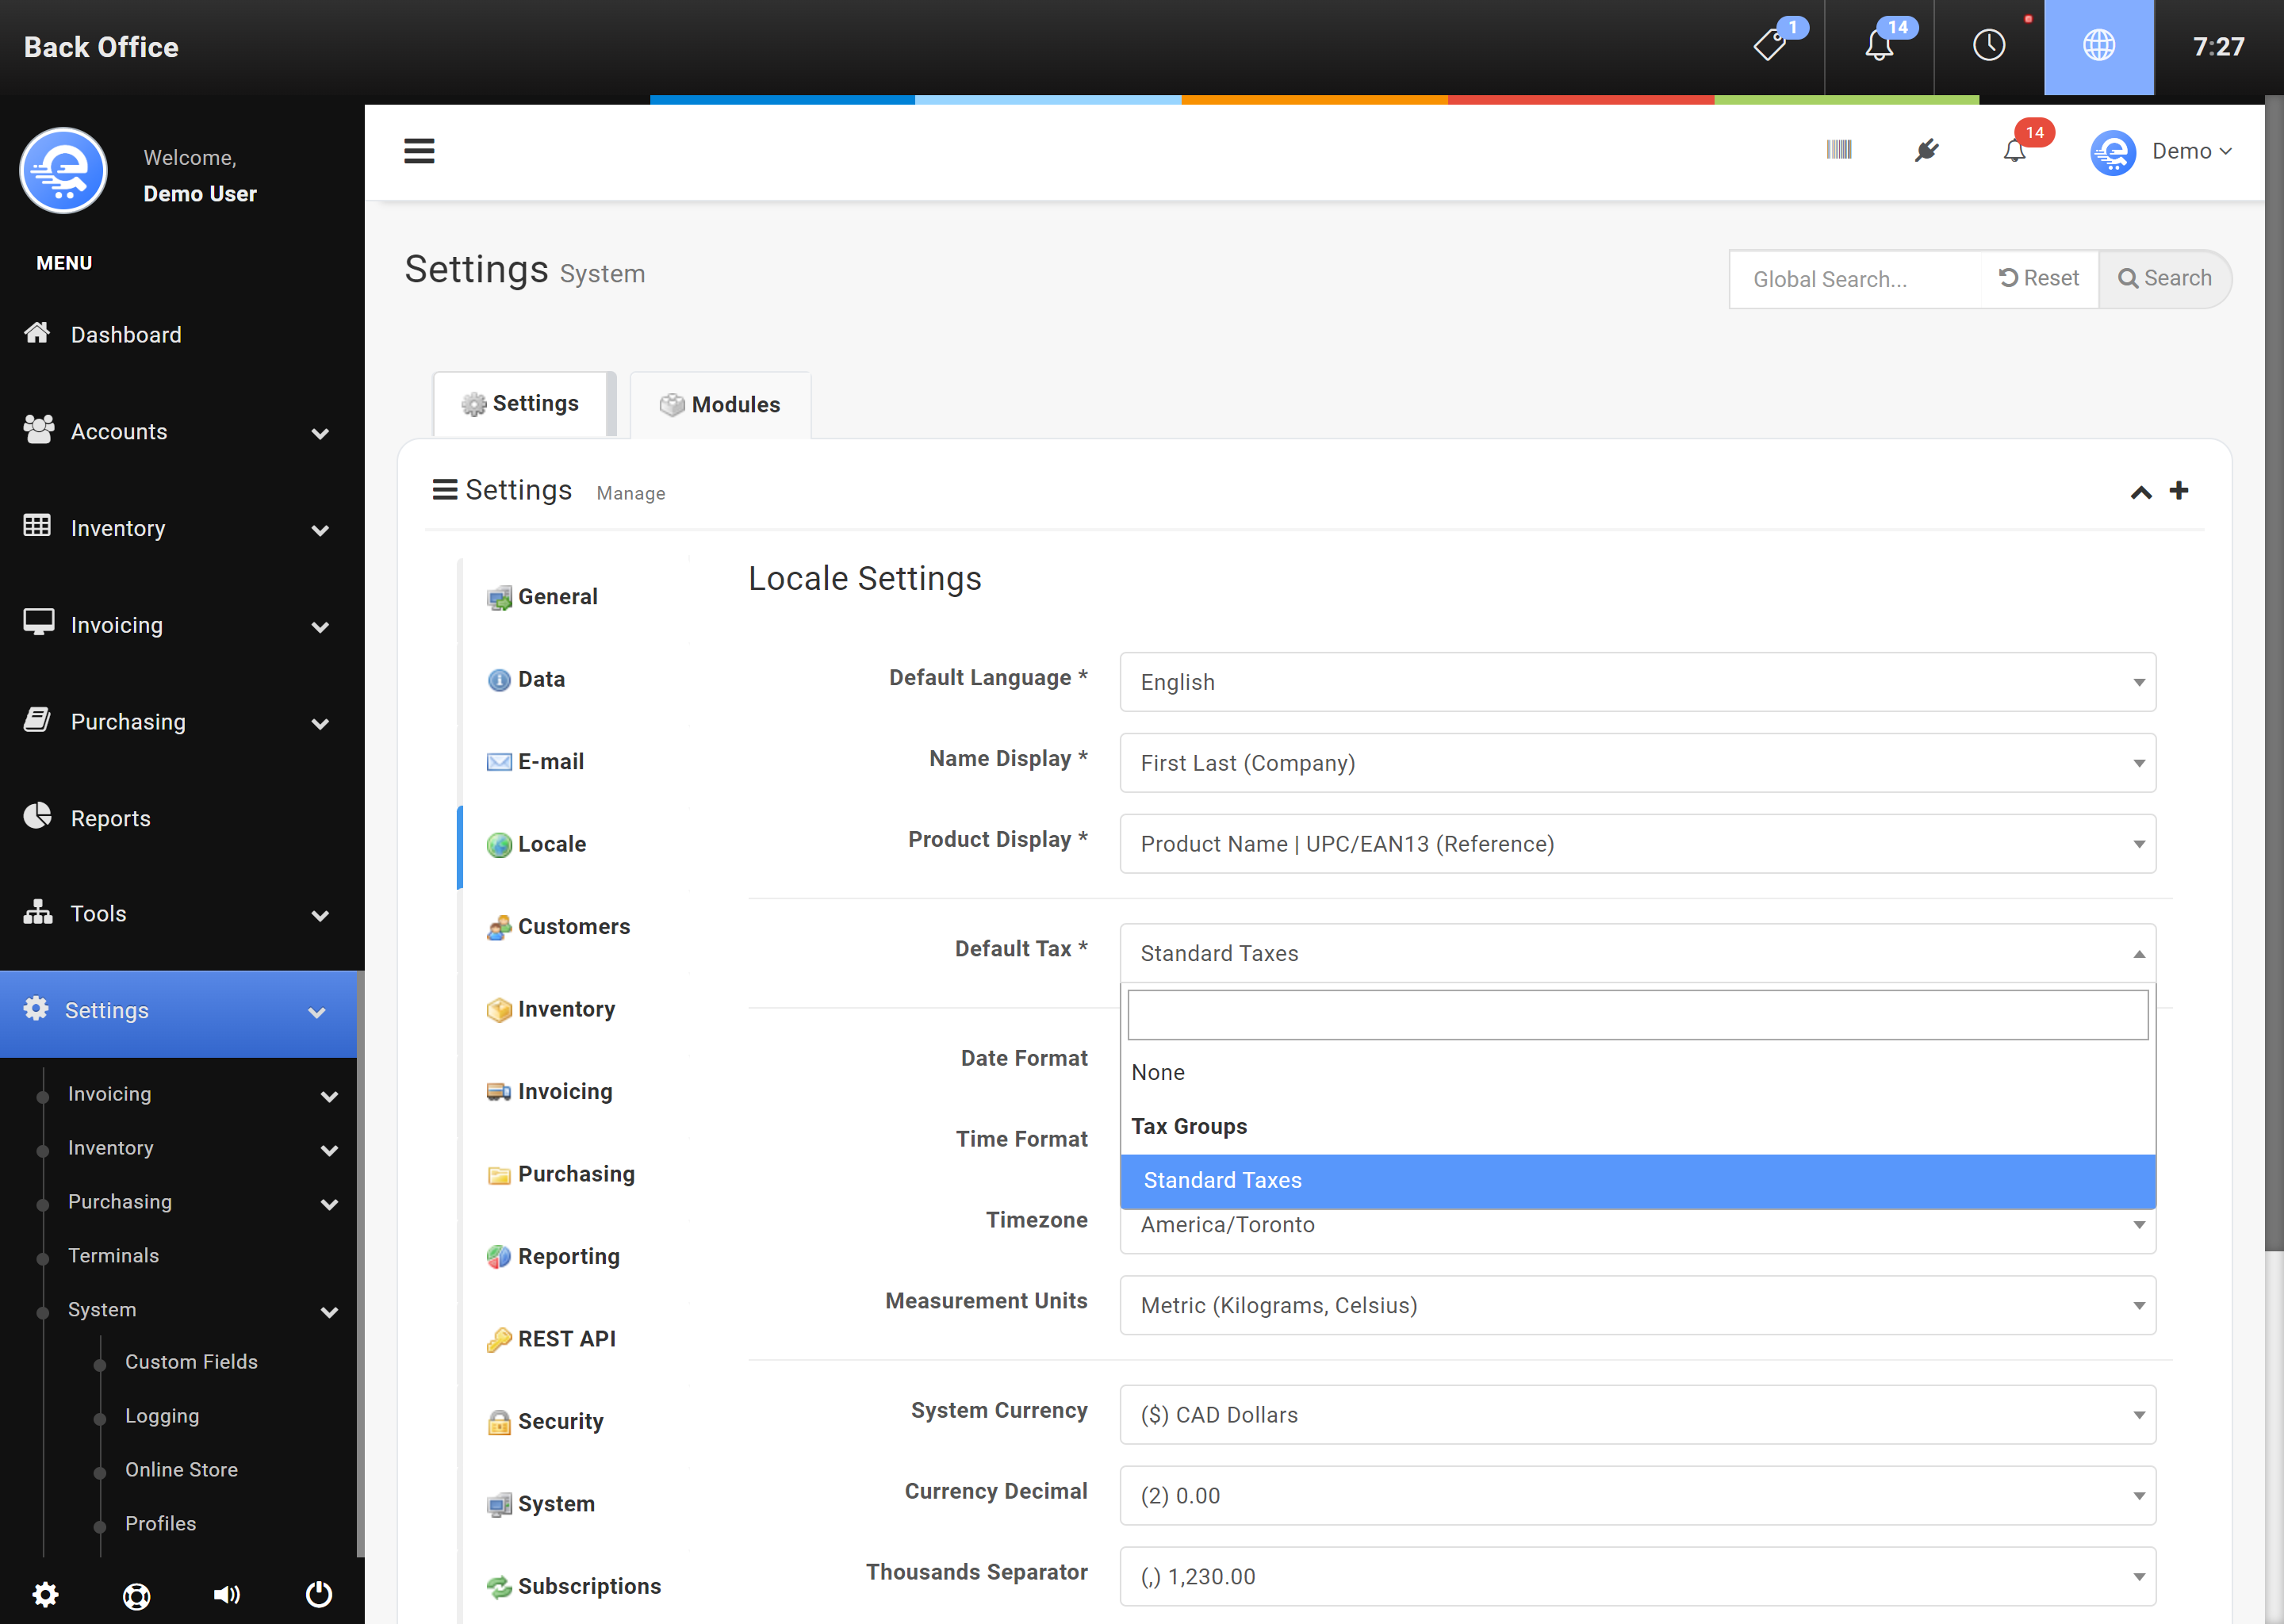
Figure E
After saving your online store to eQuate POS, you will see "Pending" until the system has synchronized.