Completing A Sale
A sale is the first step in the process of selling inventory. A sale will turn into an invoice once it has been held, or completed. This guide will explain the work-flow of completing a sale. Once a sale is completed or held, inventory will be deducted from the warehouse stock bucket. A held sale can also be cancelled, or completed. A completed sale can only be refunded.
- Adding items to the Sale
- Adding a customer to the Sale (if applicable)
- Finalising Sale details (add coupons, discounts, or notes)
- Adding a payment to the Sale
Adding Items
There are multiple ways to add an item to a sale. In this example, we will explain the easiest method; using the top search bar. The top search bar works like any search engine. For example, if you were adding a Large Red Shoe to the order; simply search "large red shoe", and select the proper product on the drop down. If the product you are adding also has a barcode (EAN-13, UPC-A, UPC-E, etc...) you can also scan that into the top search bar.
Once items have been added to a sale; attributes like discount, price, tax, quantities, and notes can be changed.
- Search the product name in the top search bar (see Figure A). You can also scan the product barcode into the top search bar.
- Once the search list populates, use the up/down button on your keyboard to select the correct product, and press your keyboards "Enter/Return" key to add it to the sale. You can also click on it with your mouse, or tap it with your figure if you use a touch screen (see Figure B)
- The product will appear on the item list.
- To change quantities, or edit attributes like discounts, price, or tax: Select the item, and the menu will change to allow you to change price, quantity, or discount.
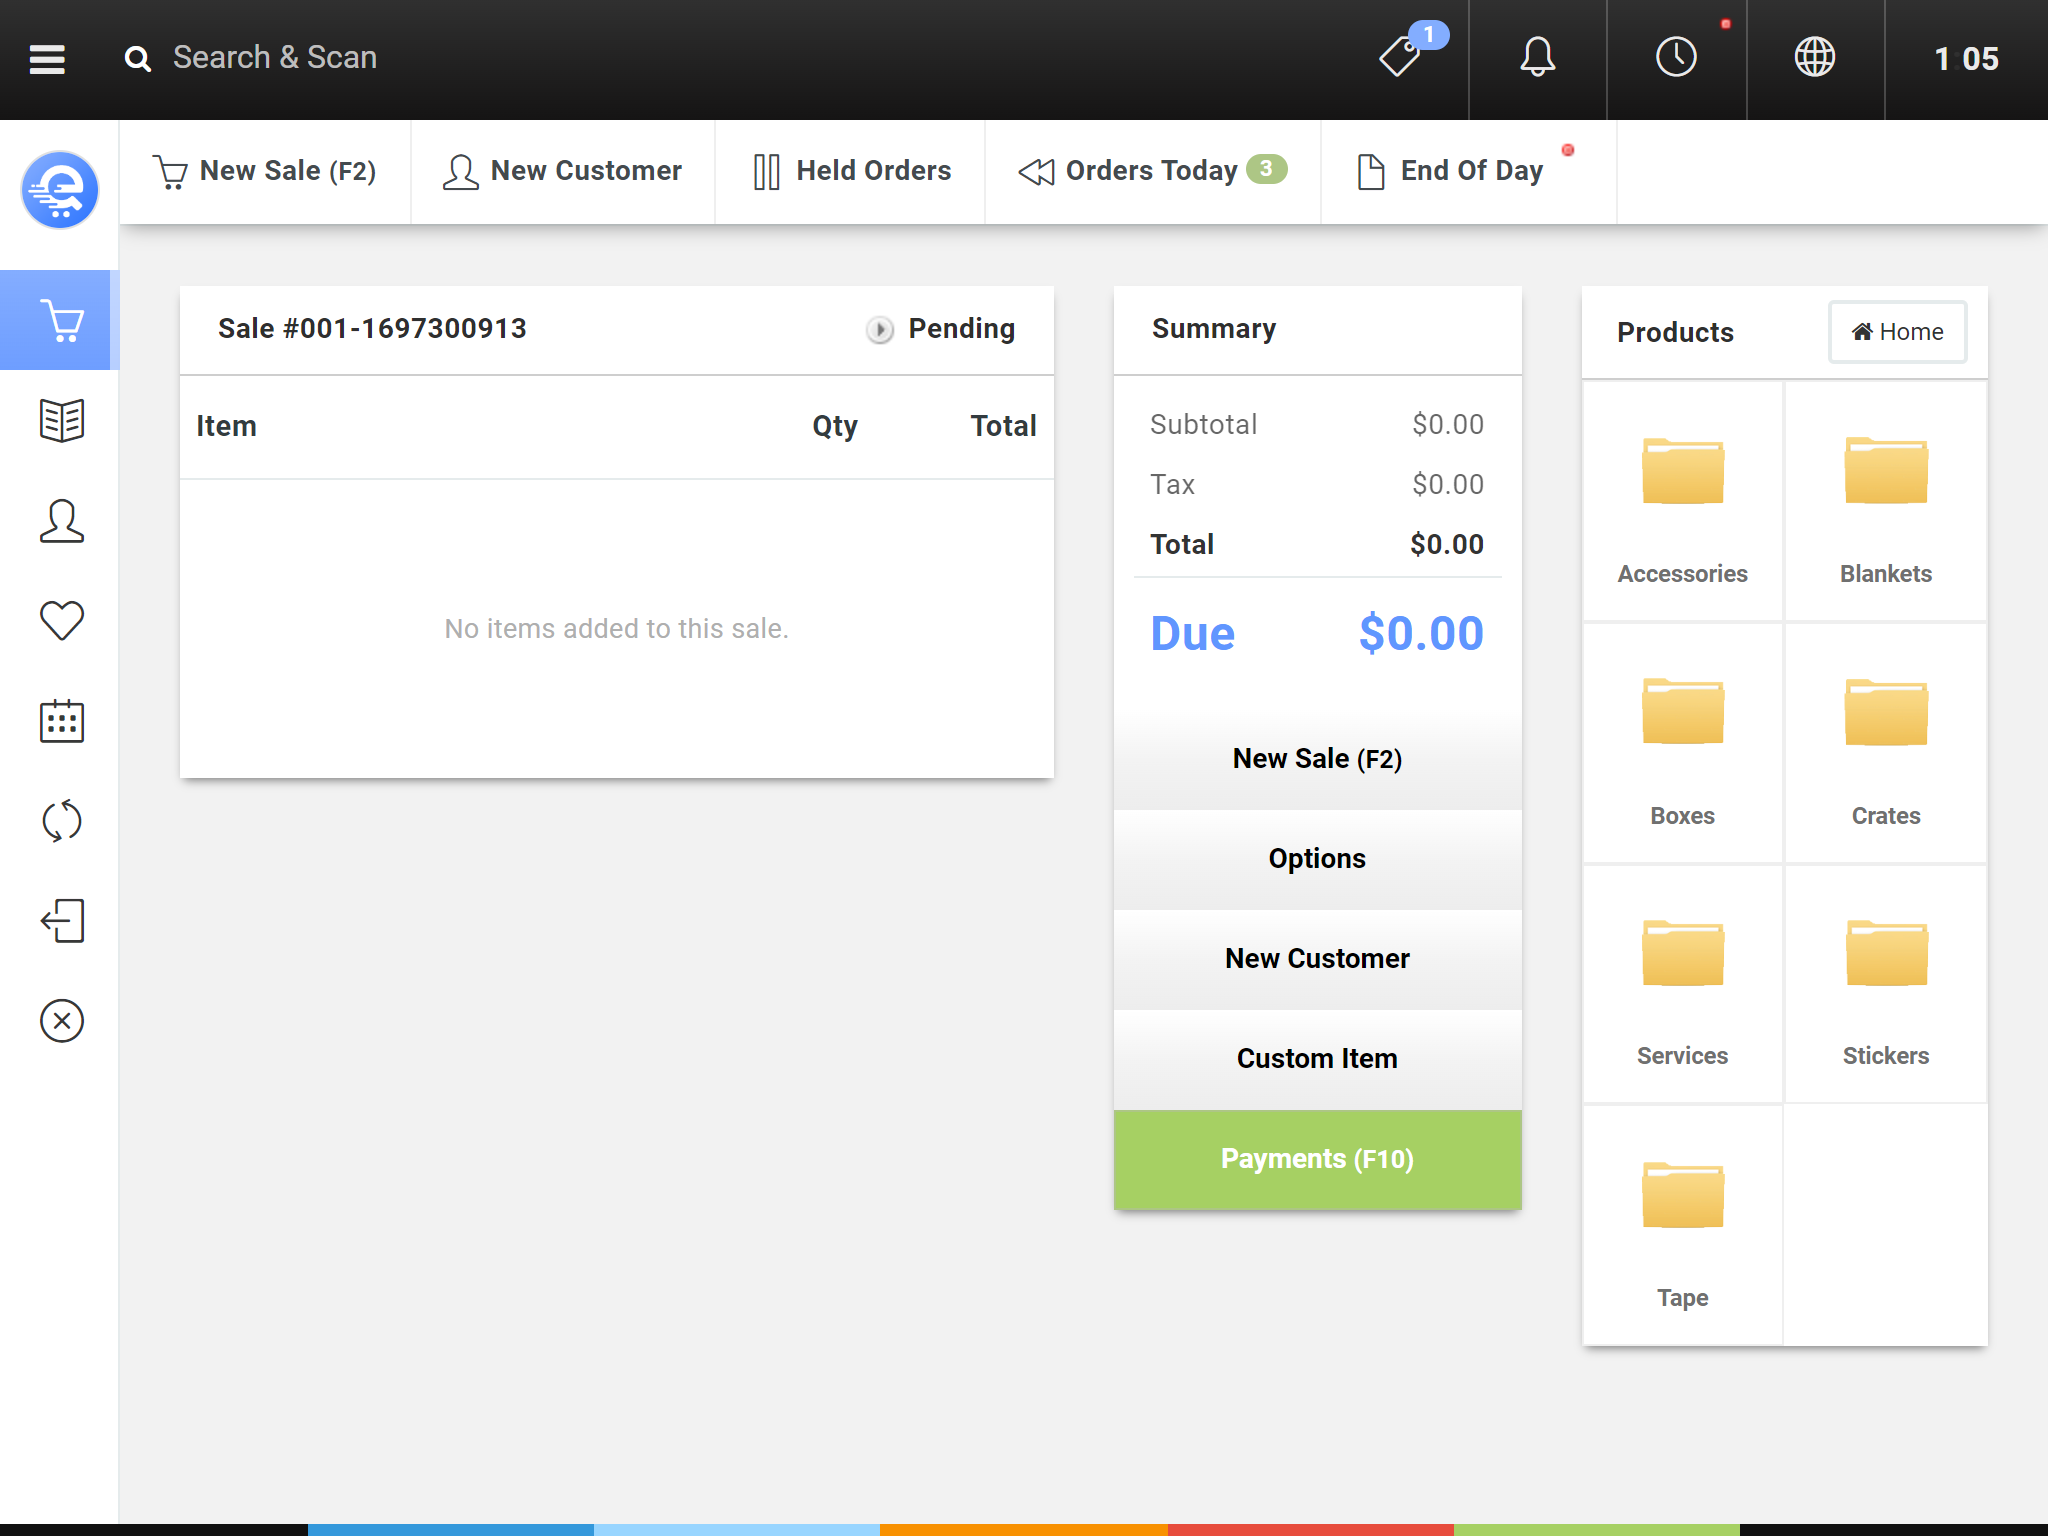
Figure A
Default sale screen.

Figure B
Use the top search bar to search products by name, or barcode.
Attaching A Customer
Assuming the customer alreaded exists in your system, you can quickly add customers to orders. Adding customers to orders allows you to quickly lookup previously purchase items, award loyalty points (if enabled), and use Account Credit (if enabled). There are multiple ways to add a customer to a sale. In this tutorial, we will focus on the easiest method which is using the top search bar.
- In the top search bar, begin by typing the customers: name, phone number, or e-mail address.
- A list of results will appear in the search drop down (see Figure C).
- Select the desired customer by using your keyboard's up and down key, or your mouse (or finger for touch screens).
- After the customer has been added, you will see the customer's details appear above the item list (see Figure D).
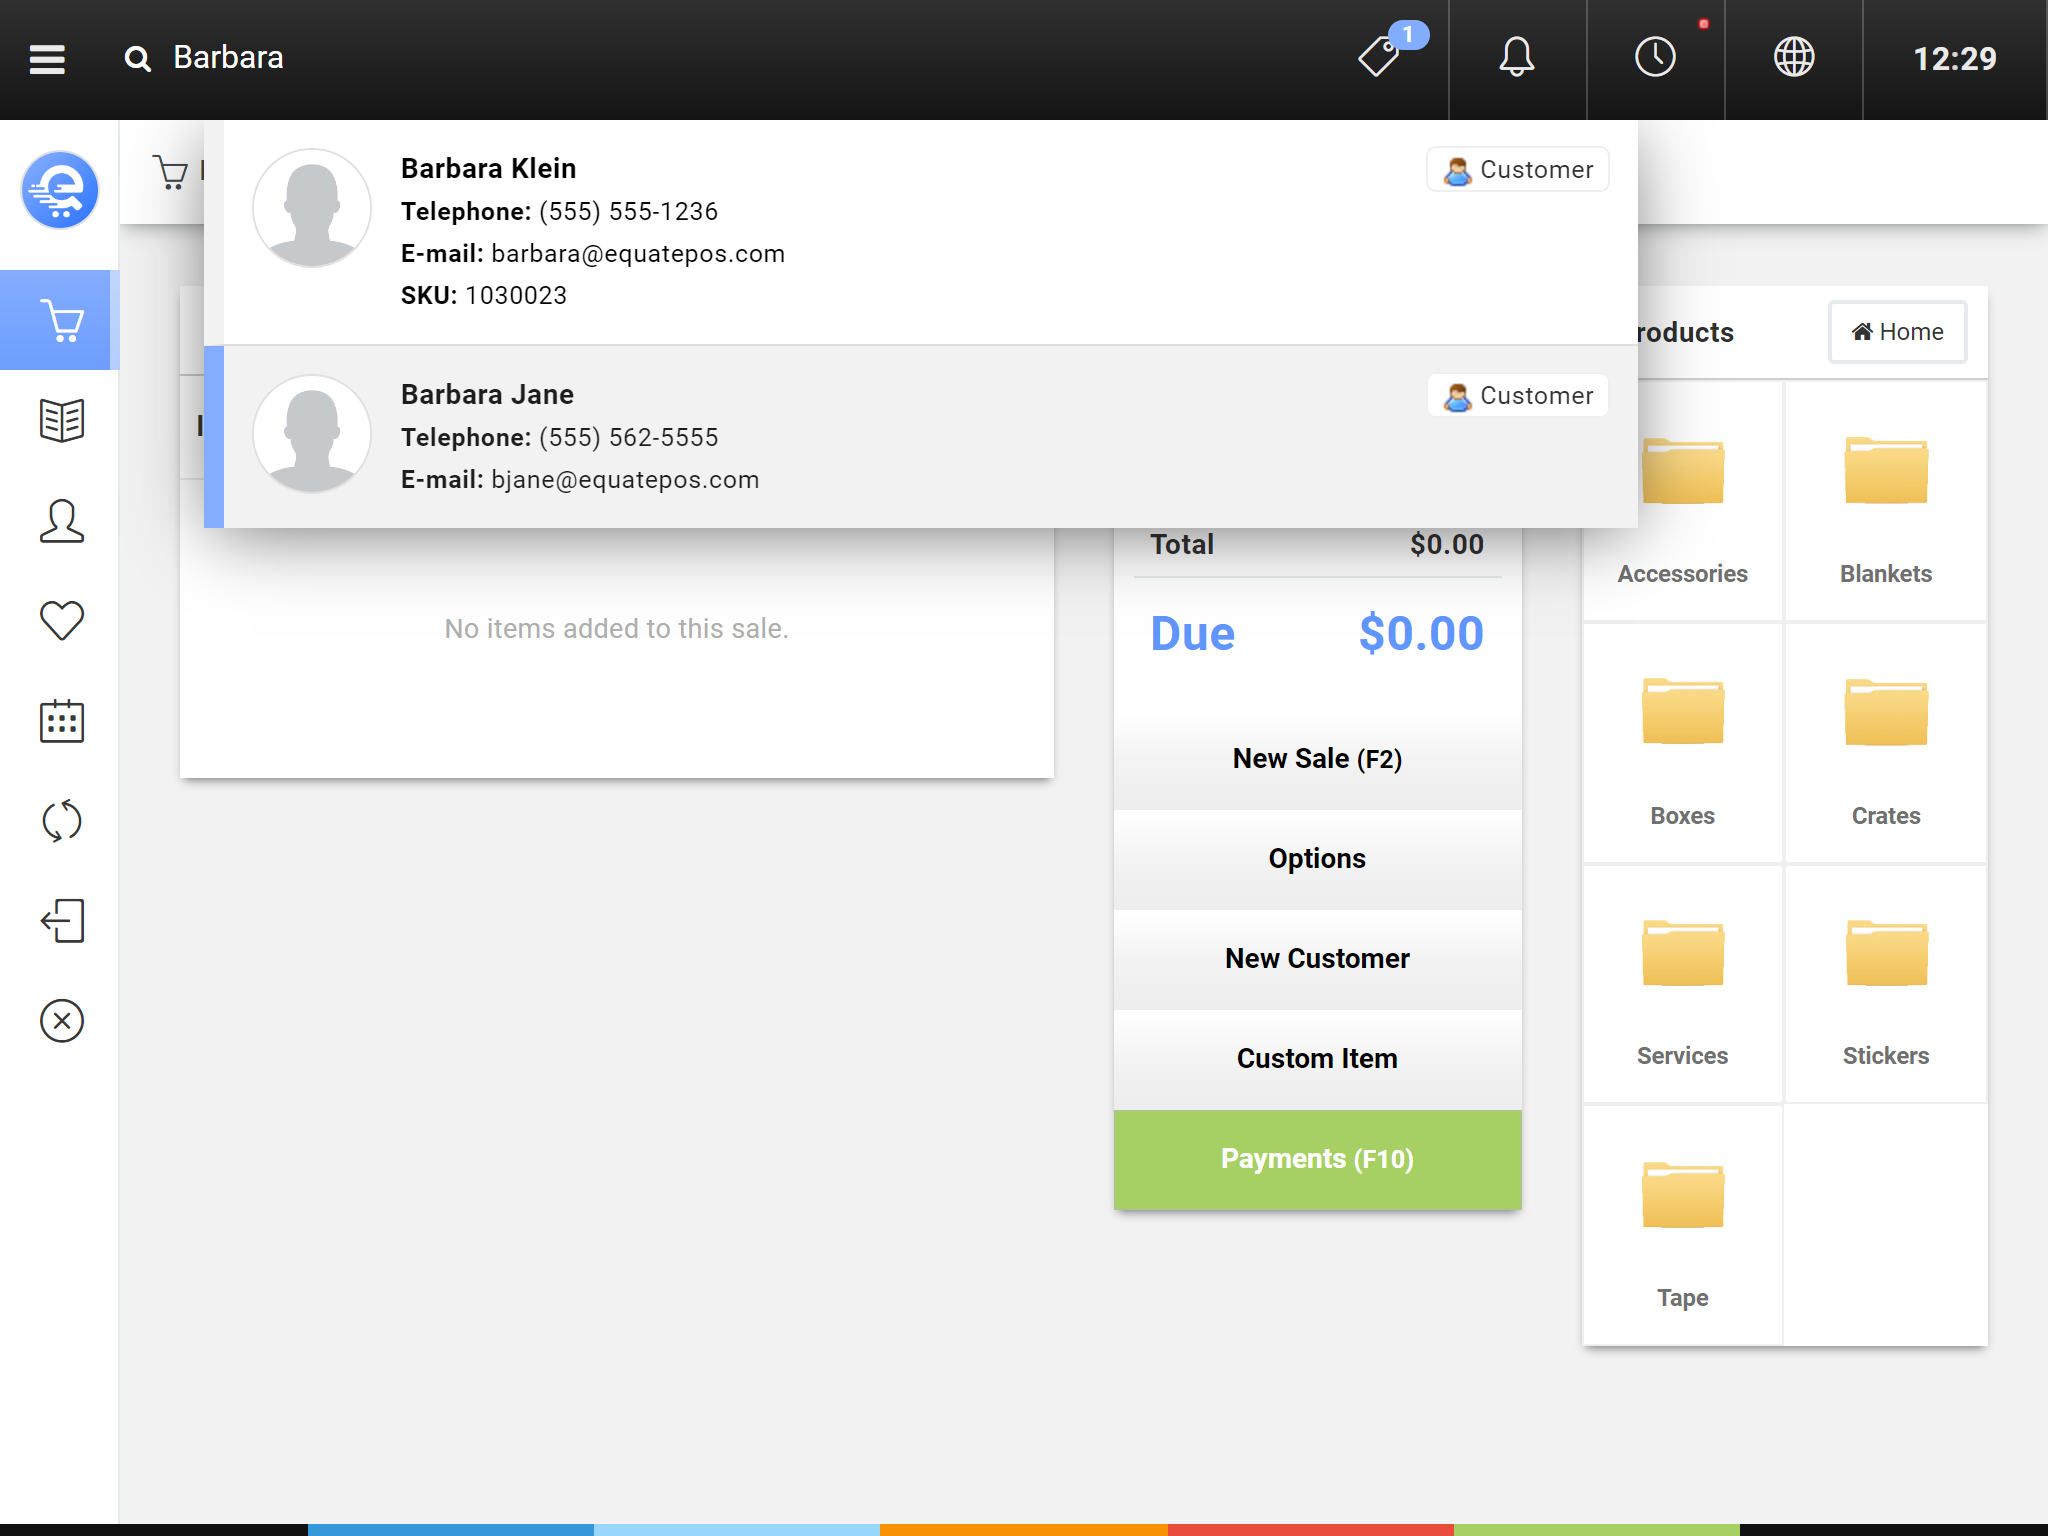
Figure C
Using the top search bar to find customers by name, e-mail, or phone number.
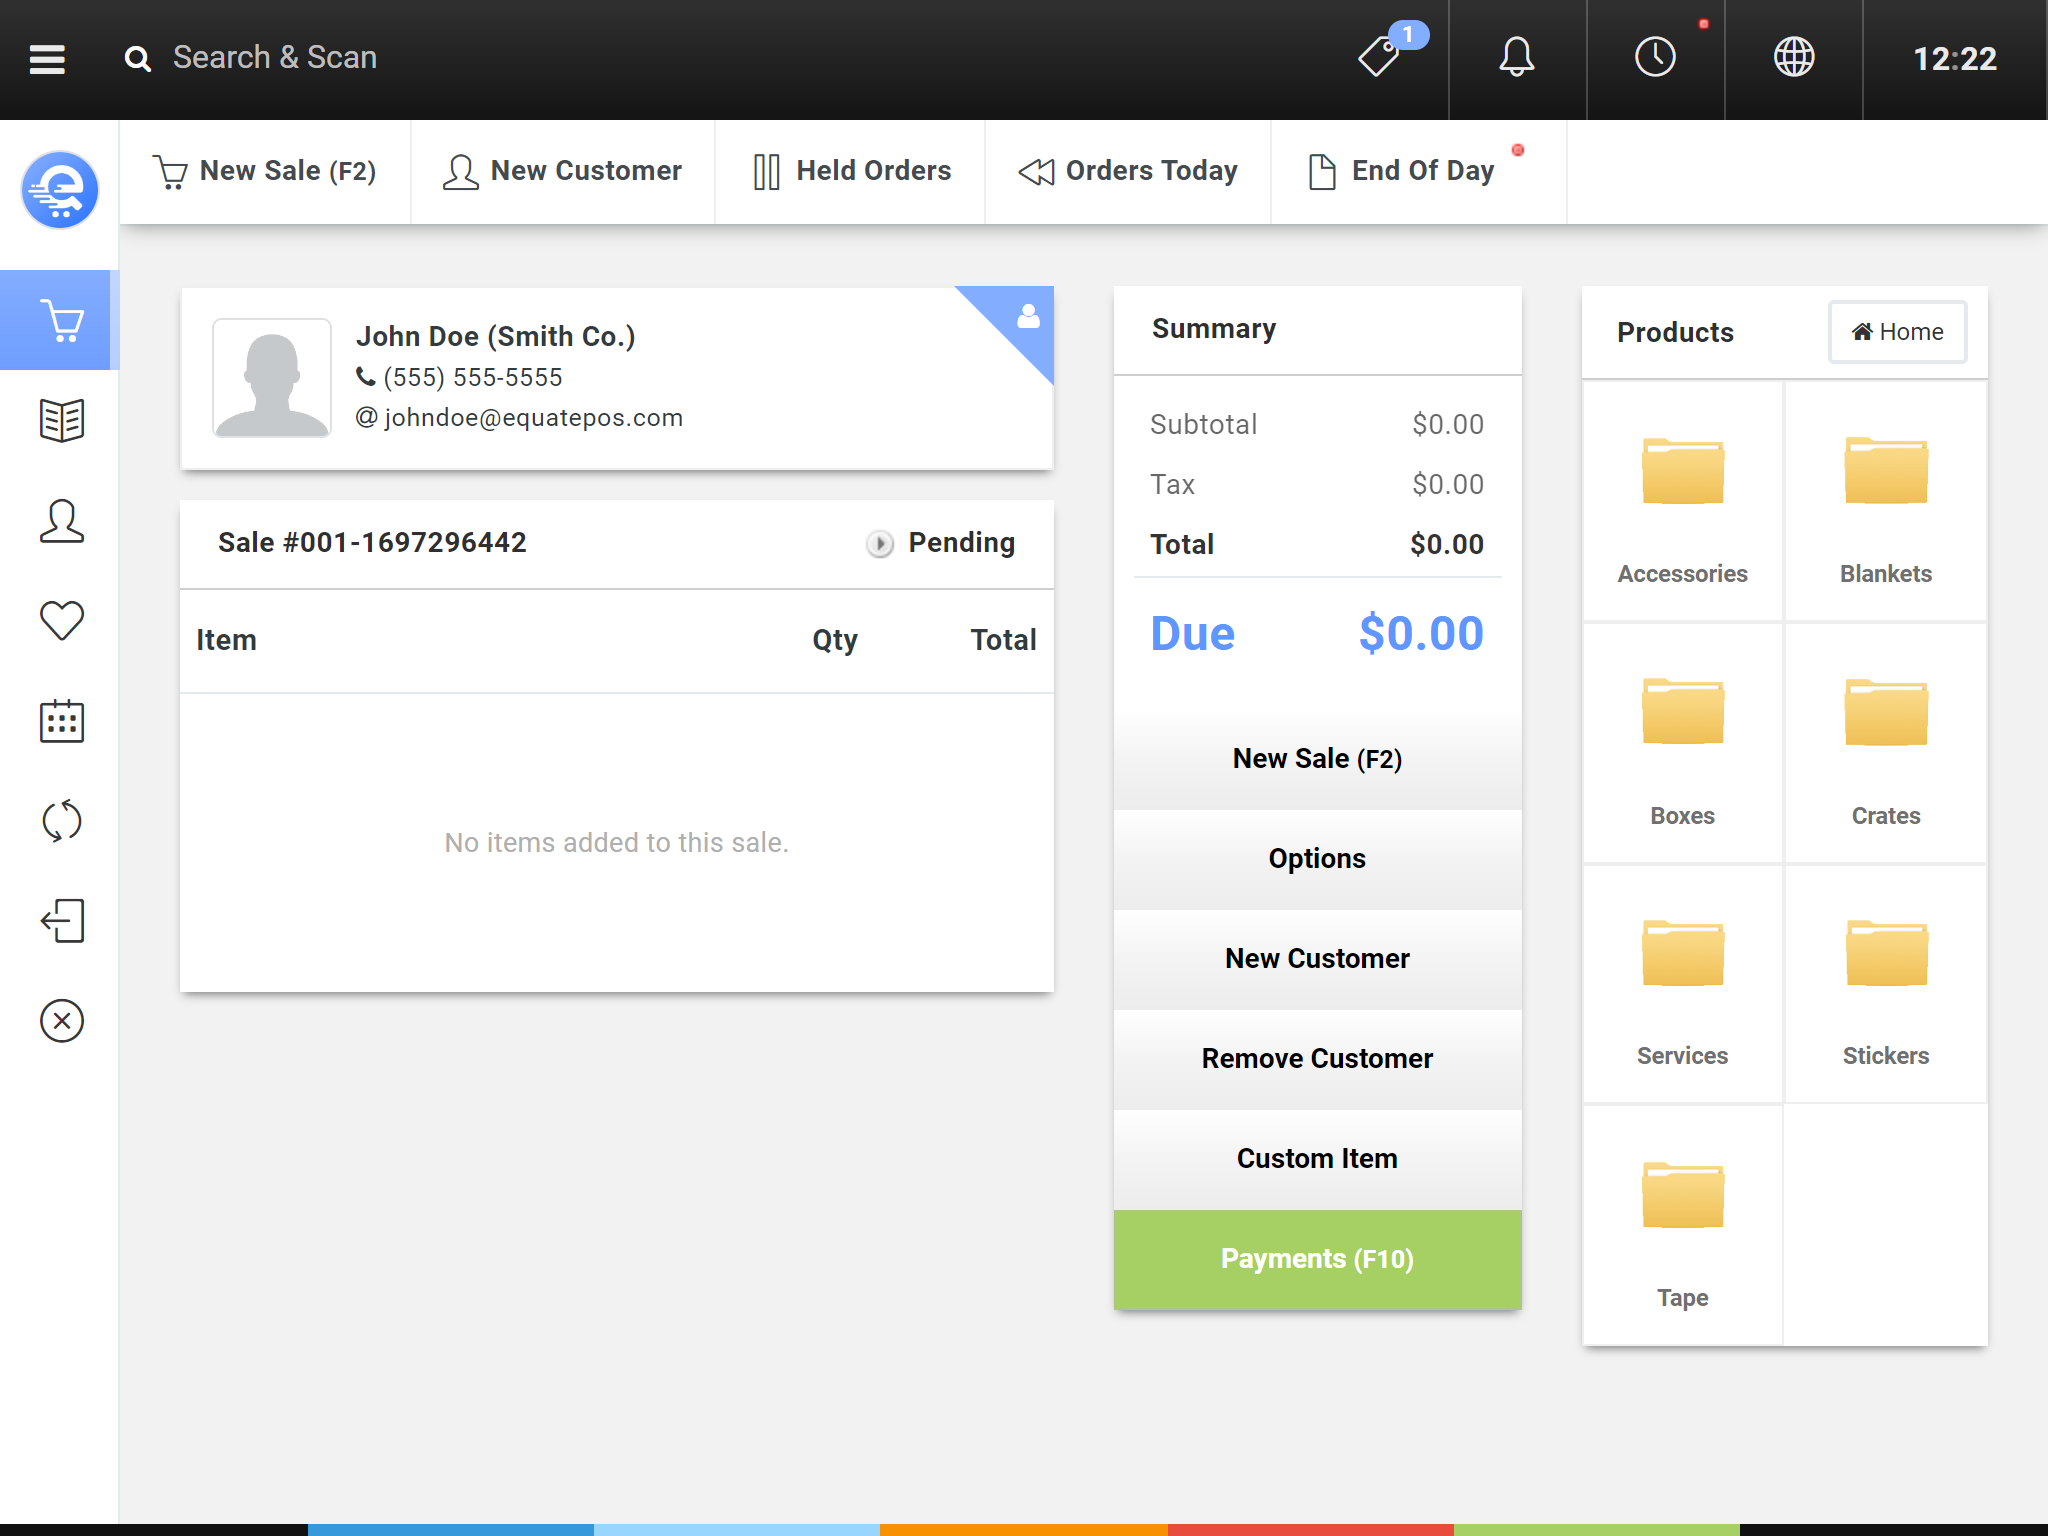
Figure D
When a customer is added to an order, the customer's details will appear above the item list.
Completing The Sale
Once you've added your items, and customer to the sale (if applicable); you may want to also adjust any extra variables; like discounts and coupons. The final step in any sale is to add a payment. The payment must be greater, or equal to the amount owing for the order to be finalised and moved into "Complete" status. You can also put an order on hold if you are not ready to complete the sale. Completed and held orders have their inventory deducted from your warehouse stock buckets. If a sale is held, and then cancelled, inventory is automatically returned into the originating stock bucket.
- On the Sale screen, click on the green "Payments" button (see Figure E).
- Fill in the total amount paid in the desired payment method, and press "Add" (see Figure F).
- If the payment method is cash, it will present a return change screen if the amount paid was greater than the amount due.
- If the payment method is gift card, it will ask you for the gift card SKU before adding the payment.
- If the payment method is loyalty or account credit, the system will first check if the loyalty/credit balance has sufficient credit to cover the payment.
- Once the total payments have exceeded the amount due; the transaction will automatically change to "Complete" status and the receipt print window will prompt (see Figure G).
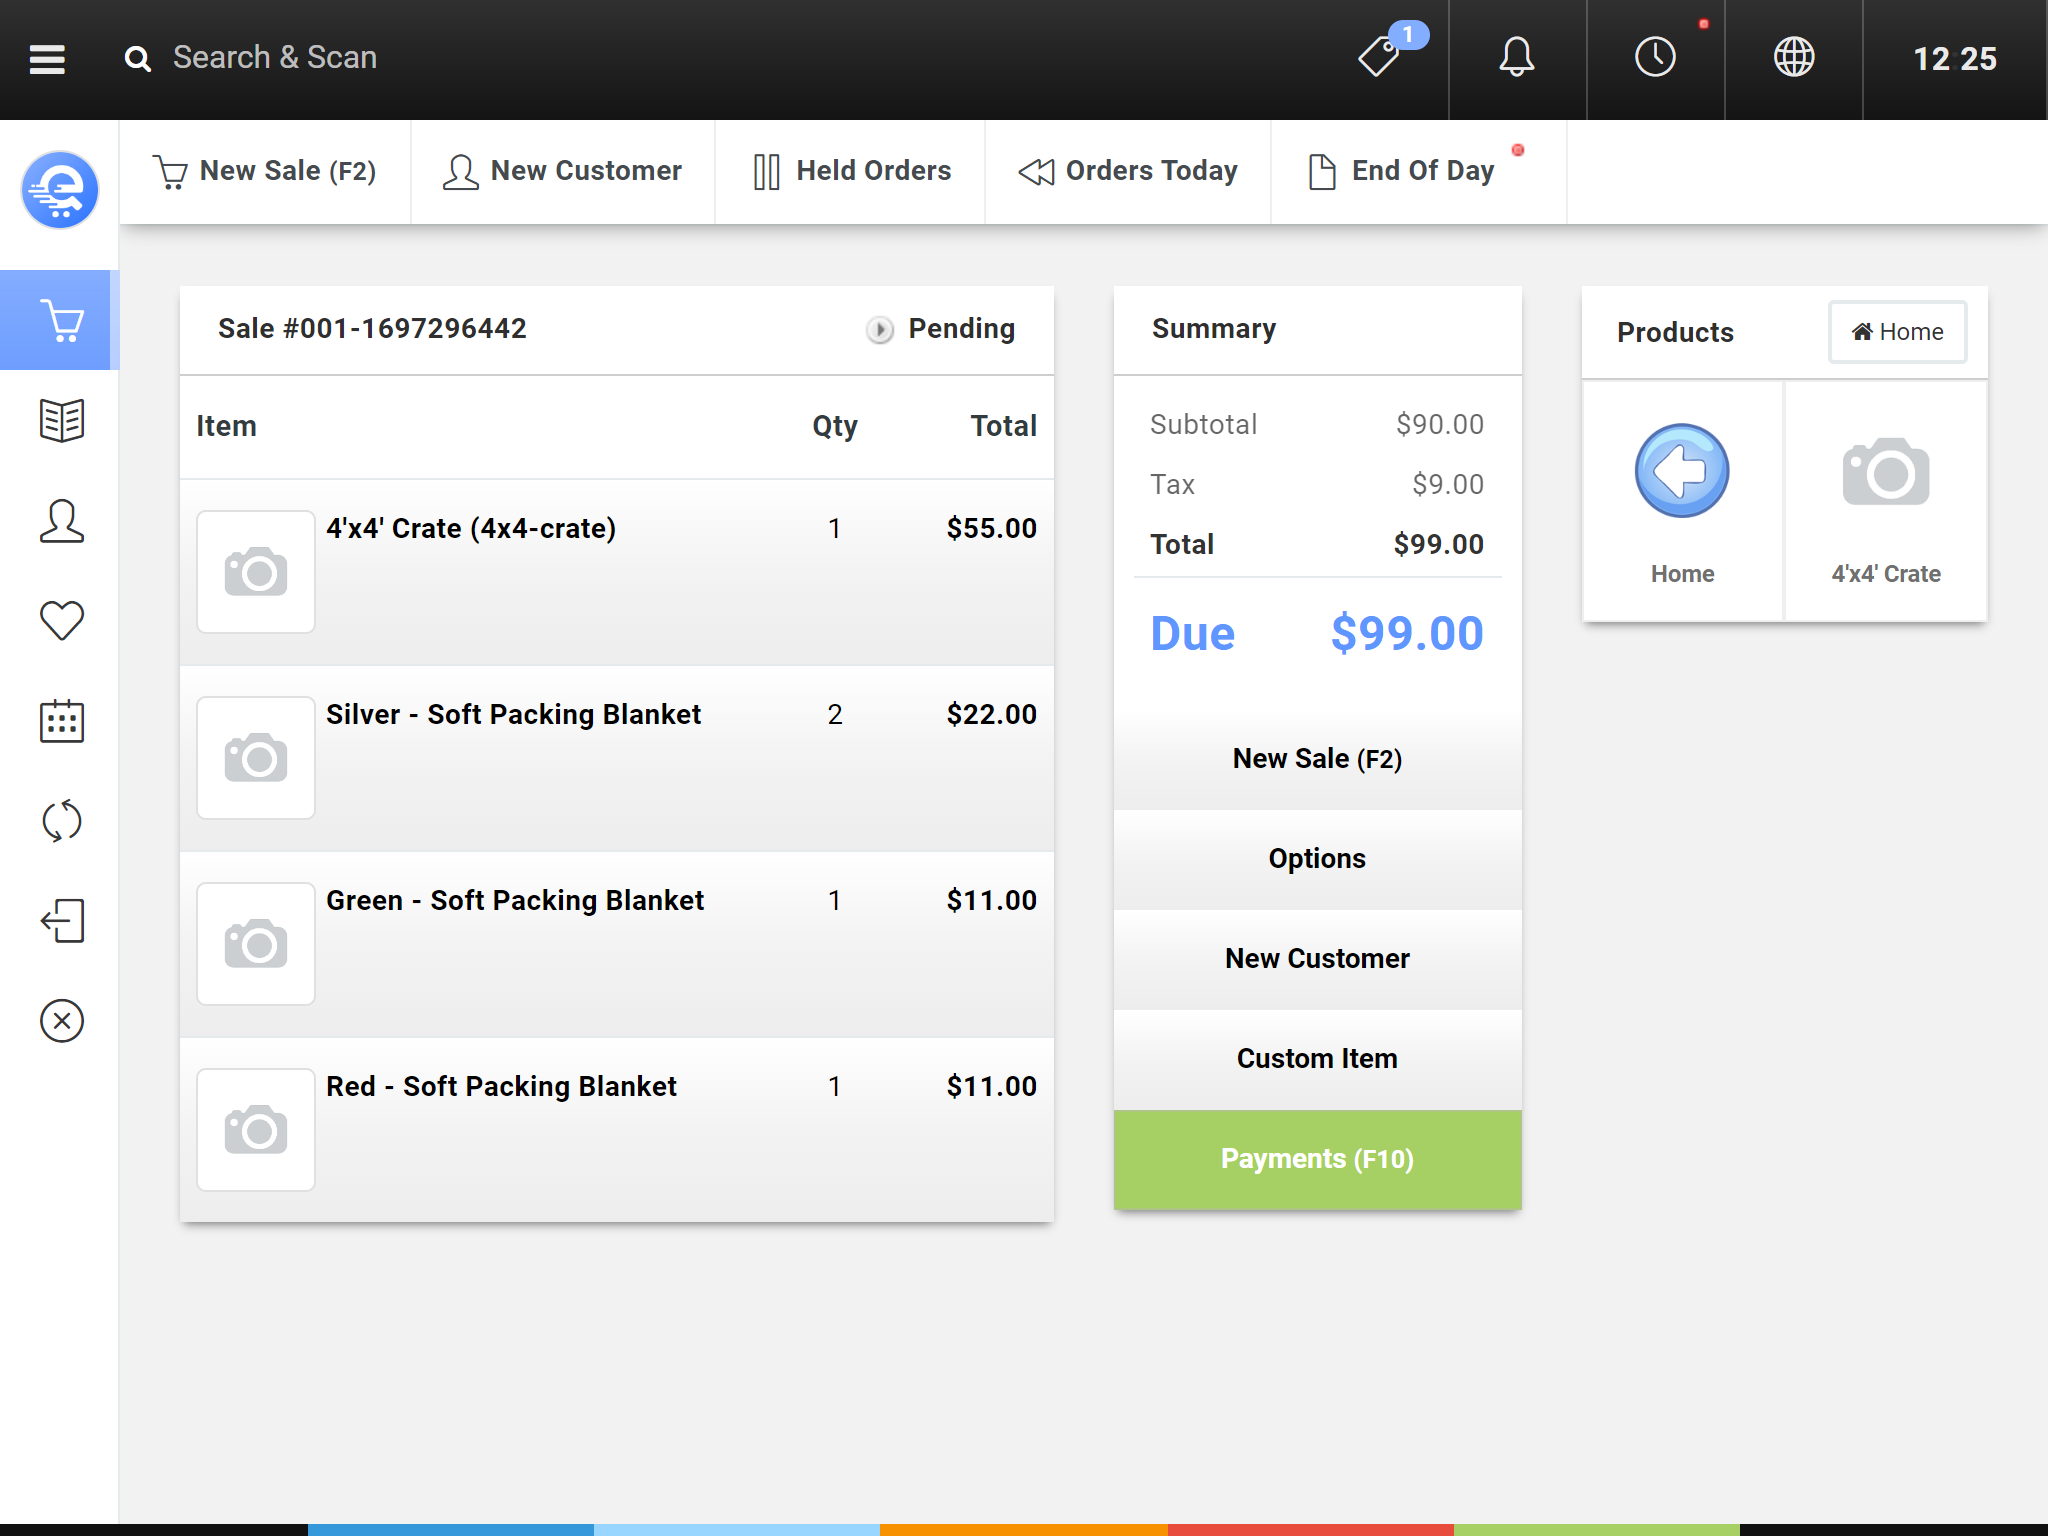
Figure E
When you are completed your order, click "Payments" to add a payment to the order.

Figure F
Enter the amount in the text box, and press "Add".
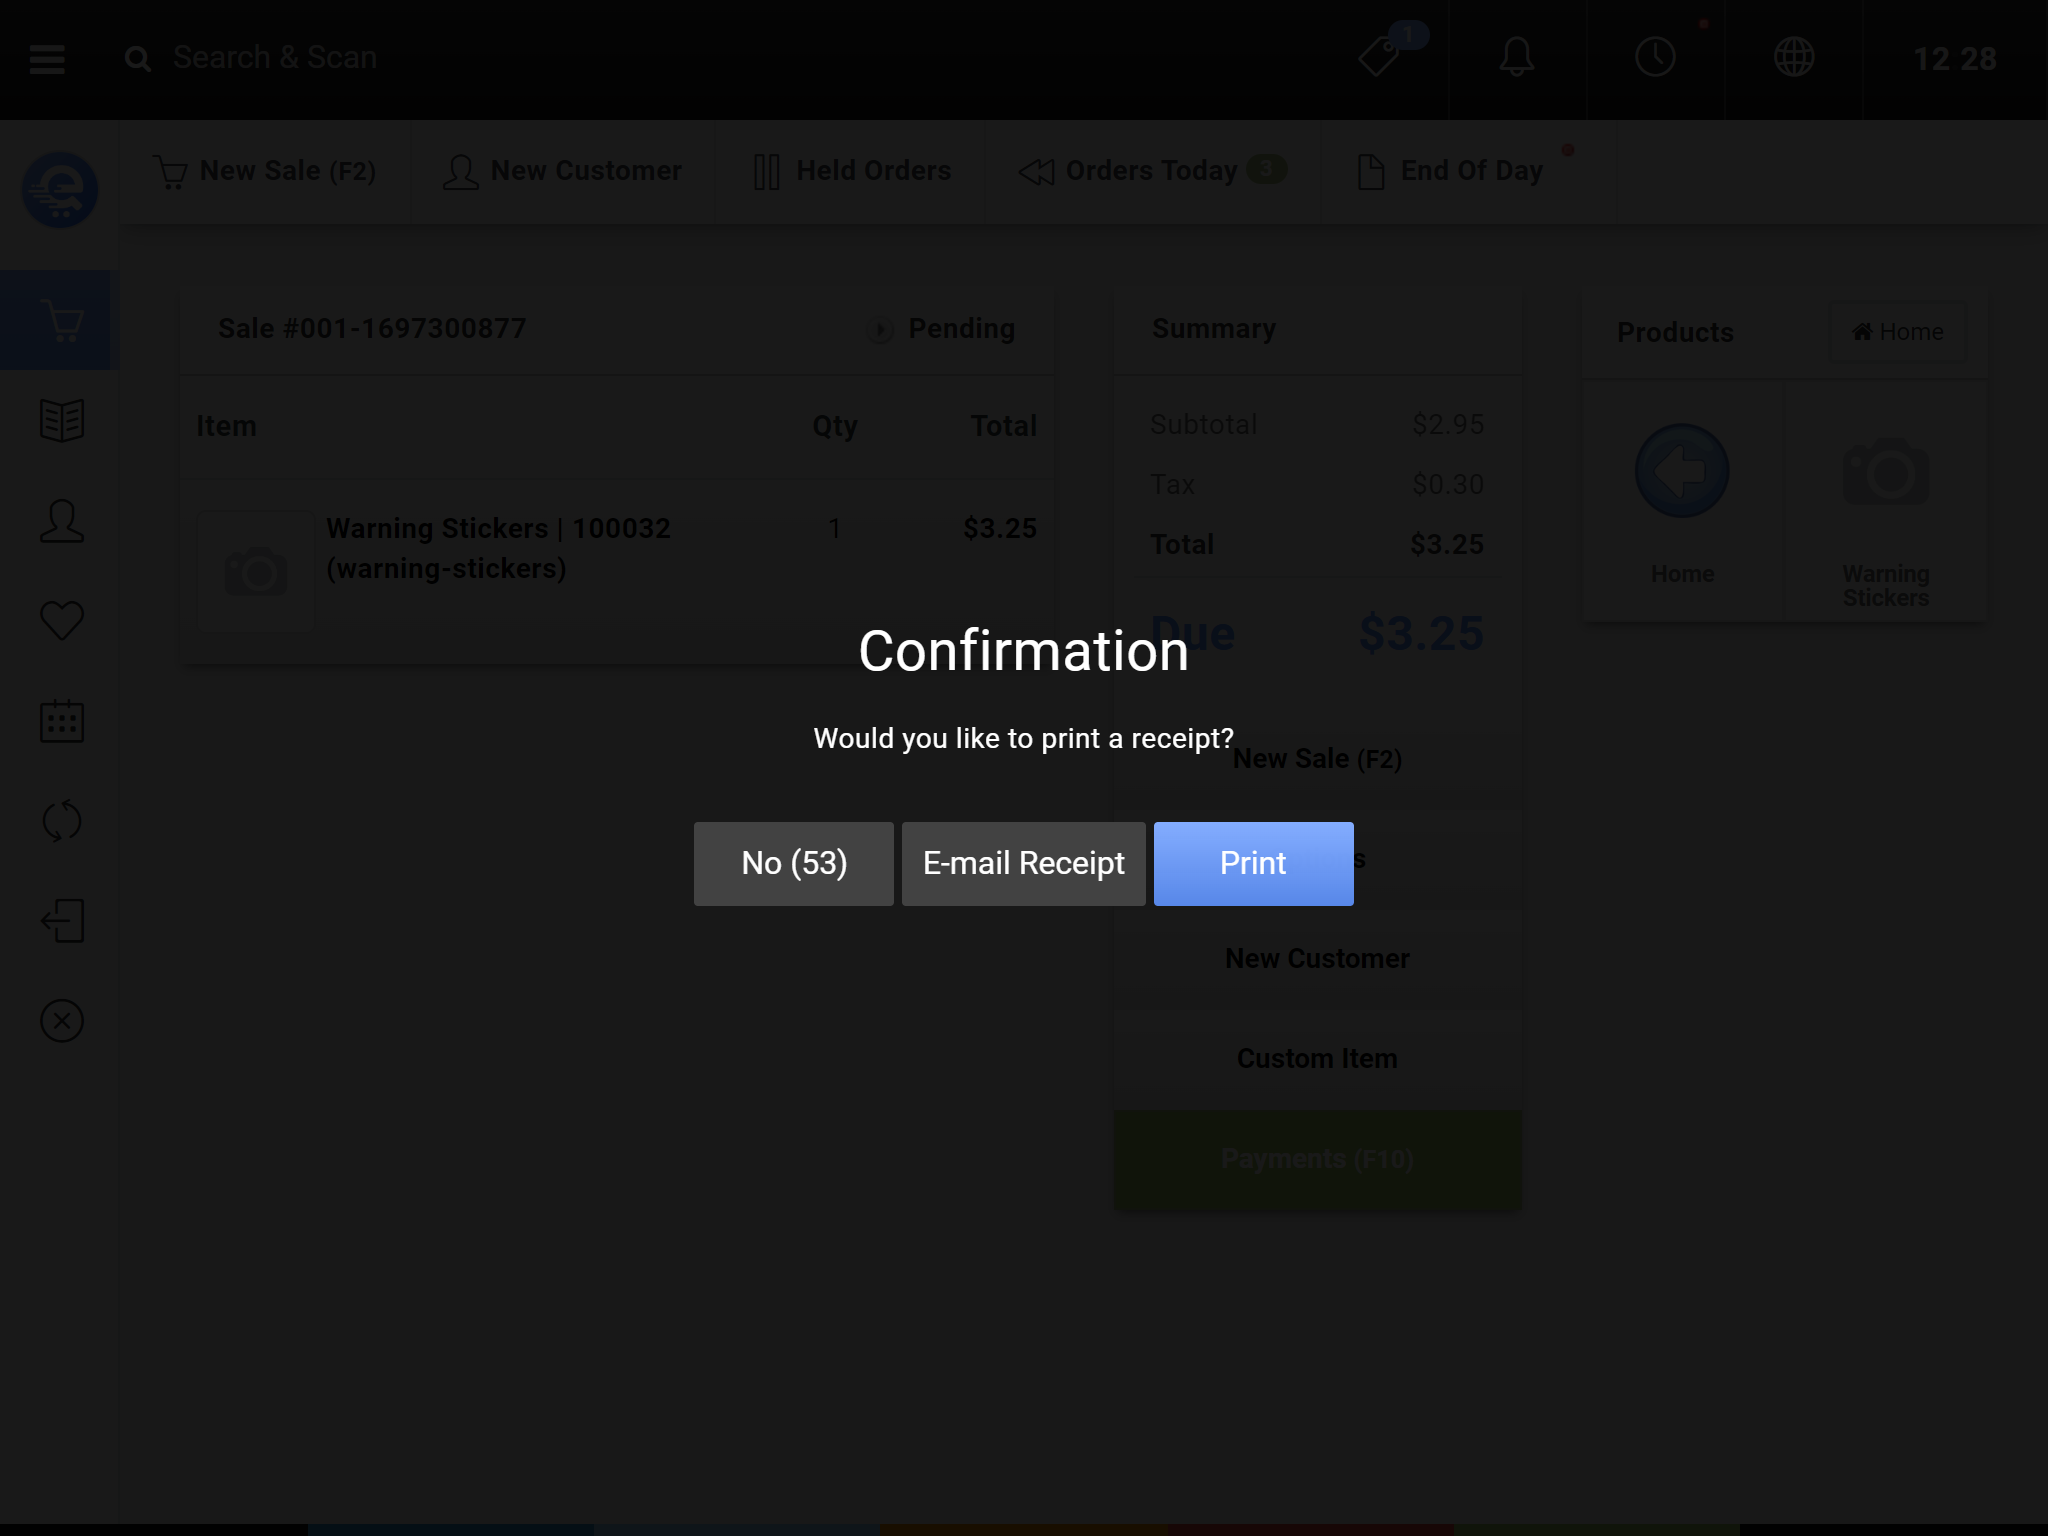
Figure G
After adding payments to order; a window will prompt to print a receipt.