Installing on Windows
eQuate POS can be installed on Windows operating systems. Download and install the Windows installation file from our downloads page.
Before You Begin
Be sure your systems meets the system requirements.
Windows Installation Steps
- Download the latest Windows installation file from the eQuate POS website.
- Run the installation file (see Figure A below).
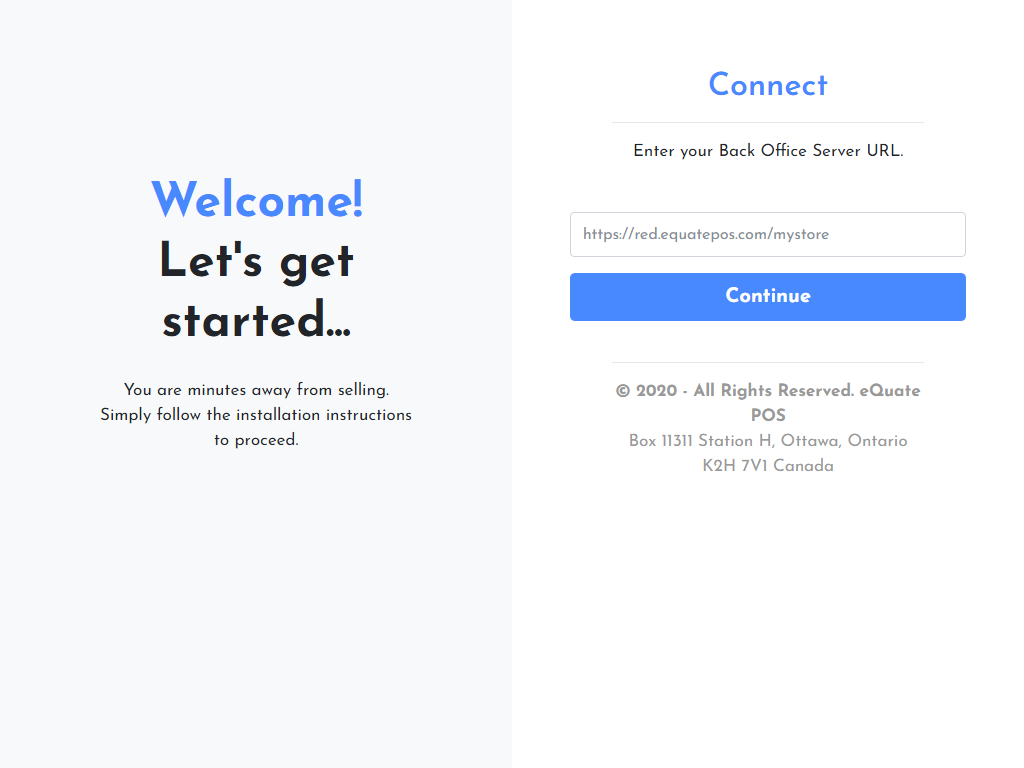
- Step 1 - Connect: To get started, enter your Back Office URL (this can be found in My Account on eQuatePOS.com) (see Figure B below).
Press Continue. - A download will begin of the software version that is required by your eQuate Back Office. When the download is complete, the software will take you to the next step - Step 2.
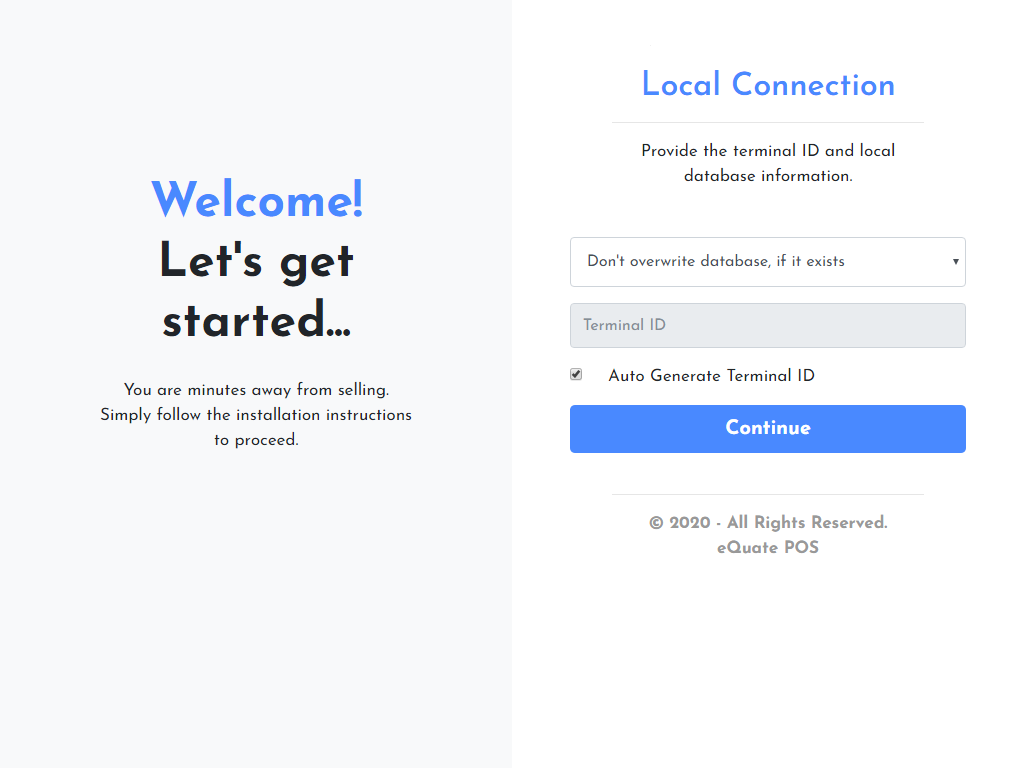
- Step 2 - Local Connection: If you are re-installing the software for an existing terminal, enter a Terminal ID (see Figure C below). This ID should be a unique numerical value of 3 digits (example: 100, 200, 300, 201, 202). If you are installing for the first time, you can leave "Auto Generate Terminal ID" checked. This will automatically generate a terminal ID.
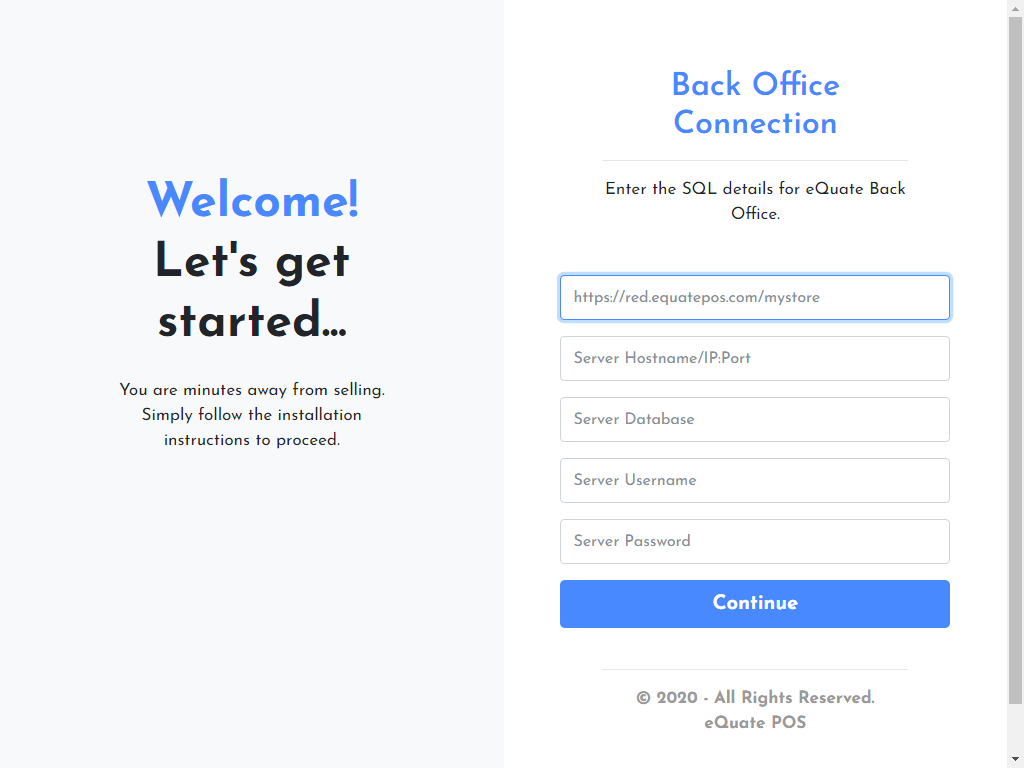
Press Continue. - Step 3 - Back Office Connection: Input the SQL information for your eQuate Back Office (Server) (see Figure D below) (this information can be found in My Account on eQuatePOS.com).
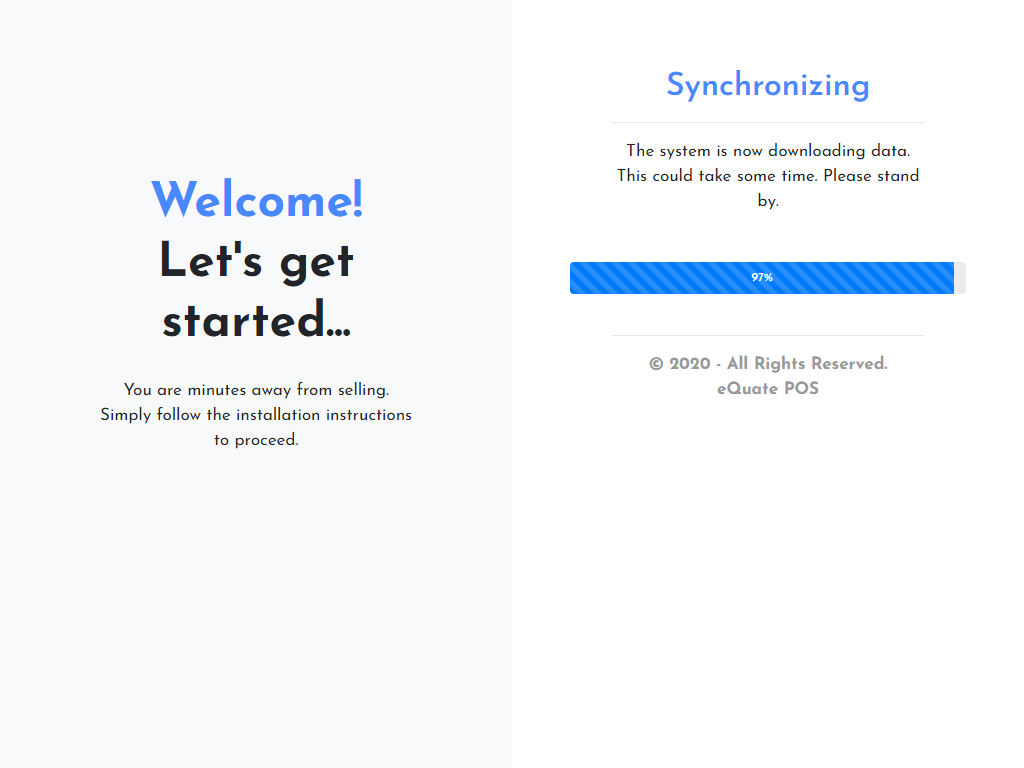
Press Continue. - Allow the system to synchronize with the Back Office (Server) for the first time. This can take up to 30 minutes depending on the size of the database (see Figure E below).
- Once the synchronization is complete, you will automatically be forwarded to a login screen (see Figure F below) (if enabled), or directly into the Point Of Sale.
- The installation process is complete.


